Bare-root roses land at Oregon nurseries soon — here’s how to plant them so they thrive
Late winter is when a certain kind of gardener starts hovering near the nursery entrance, eyeing the bundles of bare, thorny canes and thinking, just one more. If that sounds familiar, you are in good company.
Local nurseries in the Willamette Valley often begin receiving bare-root roses in late winter, and with the right timing and a little preparation, planting one this season can set you up for years of blooms. This guide walks you through every step, from shopping at the right moment to giving your new rose the patience it deserves while it quietly gets to work underground.
Shop in the late-winter-to-early-spring window
Bare-root rose season in the Willamette Valley is not a single day on the calendar, and not every nursery in Oregon follows the same schedule. The useful shopping window runs from late winter into early spring, with March standing out as a particularly favorable planting month across much of the Pacific Northwest.
Portland Nursery, as one local retail example, has reported that its bare-root roses typically arrive in mid-to-late February and are generally available as potted plants by early March for its 2026 inventory. Other retailers may receive stock earlier, later, or in smaller quantities, so it pays to call ahead rather than assume.
According to OSU Extension’s bare-root rose planting guide, bare-root roses are dormant plants sold with little or no soil around their roots and should be planted promptly once conditions allow. That last part matters a great deal in the valley.
A mild February day can feel like spring, but the soil may still be cold, compacted, or holding too much water from recent rain. Rushing into a saturated bed does more harm than waiting a week or two for conditions to improve.
Portland Nursery’s own rose resource at portlandnursery.com/roses reflects the reality that availability depends on the year, the weather, and how quickly dormant stock sells. The practical approach is to check in with your local nursery in mid-February, ask when bare-root stock is expected, and be ready to act when both the plants and the soil are in good shape.
Shopping with that flexibility, rather than chasing a fixed date, gives you the best shot at bringing home a healthy plant and putting it in the ground at the right moment.
Inspect the dormant plant before bringing it home
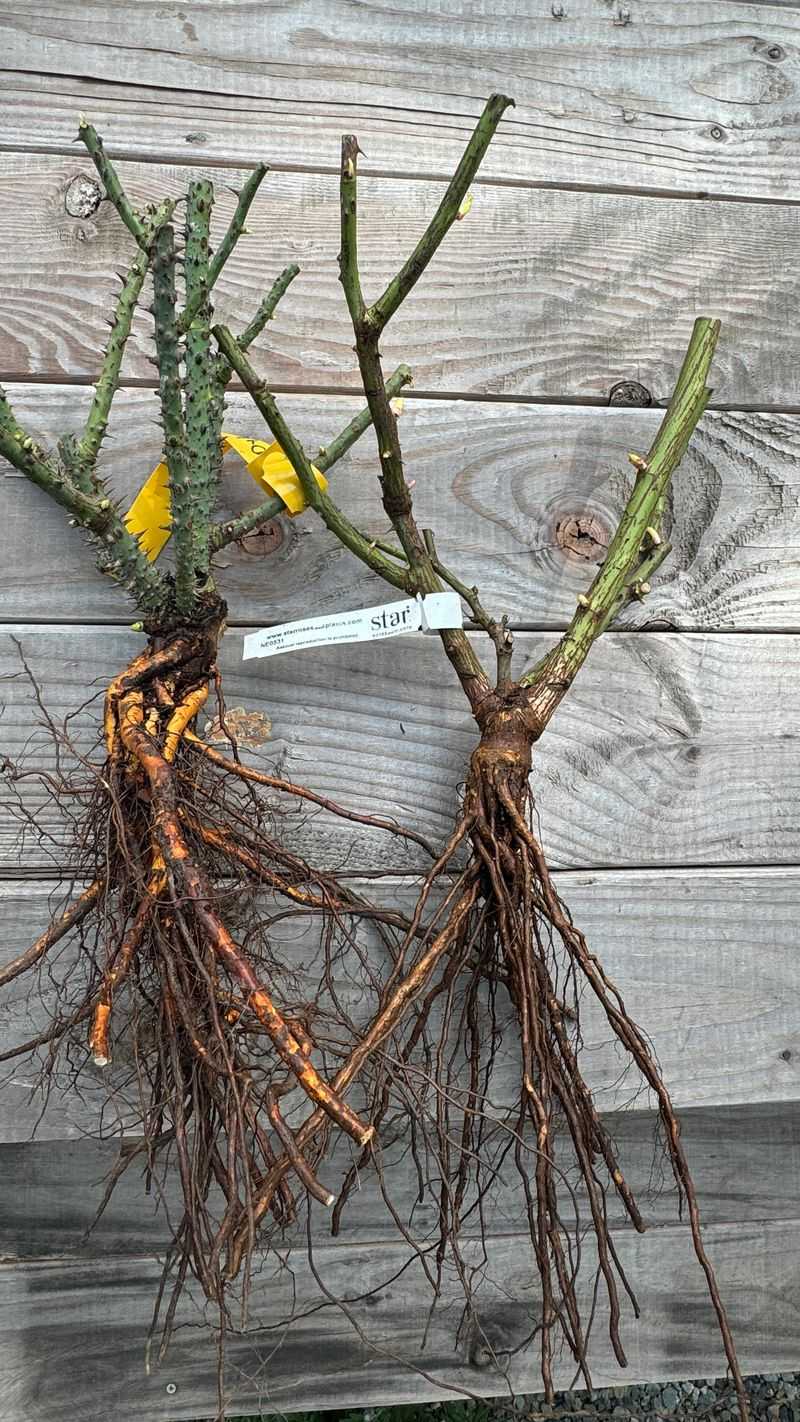
A bare-root rose does not look like much at first glance, and that is exactly why a quick inspection before purchase matters. The canes should feel firm, not shriveled or brittle, and their color should suggest life rather than desiccation.
Roots are the real story: look for ones that are light-colored, pliable, and well-branched rather than dark, mushy, or snapping when gently flexed. A good root system gives the plant a running start once it goes into the ground.
If the roots feel severely dried out, show signs of damage, or the canes are cracked and clearly dead rather than just dormant, those are reasons to pass on that particular plant or ask for a replacement. A reputable nursery will want to know if its stock has been mishandled, so do not hesitate to flag a problem.
Your Oregon Garden Changes Every Week. Your Plan Should Too.
Gardening in Oregon changes quickly throughout the season. Every Friday you’ll receive a simple weekly plan showing exactly what to plant, prune, fertilize, harvest, and protect so you never miss the right timing.
OSU Extension’s planting guidance specifically recommends favoring plants with firm canes, flexible roots, and a well-branched root structure, and treating severely compromised specimens as candidates for return or replacement.
Bare-root roses are meant to be planted promptly, and a healthy plant rewards that urgency. However, promptly does not mean carelessly.
If the soil at home is still waterlogged from a week of rain, a day or two of proper storage will not hurt a plant in good condition. What does hurt is leaving roots exposed to air and light, or letting them dry out while you wait for a sunny weekend.
Buy the healthiest plant you can find, keep it protected, and plan to get it in the ground as soon as the soil cooperates. The difference between a thriving first-year rose and a struggling one often comes down to what you chose at the nursery before you ever dug a hole.
Keep the roots cool and moist while you wait
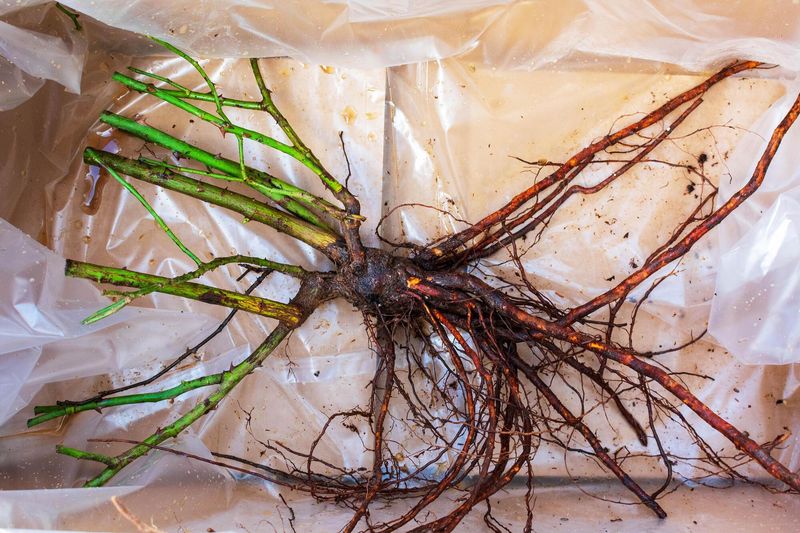
Even a day or two between purchase and planting can stress a bare-root rose if the roots are left uncovered. The fix is straightforward: keep the roots wrapped in the damp packing material they came with, or rewrap them in moist burlap or newspaper, and tuck the plant somewhere cool and dark.
A garage corner, a shaded porch, or an unheated basement all work well for short delays. The goal is to prevent the roots from drying out, not to put the plant into some kind of deep freeze.
WSU Extension recommends storage around 40 degrees Fahrenheit for short holding periods, which aligns with the kind of cool, consistent environment that keeps a dormant rose from waking up prematurely or losing moisture too quickly. You do not need a precise thermometer to manage this; a cool space that stays well below room temperature is the practical target.
What you want to avoid is warmth, which can push the plant out of dormancy before it is in the ground, and dryness, which can damage roots that are already under stress from being removed from soil.
Before planting, soak the roots in water for several hours to rehydrate them. Follow the seller’s instructions on duration, since recommendations from different regional sources vary.
A general safe range is a few hours, and there is no need to leave roots submerged overnight unless your supplier specifically recommends it. Over-soaking can be just as harmful as skipping the soak entirely.
Once the roots have had a chance to rehydrate and your soil is ready, you are set to move to the next step. Think of this holding period as a brief rest stop, not a long-term solution, and your rose will arrive at planting in much better shape.
Choose a sunny site and wait out saturated soil

Roses are not shade plants, and the site you choose will shape everything that follows. Aim for a spot that receives roughly six to eight hours of direct sun each day, with enough air movement to help foliage dry between rain showers.
Protection from harsh winds matters too, especially for newly planted roses that have not yet anchored themselves with a strong root system. Good air circulation reduces the damp, stagnant conditions that invite fungal problems, which is a real concern in the wet Pacific Northwest climate.
The bigger regional challenge is the soil itself. Much of the Willamette Valley sits on clay-heavy ground that holds winter rain like a sponge.
OSU Extension’s Growing Your Own guide warns that digging or cultivating saturated soil can compact it into hard clods that persist long after the water drains. A simple field test tells you whether the soil is ready: grab a handful and squeeze.
If it stays in a sticky mud ball when you open your hand, wait. If it crumbles apart with a little pressure, you are good to go.
When the soil does pass that test, think about improvement across a broader area rather than just the hole you are about to dig. OSU’s guidance on soil organic matter supports working amendments into the surrounding planting bed rather than creating a pocket of rich compost inside heavy native soil.
A sharply different soil texture inside the hole can actually trap water around the roots instead of letting it drain away. Improving a wider area over time, through mulching and gentle amendment, builds the kind of structure that benefits your rose for years rather than just at planting.
Stagnant, poorly drained spots are a poor match for roses regardless of how much sun they receive. If your ideal location tends to puddle after rain, consider raised planting or choosing a different spot entirely.
Getting the site right before you dig saves a lot of frustration down the road.
Shape the planting hole around the root system
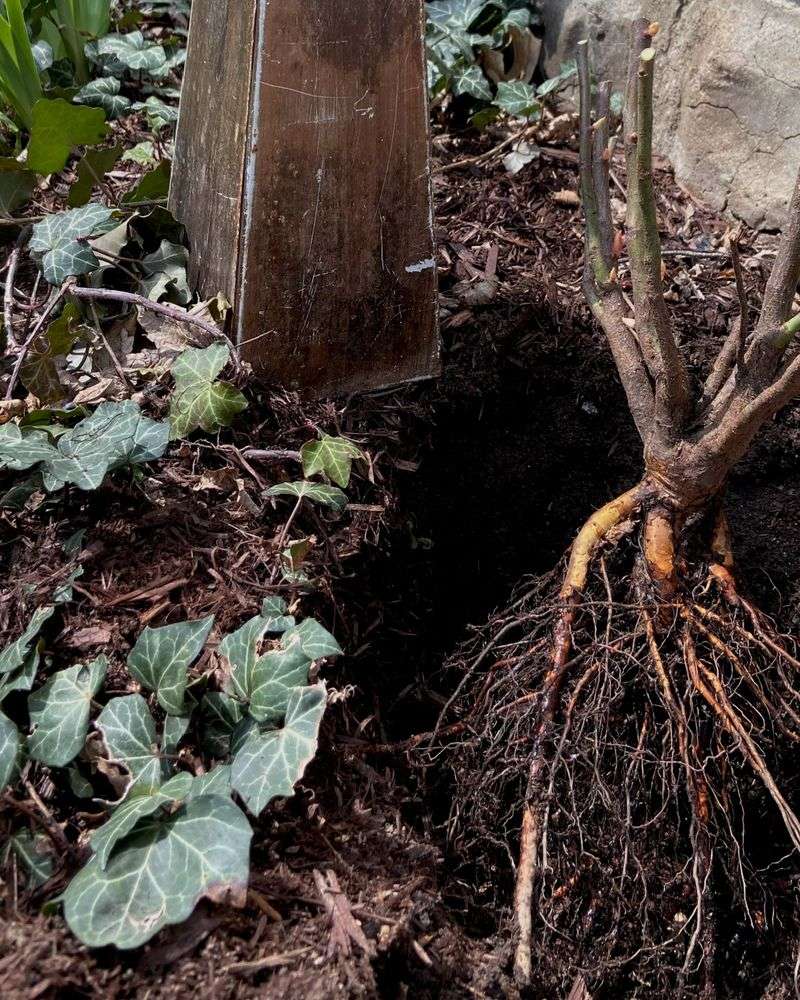
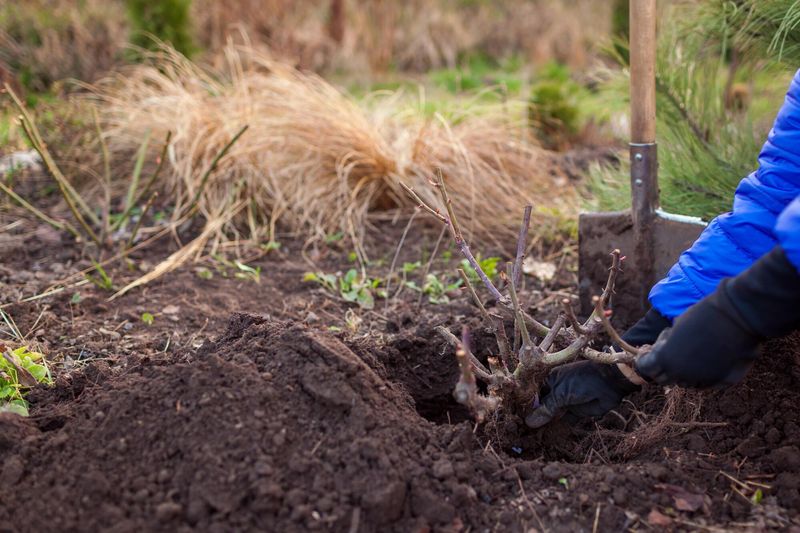
Rather than measuring the hole to a fixed dimension, let the roots guide you. The hole needs to be wide enough and deep enough for the roots to spread outward and downward in a natural position, without any bending, crossing, or crowding.
OSU Extension’s bare-root planting guide suggests roughly 18 to 24 inches wide and 18 to 20 inches deep as a general starting point, but the real measure is whether the roots have room to fan out the way they would in open ground. If the roots are longer or shorter than average, adjust the hole accordingly.
Before placing the rose, look over the roots one more time. Remove any that are clearly broken, dead, or discolored.
For roots that are healthy but simply too long to fit without bending, trim just enough to allow a natural spread. WSU Extension recommends retaining as much root length as possible, ideally no less than ten inches, while OSU’s guidance suggests trimming to around eight inches for healthy roots that are too long.
The practical takeaway from both sources is the same: take off only what you must, and never force a healthy root into a cramped position.
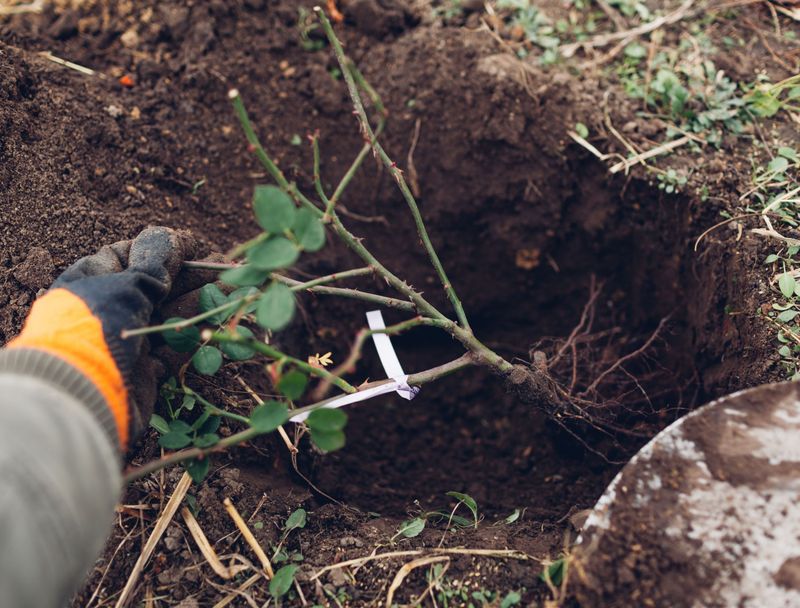
Once the hole is ready, build a firm cone or mound of native soil in the center. This is the platform your rose will sit on.
Set the plant on top of the mound and gently spread the roots outward and downward over its slopes, working around the cone so the roots splay in different directions rather than clumping together. The mound holds the crown at the correct height while you backfill, and it ensures the roots have contact with soil rather than hanging in an air pocket.
Take a moment to check that the roots look settled and natural before you move on to positioning the graft or crown.
Position the graft or crown for the rose you bought
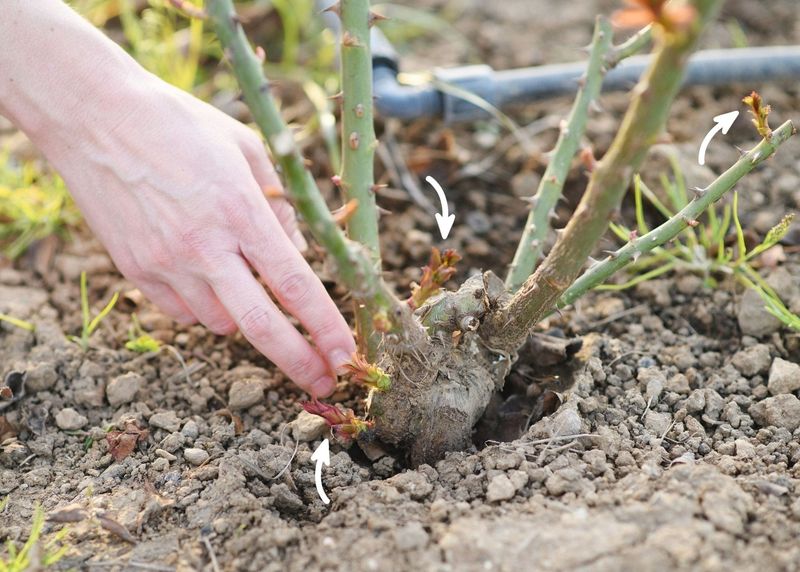
Planting depth is where many gardeners run into trouble, partly because the advice they find does not always specify which type of rose it applies to. Grafted roses have a visible bud union, the knobby swelling near the base of the canes where the flowering variety was joined to a rootstock.
Own-root roses, by contrast, were grown on their own roots from the start and have no bud union at all. Portland Nursery describes own-root roses as plants grown without any bud union, which means the depth rules that apply to grafted roses simply do not transfer to them.
For grafted roses in the Willamette Valley, the general guidance from OSU Extension’s bare-root planting resource places the bud union at or near soil level in warmer zones like those found west of the Cascades. This is different from advice written for colder climates, such as parts of Central or Eastern Oregon, where burying the graft two inches below the surface offers additional winter protection.
The Willamette Valley’s milder winters generally do not require that extra depth, and applying a colder-climate rule here can actually cause problems by encouraging the rootstock to sucker. When in doubt, follow the nursery’s cultivar-specific instructions, since some varieties have particular needs that override general guidelines.
Own-root roses should be positioned so the crown, where the canes emerge from the root system, sits at an appropriate level according to the nursery’s guidance for that plant. Do not simply assume that deeper is safer for every rose.
OSU Extension’s Central Oregon rose care publication is a useful reference for colder-zone specifics, but it should not be applied wholesale to valley conditions. Ask the nursery staff which type of rose you are buying and what depth they recommend for your location.
That conversation takes two minutes and can save you from an avoidable mistake.
Backfill, water deeply, and mound the canes temporarily
With the rose positioned correctly on its soil mound and the roots spread naturally, backfilling is the next move. Use the native soil you removed from the hole, or a modest blend of native soil and a small amount of compost if your ground is particularly lean.
OSU Extension recommends against filling the hole with a sharply different, heavily amended mix, because that kind of contrasting pocket can interfere with drainage and actually hold water around the roots rather than letting it move through. Work the soil in gently, firming it around the roots without compacting it, and check periodically that the crown or bud union has not shifted from its intended position.
Once the hole is filled, water slowly and deeply. The goal is to settle the soil around the roots and eliminate air pockets, not to flood the bed.
Let the water soak in fully before adding more. After the initial watering, keep the root zone consistently moist during establishment, but resist the urge to water again before the soil has had a chance to partially dry.
A waterlogged root zone is just as harmful as a dry one, and the valley’s wet winters mean natural rainfall will often do much of the work for you in the weeks after planting.
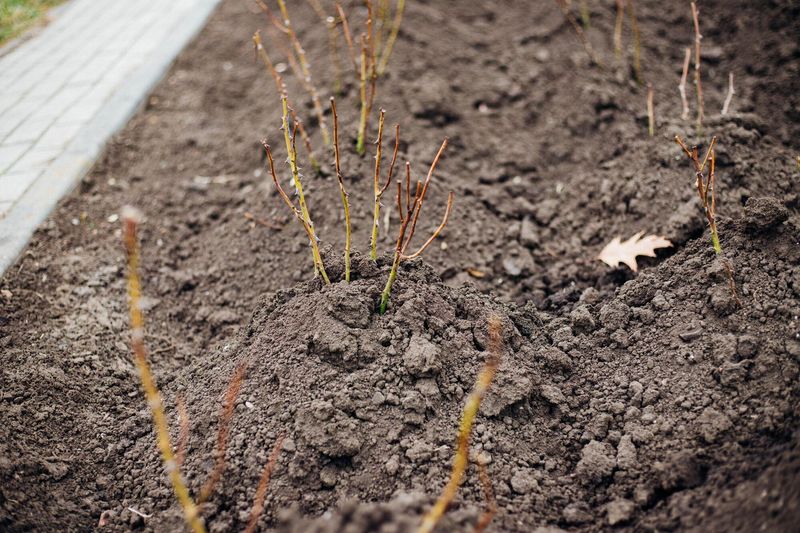
Finish by forming a temporary mound of soil or mulch, roughly four to six inches high, over the base of the canes. This helps reduce moisture loss from the exposed canes while the plant is getting established and eases some of the stress that comes with transplanting.
It is not a guarantee against every cold snap, and it should not be treated as complete frost protection. Once you see shoots beginning to develop and leaves starting to unfurl, reduce or remove the mound gradually so the emerging growth has room to breathe.
Leaving it in place too long can trap moisture and heat against the canes once the plant is actively growing.
Let roots establish before you fertilize or expect flowers
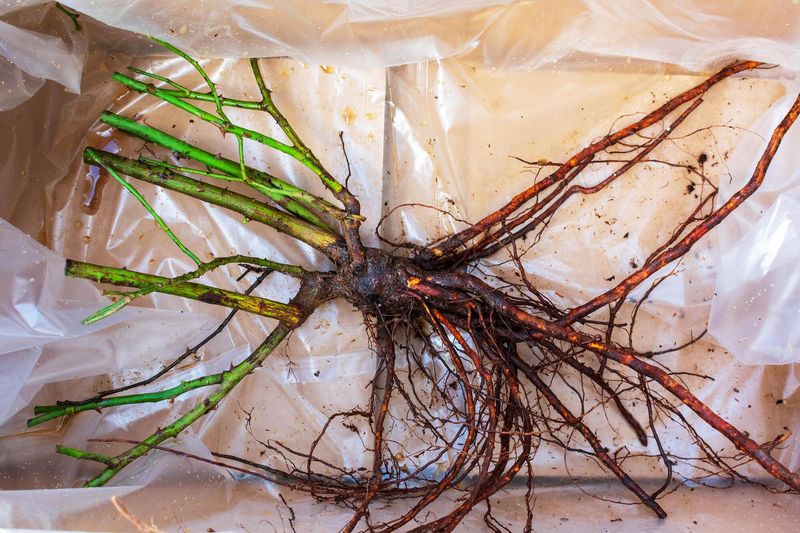
The first weeks after planting can feel anticlimactic. The canes sit there, the soil looks undisturbed, and nothing seems to be happening.
That quiet is actually a good sign. The rose is directing its energy downward, building the root system it needs before it can support top growth.
Early growth may be slow, and that is completely normal for a bare-root rose getting established. Patience here pays off in a stronger, more resilient plant by summer.
Pruning the canes at planting gives the root system a better chance to catch up. OSU Extension’s rose pruning guidance recommends cutting bare-root rose canes back to about six inches at the time of spring planting.
This applies specifically to bare-root roses being planted now, not to container roses purchased later in the season. Shorter canes mean less demand on a root system that is still finding its footing, and it encourages strong new growth from the base rather than struggling to sustain long canes that have no established support yet.
Hold off on fertilizer until you see new growth actively developing. Synthetic nitrogen placed against tender, newly planted roots can damage them, and feeding a plant before it has settled in does more harm than good.
Once the rose shows clear signs of active growth, a light, balanced fertilizer applied according to the product’s directions is a reasonable next step. There is no rush.
Watering during establishment should be deep and consistent, but not excessive. In the Willamette Valley, spring rainfall usually handles much of this naturally.
As a general disease-avoidance habit, watering at the base of the plant rather than overhead helps keep foliage drier, which can reduce conditions that favor fungal problems like black spot. Keep expectations realistic through the first season.
OSU Extension’s rose care resources note that disease-resistant varieties reduce risk for some fungal diseases without eliminating it entirely, and bloom timing depends on cultivar, establishment, and the particular rhythms of your garden. A rose that roots well this year is one that will genuinely perform next year, and that is worth the wait.