How To Propagate A Christmas Cactus In California From A Single Cutting
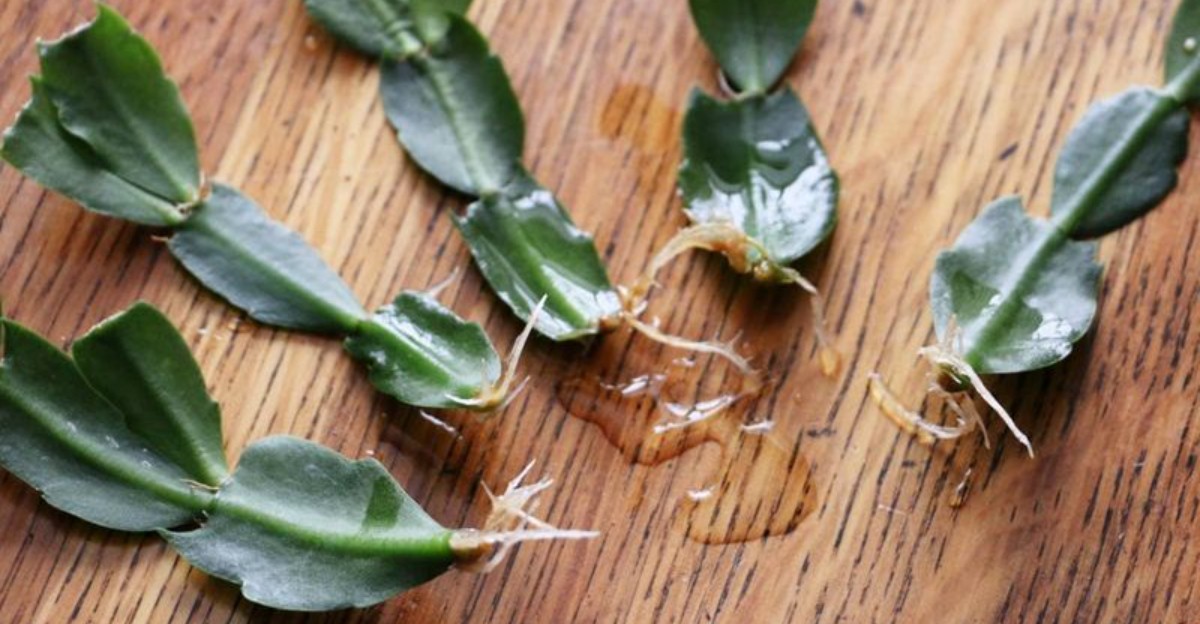
Some of the most rewarding garden projects begin with a small accident. A tiny green piece that breaks off during a move or a bump can look like a loss at first glance.
That fragment often holds far more promise than it appears.
One popular holiday houseplant ranks among the easiest to multiply, needing little more than patience and a few simple supplies.
California’s mild climate and bright winter light make the process even friendlier.
A handful of thoughtful steps separates a thriving new plant from a soggy disappointment, and none of them call for special gear.
With a little care, a single broken piece can grow into a cherished plant worth sharing for many holiday seasons to come.
1. Choose A Healthy Stem With Several Segments
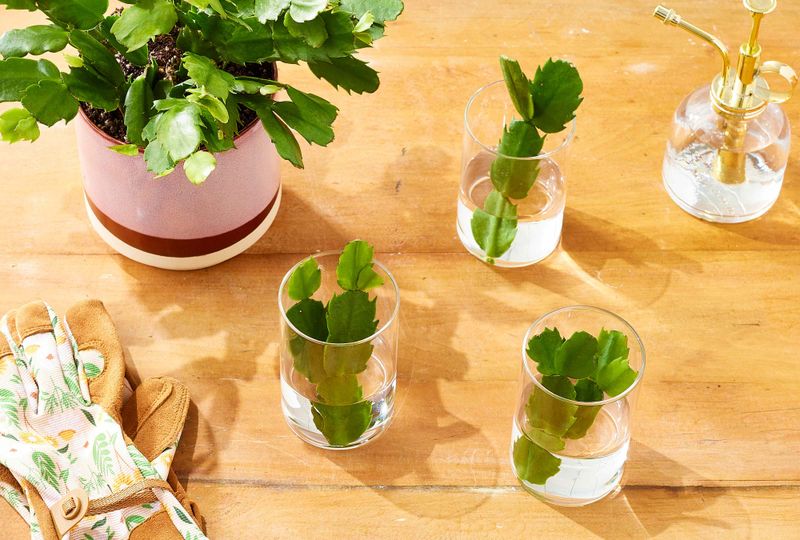
Plump, glossy segments signal a plant ready to share. Stems that feel firm rather than limp or wrinkled, with rich green color free of yellow patches, soft spots, or brown scars, make the best candidates.
A stem with at least four or five segments works well, since only the tip comes off and the parent keeps plenty of growth.
Pieces that look shriveled, mushy, or speckled with pests such as mealybugs, which resemble tiny cotton tufts, are best skipped.
Christmas cactus, known botanically as Schlumbergera x buckleyi, ranks among the easiest houseplants to grow from a single cutting, since each joint holds the power to make roots.
Timing matters as much as the stem. The plant sets flower buds in fall, when nights grow long and cool, so cutting during bud formation can mean fewer blooms that year.
The easiest window arrives after flowering ends, usually in late winter or spring.
California gardeners enjoy a small bonus. Spring across most of the state brings mild temperatures and longer days that help cuttings root faster, while late-summer heat waves are best avoided.
Watering the parent plant a day or two before taking a cutting helps, too. A well-hydrated stem carries more stored moisture, keeping the piece plump while it heals and grows roots.
An accidental snap during October can still work, as long as the piece looks healthy and firm. Indoors, out of the heat, it can root while the parent continues its bud season.
2. Twist Off A Piece Of Two To Three Segments
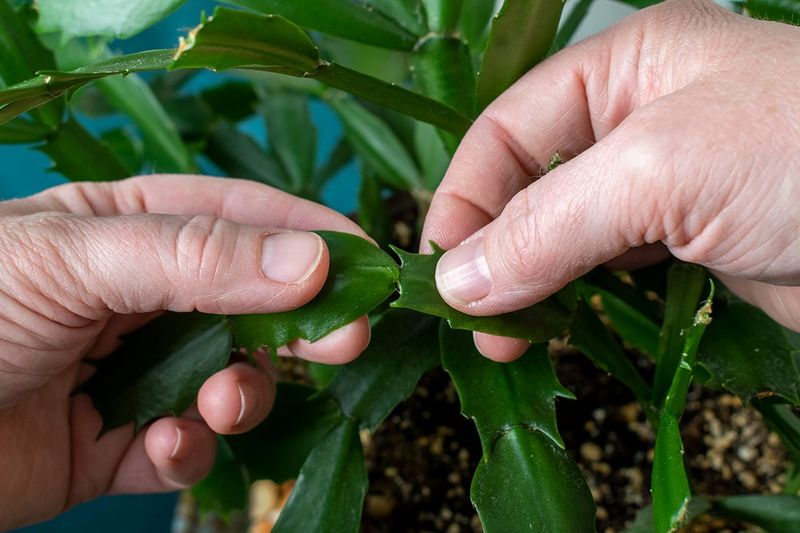
A gentle twist is all it takes. Christmas cactus stems grow in sections connected at narrow joints, and those joints serve as natural weak spots that separate cleanly with very little effort.
One hand holds the stem below the joint while the other grasps the tip piece and turns it slowly, much like opening a small jar. The piece usually pops free with a clean break.
A cutting of two or three segments works best.
A single segment can root, though it carries less stored energy. Two or three segments supply more food and water and stand up better in the pot.
Clean scissors or a sharp knife work fine for anyone who prefers tools. A blade wiped with household disinfectant beforehand avoids spreading germs.
Your California Garden Changes Every Week. Your Plan Should Too.
Gardening in California changes quickly throughout the season. Every Friday you’ll receive a simple weekly plan showing exactly what to plant, prune, fertilize, harvest, and protect so you never miss the right timing.
The snip belongs right at the joint rather than through the middle of a segment, since torn tissue heals slowly.
Extra cuttings make smart insurance. Not every piece roots, so spares provide a backup plan, and leftovers make sweet gifts for neighbors, coworkers, or anyone who admired the original plant.
Nature already uses this trick. In the wild, holiday cacti grow on trees in the coastal mountains of Brazil, and pieces that break off and land in a mossy crook can root right there.
Home propagation simply copies that strategy in a more controlled setting, with far better odds of success.
3. Let The Cut End Callus For A Day Or Two
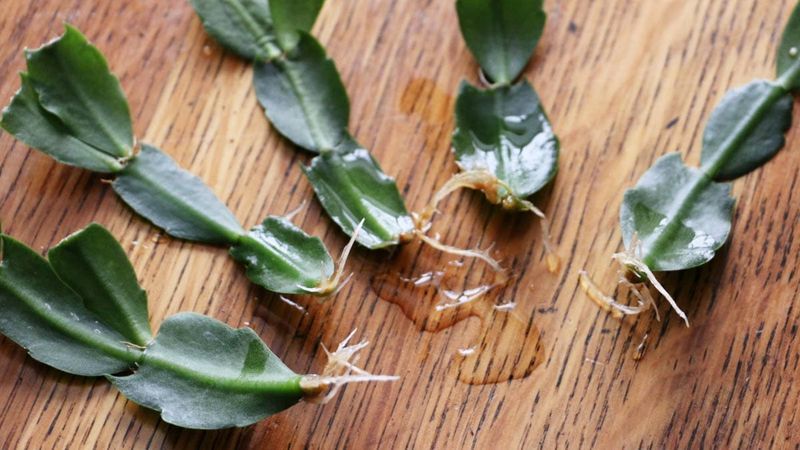
Patience begins right away, before the cutting ever touches soil. A freshly broken end is wet and open, much like a scraped knee, and planting it immediately invites fungi and bacteria that can lead to rot.
A dry paper towel or clean plate offers a better first stop. A shaded indoor spot out of direct sun, such as a kitchen counter or bookshelf, works nicely for a day or two.
During that short rest, the cut end forms a callus. It shifts from moist green to a dry, slightly pale surface.
That thin seal works like a bandage, protecting the cutting while roots begin.
Weeks of waiting, however, are best avoided. A long delay can leave segments wrinkled and short on stored water, so a day or two suffices in most homes.
California air runs dry in many areas, so callusing often happens quickly, especially inland.
Coastal homes with foggy mornings may need the full two days. A visual check works better than touching, and once the end looks sealed and dry, the cutting is ready for planting.
Many beginners skip this step and later wonder why their cutting turned mushy. A little waiting now prevents plenty of disappointment.
That brief pause gives the cutting its best possible start. Calm and dry beats rushed and soggy almost every time, and the cooler, drier days of October make callusing especially easy indoors.
4. Plant It About An Inch Deep
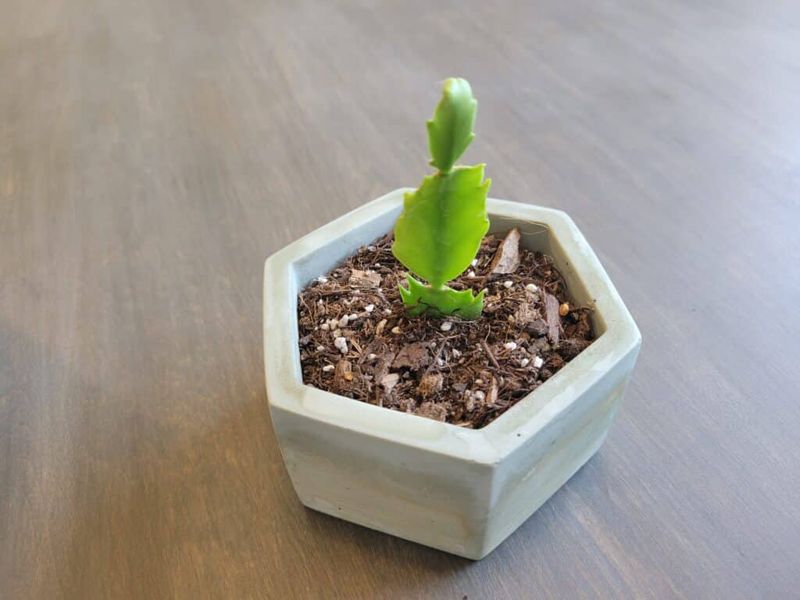
Shallow beats deep with this plant. The callused end settles about one inch into the soil, enough to cover roughly the lower half of the bottom segment, since roots form near the base.
Burying a cutting too deep leaves extra segments sitting in moist soil for weeks, raising the chance of rot.
Planting too shallow, on the other hand, lets the cutting flop over or dry out before rooting. One inch hits the sweet spot.
An upright position, or a slight tilt, works well while settling it in. Fingertips pressing the mix gently around the base create firm contact.
That stability matters, since wobbling can break tiny new roots.
A cutting that keeps leaning can rest against a toothpick or small craft stick placed beside it. Some gardeners lean two or three cuttings against each other in the same pot, holding each other up like friends in a group photo.
A small pot about three or four inches wide, with a drainage hole, suits a new cutting best. A large pot holds extra soil that stays wet too long, while clay pots breathe well and dry faster, a good match for most California homes.
Several cuttings planted together create a fuller plant sooner. A single piece grows slowly at first, while three in one pot can look bushy within a year.
Either way, this small planting may grow into a plant that blooms for decades.
5. Use A Light Well Draining Mix
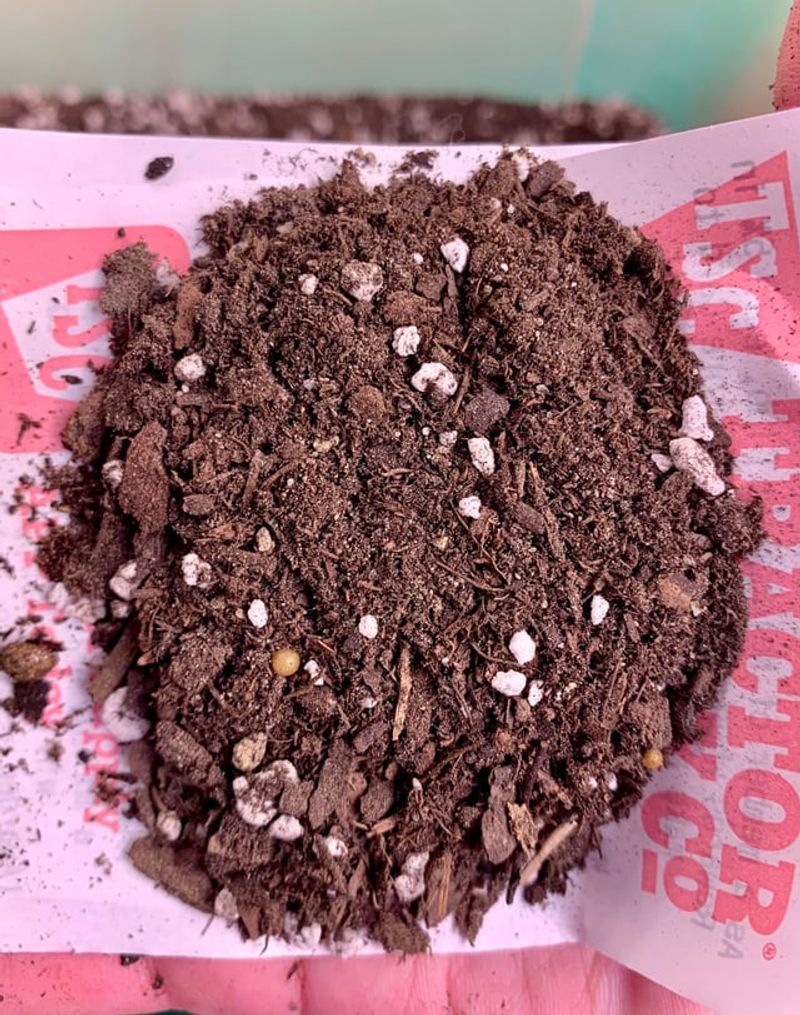
Heavy garden soil offers the quickest route to a soggy setback. Christmas cactus grows on tree branches in Brazilian forests rather than in thick dirt, so its roots expect air, quick drainage, and only a little moisture at a time.
A store-bought cactus and succulent mix makes an easy starting point. Perlite or fine bark stirred in lightens it further.
A simple recipe calls for about two parts potting mix to one part perlite. Those white bits of perlite create air pockets that roots love.
Soil scooped from the yard is best left outdoors. Much of California sits on dense clay that packs down and holds water.
Even sandy backyard soil can carry pests or weed seeds, while bagged mix stays clean and predictable.
A quick test before planting confirms good drainage. Water poured into a filled pot should flow from the drainage hole within a few seconds, and puddling on top or slow dripping calls for more perlite.
Rocks at the bottom of the pot are best avoided. Many people believe gravel improves drainage, but it actually raises the wet zone higher.
A uniform, airy mix from top to bottom works better.
Lightly moistening the mix before planting helps it settle around the base. Dry mix can repel water at first.
The goal is the feel of a wrung-out sponge, damp but not dripping. A good foundation makes every other step easier, setting the stage for strong roots through the cooler months ahead.
6. Keep The Mix Barely Moist
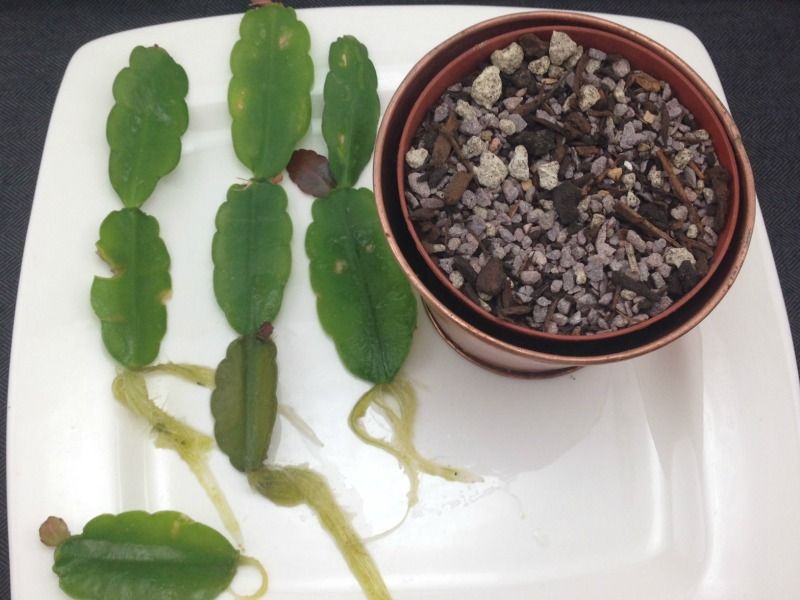
Overwatering ruins more cuttings than any other mistake. Without roots, a fresh piece can drink very little, so extra water simply sits around the base while rot sets in quietly.
The target is soil that feels barely moist, like a sponge squeezed hard. A finger pushed about half an inch into the mix reveals when the top layer has dried, signaling time for a small drink.
A spray bottle or a few spoonfuls of water handles the job nicely.
The cutting itself offers clues. Slightly soft or wrinkled segments may signal thirst, while mushy, dark, or translucent bases warn of too much water.
Rot caught early can often be trimmed away, with the healthy top callused again and replanted.
California’s varied climate changes the schedule considerably. A cutting in inland Riverside may dry out every few days, while one near the foggy San Francisco coast might go a week or longer.
The soil, rather than the calendar, sets the pace.
A pot sitting in a saucer of water is best avoided, and drips are best emptied right away. Standing water keeps the bottom of the pot soggy and cuts off air to the root zone.
Some gardeners loosely cover the pot with a clear plastic bag to hold humidity, opening it daily for fresh air, though most cuttings root fine without one.
Small, careful sips beat big, generous splashes, especially as cooler fall weather slows drying indoors.
7. Give Bright Indirect Light
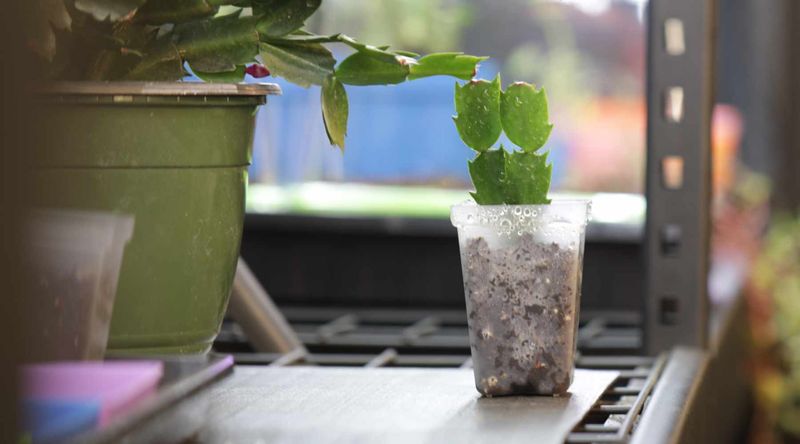
Sunburn shows up as reddish or bleached segments, and a rooting cutting has no spare energy to repair it. Christmas cactus evolved beneath a leafy forest canopy, thriving in bright light that has been softened or filtered.
An east-facing window often works best, offering gentle morning sun and afternoon shade. A spot a few feet back from a south or west window also works, and sheer curtains help diffuse harsh rays.
California sunshine stays strong even in winter. Direct afternoon sun through glass can heat a small pot quickly.
Outdoors, a covered porch or the shade of a tree suits cuttings during mild weather. Pots belong inside when temperatures drop below about 50 degrees or climb into the 90s.
Too little light causes problems as well. In a dim corner, a cutting roots slowly, and new growth turns pale and stretched.
Bright, indirect light provides enough fuel to build roots without stress.
Warmth works alongside light. Room temperatures between about 65 and 75 degrees support steady rooting, while heater vents, air conditioners, and drafty doors are best avoided, since sudden swings can stall growth.
A quarter turn of the pot every week or so keeps growth balanced, because cuttings lean toward the window. Pairing that turn with each soil check makes it an easy habit.
Bright but gentle conditions suit this shade-loving plant best. As October days shorten, a sunnier window may help a cutting get enough light through winter.
8. Wait For New Growth Before Repotting
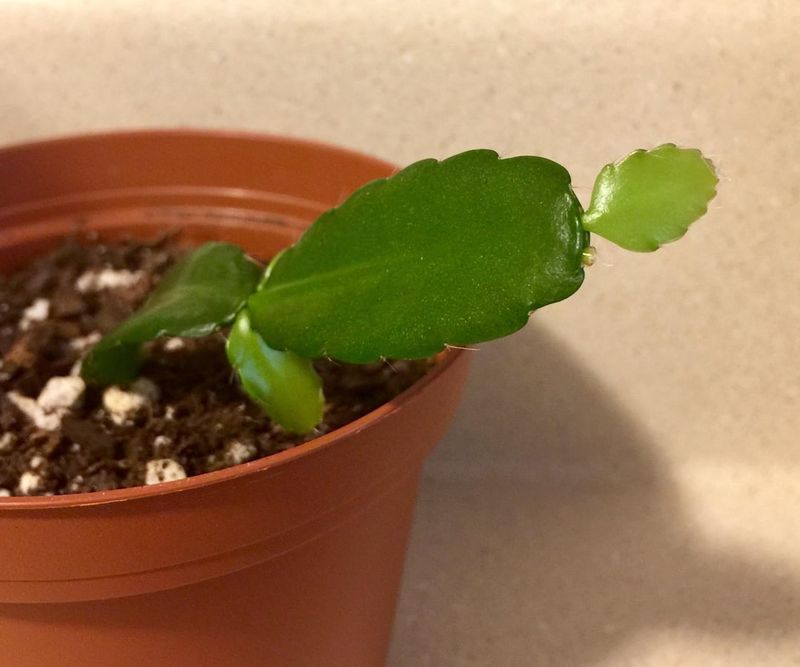
Tiny new segments at the tip bring the best possible news. They often appear as small, bright green nubs, sometimes edged in red, and they signal roots working below the surface.
Rooting usually takes several weeks. Many cuttings develop roots in about three to six weeks, though visible new growth may take a bit longer.
Pulling the cutting up for a peek tears delicate roots, so patience serves better.
A gentle tug offers a safer check. Light upward pressure meets resistance once roots have gripped the soil, while a cutting that slides out easily needs more time.
Repotting can wait until the plant has grown steadily for a few months. Christmas cactus actually prefers a slightly snug pot.
Once roots peek from the drainage hole, a move up just one size, about an inch wider, works well. The same light, fast-draining mix keeps conditions consistent.
Light watering after repotting, along with bright, indirect light, helps the plant settle. Feeding with a diluted houseplant fertilizer can begin during spring and summer growth.
Flowers rarely appear right away. Most young plants bloom once they gain size and experience the right fall conditions, with long nights and cooler temperatures.
Some bloom the very next season, while others take a year or two. Either way, that one broken piece has become a plant ready to carry the holiday tradition forward.