Don’t Let Frost Wipe Out Your Dahlias. New York Gardeners Need To Do This First
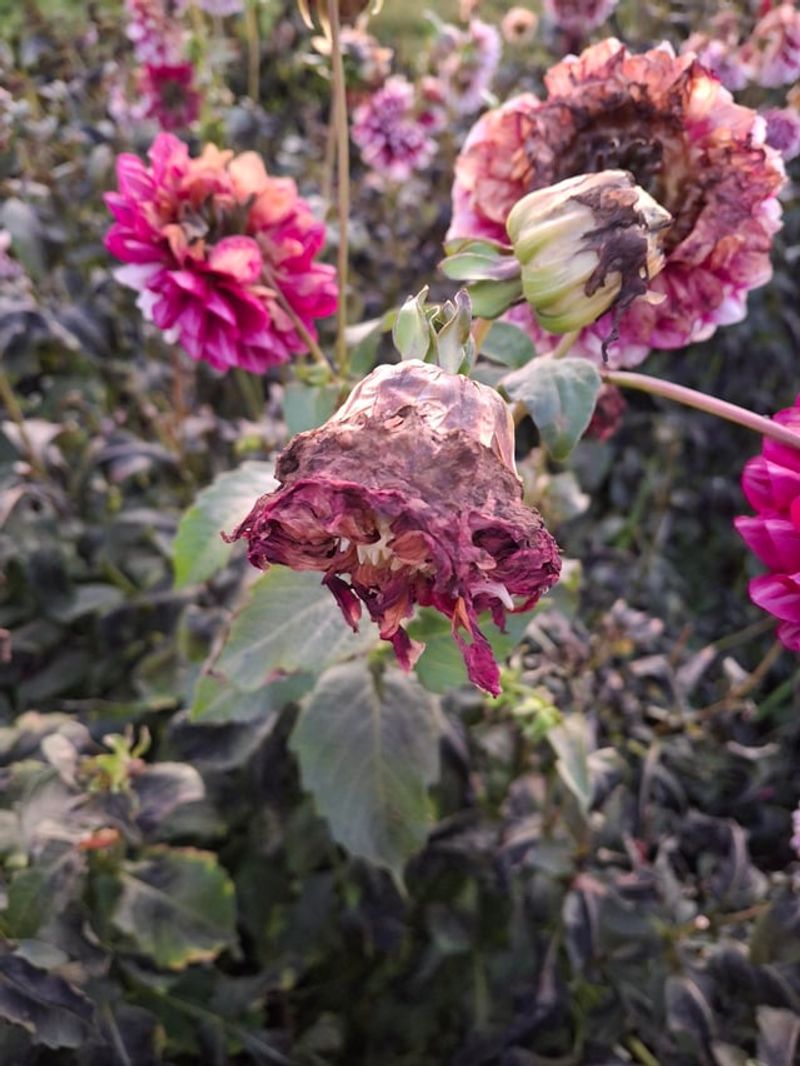
Your dinner-plate dahlias have one big enemy, and it arrives on a cold autumn night. One hard freeze can turn bright petals into dark mush by morning.
The tubers underground face a tougher test once New York’s soil starts to freeze. Luckily, saving them is easier than most people think.
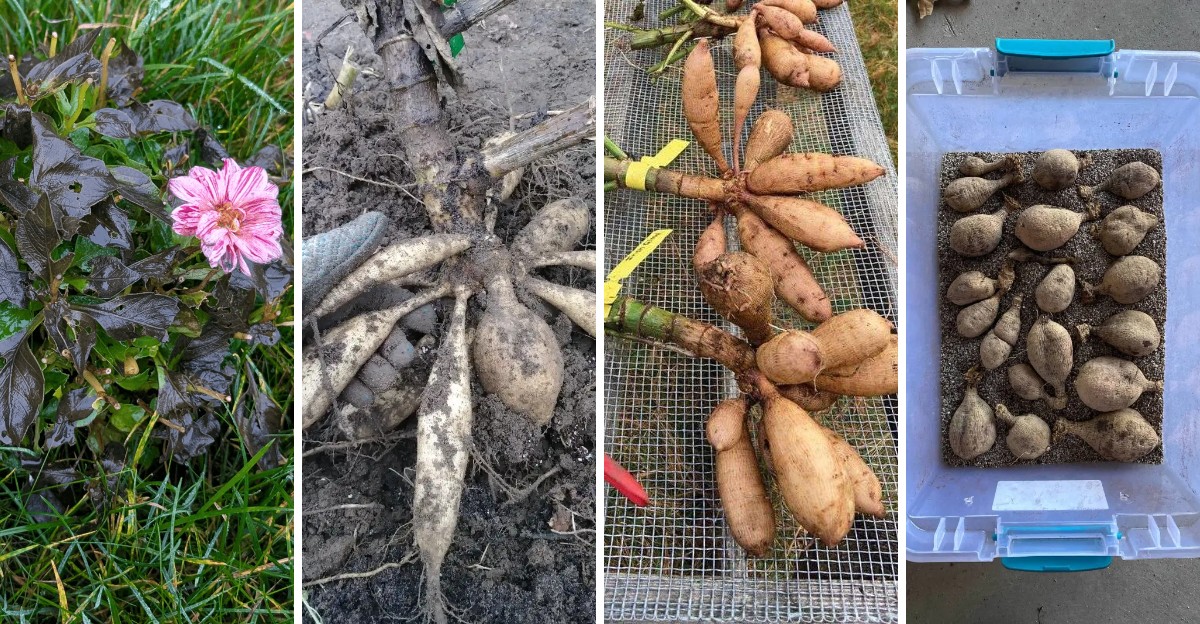
A garden fork, a few labels, and a cool basement corner are nearly all you need. Your favorite varieties can return year after year.
Many gardeners spend money each spring replacing tubers they could have saved for free. Others store them the wrong way and open a box of moldy mush in March.
The steps ahead cover the right timing, the safest way to dig, and the storage tricks that keep tubers firm. Start once frost blackens the foliage, and next summer’s blooms are covered.
1. Dahlias Can’t Survive A New York Winter In The Ground
Picture a sunny Mexican hillside, because that is where dahlias first grew wild. Their roots expect mild weather, not snowdrifts and frozen soil.
Gardeners call dahlias tender perennials for good reason. They can return each year, but only if their tubers stay above freezing.
Most of New York falls in USDA zones 7 or colder. Long Island and the city sit near the warm end, while upstate runs much colder.
Once soil freezes around a tuber, the water inside turns to ice. The tissue breaks down, turns soft, and starts to rot by spring.
Some folks gamble and leave clumps in place under thick mulch. Occasionally it works during a mild year, but the odds are poor in most of the state.
A soggy spring adds another problem for anyone taking that risk. Cold, wet ground invites fungus, and fungus loves a weakened tuber.
Digging them up might sound like a chore at first. Think of it as moving your plants into a cozy winter apartment instead.
Here is a fun bonus that surprises many beginners. One tuber planted in May can multiply into five or more by fall.
Storing them means your collection grows larger every single year. You get more plants to fill beds, swap with neighbors, or share at garden club meetings.
So treat your dahlias like summer guests who need a warm room. A little effort now pays off with a garden full of blooms later.
Plan ahead by gathering a fork, boxes, and labels in October. Being ready makes the whole job feel quick and calm.
2. Wait For Frost To Blacken The Foliage
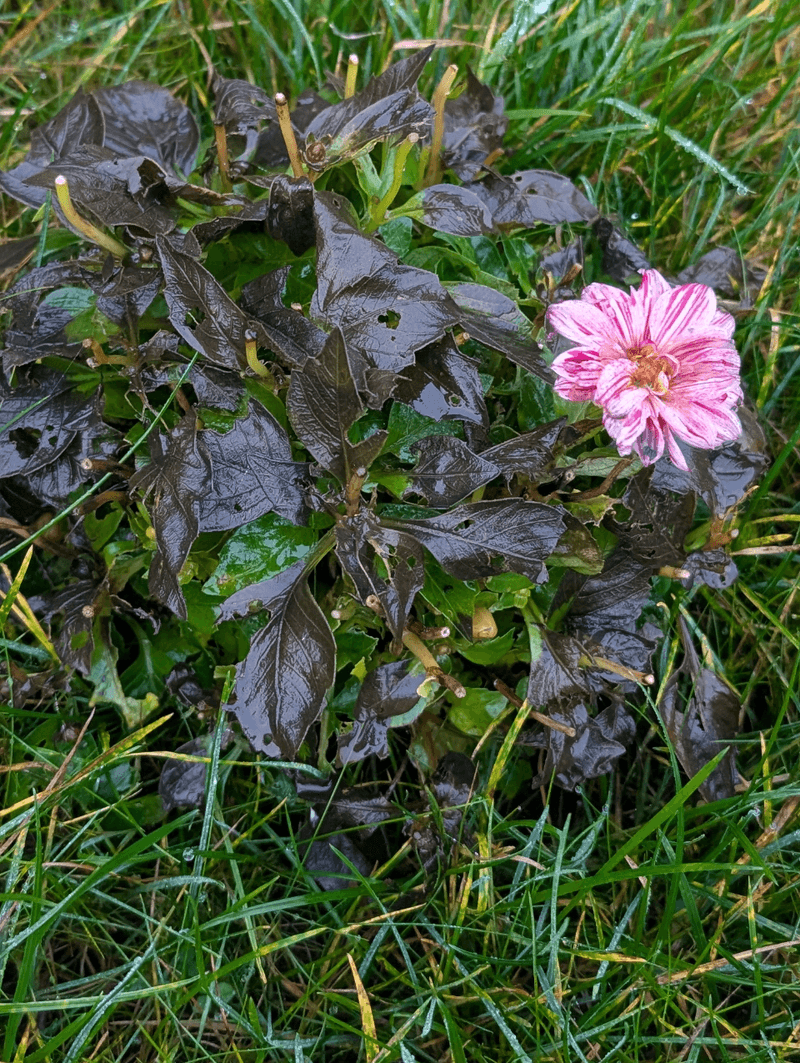
Walking outside to find your dahlias looking scorched and droopy feels awful. Believe it or not, that ugly sight is actually good news.
A hard frost turns leaves black or dark brown almost overnight. That color change tells you the plant has finished its season.
Frost sends a clear signal to the plant below the surface. Water and nutrients stop moving upward into stems and leaves.
Energy then shifts down into the tubers for safekeeping. They plump up a little and finish maturing in the cool soil.
Your New York Garden Changes Every Week. Your Plan Should Too.
Gardening in New York changes quickly throughout the season. Every Friday you’ll receive a simple weekly plan showing exactly what to plant, prune, fertilize, harvest, and protect so you never miss the right timing.
Meanwhile, the outer skin of each tuber begins to toughen. A thicker skin helps protect them from bruises and rot during storage.
Digging too early skips this helpful curing process. Tubers lifted while leaves are still green often have thin skins and shrivel in boxes.
Watch the weather app closely starting in October. Nights around 28 degrees usually bring the kind of frost that blackens foliage.
A light frost might only nip the top leaves. Wait until most of the plant looks dark and wilted before planning your next step.
Patience feels hard when cold winds start blowing in. Still, giving nature a few extra days makes your tubers much stronger.
Try snapping a few photos of your plants after the first frost. Comparing pictures each year helps you learn your yard’s typical timing.
Neighbors with gardens nearby can be helpful too. Ask them when frost hit their plants and compare notes over the fence.
3. No Hard Frost By Early November? Dig Anyway
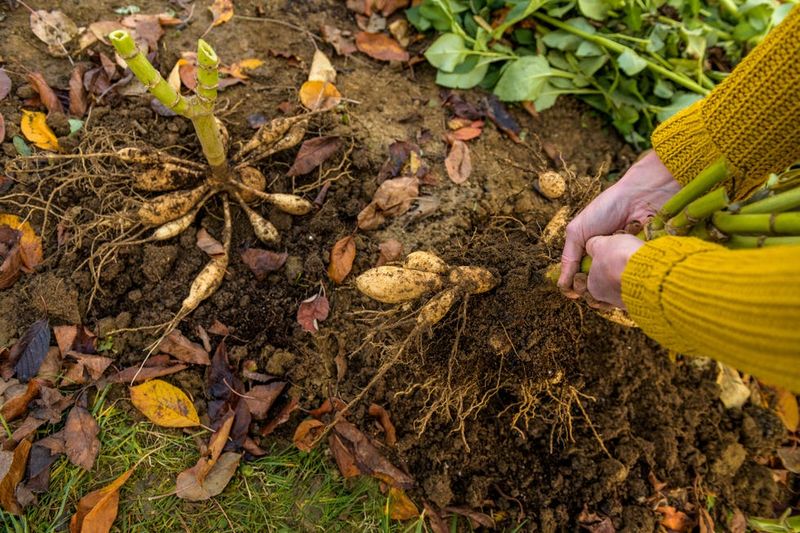
Some autumns refuse to play by the rules. Your dahlias might still be blooming happily on Halloween while you wonder what to do.
Warm falls happen more often in New York lately, especially near the coast. Waiting forever for frost can backfire in a big way.
The real goal is lifting tubers before the ground freezes solid. Frozen soil can trap your clumps until spring, and by then they are mush.
Many growers in the region use November 15 as a handy deadline. If no hard frost has arrived by then, grab your tools anyway.
Start by cutting stems down to about six inches tall. Leaving a short stalk gives you a handle point and keeps the crown visible.
Checking the forecast matters during this stretch. A sudden deep freeze can drop out of nowhere in late fall.
When a hard freeze is predicted, act quickly. Cut the plants back by hand and dig right away instead of waiting.
Maturity counts too, so think back to planting day. Tubers usually need around 120 days of growth to store well.
Late-planted dahlias may have smaller, softer tubers. Handle those extra carefully and check them more often over winter.
Upstate gardeners near Buffalo or the Adirondacks may need an earlier date. Cold arrives sooner there, so late October digging is common.
Keep a simple garden journal with your dig dates each year. Over time, you will spot patterns that make planning much easier.
4. Give Tubers A Short Rest Before Lifting
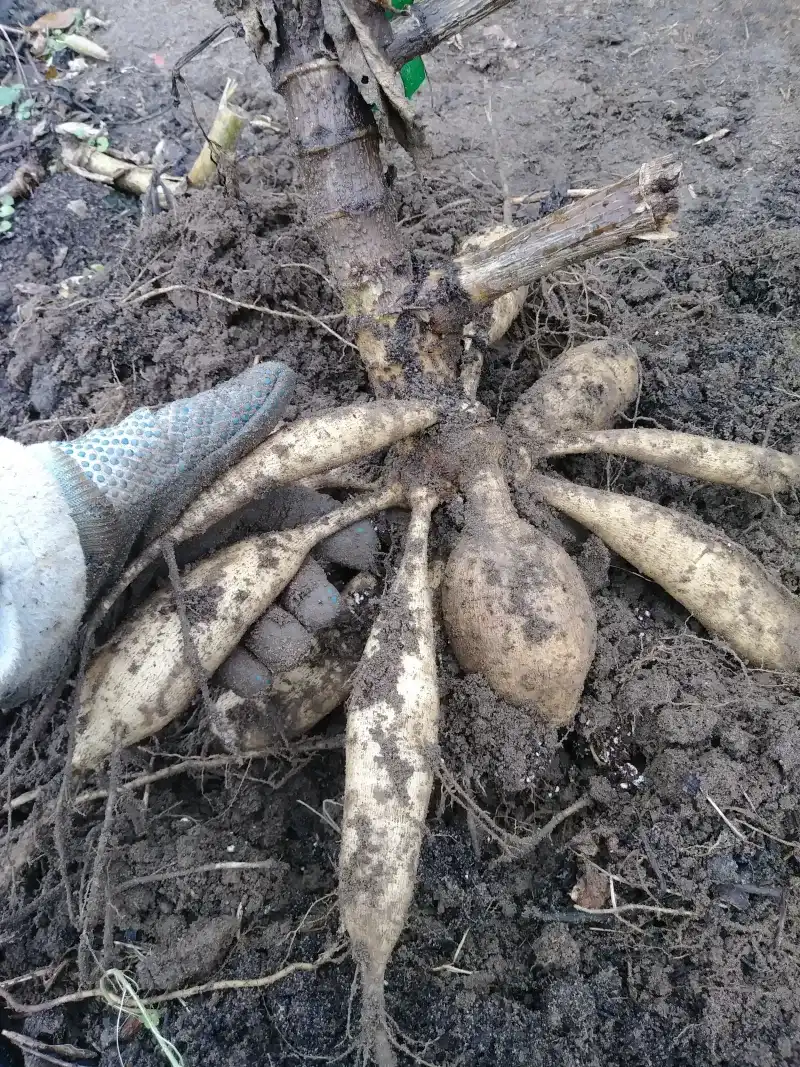
Think of this step like letting cookies cool before you pull them off the tray. Rushing ruins the results.
After frost blackens the leaves, leave the tubers in the soil for one to two weeks. That short pause works quiet magic underground.
During this rest, the tuber skins keep getting tougher. Thicker skins resist nicks, bruises, and the rot that follows them.
Moisture inside each tuber also settles down. Balanced moisture helps them avoid shriveling or turning mushy in storage.
Many growers trim the decaying tops during this waiting time. Others leave the full stalks standing until digging day.
Either way, be smart about the hollow stems. Rain can pour into open stems and sit right on top of the crown.
Standing water in the crown can lead to crown rot. Some gardeners cover cut stems with foil or a small cup to keep rain out.
Keep an eye on the forecast during this resting period. If a deep freeze is heading your way, cut the rest short and dig.
Soil temperature matters more than air temperature here. Tubers stay safe as long as the ground itself has not frozen.
A cheap soil thermometer is a handy tool for this job. Stick it four inches deep and check readings each morning.
Use these quiet days to prepare your storage space. Gather boxes, peat moss, labels, and markers so everything waits ready.
5. Dig Wide To Avoid Slicing Into Tubers
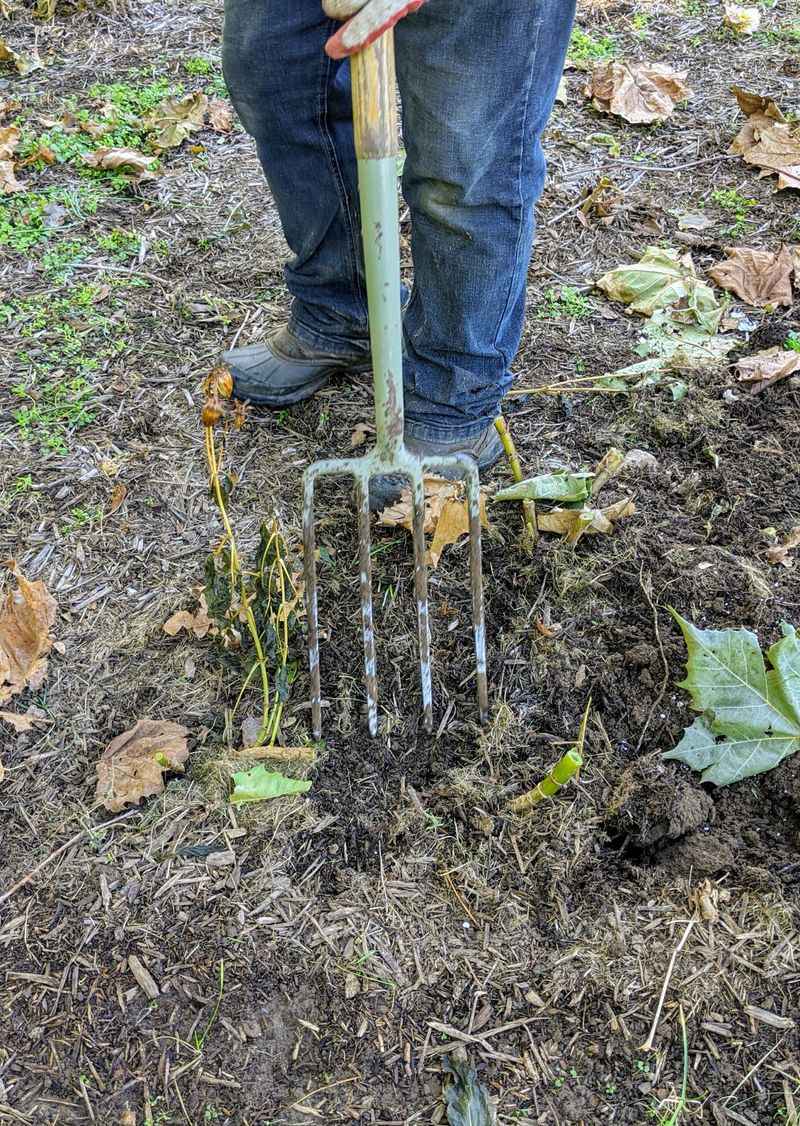
Ask any longtime dahlia grower about their worst digging memory. Most will groan about the day their shovel sliced right through a prize clump.
Dahlia tubers spread out farther than you might expect. A healthy clump can stretch a foot or more in every direction.
Grab a garden fork instead of a flat shovel for this task. The narrow tines slip between tubers rather than chopping them apart.
Start at least 12 inches away from the main stem. Push the fork straight down and gently rock it back and forth.
Work your way around the entire plant in a circle. Loosening every side first lets the clump release with little force.
Moist soil makes this job much easier on your back and the tubers. Digging after a dry spell can mean hard, stubborn ground.
Heavy clay is common in many New York yards. In clay, take extra time and loosen deeper before trying to lift anything.
Go slowly and listen as you dig. A crunching sound may mean you found a tuber, so shift your fork outward.
Nicked tubers are not always a lost cause. Small cuts can heal if you let them dry and form a callus before storage.
Deep gashes are trickier to save, though. Toss badly damaged pieces since they often rot and spread trouble to neighbors.
Wear sturdy gloves and boots for better grip. A steady stance gives you more control with every push of the fork.
6. Never Yank Clumps Up By The Stalk
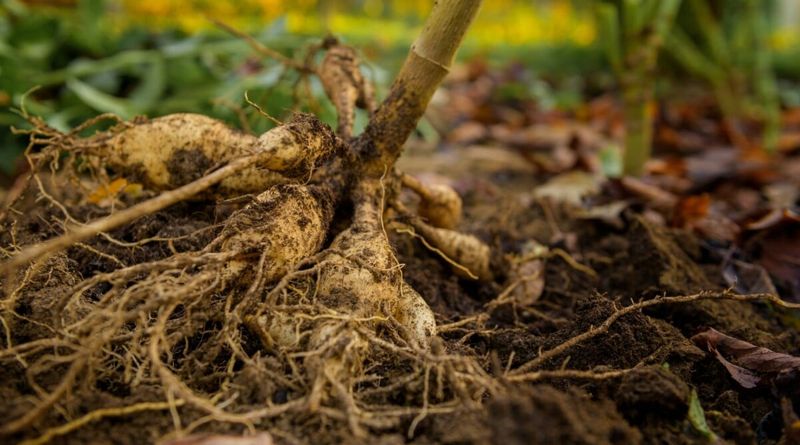
Grabbing the stalk and pulling feels so natural. Resist that urge, because it can wreck next year’s garden in one second.
Each tuber connects to the crown by a slim neck. Those necks are delicate, especially right after the clump leaves the ground.
Here is the tricky part many beginners miss. A broken neck means that tuber cannot grow a new plant next season.
New sprouts come from eyes on the crown, not the tuber itself. Without its neck, the tuber is just a lump of stored food.
So how do you lift the clump safely? Slide your fork or spade deep underneath and gently pry upward.
Support the clump from below as it rises. Cradle it like a carton of eggs rather than swinging it around.
Shake off loose soil with soft taps, not hard thumps. Too much jostling can snap necks you worked hard to protect.
Kids love helping with dahlia digging, which is wonderful. Just show them how to hold clumps from the bottom before they start.
A sturdy tarp or wheelbarrow nearby comes in handy. Set each clump down softly instead of dropping it onto hard ground.
Some gardeners keep a bucket of water ready too. Dunking the clump loosens stuck dirt without any tugging.
Treat each clump with care and your effort pays off. More healthy necks mean more plants and more flowers come summer.
7. Rinse Gently And Let Them Dry Completely
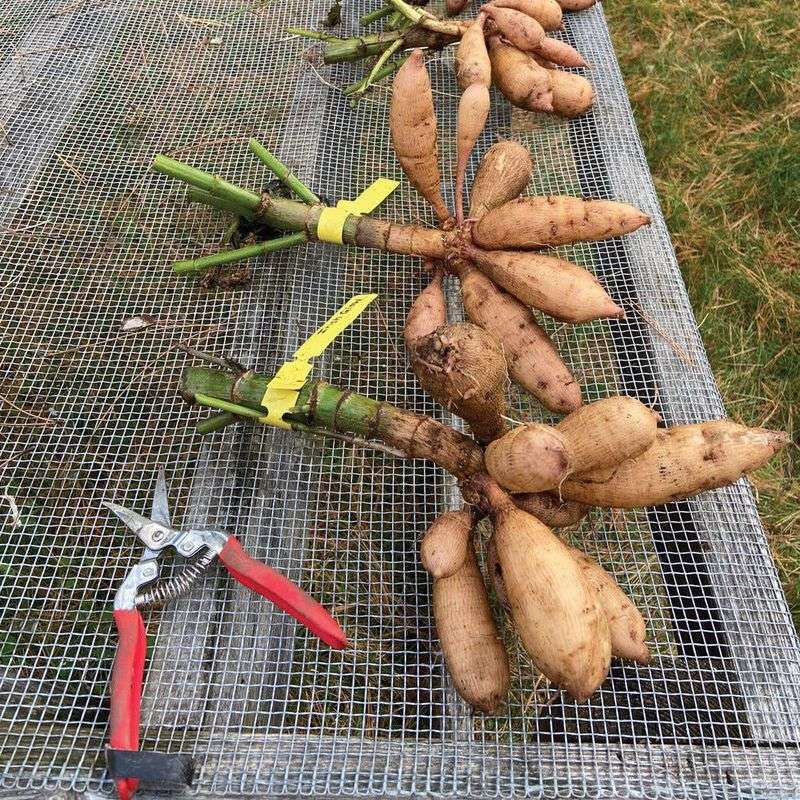
Muddy tubers might look harmless on your garage floor. Hidden in that dirt, though, are tiny organisms waiting to cause rot.
Use a garden hose on a gentle setting to rinse clumps. Wash away as much soil as you can without blasting the skins.
Flip each clump upside down after washing. Water trapped in hollow stems needs a chance to drain out.
Next comes drying, and the spot you pick matters. Choose a cool, shaded place with good airflow, like a garage or covered porch.
Skip direct sunlight and bare concrete floors. Both can pull too much moisture and leave tubers wrinkled and weak.
A wire rack, old window screen, or newspaper works nicely. Air reaches every side, so they dry evenly.
Drying usually takes anywhere from 12 to 48 hours. Humid weather may stretch that time toward the longer end.
Check them by touch before packing anything away. The outside should feel dry, but the tubers should stay firm and plump.
Some growers divide clumps right after washing in the fall. Fresh cuts need 24 to 48 hours to callous before storage.
Dividing now has a perk worth knowing. Tubers are softer in autumn, so cutting is easier than in spring.
Keep a fan running on low if your space feels stuffy. Gentle moving air speeds drying and helps keep mold away.
8. Label Every Variety Before You Forget
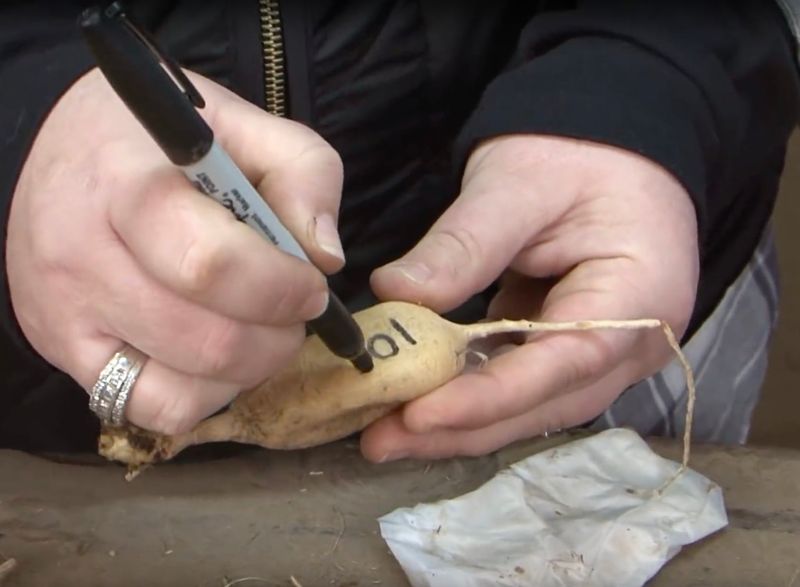
Brown, lumpy, and about the size of a sweet potato. Describe one dahlia tuber and you have pretty much described them all.
Once the colorful blooms disappear, varieties look nearly identical. Without labels, spring planting becomes a guessing game.
Imagine putting tall Café au Lait behind tiny border dahlias by mistake. Your carefully planned garden turns into a jumbled mess.
A permanent marker solves this problem fast. Write the variety name right on each tuber’s skin once it is dry.
Fine-tip markers work best for small tubers. Short codes or abbreviations help if names are long.
Plastic plant tags offer another easy option. Tuck a tag with each clump or tuber in its storage box.
Some growers use colored rubber bands or tape. Pair those colors with a simple written key kept in a notebook.
Here is a smart habit to start now. Snap a photo of each plant in bloom with its tag visible.
Photos help you remember color, size, and flower shape later. They also make sharing or trading tubers with friends much easier.
Label while digging, not afterward. Memory gets fuzzy quickly once several clumps are spread across the garage.
Fun fact for flower lovers out there. The American Dahlia Society recognizes thousands of named varieties, so tracking yours really matters.
9. Pack Them In Peat Moss Or Vermiculite
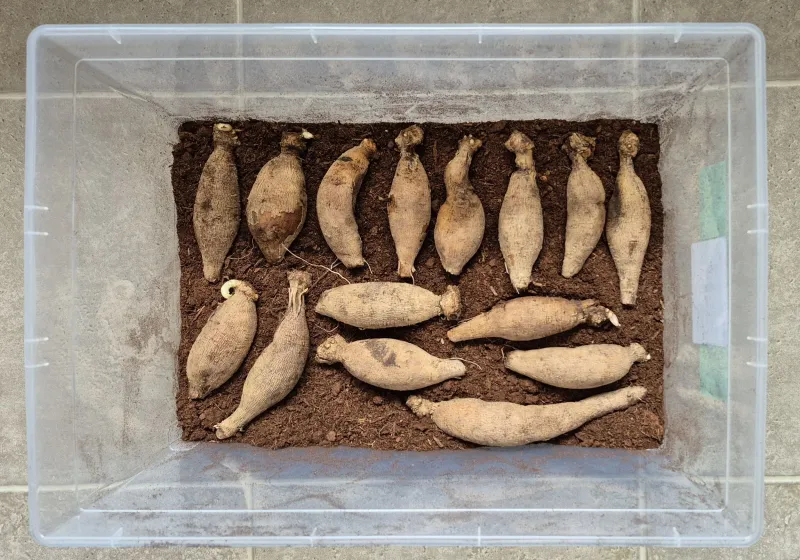
Tucking tubers into bed for winter is oddly satisfying. The right bedding keeps them snug, firm, and healthy until spring.
Good choices include peat moss, vermiculite, or sawdust. Each one holds a little moisture while still letting air move.
Aim for damp, not soggy, packing material. Squeeze a handful, and no water should drip out.
Skip wood shavings sold for pet bedding. They can pull moisture right out of the tubers and leave them shriveled.
For containers, try cardboard boxes, wooden crates, or plastic bins. Leave bin lids cracked open so fresh air can circulate.
Start with a few inches of material on the bottom. Lay tubers on top, then cover them with another layer.
Keep tubers from touching one another as you layer. If one starts to rot, spacing helps stop the trouble from spreading.
Plastic bags can work in a pinch too. Leave them partly open so moisture does not build up inside.
Some gardeners wrap each tuber in plastic wrap instead. That method saves space and keeps moisture locked in tight.
Write variety names on the outside of each box as well. Finding the right tubers in April becomes simple and stress-free.
Try testing two storage methods side by side this year. Comparing results shows what works best in your own basement.
10. Store Them Around 45 Degrees And Check Monthly
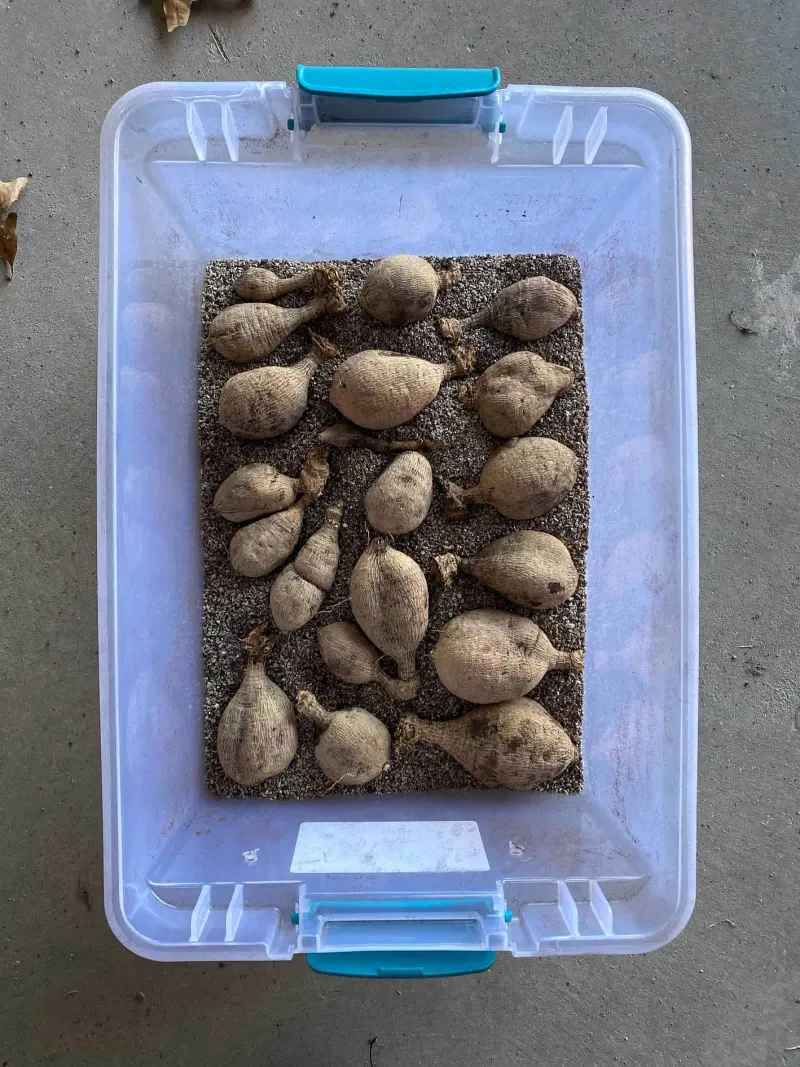
Finding a spot that stays chilly but never freezes is the final puzzle. Get it right, and your tubers sleep peacefully all winter.
Aim for temperatures between 40 and 50 degrees Fahrenheit. Around 45 degrees is the sweet spot many growers swear by.
Unheated basements often fit the bill in New York homes. Insulated garages, root cellars, or cool closets can work too.
Freezing temperatures will ruin tubers quickly. Too much warmth brings trouble as well, like early sprouting or shriveling.
Humidity around 80 to 85 percent keeps tubers plump. A cheap hygrometer helps you track both moisture and temperature easily.
Set a monthly reminder on your phone for checkups. Open each box and gently squeeze a few tubers.
Soft, mushy, or moldy tubers need to go right away. Removing them fast protects healthy neighbors from spreading rot.
Wrinkled tubers are thirsty, not doomed. Lightly mist the packing material with water to raise the moisture level.
Spotting little sprouts in January means your space runs warm. Move the boxes somewhere cooler to slow things down.
By late April, your tubers will be ready for soil again. Plant them once frost danger passes, usually in May.
Each healthy tuber you save is a gift to future summers. Bright blooms and full vases will thank you for every careful step.