What Ohio Gardeners Should Do With Dahlias, Cannas, And Glads After The First Frost
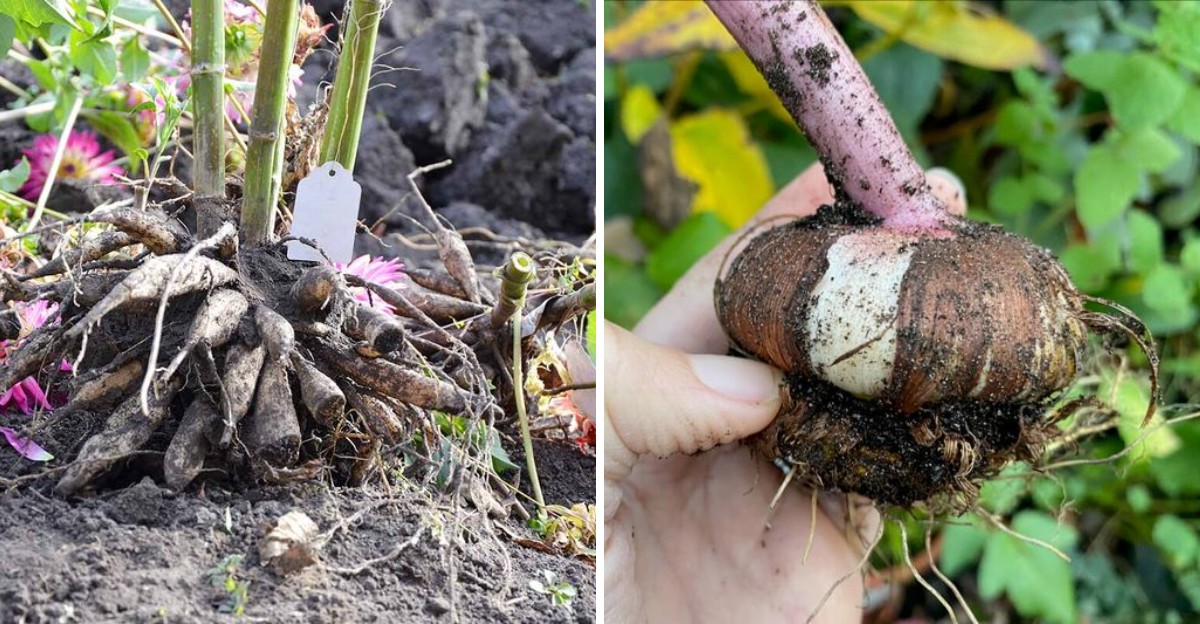
Frost came through last night, and the big, bold blooms you babied all summer now droop like a party that ran too long.
Three of Ohio’s showiest bulbs, tubers, and corms sit in your beds right now, and they don’t want the same treatment. One group wants to be lifted fast.
Another can wait a little. A third has a trick that surprises first-timers.
Mix up the plan and you could lose a whole season of effort in a single cold snap. Get it right and next year’s garden practically plants itself, bigger and better than before.
Timing matters here, and so does what you do with the plants once they’re out of the ground. Skip a step and the storage bin turns into a heap of mush by February.
Grab a spade and a few boxes before the next cold night arrives.
1. Wait For Frost To Blacken The Foliage
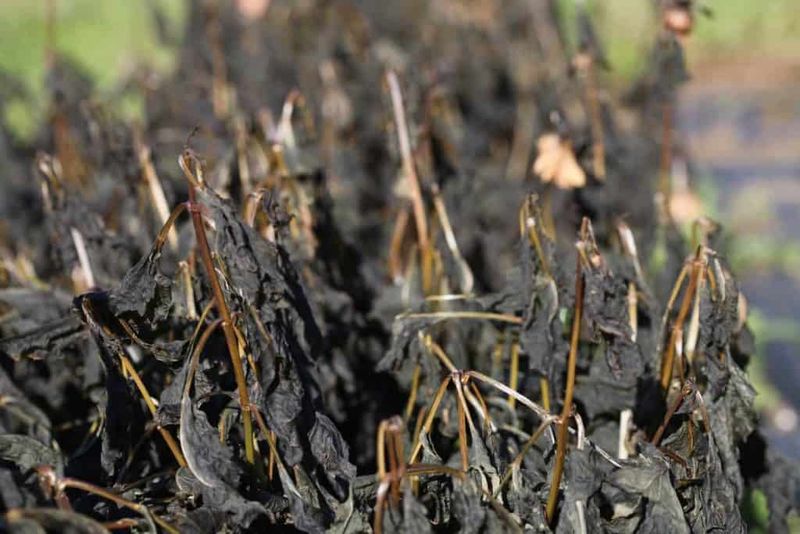
Patience is a gardener’s best friend in late fall. Those blackened, droopy leaves after the first frost may look sad, but they carry good news.
Your plants are getting ready to rest.
For dahlias, a light frost helps the tubers settle into dormancy. It also helps their skins toughen up, which protects them in storage.
Thicker skins mean fewer problems with rot and shriveling over the winter months.
Cannas work in a similar way. Their big tropical leaves turn yellow or go black after a frost.
During that time, the plant pushes leftover energy down into its rhizomes, which are the thick roots underground.
Gladiolus also benefit from a little waiting. Letting their leaves yellow and fade gives the corms time to store food.
That stored food powers next summer’s tall flower spikes.
So resist the urge to rush out with a shovel the moment it gets cold. Many Ohio gardeners see their first frost sometime in October, though it varies by region.
Northern counties near Lake Erie can get frost a bit later, while southern hills may see it early.
Keep an eye on your local weather report. When the forecast calls for temps near 32 degrees, expect to see changes the next morning.
Snap a photo of each bed so you remember which colors grew where.
A fun tip is to label plants before the foliage fades. Once leaves turn black, telling a red dahlia from a pink one gets tricky.
Tie a plastic tag to each stem with the variety name.
Think of this waiting period as nature’s way of tucking your plants in. A few days of blackened leaves now can mean healthier, stronger blooms next year.
Your garden will thank you for the pause.
2. Dig Before A Hard Freeze Sets In
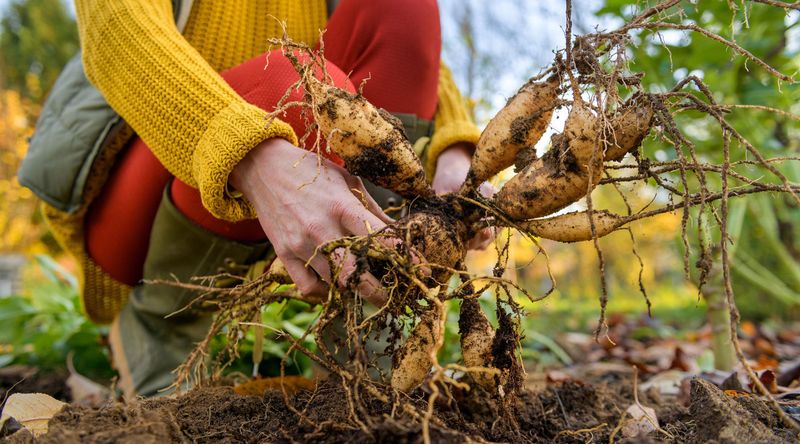
Timing is a bit like catching a bus. Show up too early and you wait around, but show up too late and you miss your ride.
Digging tender bulbs works much the same way.
After the first frost, you have a window of time before the ground freezes hard. Most experts suggest waiting about one to two weeks after frost to dig dahlias.
Your Ohio Garden Changes Every Week. Your Plan Should Too.
Gardening in Ohio changes quickly throughout the season. Every Friday you’ll receive a simple weekly plan showing exactly what to plant, prune, fertilize, harvest, and protect so you never miss the right timing.
That gives the tubers time to harden off without risking a freeze.
A hard freeze is different from a light frost. Light frost nips the leaves, while a hard freeze can chill the soil deep enough to harm tubers.
Frozen tubers often turn mushy and rot.
Cannas are tropical plants from warm places. They simply can’t handle a typical Ohio winter in the ground.
Plan to lift them before temperatures dip below about 28 degrees on a regular basis.
Gladiolus corms need the same care. Leave them too long, and the cold can damage them before you get a chance to save them.
Aim to get everything out of the ground by mid to late November in most of Ohio.
Pick a dry day for digging if you can. Wet, muddy soil sticks to everything and makes cleanup harder.
It also adds extra moisture that may lead to rot in storage.
Here’s a helpful habit. Check the ten-day forecast each week in late fall, and watch for nights in the low twenties.
When you see one coming, move digging to the top of your weekend list.
Enlisting a friend or family member can make the job go faster. Kids often love hunting for the hidden treasures under the soil.
It feels a little like digging up buried gold, and the reward comes next summer.
3. Lift Dahlia Clumps Gently To Avoid Damage
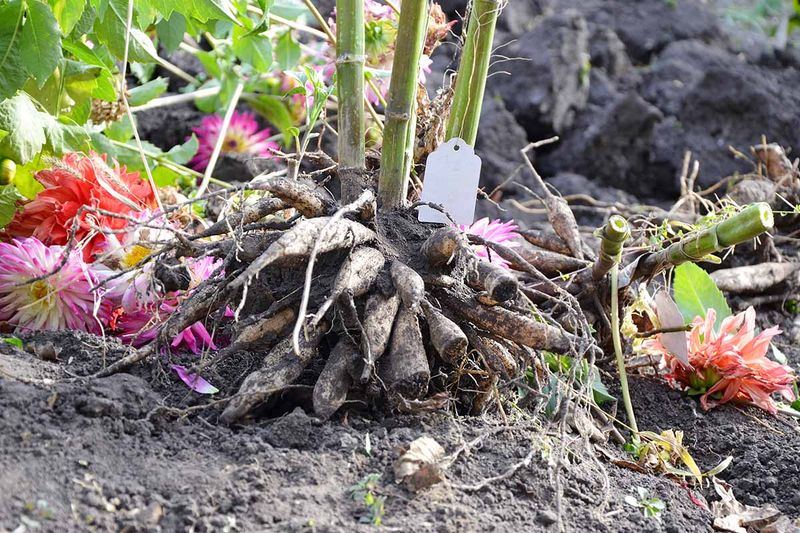
Picture a bunch of fragile potatoes all holding hands. That’s pretty much what a dahlia clump looks like underground.
One rough tug and those delicate connections can snap.
Start by cutting the stems down to about six inches. This short stalk gives you something to see, but don’t use it as a handle.
Pulling on the main stem can break the tuber necks.
The neck is the skinny part where each tuber joins the crown. A tuber needs that neck and an eye to sprout next year.
If the neck breaks, the tuber usually won’t grow.
Grab a garden fork or pitchfork instead of a shovel. A shovel blade can easily slice right through a hidden tuber.
Fork tines slip between them with less risk.
Begin digging about 8 to 18 inches away from the stem. Work your way in a wide circle around the plant.
Push the fork deep and gently rock it back and forth to loosen the soil.
Once the soil feels loose, slide the fork underneath the clump. Lift slowly from below, like you’re scooping a cake off a plate.
Let gravity shake some soil free on its own.
Big dahlias can grow huge clumps, sometimes as wide as a basketball. You may need to loosen the soil on all sides before it comes free.
Take your time, since there’s no prize for speed.
Did you know dahlias are the national flower of Mexico? The Aztecs grew them centuries ago, and some types even had hollow stems used for carrying water.
Treat your clumps with the same respect those early growers did.
Set lifted clumps upside down for a few hours. This lets water drain from the hollow stems.
4. Pack Dahlia Tubers In Peat Or Vermiculite
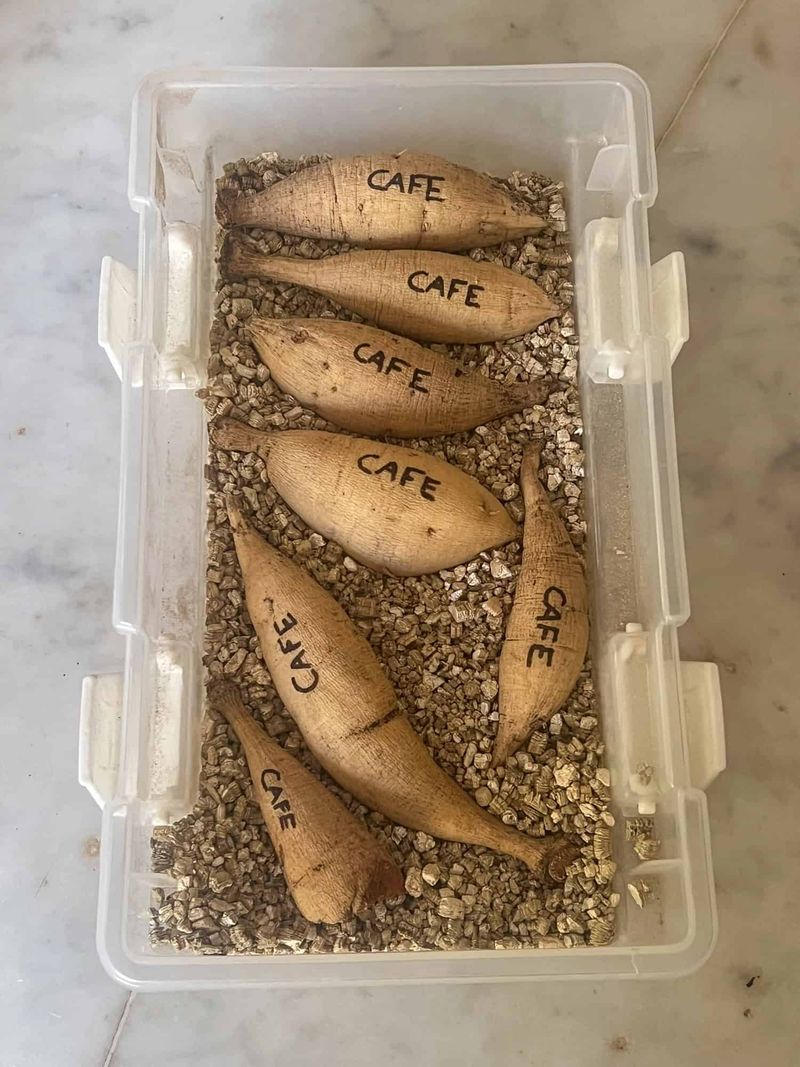
Ever packed a fragile gift for the mail? You wrap it carefully so nothing bumps or breaks.
Storing dahlia tubers takes the same kind of thoughtful packing.
Choose a breathable material like vermiculite or peat moss. These hold just enough moisture to keep tubers plump without soaking them.
Some gardeners use wood shavings too, though shavings can pull moisture out.
Grab a cardboard box or plastic bin. If you use plastic, crack the lid open a bit for airflow.
Trapped air can get damp and stuffy, which invites mold.
Spread one to two inches of packing material on the bottom. Lay your tubers on top so they don’t touch each other.
Then cover them with more material and repeat in layers.
Keeping tubers apart matters a lot. If one starts to rot, it won’t spread to its neighbors as easily.
Wrapping each tuber in newspaper works well too.
Temperature is the next big piece. Aim for a spot between 40 and 45 degrees, above freezing but under 50.
Humidity around 80 to 90 percent keeps them from drying into raisins.
Write the variety name right on each tuber with a permanent marker. That way, you’ll know exactly what you’re planting in spring.
Your future self will appreciate the effort.
Check your bins about once a month. Gently squeeze a few tubers to test them.
Firm is good, while soft spots mean rot and wrinkles mean they need a light mist of water.
Toss any tubers that look moldy or mushy right away. A quick monthly check-in takes only minutes.
It can save your whole collection from trouble before spring.
5. Store Canna Rhizomes Below 50 Degrees
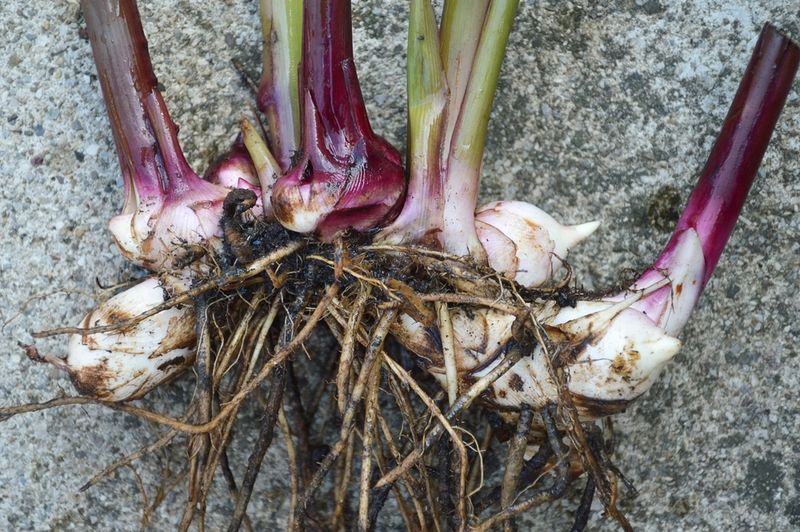
Think of cannas as sleepy bears looking for a cave. They want somewhere cool, dark, and quiet for the long winter nap.
Give them that spot, and they’ll wake up ready to grow.
The sweet spot for canna storage is roughly 40 to 50 degrees. Some sources allow up to 55, but cooler keeps them more reliably dormant.
Warmer spots may cause early sprouting.
Freezing is the real enemy here. Frozen rhizomes often turn soft and mushy, and they rarely recover.
Keep them above 32 degrees at all times.
So where should you put them? Unheated basements, fruit cellars, and cool crawl spaces make great choices.
Many older Ohio homes have a stone cellar corner that’s ideal.
Skip the attic and most garages. Attics can swing from hot to icy, while garages often drop below freezing in January.
Those big temperature changes stress the rhizomes.
Pack cannas in peat moss or shredded newspaper inside tubs. This keeps a little moisture around them while still letting air move.
Leave the lids slightly open.
Some gardeners grow cannas in pots instead. If that’s you, simply move the whole pot to a cool, dark space.
Stop watering during dormancy so they stay asleep.
A cheap thermometer is a smart buy for any storage area. Place it near your tubs and check it now and then.
You’ll quickly learn if your spot stays in the safe range.
Cannas have been grown for thousands of years, and some kinds were used as food. Their seeds are so hard that people once used them as shotgun pellets.
These plants are tougher than they look, but they still need your help with cold.
6. Keep A Piece Of Old Stem With Each Canna Division
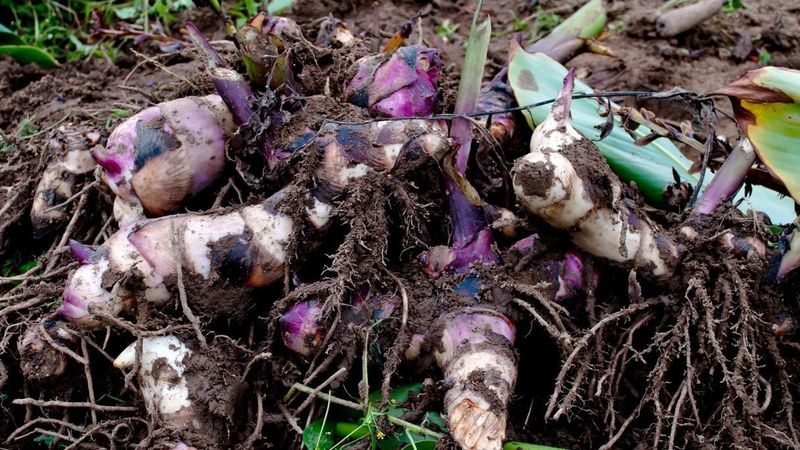
Here’s a little trick that seasoned growers swear by. A tiny bit of leftover stem can make spring planting so much easier.
It works like a built-in arrow that says this way up.
After frost hits your cannas, cut the stalks back to one or two inches above the rhizome. Don’t slice them flush with the root.
That short stub has a job to do.
Once you dig the clump, shake off the extra soil. You can also give it a light rinse if it’s caked with mud.
Let it dry well before moving on.
Canna clumps grow quickly and can get crowded. Dividing them gives you more plants for free.
Use a clean, sharp knife to cut the clump into sections.
Make sure each piece has at least three to five eyes. Eyes are the little bumps where new shoots will form.
More eyes usually means a stronger plant next year.
Leave a short piece of stem attached to every division. It gives you something easy to grab without bruising the rhizome.
It also shows you which end points up.
Planting upside down slows growth and wastes precious time in spring. Ohio summers aren’t very long for tropical plants.
Every week of growth counts toward getting those big, bold blooms.
Let the cut surfaces dry for a day or two before storing. This helps seal the wounds and lowers the chance of rot.
A warm, airy spot indoors works fine.
Extra divisions make wonderful gifts for neighbors and friends. Wrap a few in newspaper with a note about the color.
Sharing plants is one of the happiest parts of gardening.
7. Don’t Wash Gladiolus Corms
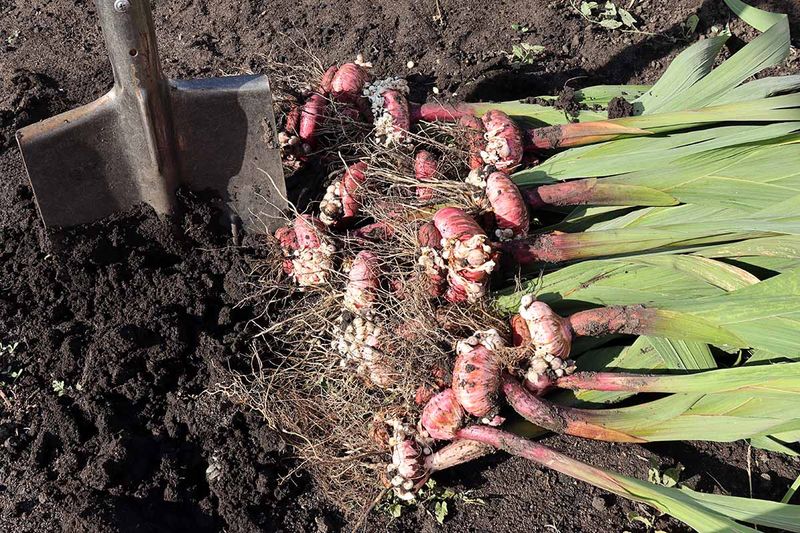
Wait, put down that garden hose! It feels natural to scrub dirty things clean.
But gladiolus corms actually prefer to stay a little dusty for now.
Water adds moisture that can hang around in the papery husks. That moisture creates a cozy home for fungus and rot.
A few spots of mold can spread fast in storage.
Instead, brush off loose soil with your hands or a soft brush. Don’t worry about getting every speck.
A thin layer of dirt won’t hurt anything.
Heavy clay soil is common in many parts of Ohio. If your corms are coated in sticky clay, just leave it for now.
Most of it will crumble off easily once the corms dry.
Cut the leaves down to about an inch above the corm. Some gardeners leave the foliage on during drying and trim later.
Either way works, so choose what fits your space.
Sometimes the soil is just too muddy to ignore. If washing is truly needed, rinse quickly and dry right away.
Set the corms in a spot with excellent airflow, like near a fan.
Gladiolus get their name from the Latin word for sword. Take one look at their pointy leaves, and you’ll see why.
Roman gladiators were even named after the same word.
Keeping things simple at this stage saves you time and trouble. Less fuss now often means healthier corms in spring.
Sometimes doing less really is the smarter choice.
Spread your brushed corms out on newspaper or a screen. Keep different colors in separate groups with labels.
Then you’re ready for the next step of curing.
8. Cure Glads For Two To Three Weeks
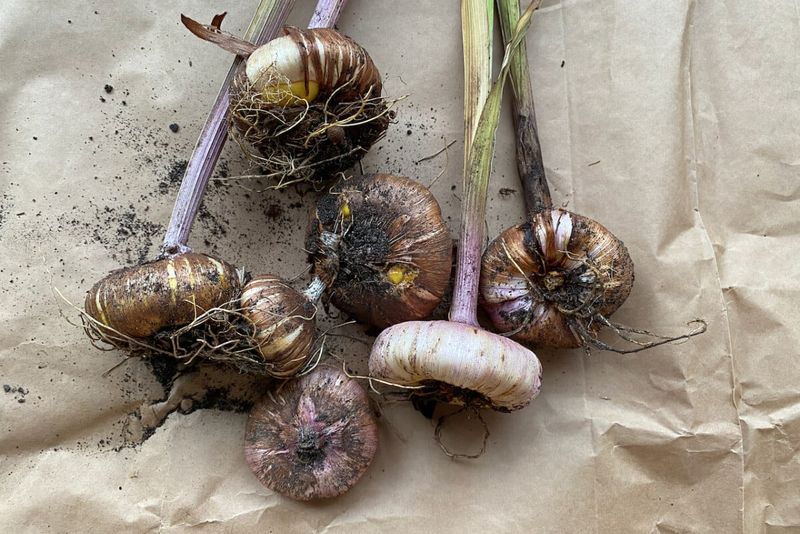
Good things come to those who wait, and glads are proof. A few weeks of drying turns soft, freshly dug corms into tough little storage champs.
This step is called curing.
Curing lets the outer surface of each corm seal up. It also turns the husks dry and papery.
Both changes help protect the corm from rot during winter.
Find a warm, dry spot with good airflow. Room temperature between 65 and 80 degrees works best.
A spare room, a heated porch, or a dry workshop could all do the trick.
Keep the corms out of direct sunlight. Too much sun can overheat them and dry them unevenly.
Gentle warmth is what you want.
Spread them out in a single layer. Drying racks, window screens, or mesh bags let air reach every side.
Avoid piling them up in a heap.
Plan on two to three weeks for the full cure. Mark the date on a calendar so you don’t forget.
It’s easy to lose track once the holidays roll in.
You’ll know they’re ready when the husks feel crisp. The leftover soil should brush off easily too.
If anything still feels damp, give it a few more days.
One handy idea is to hang mesh onion bags from a hook. They take up little space and let air flow all around.
Bonus points if you label each bag with its color.
Curing might feel like the slow part of the process. Still, it’s one of the most helpful steps for keeping corms healthy.
A little patience now pays off with bright flower spikes next August.
9. Snap Off The Old Mother Corm Before Storing
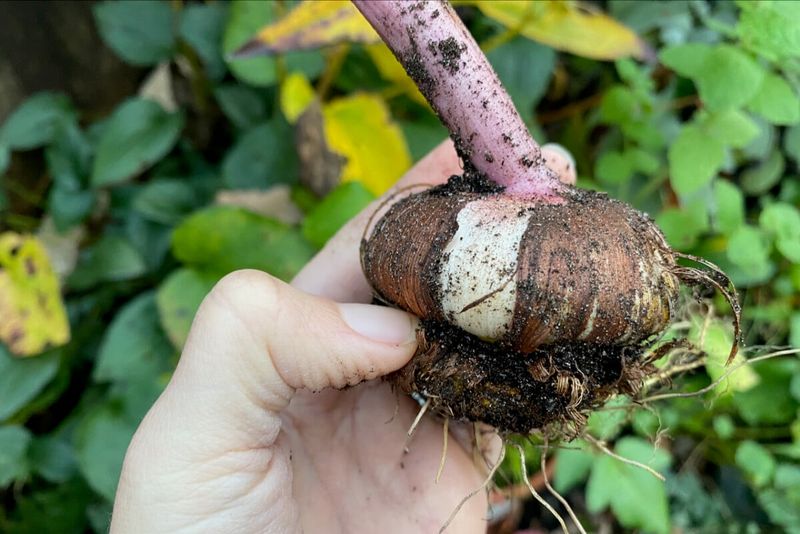
Flip a cured gladiolus corm over and you’ll find a surprise. Stuck to the bottom is a flat, shriveled disc that looks like a tiny brown pancake.
That’s the old mother corm.
Every summer, a glad uses up its old corm to make flowers. While it grows, it builds a brand new corm right on top.
By fall, the old one is all used up.
After curing, that worn-out corm should pop off with a gentle twist. It often makes a satisfying little snap.
Toss the old piece in your compost or trash.
If it won’t come loose, don’t force it. Prying can tear the new corm and open a door for rot.
Just let it dry a few more days and try again.
You may also spot tiny round cormels around the base. They look like little beads or peas.
Each one can grow into a new plant with some time.
Save the cormels if you enjoy a fun project. Plant them in a nursery bed next spring, and they’ll grow bigger each year.
It may take two or three seasons before they flower.
Not interested in waiting? It’s fine to discard them.
Many gardeners keep only the big, healthy corms for easy blooms.
Some growers dust cured corms with a powdered fungicide. This helps if you’ve had rot problems in past winters.
Follow the label directions carefully.
Store finished corms in mesh bags or paper sacks in a cool, dry place. Around 40 to 50 degrees works nicely.
Come spring, you’ll have a stash of ready-to-plant treasures waiting for warm Ohio soil.