
Save Geraniums With These 8 Simple Steps Before Frost Hits
The flower sitting in your window box is probably not a true geranium, even though its tag may say so. Botanists moved it into a separate genus back in 1789, yet garden centers still use the old name.
Its true homeland is South Africa, where winters stay mild and frost is a rare visitor. That sunny family history explains why one icy autumn night can turn lush green leaves into limp mush.
I have to admit I tossed my geraniums into the compost pile every fall for years. Then a friend showed me her ten-year-old plants, and I felt a little silly about all that wasted color.
You can keep your favorite pots blooming next spring without buying a single new plant from the store. Are you ready to learn how a few easy moves today can outsmart the coming cold?
1. Check The Plant Tag For Pelargonium Before You Start
Hardy cranesbill geraniums shrug off snow, while their flashy cousins on your porch cannot handle a single hard freeze. Knowing which one you own saves you from hauling a happy perennial indoors for nothing.
The word geranium comes from the Greek geranos, meaning crane, because the seed pods look like a bird beak. Pelargonium comes from pelargos, the Greek word for stork, which I find oddly charming.
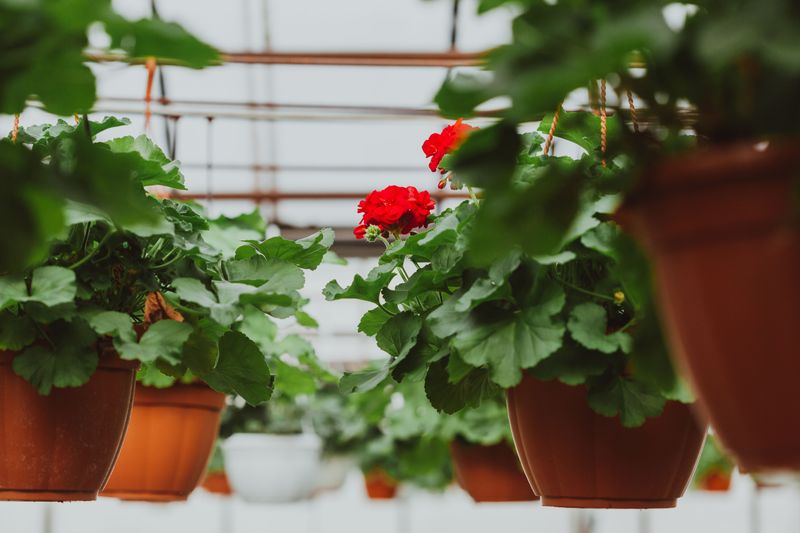
Zonal types usually show a dark horseshoe band across rounded leaves and big ball-shaped flower clusters. Ivy types trail gracefully over baskets with glossy, pointed leaves that look a lot like ivy foliage.
True cranesbills grow low in garden beds with finely cut leaves and simple flowers with five equal petals. Many of these sturdy plants come back reliably each spring in cold regions across much of the country.
Pelargoniums handle winter outdoors only in warm places like USDA zones 10 and 11. Everyone else needs a rescue plan before chilly weather arrives, or those bright blooms will turn soft and brown.
Personally, I flip over the old nursery tag first, because the botanical name settles the question in seconds. If the tag is gone, a quick photo search with a plant app often helps you sort it out.
Once you confirm you have tender pelargoniums, you can choose the best way to save them. That small bit of detective work today makes every following step much easier and far less confusing.
2. Watch The Forecast For That First Frost Night
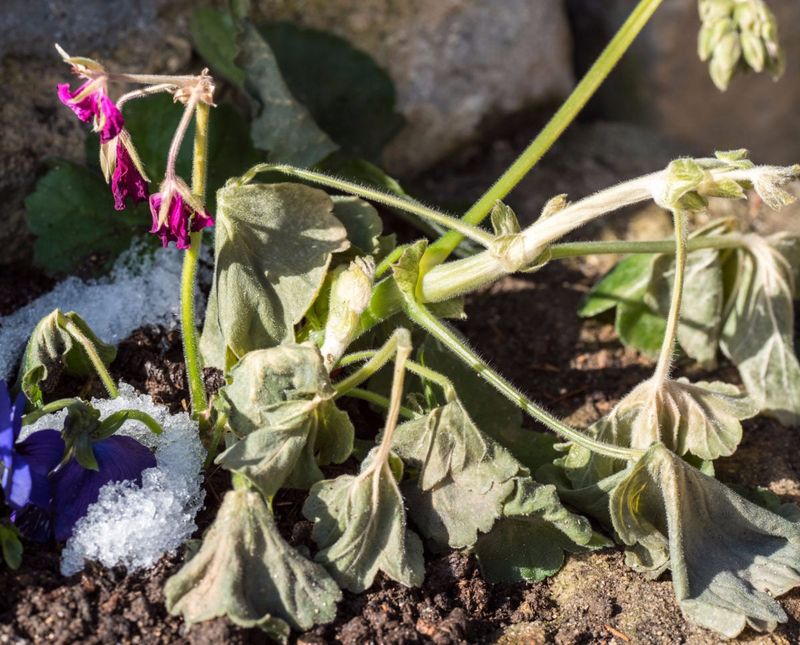
Frost can sneak in on a calm, clear evening when daytime temperatures felt pleasant just hours earlier. I learned that lesson after waking up to a row of droopy, darkened pots on my front steps.
Pelargoniums come from South Africa, so their soft stems and juicy leaves carry plenty of water inside them. When that water freezes, plant cells rupture, and the damage shows up as mushy blackened tissue.
You can look up your average first frost date through your local extension office or a trusted weather service. Aim to move plants or take cuttings about one to two weeks before that expected date.
Watch nighttime lows closely once forecasts dip into the low forties, because cold air settles near the ground. Low spots in the yard can frost even when the official reading stays slightly higher.
A cheap outdoor thermometer near your plants gives you a far better picture than a city weather report. I keep mine clipped to the porch railing, and it has rescued my flowers more than once.
If a surprise chill shows up early, toss an old bedsheet over garden plants for the night. Remove the cover in the morning so trapped heat does not cook the leaves once the sun climbs.
Planning ahead also gives you calm weekend time instead of a frantic scramble in the dark with a flashlight. Your plants handle the move better when you work slowly and gently around their roots.
3. Inspect Geranium Leaves For Pests And Disease
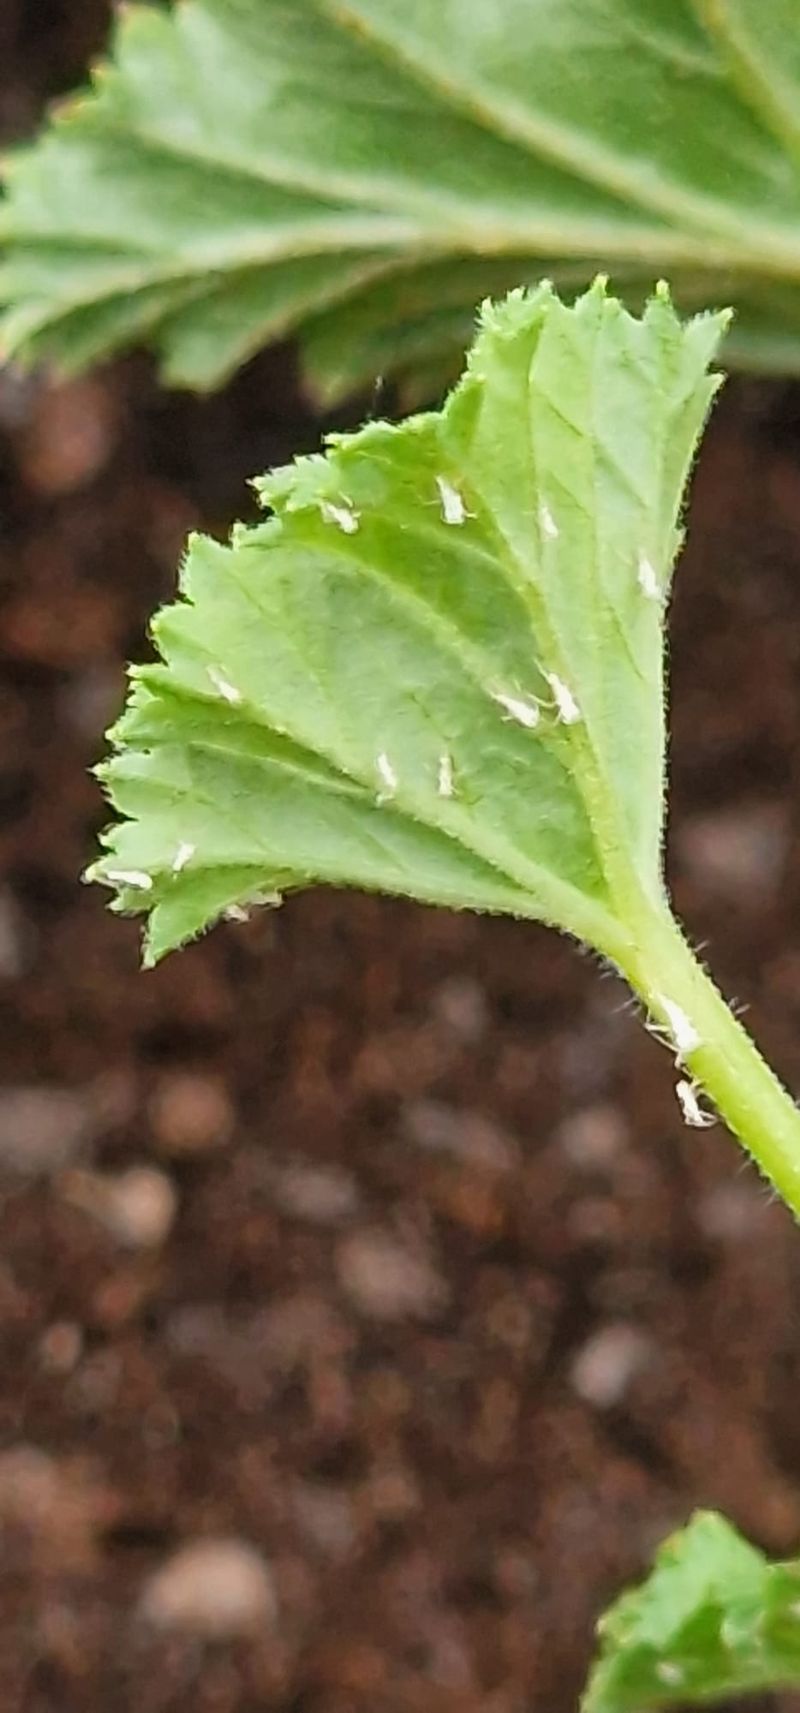
A single hitchhiking whitefly can turn your cozy living room into a buzzing bug party by midwinter. Giving every plant a careful once-over outdoors keeps those tiny freeloaders from moving in with you.
Flip each leaf over and look closely at the undersides, where aphids and whiteflies love to hide. Spider mites leave fine webbing and speckled yellow dots, so a magnifying glass can come in handy.
Next, check stems near the soil line for soft, dark spots that may signal rot problems. Gray fuzzy mold on old blooms usually points to botrytis, a fungus that thrives in cool, damp conditions.
Snip off yellow leaves and faded flowers, then toss them in the trash instead of the compost pile. Removing that debris reduces the chances of mold spreading during the long indoor months ahead.
A gentle spray of water from the hose knocks off many soft-bodied pests before you carry pots inside. For stubborn bugs, insecticidal soap works well when you follow the label directions with care.
I like to give plants a few days on the porch after treatment so I can spot any survivors. Keeping new arrivals away from your other houseplants for a couple of weeks adds extra protection.
Badly infested or rotting plants are often not worth saving, and that is perfectly fine. Take a healthy cutting from a clean stem instead, and say goodbye to the struggling parent plant.
4. Trim Geranium Stems Back By Half
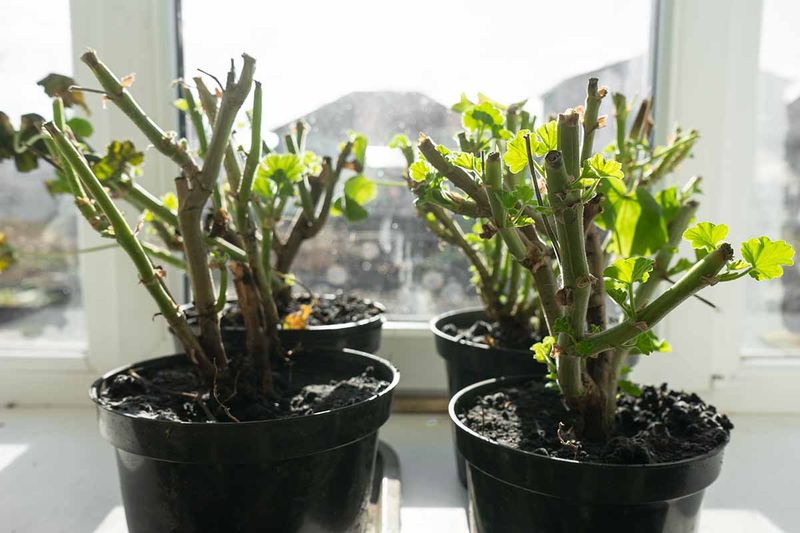
Snipping away half of a gorgeous plant feels painful, yet your geraniums will thank you for the haircut later. Shorter stems mean fewer leaves to support, which helps plants settle into lower indoor light.
Most experts suggest cutting plants back by about one third to one half before bringing them inside. Use sharp, clean pruners and make each cut just above a leaf node, where new shoots will sprout.
Wiping blades with a household disinfectant between plants helps reduce the spread of disease from pot to pot. I keep a little spray bottle in my garden bucket, so cleaning tools becomes a quick habit.
Aim for a rounded, balanced shape instead of chopping everything to one height like a flat-top hedge. Leaving a few healthy leaves on each stem keeps the plant feeding itself through the gray months.
Leggy stems with long bare sections can be cut lower, since geraniums often push new growth from older wood. Those trimmings make perfect cutting material, so set the best pieces aside instead of tossing them.
You may notice the plant looks a bit sad for a week or two after pruning. That pause is normal, and fresh green buds usually appear once roots adjust to their new home.
Pruning also makes pots lighter and easier to carry, which my back appreciates every single fall. Smaller plants fit neatly on windowsills too, leaving room for a few more rescued favorites.
5. Pot Up Garden Geraniums For A Sunny Window
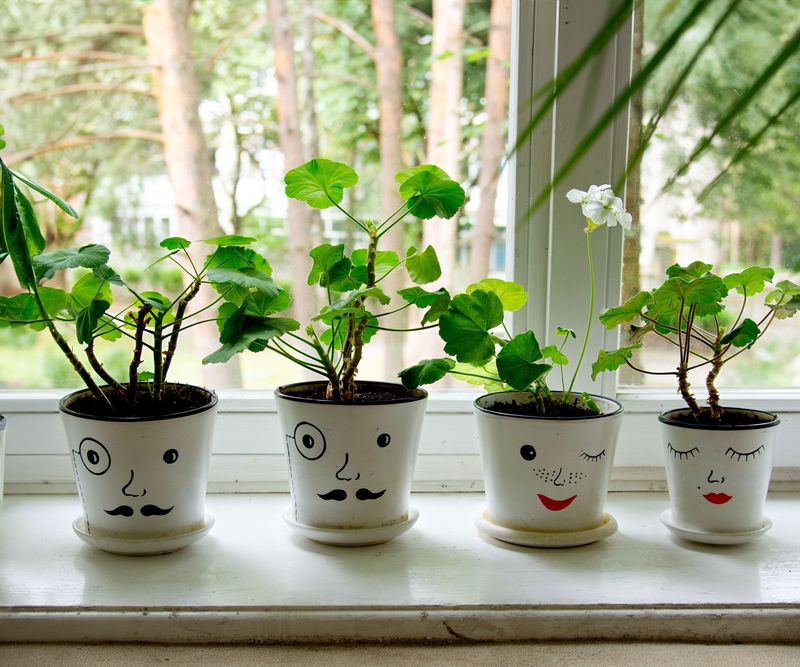
Your living room can become a winter flower shop if you give geraniums a bright window and cool air. A south or west window usually delivers the strongest light during short winter days.
Dig garden plants carefully before frost, keeping a good chunk of roots, then shake off extra soil. Choose a pot just slightly bigger than the root ball, because oversized pots hold too much water.
Fresh, well-draining potting mix works far better than heavy garden soil, which packs down and stays soggy indoors. Make sure every container has drainage holes, since standing water quickly leads to root rot.
Pelargoniums prefer cool rooms around 50 to 60 degrees Fahrenheit during their winter stay indoors. Keep them above 40 degrees, and move them away from heat vents that blow dry air across their leaves.
Cold drafts from leaky windows or busy doors can stress plants just as much as heat does. I like a spare bedroom or sunroom, where temperatures stay steady and the light stays bright.
Turn each pot a quarter turn every week or so, since stems naturally lean toward the glass. That simple habit keeps plants balanced and helps every side receive a fair share of sunlight.
Pinch soft growing tips whenever stems start stretching, because pinching encourages bushier growth with more side shoots. You might even enjoy a few winter blooms, though spring is when they really shine again.
6. Root Geranium Cuttings In Small Pots
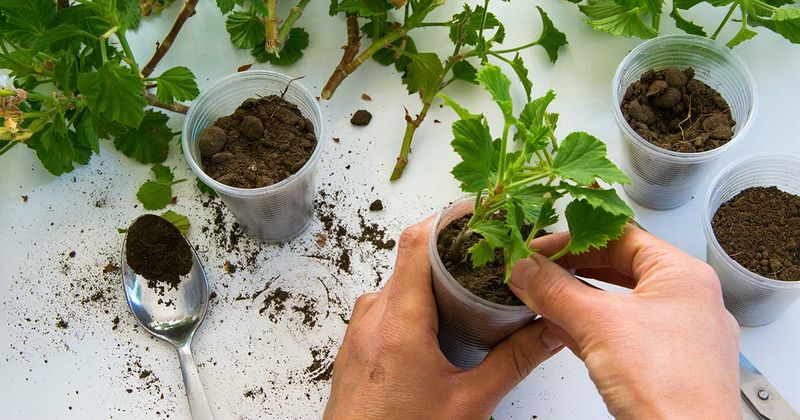
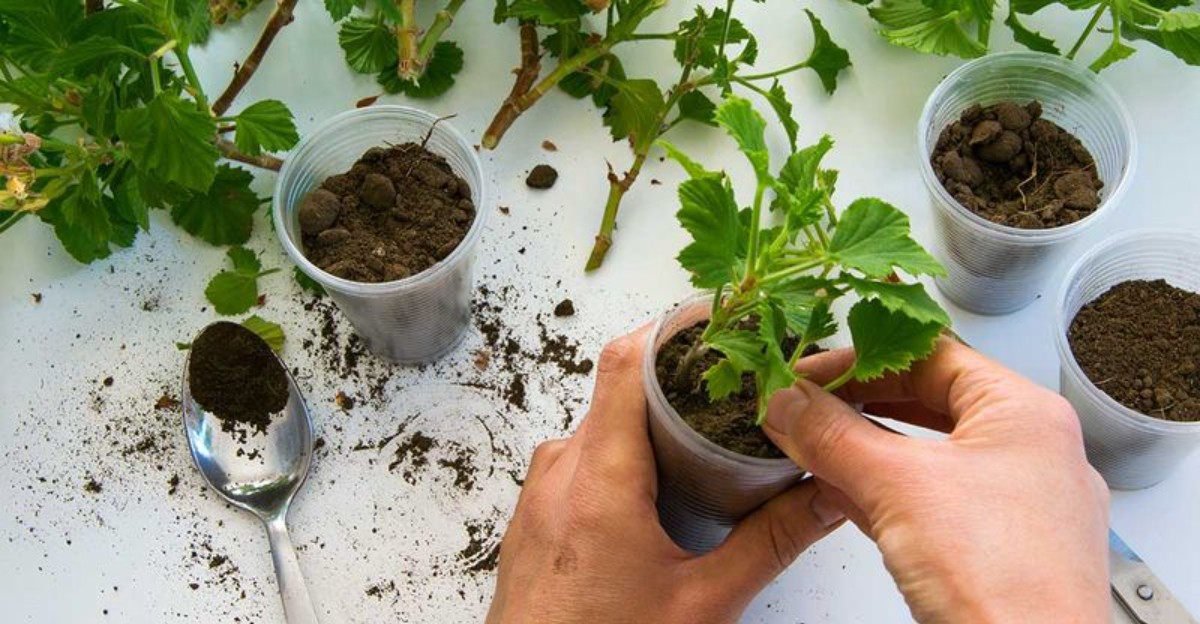
One healthy geranium can quietly become a whole windowsill of baby plants with just a clean knife. I love how cuttings take up so little space while giving you fresh, vigorous plants for spring.
Late summer or early fall is the best time to take cuttings, while stems are still strong. Choose healthy, non-flowering shoots and cut sections three to six inches long, just below a leaf node.
Strip off the lower leaves and pinch away any flower buds, so energy goes toward making roots. Dipping the cut end in rooting hormone is optional, but many gardeners feel it improves their success rate.
Stick each cutting into a small pot of moist, well-draining mix, such as seed compost blended with perlite. Some folks root them in water instead, changing it every couple of weeks to keep things fresh.
Place cuttings in bright, indirect light rather than harsh direct sun during their first few weeks. Keep the mix lightly moist but not soggy, since too much water makes stems turn soft and rot.
Roots usually form within three to six weeks, and a gentle tug that meets resistance means success. Once rooted, move each new plant into its own pot and give it your sunniest window.
What surprises me most is how fast these little starts catch up with full-sized plants by summer. They also make sweet gifts for friends who admired your porch pots all season long.
7. Store Bare Root Geraniums In A Cool Basement
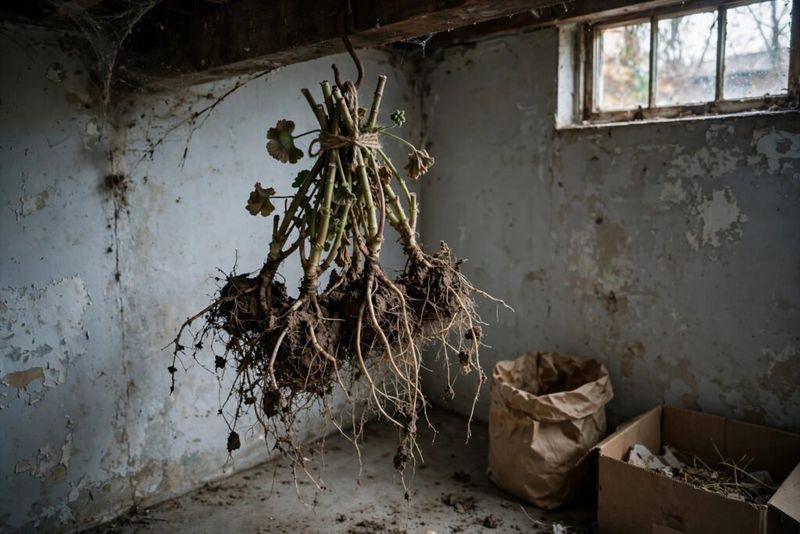
Old-time gardeners once hung geraniums upside down in cellars like bundles of drying herbs, and the trick still works. That sleepy storage method saves serious space if you lack sunny windows.
Before a hard frost, dig up the whole plant and gently shake away as much soil as possible. If you rinse the roots, let them dry thoroughly before storage so mold has less chance to grow.
Cut stems back to roughly three or four inches from the crown, removing much of the top growth. Strip away remaining leaves, because leftover foliage can trap moisture and invite mold during storage.
Pick a cool, dark, frost-free spot that stays between 40 and 60 degrees Fahrenheit. An unheated basement or attached garage often works well, as long as temperatures stay above freezing all winter.
Hang plants upside down from a beam, or tuck them loosely into open paper bags for good airflow. Plastic bags are a poor choice here, because they hold humidity and encourage rot on the roots.
Check on your sleeping plants about once a month throughout the cold season. If roots look shriveled and brittle, soak them in lukewarm water for an hour, then let them dry before storing.
Trim away any moldy or shriveled sections whenever you spot them during those monthly visits. I have to admit this method feels strange at first, but seeing bare stems sprout leaves in spring feels magical.
8. Water Indoor Geraniums Sparingly All Winter
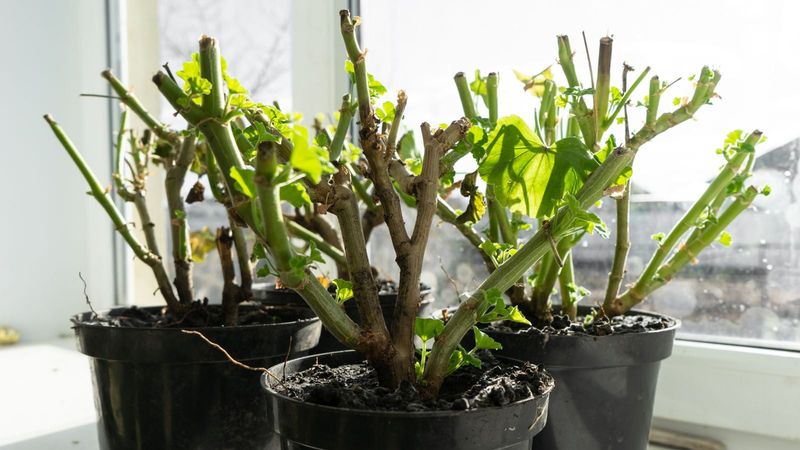
More indoor geraniums struggle from too much kindness with a watering can than from simple neglect. Their thick stems store moisture well, so they handle a little dryness better than soggy feet.
Let the potting mix dry out considerably between drinks, which often means watering every two to three weeks. Push a finger an inch into the soil, and wait a few days if you feel dampness.
Pour water directly onto the soil instead of the leaves, since wet foliage in cool rooms invites fungal spots. Empty saucers after watering, so roots are not left sitting in a puddle for days.
Skip fertilizer through the winter, because resting plants do not need extra food while growth slows down. Feeding now often produces weak, stretchy stems that flop over before spring even arrives.
As days lengthen in late winter, you can slowly increase water and add a diluted fertilizer. Revived dormant plants should soak overnight before you pot them in fresh soil near a sunny window.
Before moving plants outdoors, harden them off by setting them outside for a few hours each day. Wait until nighttime temperatures stay reliably warm and your local frost risk has clearly passed.
Personally, I mark my calendar with reminders, since winter watering is easy to forget or overdo. Those faithful plants will greet you with earlier blooms than any new nursery purchase could offer.


