Early Fall Soil Amendments Worth Adding to New York Yards Before November
Walk outside on a crisp October morning, and your yard smells like apples, fallen leaves, and damp earth. Under your boots, though, the ground might be tired, hungry, and quietly asking for a little help.
Summer in New York works soil hard, with heavy rain, hot spells, and crops pulling nutrients all season. By early fall, many beds look pale, crusty, and worn.
The trick is that fall gives you a sneaky window that most gardeners rush past without noticing. Cool air, warm ground, and steady rain help nutrients settle into the root zone.
Wait too long, and frost locks the ground tight like a jar lid twisted by a strong grandparent. Act now, and your plants can head into next spring with stronger roots and healthier leaves.
Yards across New York, from Buffalo lawns to Brooklyn backyards, can gain a lot from a smart autumn boost. Grab a shovel, pull on some gloves, and give that hardworking dirt the snack it has earned.
1. Finished Compost Worked Into Depleted Beds
Picture a garden bed that grew tomatoes all summer and now looks gray, crumbly, and worn out. That soil gave everything it had, and finished compost is the quickest way to pay it back.
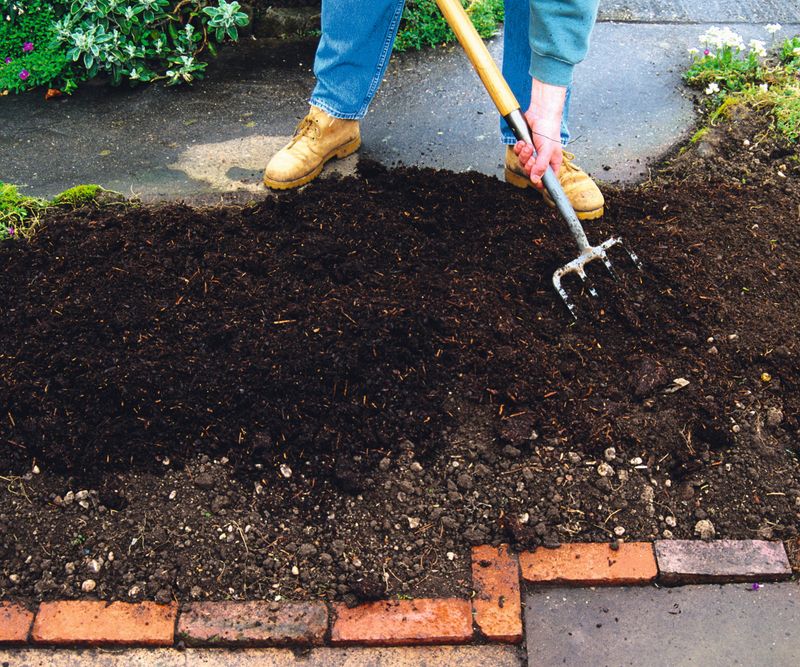
Good compost smells sweet and earthy, like a forest floor after rain, with no sour or rotten odor. It should look dark brown and crumble easily in your hand, with few recognizable food scraps left.
Spread about two inches across each tired bed, then mix it into the top six inches with a fork. Early October works well in New York because the ground is still soft and easy to turn.
Compost feeds the millions of tiny microbes and earthworms that keep soil loose, airy, and full of life. Those little helpers keep working slowly through fall, breaking down organic matter until the ground finally freezes.
Compost also acts like a sponge, helping sandy soil hold water and helping clay soil drain better. That balance matters during New York winters, when snowmelt and icy rain can leave beds soggy for weeks.
Some towns across the state offer free or low-cost compost at local recycling centers. Call ahead to check availability, and bring sturdy buckets or a tarp to protect your car trunk.
Skip piling compost against tree trunks or plant stems, since constant moisture there can invite rot. Keep it a few inches away, and your beds will start spring with darker, richer soil.
2. Shredded Leaf Mold Spread Over Heavy Clay
Clay soil is the stubborn mule of the garden world, sticky when wet and hard as bricks when dry. Plenty of New York yards sit on heavy clay, especially across the Hudson Valley and western counties.
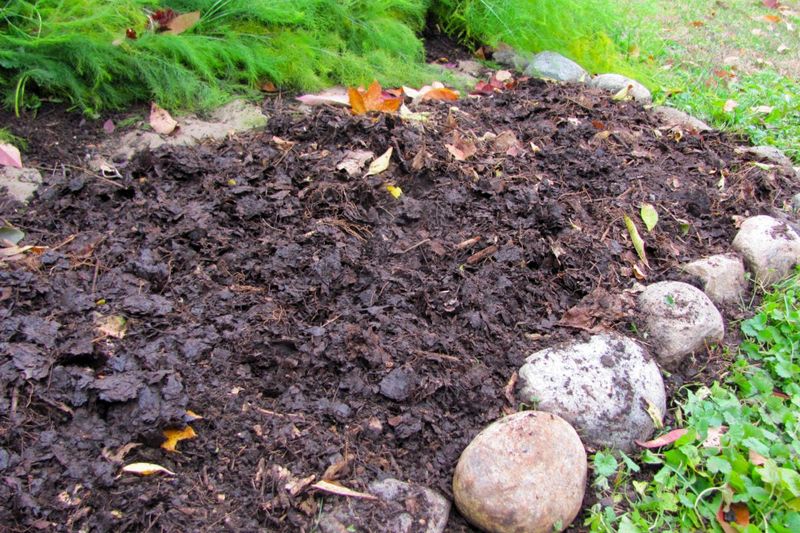
Luckily, the trees in your yard are dropping free help right now, one crunchy leaf at a time. Leaf mold is what leaves become after fungi slowly break them down into a soft, dark, earthy material, which can take a year or more.
Run over fallen leaves with a mower a few times to chop them into small, dime-sized pieces. Whole leaves tend to mat together like wet paper, while shredded ones break down much faster.
Your New York Garden Changes Every Week. Your Plan Should Too.
Gardening in New York changes quickly throughout the season. Every Friday you’ll receive a simple weekly plan showing exactly what to plant, prune, fertilize, harvest, and protect so you never miss the right timing.
Spread a layer of shredded leaves about three inches thick over clay beds, keeping it loose rather than packed down. Over time, worms and soil life pull the bits underground, opening tiny tunnels that help water and air move through.
Fungi do most of the work here, which is why the finished product is called leaf mold. Don’t worry, it is a harmless, earthy material and not the fuzzy mold found on old bread.
Oak, maple, and birch leaves all work well, and mixing several types gives a richer final blend. Avoid black walnut leaves, since they contain a natural chemical that can stunt many garden plants.
Over the seasons, that sticky clay often feels softer and crumblier. Repeat the routine every October, and your soil keeps getting easier to dig with each passing year.
3. Ground Limestone Applied To Acidic Soil
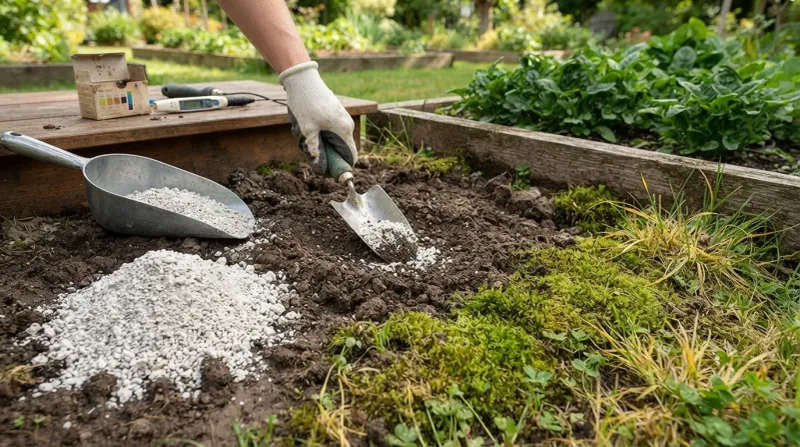
Many New York soils lean acidic, especially in areas with heavy rainfall and conifer forests, though levels vary by region. When soil gets too sour, plants struggle to absorb nutrients, even if you fertilize them regularly.
Before adding anything, grab a soil test kit or send a sample to your local Cornell Cooperative Extension office. Most lawns and vegetables prefer a pH between 6.0 and 7.0, which ranges from slightly acidic to neutral.
If your test shows a number below six, ground limestone can gently nudge that reading back upward. Lime works slowly, often taking several months, which is exactly why fall is the smartest time to apply it.
Rain and snow help work the lime into the soil surface, so it starts reacting well before spring planting. A broadcast spreader makes the job easy, scattering the lime evenly across lawns and garden beds.
Pelletized limestone is less dusty than the fine powder, so it is friendlier on windy October afternoons. Follow the bag directions carefully, since adding too much can push soil too far in the other direction.
Skip lime around blueberries, rhododendrons, and azaleas, because those shrubs actually love sour, acidic ground conditions. Bigleaf hydrangeas are another interesting case, since soil pH can shift their flowers between blue and pink.
Farmers have spread crushed limestone on fields for centuries, long before anyone could measure pH with a test. They simply noticed that crops grew better afterward, and modern science later explained exactly what was happening underground.
4. Aged Manure Dug Into Vegetable Beds
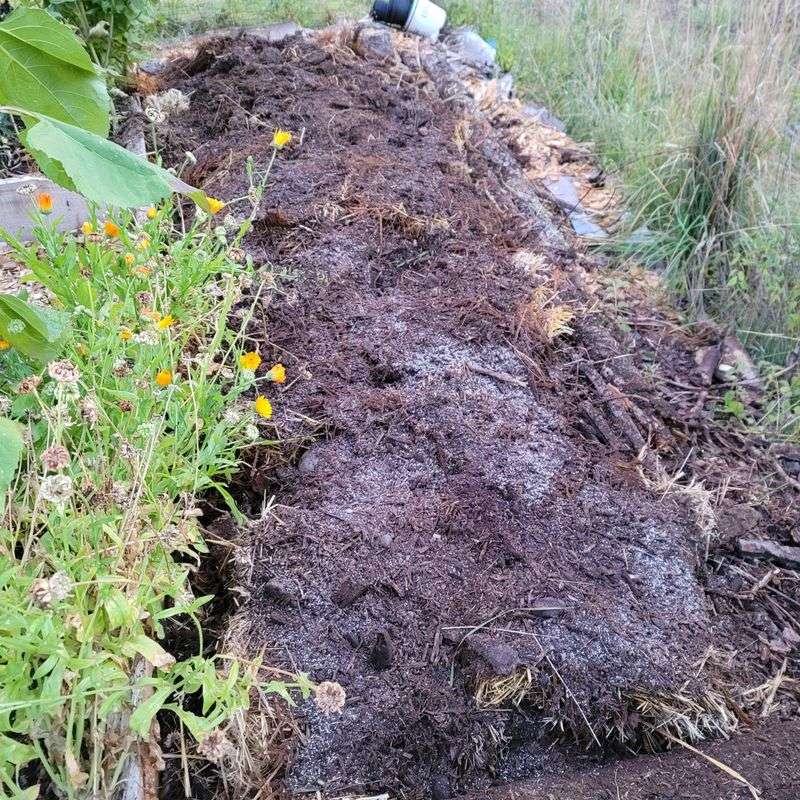
Many longtime vegetable gardeners rely on one simple secret, and it usually comes from a nearby barn. Aged manure has fed farm fields across upstate New York for generations, and it still works well today.
The key word is aged, meaning the manure has rested and broken down for at least six months. Fresh manure is too strong, and it can damage tender roots or carry harmful bacteria into your garden.
Well-aged manure looks dark and crumbly, and it smells more like rich soil than a stinky stable. Cow, horse, and chicken manure are the most common types, though chicken manure is much stronger than the others.
Once your summer crops are cleared out, spread one to two inches over each empty vegetable bed. Dig it into the top several inches with a spade, breaking up clumps as you go along.
Adding manure in fall gives it months to mellow before spring, so nutrients become ready right when seedlings need them. Nitrogen, phosphorus, and potassium all get a boost, along with organic matter that improves soil texture.
Local farms and horse stables across the state often give away aged manure if you haul it yourself. Bagged versions from garden centers cost a bit more, but they are clean, convenient, and easy to store.
Avoid manure from dogs, cats, or pigs, since those can carry parasites that do not belong near food. Wear gloves while working, wash your hands afterward, and enjoy those plump tomatoes and peppers next summer.
5. Bone Meal Tucked Beneath Spring Bulbs
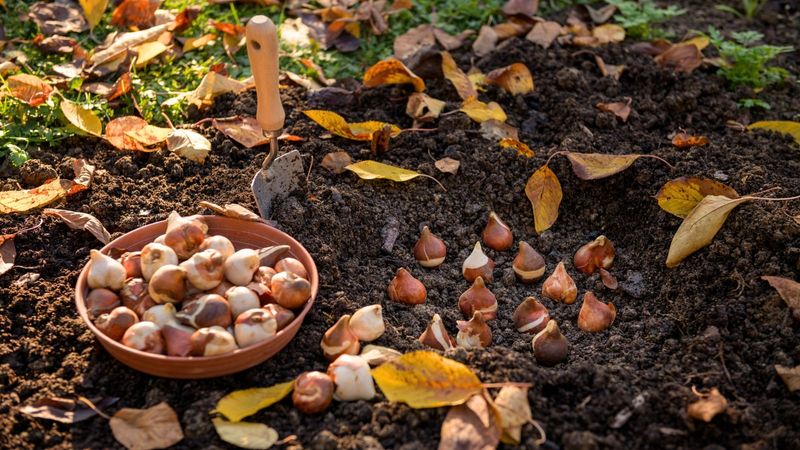
Ever wonder how tulips and daffodils manage to burst through cold April soil with such bright, cheerful color? Much of that magic starts in October, when gardeners tuck bulbs into the ground with a little extra food.
Bone meal is a slow-release organic fertilizer rich in phosphorus and calcium. Phosphorus helps bulbs build strong roots during fall and winter, long before any green shoots appear above ground.
A soil test can show whether your soil already has enough phosphorus. If levels are already high, you can skip the bone meal.
In New York, bulbs generally go in from October until the ground freezes, with Long Island and the lower Hudson Valley often planting later than the North Country. Aim to finish after the soil cools down but before it freezes solid.
Dig each hole three times as deep as the bulb is tall, then sprinkle in a teaspoon of bone meal. Mix it into the loose soil at the bottom, so the bulb does not sit directly on the powder.
Set the bulb pointy side up, cover it with soil, and water the spot well to settle everything. Planting in clusters of five or more looks more natural than single rows, like little bursts of confetti.
One small warning: dogs, raccoons, and skunks sometimes love the smell of bone meal and may start digging nearby. Covering the spot with chicken wire or a layer of leaves can help discourage those furry little excavators.
Squirrels tend to skip daffodils because the bulbs are toxic and taste bitter, which makes them a smart choice for busy yards. Mix them with tulips and crocuses, and your spring garden will glow like a box of fresh crayons.
6. Worm Castings Scattered Around Tired Perennials
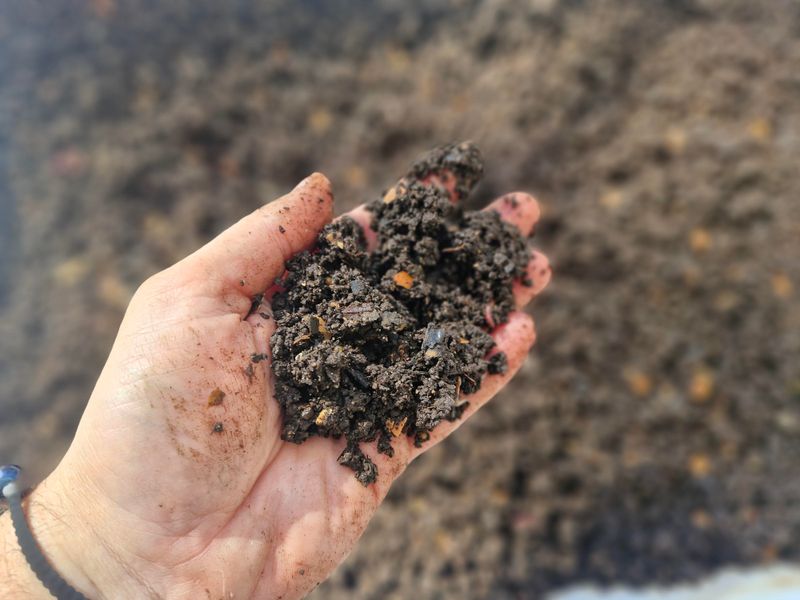
Earthworms might be the hardest workers in your yard, and they rarely ask for anything in return. Their droppings, called worm castings, are like a gentle multivitamin for plants that need a little pick-me-up.
By early October, many perennials like coneflowers, hostas, and daylilies look ragged and weary from a long growing season. Their roots are still busy underground, storing energy for winter and preparing for next year’s fresh growth.
Worm castings feed those roots slowly, releasing nutrients bit by bit with very little risk of burning the plants. They also carry helpful microbes that may support stronger root systems and healthier soil over time.
Sprinkle about half a cup around the base of each perennial, then scratch it lightly into the surface. A gentle watering afterward helps the castings settle in, especially if October rain has been scarce lately.
Castings look like fine, dark coffee grounds, and they have almost no smell at all, which neighbors appreciate. You can buy them in bags or make your own with a simple worm bin kept indoors over winter.
Red wigglers are the usual choice for worm bins, and they happily munch on veggie scraps and shredded paper. Kids often love helping with a worm bin, since it feels like a science project that gives back.
Charles Darwin studied earthworms for decades and wrote a whole book praising their role in building soil. Give your perennials a scoop of castings now, and they may return next spring looking refreshed and lively.
7. Kelp Meal Mixed Into Sandy Soil
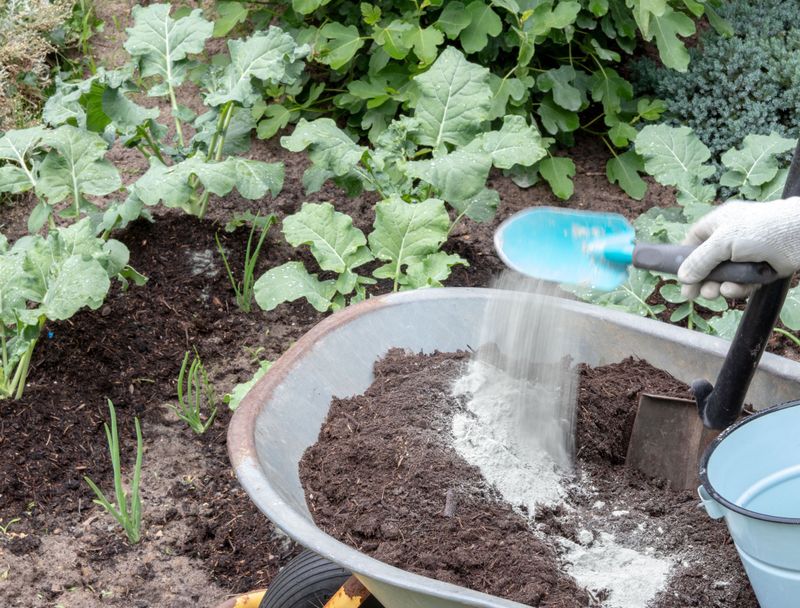
Sandy soil on Long Island and along the shore drains so fast it can feel like gardening in a sieve. Water and nutrients slip right through, leaving plants thirsty and hungry between feedings.
Fittingly, one useful addition for coastal soil comes straight from the ocean itself, in the form of seaweed. Kelp meal is dried, ground kelp, and it carries dozens of trace minerals.
It also contains natural plant compounds that may encourage root growth and help plants handle stress. Compost does the main work of helping sandy soil hold moisture, while kelp meal plays a supporting role.
Sprinkle roughly one pound per hundred square feet, then rake it into the top few inches of soil. Fall application gives the kelp time to break down slowly, so its minerals are ready by spring.
Expect a mild, salty ocean smell when you open the bag, a little like a breezy day at the beach. The scent fades within a day or two once the meal is worked into the ground.
Some gardeners collect fresh seaweed from local beaches, but rules vary, so check town regulations before gathering any. Rinse beach seaweed well to remove extra salt, since too much salt can harm young roots.
Coastal farmers in Ireland and Scotland have layered seaweed onto their fields for hundreds of years with great results. Borrow their old trick this October, and your sandy beds may hold onto nutrients a little better.
8. Winter Rye Sown Across Bare Beds
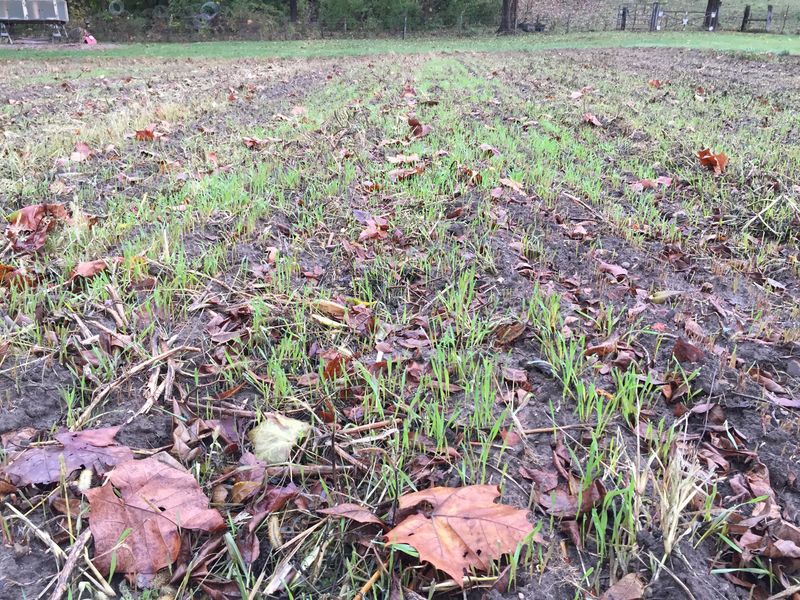
Bare soil in winter is a bit like leaving your house without a coat during a January blizzard. Wind, rain, and melting snow can carry away precious topsoil, especially on slopes and in open garden beds.
Winter rye is a tough cover crop that acts like a living blanket, holding the ground in place until spring. It sprouts quickly in cool weather and keeps growing on mild days, even when temperatures hover near freezing.
In New York, sow rye from mid-September through mid-October, giving it a few weeks to root before hard frost. Gardeners in the colder North Country should aim for the earlier side of that window for best results.
Rake the bed smooth, scatter about two to three pounds of seed per thousand square feet, then rake lightly again. A quick watering helps the seeds settle, and tiny green blades usually pop up within a week or so.
Rye roots reach surprisingly deep, breaking up compacted soil and grabbing leftover nutrients that might otherwise wash away. Those nutrients return to the soil in spring when you cut the rye down and turn it under.
Timing matters at that point, so mow or chop the rye before it grows tall and forms seed heads. Wait about two to three weeks after turning it under before planting vegetables, giving the stems time to break down.
A fun bonus: a field of green rye in November looks cheerful when most of the yard has turned brown. Birds sometimes visit to nibble on the young shoots, adding a bit of life to chilly late-fall mornings.