How Georgia Gardeners Successfully Propagate Roses From Cuttings
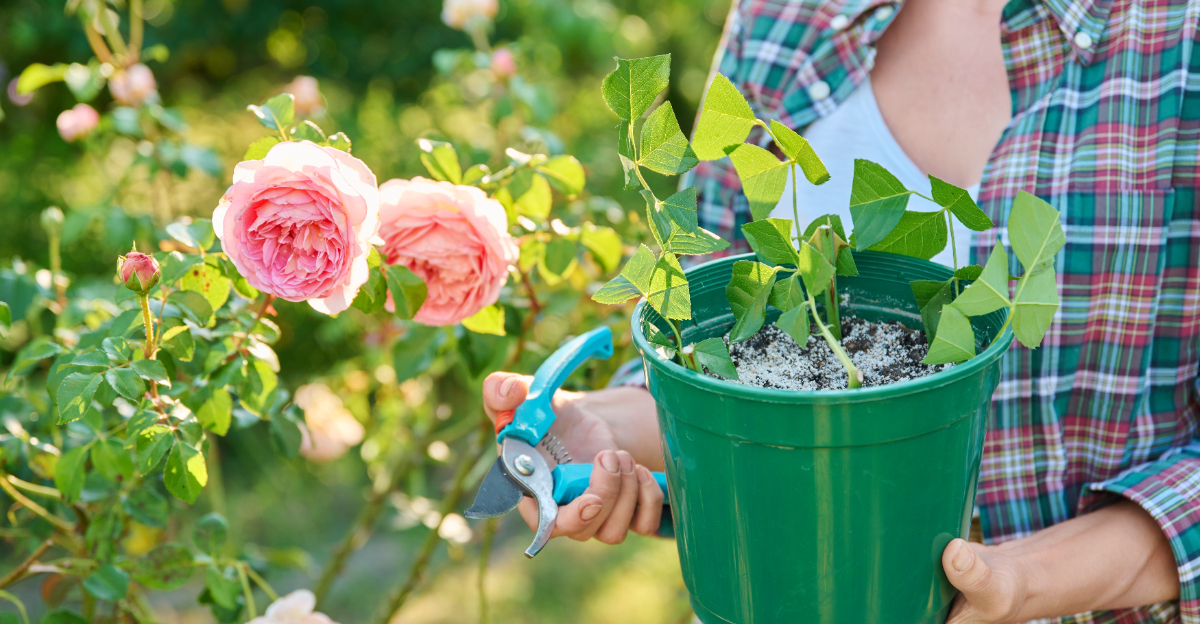
Rose bushes become expensive fast once gardeners start wanting more color around the yard.
That is one reason cuttings stay so popular in Georgia, especially during the warm growing season when healthy stems root much more easily than many people expect.
A single strong branch can eventually turn into a full new plant with the right timing and care.
Humidity often helps the process move faster, but too much moisture around the stem can quickly create problems before roots have time to form properly.
Simple setup mistakes are usually what slow people down most.
Container choice, soil texture, and sunlight all play a bigger role than beginners realize. Strong afternoon heat can dry cuttings out quickly, while soggy soil often causes weak growth before roots fully develop.
Fresh new leaves are usually the first sign things are finally working. After that, growing more roses from favorite plants starts feeling much easier and far less intimidating
1. Choose Healthy Stems Before Summer Heat Arrives

Picking the wrong stem is the fastest way to waste your time. Not every cane on a rose bush is ready to become a new plant.
Look for stems that are firm, green, and about the thickness of a pencil. Avoid anything that looks soft, mushy, or already blooming.
Flower-heavy stems put all their energy into the bloom, not into growing roots.
Softwood cuttings work best in late spring, right after the first flush of blooms fades. At that point, stems are still flexible but strong enough to survive the rooting process.
Timing matters more than most beginners expect.
Check each stem carefully before you cut. Healthy canes have tight, compact nodes and a slightly waxy feel.
Skip anything with spots, discoloration, or unusual texture.
Early morning is the best time to take cuttings. Stems are fully hydrated then, which gives them a stronger start.
Waiting until midday means the stem has already lost some moisture to heat.
Warm-climate gardeners know that summer heat can shut down rooting fast. Getting cuttings started before temperatures climb above 90 degrees gives roots a real fighting chance.
2. Make Clean Cuts Just Below A Leaf Node

A dull blade does more damage than most gardeners realize. It crushes the stem tissue instead of slicing through it cleanly, and that slows down rooting significantly.
Sharp, sterilized pruners are non-negotiable.
One contaminated cut can introduce problems before the cutting ever touches soil.
Cut at a 45-degree angle, just below a leaf node. That node is where root growth begins.
Skipping it means your cutting has far less potential to establish itself.
Keep the cut smooth and clean with no jagged edges. Rough cuts create openings where moisture escapes and pathogens enter.
A single clean slice is always better than multiple attempts.
Right after cutting, place the stem in a cup of water or wrap it in a damp paper towel. Exposed stems dry out quickly in warm air.
Protecting that cut end immediately makes a real difference in early root development.
Some gardeners score the bottom inch of the stem lightly with a knife before dipping it in rooting hormone. That light scraping exposes more cambium tissue, which is the layer where roots actually emerge.
Your Georgia Garden Changes Every Week. Your Plan Should Too.
Gardening in Georgia changes quickly throughout the season. Every Friday you’ll receive a simple weekly plan showing exactly what to plant, prune, fertilize, harvest, and protect so you never miss the right timing.
3. Remove Lower Foliage Before Placing Cuttings In Soil

Leaves left underground rot fast. That rotting spreads upward and can ruin an otherwise healthy cutting before roots even form.
Strip all foliage from the bottom half of the stem. Leave only two or three leaves at the very top.
Those remaining leaves keep photosynthesis going without putting too much stress on the stem.
Pull lower leaves off with a firm downward motion. Avoid twisting or tearing, which can strip bark and create unnecessary wounds.
Clean removal is always the goal.
If your rose has large leaves, trim them in half horizontally. Smaller leaf surface means less water loss through transpiration.
Cuttings cannot replace water efficiently until roots develop, so reducing leaf area helps balance that equation.
Some gardeners also remove any small buds or flowers still attached to the cutting. Those take energy that the stem needs for root development.
Pulling them off early keeps the cutting focused on one job.
After stripping the foliage, look at the bottom two inches of the stem. It should be clean, smooth, and free of any leaf debris.
4. Use Moist Potting Mix With Good Drainage

Soggy soil is a silent problem. Roots need oxygen just as much as moisture, and a waterlogged mix gives them neither.
Choose a potting mix that holds moisture without becoming compacted. A blend of perlite and standard potting soil works well.
Roughly half and half gives you the drainage and moisture retention that young cuttings need.
Avoid using garden soil directly from your yard. It compacts quickly in containers and often carries pathogens that attack vulnerable stems.
A fresh, sterile mix is always the safer starting point.
Moisten the mix before you plant, not after. Pouring water onto dry soil after inserting the cutting can shift it out of position.
Pre-moistening lets you place the cutting into stable, evenly damp medium.
Use a pencil or chopstick to create a planting hole first. Pushing the cutting directly into dry or packed soil can scrape off the rooting hormone you just applied.
A pre-made hole keeps the treatment intact.
Plant the cutting about two to three inches deep. That depth gives the node enough coverage while keeping the cutting upright.
Shallow planting often leads to tipping, which disrupts early root formation.
5. Keep Containers In Bright Morning Light

Light placement is something many beginners get wrong on the first try. Too much direct afternoon sun scorches unrooted cuttings before they have any way to recover.
Morning light is ideal because it is bright but not intense. Eastern or northeastern exposures give cuttings several hours of gentle sun followed by shade during the hottest part of the day.
That balance supports growth without overwhelming a stem that has no roots yet.
Avoid full southern or western exposures during summer months. Afternoon sun in those spots can push container temperatures well above what a young cutting can handle.
Shade cloth can help if you have no other options.
A covered porch that gets morning light is one of the best spots available. It offers protection from sudden rain while still delivering consistent brightness.
Many experienced gardeners in the region rely on this setup every season.
Watch the cuttings for signs of stress. Drooping leaves during midday usually signal too much heat exposure.
Yellowing leaves can point to overwatering or insufficient light, depending on when the yellowing appears.
6. Cover New Cuttings To Hold In Humidity

Humidity is what keeps an unrooted cutting alive while it works on developing roots. Without it, the stem loses moisture faster than it can manage.
A simple clear plastic bag placed over the pot creates a mini greenhouse effect. Moisture stays trapped inside, the cutting stays hydrated, and the environment stays stable.
It requires almost no equipment and works surprisingly well.
Use a few sticks or chopsticks inside the pot to keep the bag from collapsing onto the leaves. Contact between the plastic and foliage can encourage mold.
A little airspace between them makes a real difference.
Leave a small opening at the base of the bag for minimal airflow. Completely sealed environments can get too warm and moist.
A slight gap helps regulate temperature without losing the humidity benefit.
Check the inside of the bag every day or two. If condensation covers the entire surface, open it briefly to let some air circulate.
Too much moisture trapped inside can cause stem issues near the soil line.
Some gardeners use clear plastic domes sold at garden centers instead of bags. Those are easier to remove and replace and allow better airflow control.
Either option gets the job done if used consistently.
After about three to four weeks, begin opening the cover for longer periods each day.
7. Transplant Rooted Roses Gradually Into The Garden

Rushing a rooted cutting into the ground is one of the most common mistakes at this stage. Roots that formed in a sheltered pot are not yet ready for full outdoor conditions.
Start by moving the pot outside to a sheltered spot for a few hours each day. Increase that time gradually over one to two weeks.
That process, called hardening off, prepares the plant for wind, temperature swings, and direct sun.
Check for roots before transplanting by gently tugging the stem. Resistance means roots have formed.
If the cutting pulls out easily, it needs more time in the pot.
Choose a transplant day when temperatures are mild and overcast skies are in the forecast. Planting into full sun on a hot afternoon stresses even well-rooted young plants.
A cloudy morning is far more forgiving.
Dig a hole slightly larger than the root ball. Loosen the surrounding soil so roots can spread easily.
Compacted ground makes establishment slower and harder for a young rose.
Water the transplant thoroughly right after planting. That first deep watering settles the soil around the roots and removes air pockets.
Follow up with consistent moisture for the first two weeks.
Avoid heavy fertilizing immediately after transplanting. New roots are sensitive, and strong fertilizer can cause tip burn on tender growth.