How To Dig Up And Store Gladiolus Corms Before Frost Arrives In Michigan

Gladiolus corms left in the ground through a Michigan winter won’t survive the deep freeze that settles into the soil, making fall removal essential for anyone hoping to see the same plants bloom again next year.
Timing this dig matters, since waiting for foliage to yellow naturally after the first light frost allows the corm to finish storing energy before it’s lifted from the ground.
Proper curing afterward, drying corms in a well-ventilated spot for a week or two, prevents the rot that quickly ruins improperly stored bulbs over winter.
Once cured, corms need a cool, dry storage space, since anything too warm or humid can trigger early sprouting or fungal problems long before spring planting season arrives.
Getting each of these steps right turns a one-season gladiolus display into a plant that comes back reliably year after year.
1. Why Gladiolus Corms Need To Come Out Of The Ground
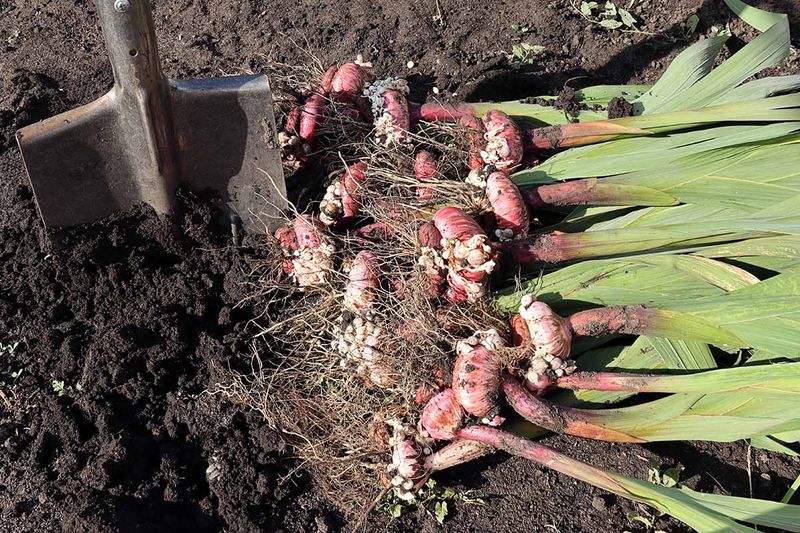
Gladiolus may look tough standing tall in the garden, but they come from warm parts of Africa. That sunny background means they simply cannot handle a Michigan winter. They are tender plants, and the cold here is far too harsh for them.
Once the ground freezes solid, any corms left behind usually get damaged. Ice crystals form inside the plant tissue and break it down.
By spring, those corms are often mushy, shriveled, or no longer able to grow, which means no flowers and a trip to the garden center for new ones.
Every corner of the state faces the same problem. Gardeners in Detroit and Grand Rapids deal with deep frost, while folks in Marquette and the rest of the Upper Peninsula see even longer, colder winters.
No matter where you live in Michigan, your gladiolus need to come inside. The good news is that the plan is simple. First, you dig up the corms in the fall. Next, you cure them so the skins dry and toughen.
After that, you clean them and tuck them away in a cool, dry place until planting time comes around again.
Following these steps pays off in a big way. A healthy corm stored well can bloom again next summer, and many will even grow little baby corms that give you more plants over time.
Think of fall digging as a small chore that protects your investment and keeps your garden bursting with color year after year.
2. Time The Dig With The Foliage And The Forecast
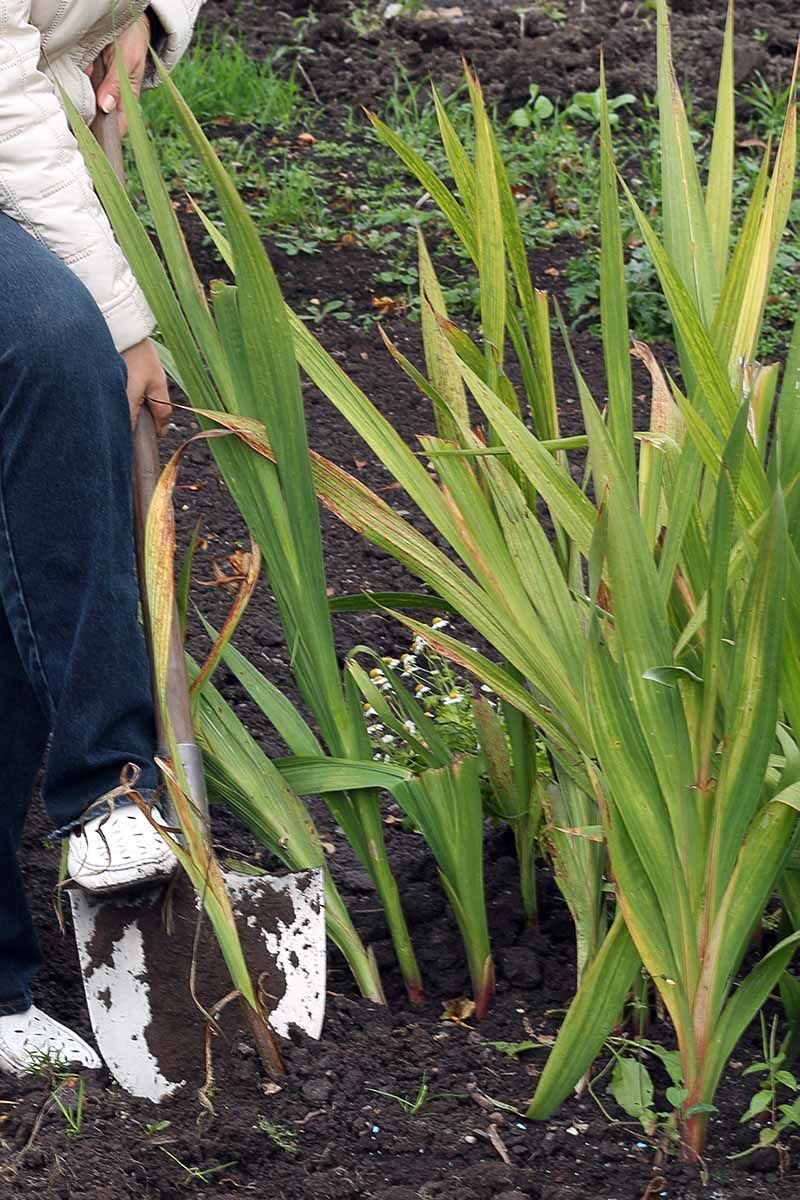
Patience is a gardener’s secret weapon when it comes to gladiolus. After the flowers fade, the green leaves keep working hard. They soak up sunlight and send food down to the brand new corm forming underground.
Cutting that process short leaves you with smaller, weaker corms. Try to wait about six weeks after blooming before you dig. During that time, the corm fills out and stores the energy it needs to flower next summer.
Your plants will give you a clear signal when they are ready. Watch for the leaves to start turning yellow. A light frost that browns the foliage is another good sign, and it actually does no harm to the corms tucked safely in the soil.
Your Michigan Garden Changes Every Week. Your Plan Should Too.
Gardening in Michigan changes quickly throughout the season. Every Friday you’ll receive a simple weekly plan showing exactly what to plant, prune, fertilize, harvest, and protect so you never miss the right timing.
Waiting too long brings its own trouble, though. Once the ground freezes, digging becomes hard work, and the corms can get damaged. Keep an eye on the weather report and finish the job before a hard freeze shows up in the forecast.
Timing looks different depending on where you garden in Michigan. In the Upper Peninsula and the northern Lower Peninsula, cold arrives early, so plan to dig by late September or early October.
Gardeners in southern Michigan, around places like Kalamazoo or Ann Arbor, can often wait until mid to late October.
A simple trick helps a lot here. Jot down your bloom dates on a calendar during summer, then count forward six weeks. That way, you have a target date ready long before the chilly nights begin.
3. Dig Carefully To Avoid Damaging The Corms
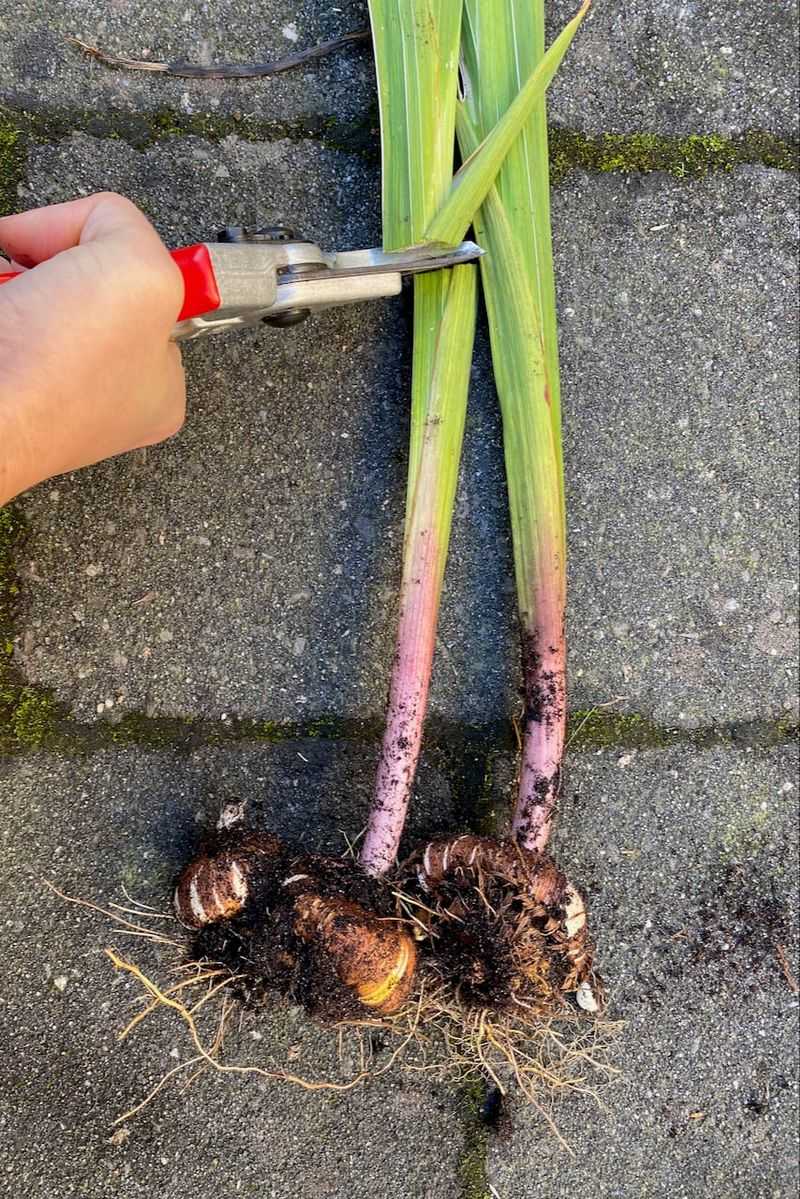
One careless jab with a shovel can ruin a perfectly good corm. Even a small cut or bruise gives mold and rot an open door during storage. A little extra care at digging time keeps your corms healthy all winter long.
Reach for a spading fork instead of a flat shovel. The tines slide into the soil without slicing through corms the way a sharp blade can. Push the fork into the ground several inches away from the base of the plant to give the corms plenty of room.
Work your way around the plant, loosening the soil on all sides. Then gently lift the whole clump up from underneath. Pulling on the leaves alone can snap them off and leave the corms behind, so let the fork do the heavy lifting.
Once the clump is out, give it a soft shake to knock off the loose dirt. There is no need to scrub it clean right now. You will tidy up the corms later, after they have dried a bit.
Choosing the right day makes a huge difference too. Wait for a dry stretch when the soil is not soggy. Wet soil is heavy, sticky, and much harder on both you and your plants.
That advice matters even more in parts of Michigan with heavy clay soil. Clay clings to corms like glue when it is wet, making them tough to clean and slow to dry. A few sunny days before digging can save you a messy afternoon.
4. Cut Back The Foliage
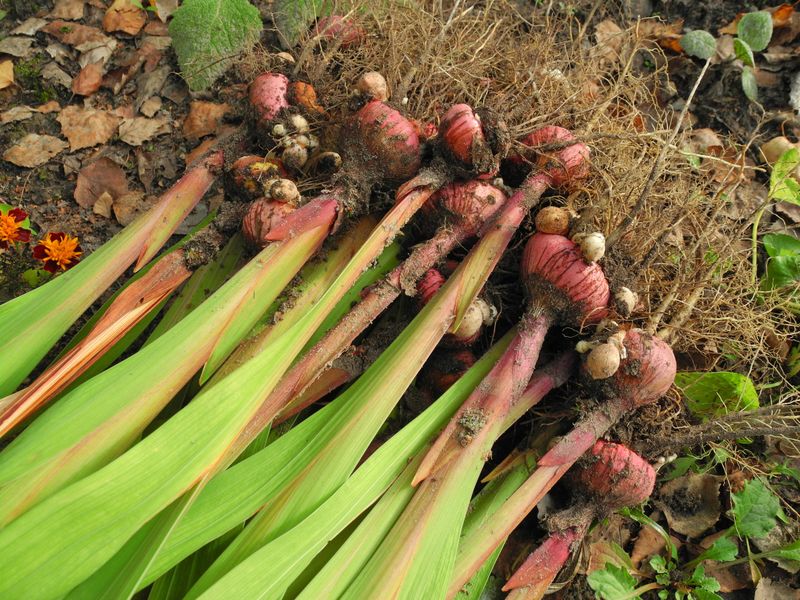
Grab your pruners, because this step is quick and oddly satisfying. Those long, floppy leaves have done their job for the year. Now they just get in the way of drying and storing your corms.
Trimming the foliage helps the corms dry faster and more evenly. It also removes hiding spots where insects and disease like to hang out. A tidy corm is a much safer corm once it heads into storage.
Cut the leaves and stem about 1 inch above the top of each corm. That short stub gives you a handle to hold and helps protect the top of the corm. Try not to cut too close, since you want to avoid nicking the corm itself.
Take a quick look at the leaves as you work. If any show spots, streaks, or signs of insect damage, toss them in the trash instead of the compost pile. Many garden problems can hang on in old plant material and return next year.
Keeping your colors straight is the next big task. If you grow more than one variety, keep each group together as you trim. Write the name or color on a label and tuck it right in with the corms.
Plenty of Michigan gardeners grow rows of gladiolus for cut flowers, often in a whole rainbow of shades. Sorting now makes spring planting so much easier.
You will know exactly where the ruby reds, soft pinks, and bright yellows belong when warm weather returns.
5. Cure Corms In A Warm, Dry, Airy Spot
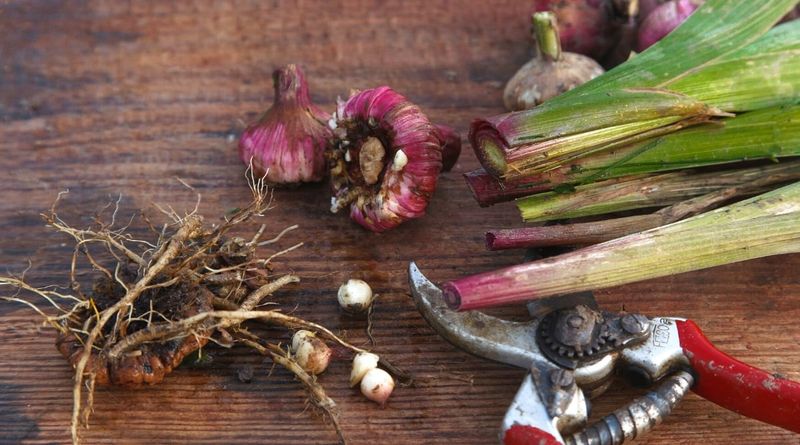
Curing sounds fancy, but it really just means letting your corms dry out properly. Freshly dug corms are full of moisture. If you pack them away too soon, that moisture can lead to rot or shriveling.
During curing, the outer layers dry and the skin gets tougher. That tougher skin acts like a protective jacket for the long months ahead. It is one of the best things you can do to keep corms firm and healthy until spring.
Spread the corms out in a single layer so they do not touch much. Old window screens, shallow trays, or sheets of newspaper all work well. Screens are especially handy because air can reach every side.
Pick a spot that is warm, dry, and has good airflow. Keep the corms out of direct sunlight, which can dry them too quickly. Leave them to cure for about two to three weeks.
Every few days, give the corms a gentle turn. That helps them dry evenly all the way around. It also lets you spot any problems early.
Fall weather in Michigan tends to be cool and damp, so drying corms outdoors rarely works well. Rain, heavy dew, and chilly nights can slow the whole process. A garage, shed, or basement corner near the furnace usually offers the steady warmth you need.
A small fan running nearby can speed things along on humid days. Just keep it on a low setting so the air moves gently.
6. Separate And Inspect Every Corm
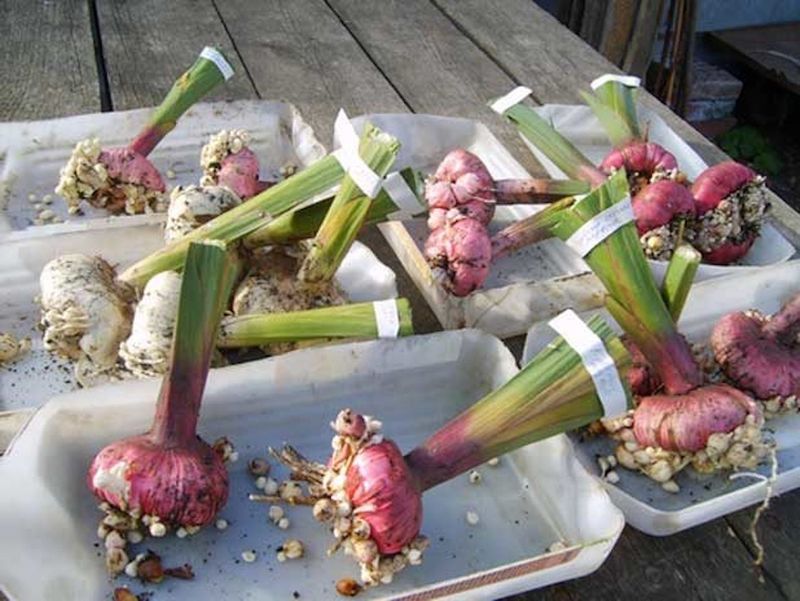
Something surprising happens underground each summer. A gladiolus uses up its original corm and grows a brand new one right on top of it. Many plants also produce tiny baby corms called cormels around the base.
After curing, flip a corm over and you will see the old one clinging to the bottom. It looks flat, dry, and wrinkled. That old corm is spent and will not bloom again, so it can go straight into the trash.
Gently snap it off the bottom of the new corm. It usually pops free with a little twist once it has dried. While you are at it, brush away loose soil and any dry, papery husks that come off easily.
Now take a close look at each corm. Toss any that feel soft, show mold, or have dark, sunken spots. One bad corm can spread problems to the rest of the batch during storage.
Those little cormels are worth saving if you enjoy a slow project. Plant them in spring and they will grow bigger each year. Most take two to three years to reach blooming size, but it is a free way to grow more flowers.
Careful sorting matters a lot in Michigan. Corms here spend five to six months in storage before it is safe to plant again. Starting with only clean, healthy corms gives them the best chance of making it through that long wait in great shape.
7. Watch For Gladiolus Thrips
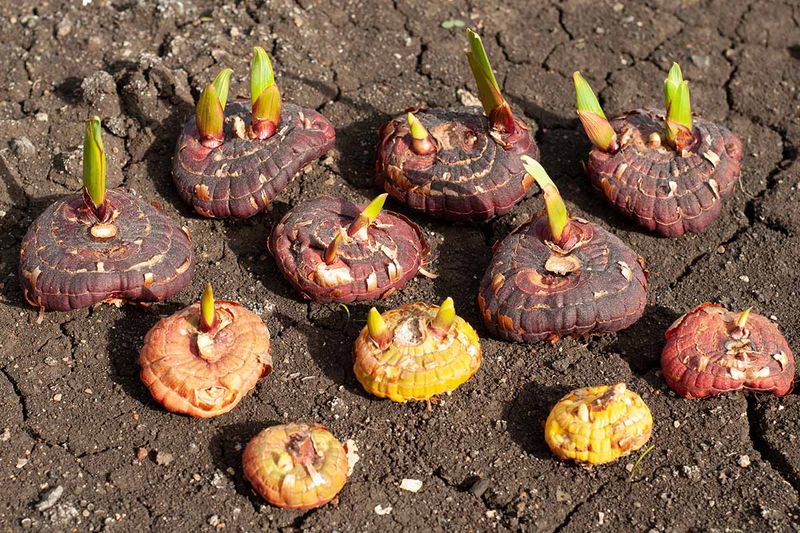
Tiny troublemakers can hitch a ride right into your storage bin. Gladiolus thrips are small, slender insects about the size of a comma. They feed on flowers and leaves, leaving silvery streaks and blooms that look faded or fail to open.
These pests have a sneaky habit. They can hide on stored corms all winter and keep feeding. Damaged corms often look rough, corky, or even feel a bit sticky.
When spring comes, the thrips return to the garden along with the corms. Before long, they are back on your new plants, starting the cycle again. Stopping them in storage is one of the smartest moves you can make.
Look over each corm for rough, discolored patches. Throw away any that are badly damaged instead of trying to save them. A few lost corms are better than a whole garden full of streaked flowers next summer.
Temperature plays a big role too. Warm storage lets thrips stay active and keep munching. Cool storage slows them way down, so a chilly spot works in your favor.
Keep your gladiolus separate from other stored bulbs like dahlias or cannas. That way, any pests stay contained in one place. Separate bins or bags on different shelves work fine.
Michigan gardeners who save and replant corms year after year can see thrips build up over time. A careful check each fall keeps those numbers low. Your future flowers will thank you with clean, bright petals.
8. Store Cool, Dry, And Well Ventilated
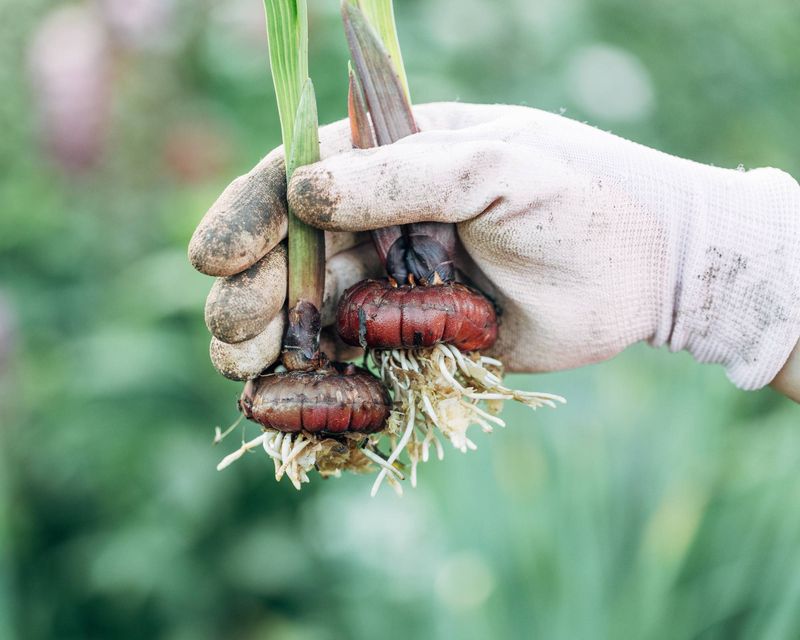
Your corms are clean, cured, and ready for their long winter nap. Now the goal is to keep them resting quietly until spring. The right storage spot makes all the difference.
Cool temperatures keep corms dormant, which means they stay asleep and do not start sprouting early. At the same time, they must never freeze. Freezing damages the tissue just like leaving them in the ground would.
Aim for a spot that stays around 35 to 45°F. A simple thermometer helps you check. Dry air matters just as much, since moisture leads to mold and rot.
Good airflow keeps moisture from building up around the corms. Mesh bags, paper bags, or old nylon stockings all let air move freely. Skip plastic bags, which trap humidity and invite trouble.
Label every bag with the variety or color. Hanging the bags from hooks or nails is a great way to boost airflow even more. It also keeps them away from curious mice.
Once a month, take a few minutes to check on your stash. Give each bag a gentle squeeze and peek inside. Remove any corms that turn soft or moldy right away.
Finding the right place in Michigan takes a little thought. Unheated garages often drop well below freezing in January, so they are risky. A cool basement or an unheated room that stays frost-free is usually your best bet.
Come spring, you will have plump, healthy corms ready to fill your garden with color once again.