How To Make A Holiday Wreath From New York Garden Evergreens
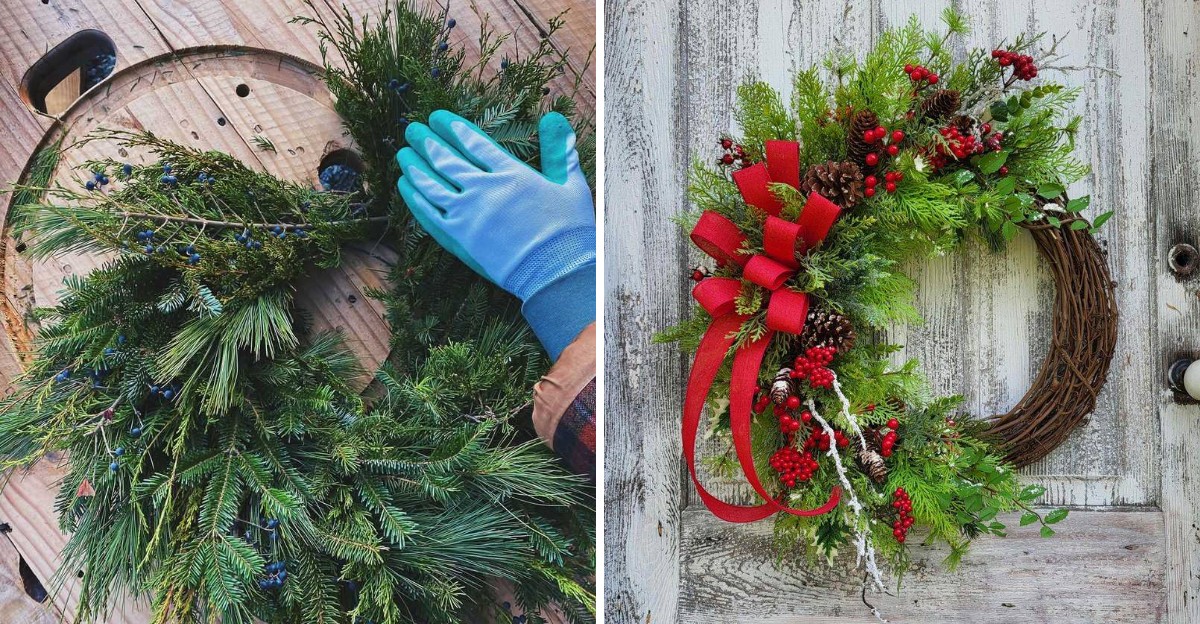
The air is crisp enough to pinch your nose, and your backyard smells like a pine-scented candle that somebody forgot to blow out. Out there, a pile of free holiday decor is just standing around, waiting for its big moment.
Good news for your wallet: no fancy craft store haul required. Grab some clippers, a little wire, and a lazy afternoon, and you are most of the way there.
Snacks are optional but highly recommended.
Fair warning, though. Once your New York front door is wearing a fresh, homemade wreath, the neighbors might start lingering on the sidewalk a little longer than usual.
Let them wonder.
The best part? The greenery is growing right outside your window.
Grab a warm mug, and let’s build it together, one easy step at a time.
1. Scout Your Yard For The Best Evergreen Branches
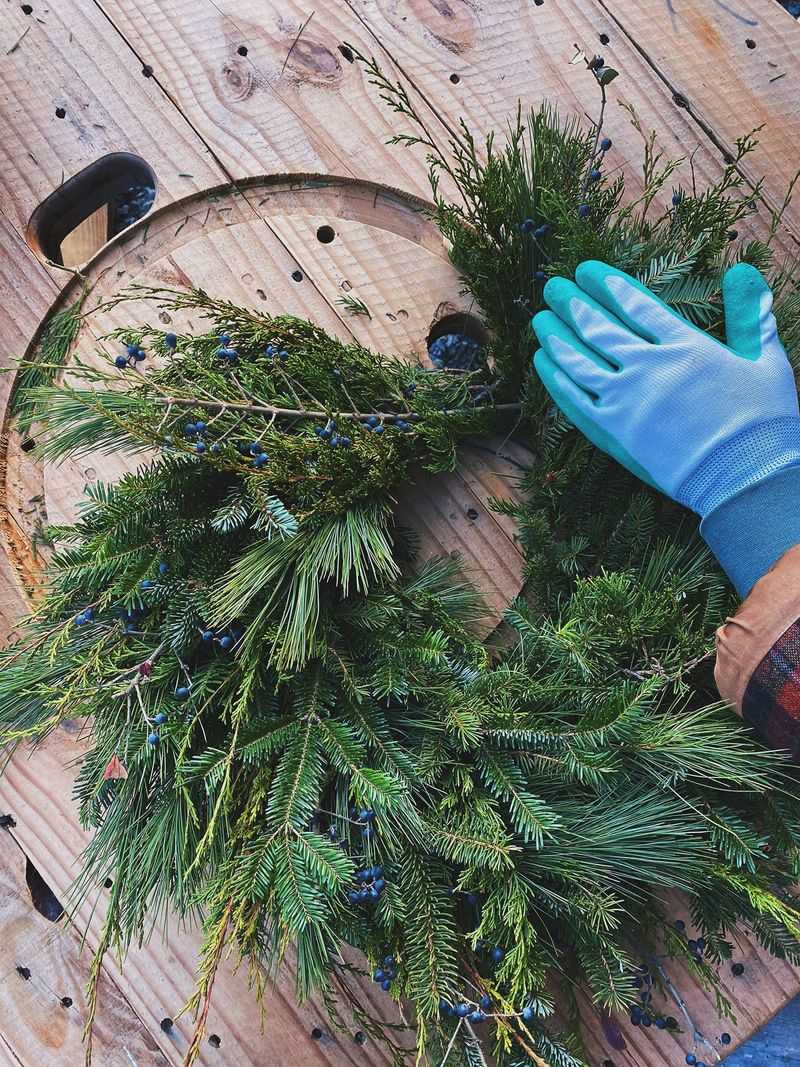
Every great wreath begins with a short walk around the yard. Grab a notebook and look at what is already growing near your fence, porch, and driveway.
Many New York gardens hold a surprising mix of greenery. Eastern white pine gives soft, bendy needles, while balsam fir smells like a holiday candle shop.
Juniper, arborvitae, holly, and boxwood add different shapes and shades of green.
Aim for at least three types of foliage. Mixing textures makes the finished wreath look rich and full instead of flat.
Feathery cedar paired with glossy holly leaves creates a lovely contrast that catches the eye.
Fun fact: balsam fir is native to the Adirondacks and Catskills. Its needles hold their scent well, which is why so many people love it indoors.
A quick note on boxwood: box tree moth, an invasive pest, has been found in several western counties, and its tiny caterpillars can hide in cut boxwood over winter. Boxwood blight, a fungal disease, can also travel on clippings.
If you live in western New York, skip boxwood this year. Everywhere else, inspect it closely for webbing, droppings, leaf spots, or sudden leaf drop, and leave out anything that looks off.
While you scout, check each plant for health. Pick branches that look bright, flexible, and free of brown patches or pests.
Brittle twigs tend to shed needles quickly once they come inside.
Also think about how much each shrub can spare. Taking a few branches from several plants is kinder than stripping one bush bare.
Your evergreens will thank you next spring with fresh, even growth.
Make a simple list of what you found. That small plan saves time later and helps you picture the colors before you cut anything at all.
2. Gather The Right Tools Before Cutting In New York Weather
Nothing slows down a crafting day like hunting for scissors in a junk drawer. Gather your supplies first, and the whole project flows like a smooth sledding run.
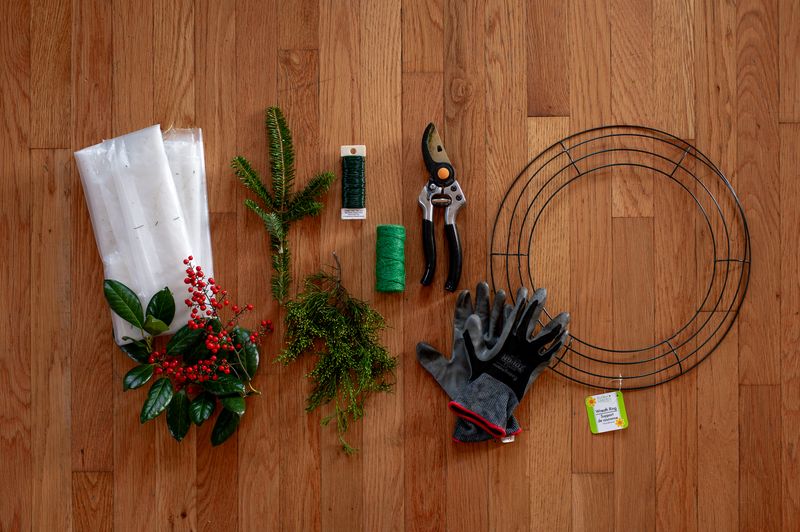
Sharp bypass pruners are the star of your toolkit. They make clean cuts that help your shrubs heal well.
Dull blades crush stems, which can invite trouble for the plant.
Your New York Garden Changes Every Week. Your Plan Should Too.
Gardening in New York changes quickly throughout the season. Every Friday you’ll receive a simple weekly plan showing exactly what to plant, prune, fertilize, harvest, and protect so you never miss the right timing.
Next, grab a wire wreath frame or a grapevine base. A 12 to 14 inch frame works nicely for most front doors.
Add a spool of green paddle wire, which blends into the branches and stays hidden.
Sturdy gloves are a must. Holly leaves are prickly, and pine sap sticks to skin like glue.
Many crafters find that a little cooking oil helps loosen sticky sap before washing up with soap.
Since New York winters can turn bitter, dress in warm layers before heading out. Fingers get stiff fast when temperatures dip below freezing.
A pair of thin gloves under work gloves keeps you nimble.
Other handy items include:
A bucket of cool water, a tarp for scraps, and wire cutters.
Ribbon, pinecones, and dried berries for decorating later.
Lay everything out on a table near a sunny window. Having tools within reach lets you focus on the fun part, which is turning plain branches into something that looks store bought.
3. Snip Branches Wisely To Protect Your Shrubs
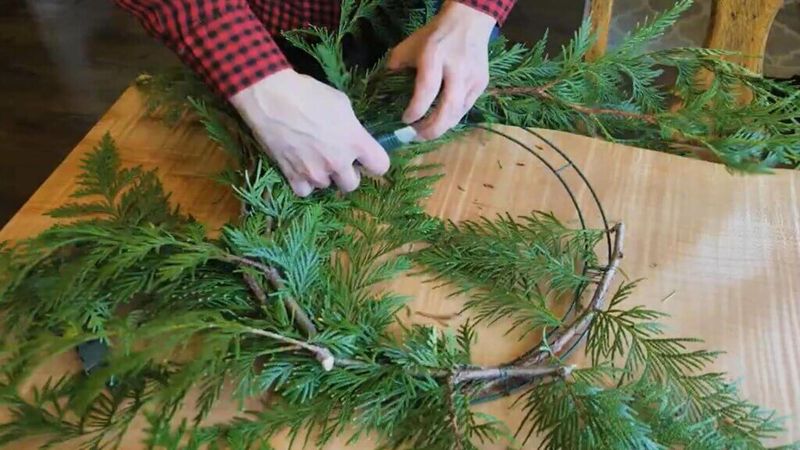
Gardeners have a saying: prune like a barber, not a lumberjack. A light touch keeps your shrubs happy and growing strong for years.
Cut branches that are about 8 to 12 inches long. Make each snip just above a side shoot or bud, at a slight angle.
Snipping there encourages new growth in spring instead of leaving bare stubs.
Reach inside the shrub and take stems from the back or underside. Doing so keeps the plant looking full from the front.
Nobody walking past will even notice your harvest.
A good rule is to remove no more than one third of a plant in a season. Spread your cuts around evenly to keep a natural shape.
Timing matters too. Late November through mid December works well across most of New York, because the plants are dormant and resting.
Try to cut on a mild day when branches are not frozen solid, since icy stems can snap.
Got a neighbor with a giant spruce? Many folks are happy to share trimmings if you ask politely.
Christmas tree lots sometimes have extra trimmings on hand too, so it is worth asking.
Once cut, toss stems straight into your bucket of water. Quick hydration helps them stay fresh much longer on your door.
4. Condition Your Fresh Greens For Lasting Color
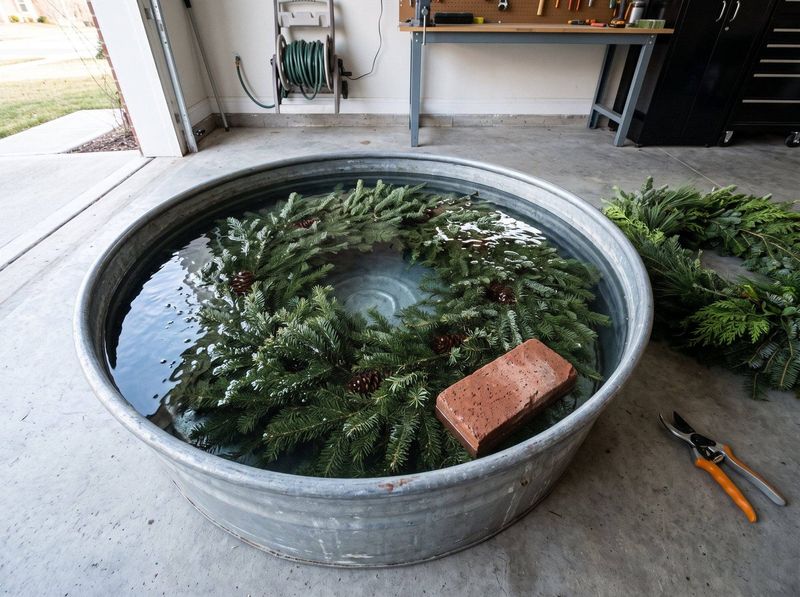
Picture a florist and a chef, and you will find they share one secret. Both soak their fresh ingredients before using them.
Conditioning your greens sounds fancy, but it is simple. Once indoors, recut the bottom of each stem about one inch.
Then place the branches in a tub of cool water overnight.
Woody stems drink better when you split the ends a bit. Use your pruners to make a small cut up the middle.
Thicker branches like pine and fir benefit most from this trick.
Keep the tub in a cool spot such as a garage, basement, or mudroom. Warm kitchens cause needles to dry out faster.
Many New York homes have chilly enclosed porches that work well.
Some crafters mist their greens with an anti-transpirant spray. These sprays create a thin coating that slows moisture loss.
It can help your wreath stay green into January.
Before building, shake each branch gently over a tarp. Loose needles fall away, and you may also find hidden spiders or bits of dried leaves.
Fun fact: evergreens lose water through tiny pores on their needles, even in winter. A good soak tops off that moisture before the branches head outside.
That extra drink can help your wreath stay fresh longer.
5. Build Small Bundles Like A Florist
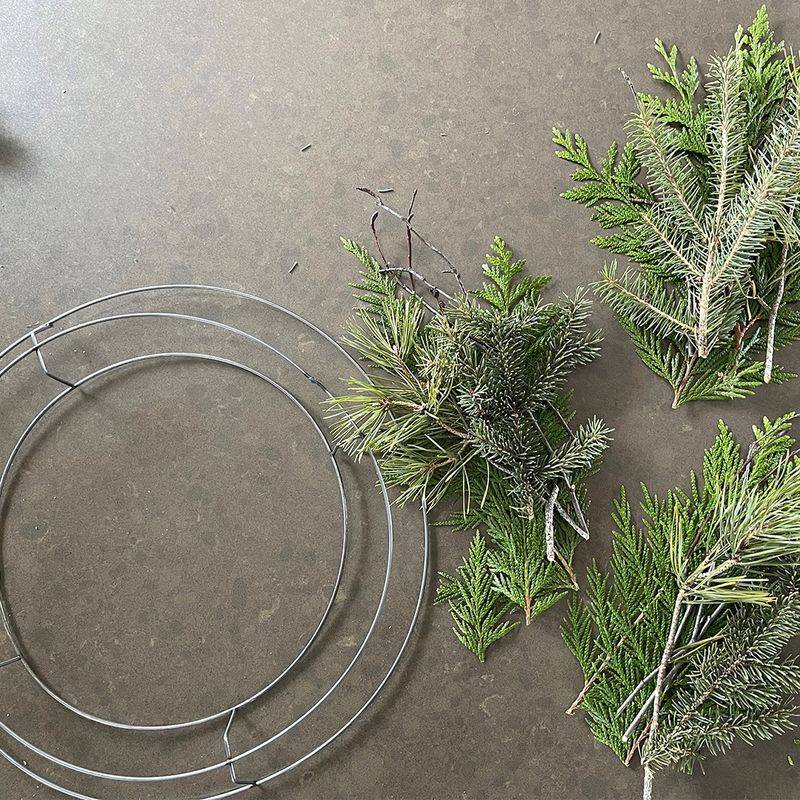
Ask any florist at a Manhattan holiday market how wreaths get so lush. Most will hold up a tiny bundle and grin.
Bundles are the building blocks of your wreath. Cut your greens into short sprigs about 5 to 7 inches long.
Then group three or four sprigs together in a small fan.
Place the fullest, prettiest piece in back. Layer smaller pieces of different greens on top.
For example, you might use fir behind, cedar in the middle, and a sprig of boxwood in front.
Wrap the stems tightly with a short piece of paddle wire. Leave a little tail so you can attach the bundle to the frame later.
Plan on making 20 to 30 bundles for a medium wreath. That number may seem like a lot, but full wreaths need plenty of greenery.
Thin wreaths can look a bit sad on a big door.
Try to make each bundle a little different. Small changes in texture and color give your wreath a natural, handmade charm.
Put on some music and set up an assembly line. Kids enjoy this step, since sorting sprigs feels like a puzzle game.
Before long, you will have a happy pile of green bundles ready to go.
6. Attach Greens To The Frame
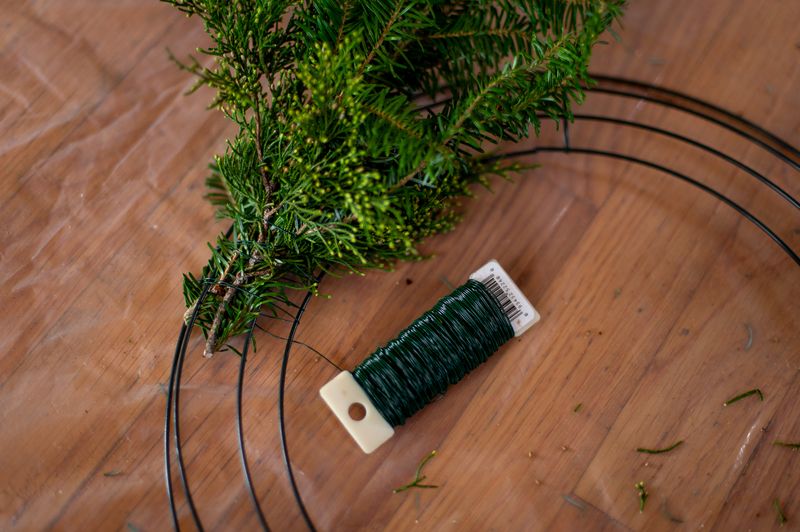
Here comes the satisfying part, when loose bundles finally become a ring of green. Patience pays off big during this stage.
Tie your paddle wire to the frame first and leave the spool attached. Lay your first bundle on the frame with the leafy tips pointing clockwise.
Wrap the wire tightly around the stems two or three times.
Place the next bundle so its leaves cover the stems of the first one. Keep wrapping and overlapping as you move around the ring.
Think of shingles on a roof, each layer hiding the one below it.
Angle some bundles slightly toward the inside and others toward the outside edge. Doing so fills the frame evenly and keeps it looking round.
When you reach the start, gently lift the first bundle. Tuck the last stems underneath, then wire them down.
Snip the wire and twist the end into the back so it will not scratch your door.
Hold the wreath up and look for gaps. Bare spots are easy to fix by sliding in extra sprigs.
This overlapping method has stayed popular for generations because it works so well and looks timeless.
7. Add Natural Accents Like Pinecones And Berries

Grandma’s wreath had a certain magic, and part of it came from treasures she found on her walks. You can capture that same feeling with nature’s own decorations.
Pinecones are an easy favorite. White pine cones are long and slender, while spruce cones vary by type, with some small and tidy and others long.
Wrap a piece of wire around the bottom scales and twist it onto the frame.
Bright red winterberry grows wild in many New York wetlands and gardens. Its berries add a pop of color against deep green.
Bittersweet should be skipped, since the invasive kind spreads easily when birds scatter its seeds.
The same goes for multiflora rose hips. Multiflora rose is a prohibited invasive plant in New York, so stick with hips from native roses or leave them out.
Other fun accents include:
Dried hydrangea heads, sumac clusters, and birch bark curls.
Dried orange slices, cinnamon sticks, and sprigs of lavender for a sweet scent.
Group decorations in odd numbers like three or five. Odd groupings look more natural to the eye.
Place your biggest accent near the bottom or off to one side.
Bake pinecones at 200 degrees for about 30 minutes first. Low heat opens them up and sends any hiding bugs packing.
Holly and winterberry berries are toxic to pets and small kids, so hang your wreath where curious paws and hands cannot reach.
Step back often while decorating. A few well placed accents usually look better than a crowded wreath.
Let the greens shine as the main attraction.
8. Top It Off With A Bow Fit For A Doorway

Ribbon is like the frosting on a cake. A good bow can turn a nice wreath into a real showstopper.
Choose wired ribbon whenever you can. The thin wire inside the edges lets you shape loops that stay puffy, even in wind.
Velvet, plaid, and burlap all look wonderful against fresh greens.
To make a simple bow, form a loop and pinch it in the center. Add more loops back and forth, like a figure eight.
Five or six loops make a full, cheerful bow.
Wrap a piece of wire tightly around the pinched middle. Use the same wire to attach the bow to your wreath.
Then cut the ribbon tails at an angle or into a V shape.
Think about your door color. Red pops on white or black doors, while gold and cream look elegant on dark green or navy.
Brownstones in Brooklyn and Victorian homes in towns along the Hudson often feature big classic bows. Smaller cottages may look sweeter with a simple twine knot.
Fun fact: evergreen wreaths have long been tied to winter celebrations. Many people see the green circle as a symbol of lasting life and hope through the long, dark winter months.
9. Keep Your Wreath Fresh Through The New York Winter

Good news for busy families: fresh wreaths need very little babysitting. A few smart habits will keep yours green until New Year’s Day or beyond.
Location makes the biggest difference. Outdoor doors in shady spots keep greens fresh the longest.
Cold air acts like a natural refrigerator, which is one perk of a New York winter.
Watch out for doors facing south or west. Strong afternoon sun can dry needles quickly.
Glass storm doors also trap heat, so leave a little gap or hang the wreath elsewhere.
Indoor wreaths fade faster because of dry heat. Keep them away from radiators, fireplaces, and heating vents.
Hang them in a cool hallway if possible.
Mist your wreath with water every few days. Lay it flat on a towel and spray both sides lightly.
Skip misting when temperatures drop below freezing, since ice can bend the branches.
Check the hanger after windy storms. Over-the-door hooks with felt backing protect paint and hold steady.
Once the season ends, strip off ribbon and accents to save for next year. Pine, fir, cedar, and other greens can go into your compost pile or local yard waste pickup.
Boxwood is the exception. Double-bag any boxwood greens and put them out with the trash, since composting them can spread box tree moth and boxwood blight to nearby shrubs.
Some towns collect holiday trees and greens for mulch, giving your wreath one last useful job in the garden.