Monstera Root Rot: Symptoms, Causes, And How To Fix It
Most houseplant growers have at least one Monstera, and once you have one you’ll definitely want more Monsteras! The Monstera is an amazing plant, but it is susceptible to root rot, a deadly fungal disease usually caused by overwatering.
The most common variety is undoubtedly the Monstera deliciosa. Still, many other varieties, especially the variegated Monsteras, have become more and more popular.
Anyone that grows indoor plants will have almost certainly heard of root rot, especially in their Monstera. It’s essential to know what root rot is and how to recognize it so you can determine the cause and help your plant recover as soon as possible.
The problem with this disease is that it spreads fast and is really dangerous if left untreated.
That’s why I decided to write this article about Monstera root rot. I’ll show you how to recognize the disease and its possible causes, and also how to recover your plant and prevent root rot from occurring again!
Let’s get started!
The Symptoms Of Monstera Root Rot
Root rot is one of the most common and dangerous diseases that affect houseplants. If your Monstera plant suffers from this disease, it will display changes all over it.
As the disease progresses, roots, leaves, stems, and eventually the crown will become more and more damaged. The worst outcome of this disease is death!
The symptoms of root rot in Monstera plants are stunted growth, leaves turning yellow and wilting, black spots on the leaves, mushy soil with a foul odor, discolored and mushy roots, and a mushy stem.
This is a quick overview of how to inspect your Monstera:
1. Closely inspect the leaves and see if they are soft or dry to touch and if they have started yellowing or wilting.
2. Check the soil moisture content and dig up a portion of the soil. Smell it and observe the structure and general appearance of the leaves.
3. Check the stem and the crown of the plant.
Let’s get into details!
Stunted Growth
What does stunted growth mean? It’s not about the Monstera stopping growing entirely, but the growth rate significantly decreasing.
Remember that stunted growth doesn’t necessarily indicate an issue with the roots, so you should consider other things that may cause a slow growth rate.
Most houseplants enter dormancy when the winter approaches. Think of this as the time your indoor plants take to rest after the growing season.
Your Swiss cheese plant won’t grow as fast and won’t require as much water and nutrients during this period.
The tricky thing is that inadequate light levels, under fertilization, and dehydration during the growing season may also stunt the growth of your Monstera.
In order to understand what’s going on with your plant and why it’s not growing so fast, you’ll need to inspect it closely and take the season into consideration.
The first thing to look at are the leaves, which will display changes if the roots are rotten.
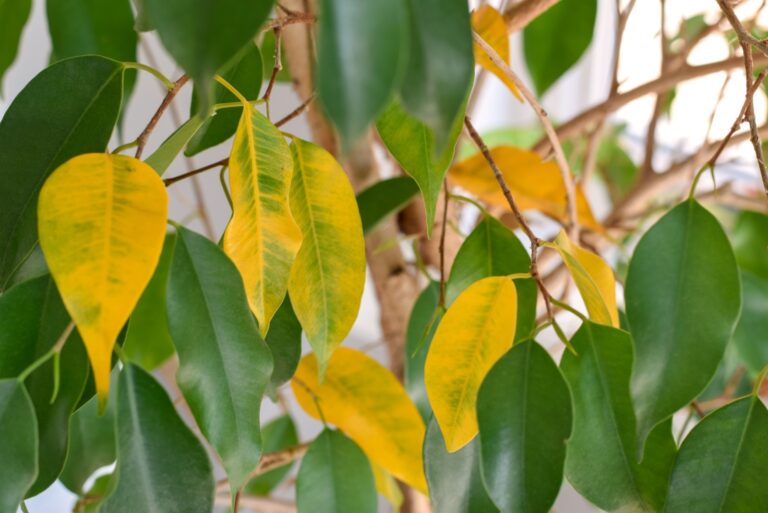
Leaves Turning Yellow
Remember that a healthy root system sends food and water to other parts of the Monstera. The leaves can’t survive without these two elements, and will display changes in response to a lack of water and nutrients.
If the leaves of your Monstera start turning yellow, your plant may be suffering from root rot.
Again, this sign may also indicate other issues with your plant, so don’t jump to conclusions. Instead, check if the other conditions are adequate.
Yellowing may also be caused by lack of water, temperature shock, inadequate light, pests, or repotting.
I know what you might be thinking: how on earth can you tell what’s wrong with your plant?
Keep reading to learn exactly what the matter is and how to fix it.
Leaves Wilting
When someone mentions wilting, I instantly think of dehydration or excess temperatures. Believe it or not, wilting is also a common sign of root rot.
The thing is that it’s about dehydration, but the leaves are dehydrated, not the plant. How come? If the roots are damaged and stop functioning, they also stop sending water and food to the Monstera leaves.
The easiest way to check if your plant either needs water or has too much is by observing and checking the moisture content in the soil.
Your plant needs water if the soil is dry and light brown in color. On the other hand, wet soil means it has too much.
If your plant isn’t growing very fast and displays yellowing and wilting leaves, the roots may have started rotting. Therefore, this is an early stage of root rot disease.
It’s time to dig deeper.
Mushy Soil And An Unpleasant Smell
The above mentioned conditions tell you it’s time to inspect the root system. I love the scent of most of my houseplants, and the thought of a foul odor scares me as it indicates something bad is happening in most cases!
Unfortunately, that’s the case with root rot. The soil will stink and have the most unpleasant smell of all: a rotting smell!
I have to mention that the smell isn’t strong in the early stages of the disease, but as the disease progresses it gets stronger and stronger.
The entire root system may be rotten if the smell is really strong.
The soil will be mushy at this point and also likely develop mold.
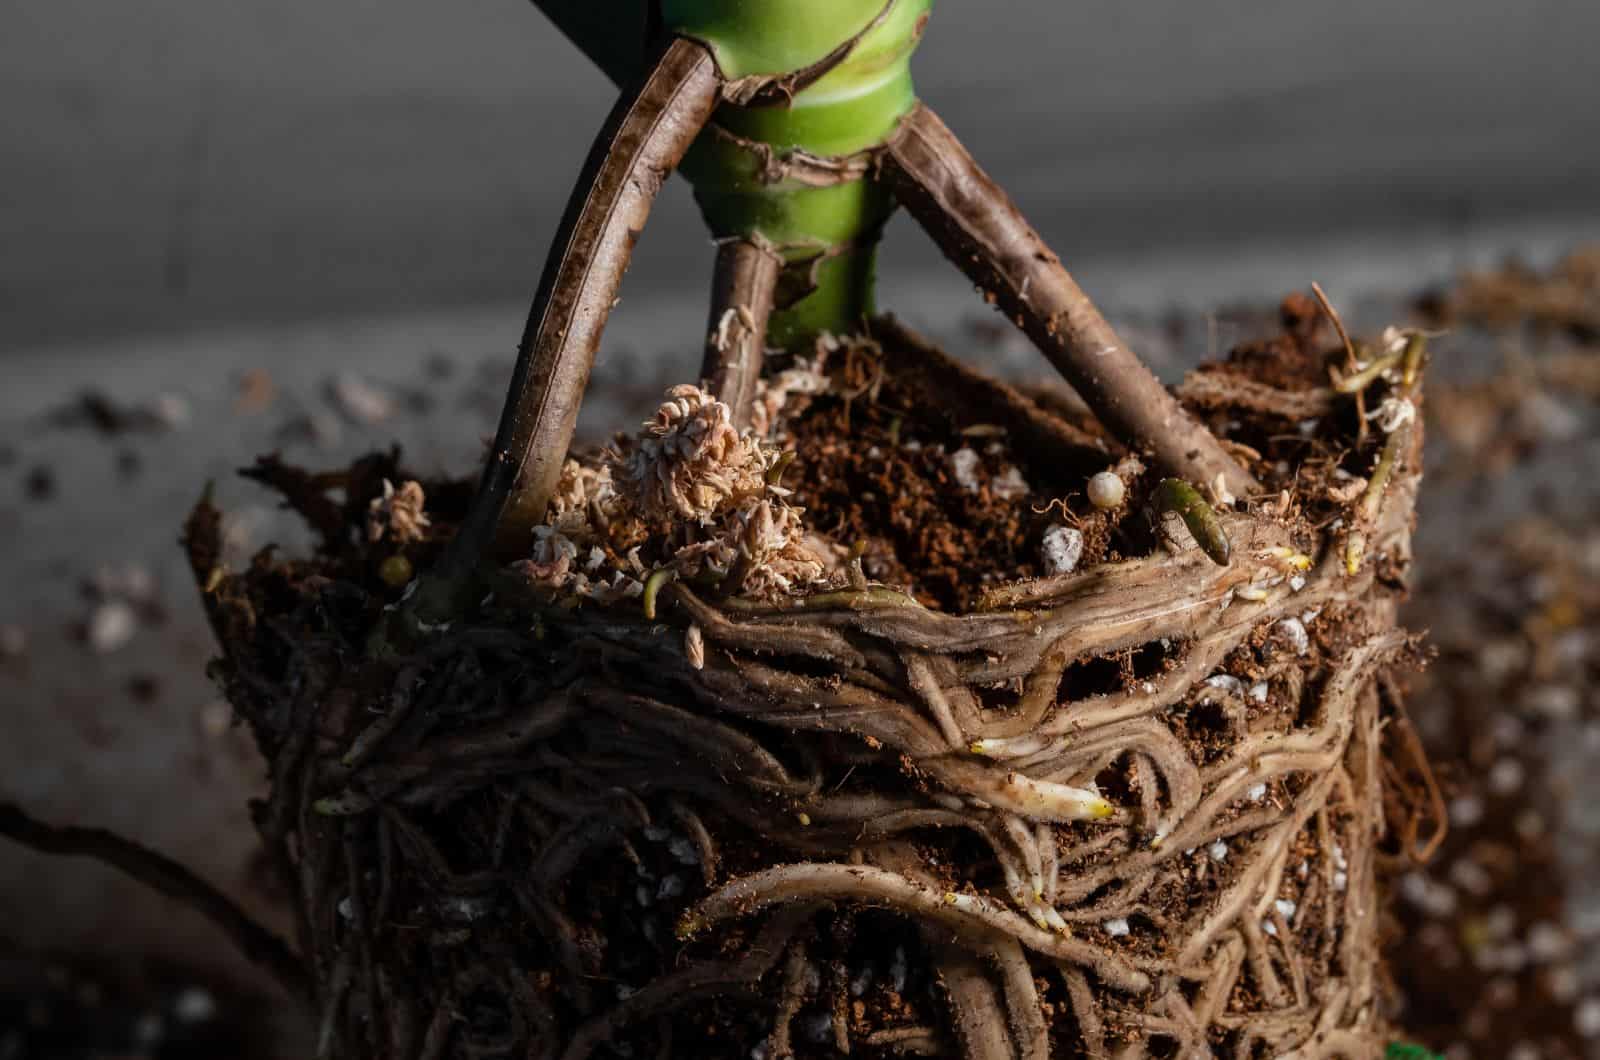
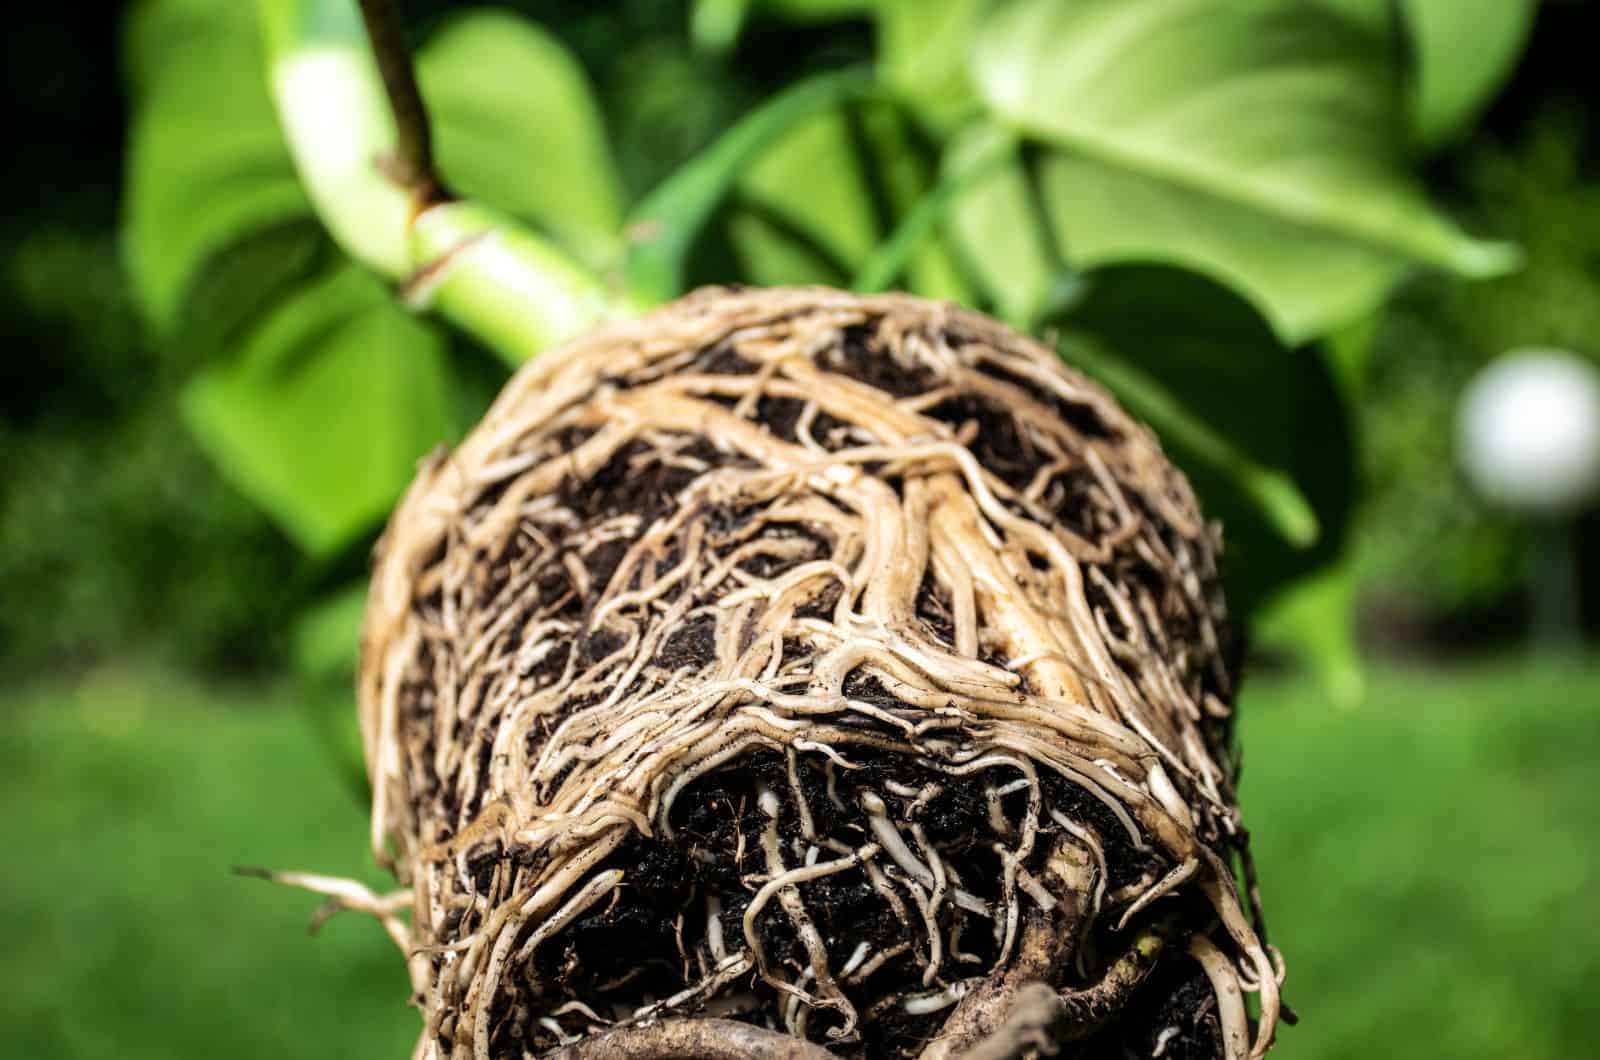
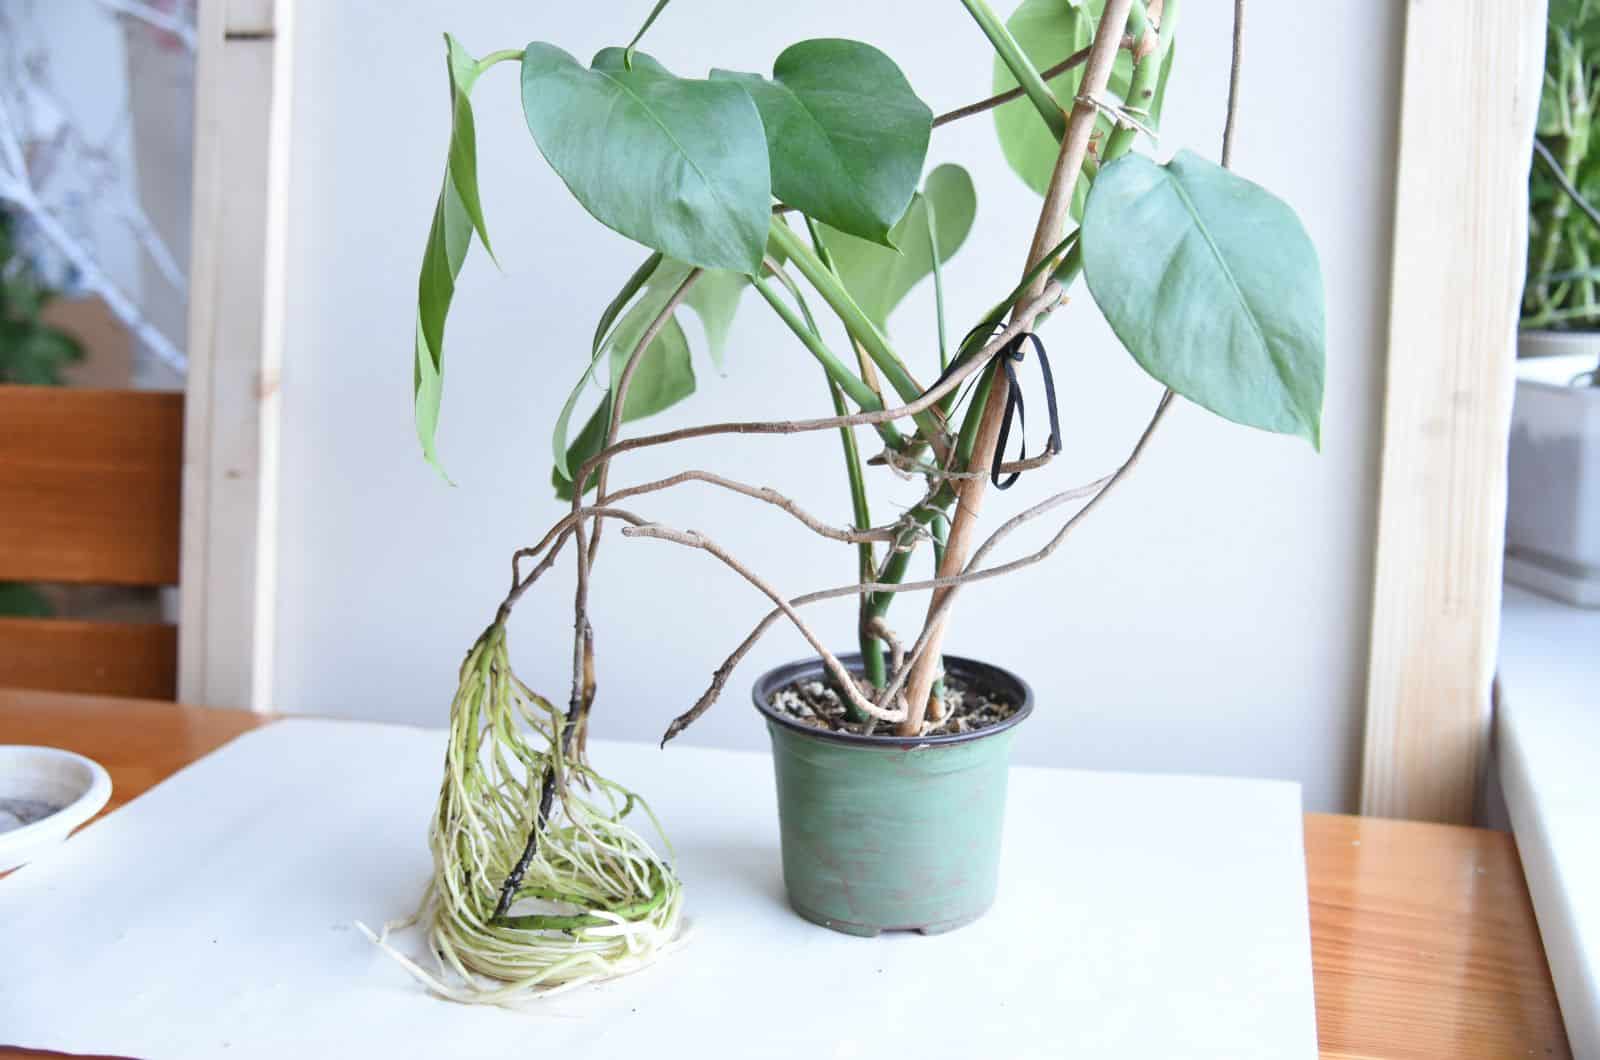
Roots Are Discolored
The first thing to discuss is what the healthy roots of a Monstera should look like. They are grayish-white and look firm and thick.
So, if the roots turn black or brown and are mushy and thin, they are probably infected.
The worst thing about this is that you can’t see the roots because they are in the soil. When we notice changes in the plant, you can’t just remove them from the pot each time as it will stress them.
But, if the plant displays all the changes we have discussed, you’ll definitely need to take it out of the pot.
The infected roots should be removed, so keep reading to find out exactly how to do so.
Black Spots
The infection has started spreading to the entire plant if you notice black spots on your Monstera. Your Monstera is in big danger if there are black spots on it!
These black or brown spots often have yellow edges, which means that the disease is eating the leaves.
This may be the last chance to save your Monstera!
Dead Roots
Now we come to the last two stages of root rot. If you can’t find any greyish-white and firm roots, your Monstera has lost its fundamental sources of food and water.
If all the roots are dead it means that the other parts of the plant aren’t receiving food and water, so they are about to dehydrate.
Mushy Stem
The last stage of root rot is discoloration of the stems and changes in structure. What once was a green, firm, beautiful, healthy stem is now a mushy, black, and brown mess.
Unfortunately, if you see this sign your Monstera will die in a matter of days.
What Causes Root Rot In A Monstera Deliciosa?
It’s essential to know what causes root rot disease so that you can fix the issue and avoid repeating the mistake.
The most common causes of deliciosa root rot are overwatering, underwatering, fungal infection, a pot that’s too big and doesn’t have drainage holes, or that your Monstera is over fertilized.
Let’s get into details!
Overwatering
You can’t mention root rot without also mentioning overwatering. Roots need a lot of water to grow, but can often trick us into giving them more water than they can drink. As a result, we end with an overwatered Monstera.
Overwatering leads to root and stem rot, both of which can cause death.
There are many things that lead to overwatering, and it’s not just about pouring too much water at once.
Let’s see what leads to overwatering!
Relying On A Watering Schedule Too Much
The first reason is a precise watering schedule, which inevitably leads to overwatering Monsteras. We all know that plants can’t live without water, so we are inclined to keep giving them water to encourage growth.
That’s actually the worst thing we can do. The watering schedule isn’t a fixed thing, but rather depends on many other conditions you need to take into consideration before adding more water.
The first thing we do wrong is watering without checking the moisture content in the soil. For example, you like to water your Monstera weekly, and rely on that schedule.
The soil should indeed be moist, but adding more water to already moist soil will do more harm than good.
We are just creating a perfect environment for pathogens because they are big fans of waterlogged soil.
Keep reading to find out when to water and how much water a Monstera needs.
The Wrong Sized Pot
Another thing that can lead to overwatering is using a pot that’s too large.
This is dangerous because the roots shouldn’t have too much soil surrounding them.
The parts of the soil that have no roots will still retain moisture and the water won’t evaporate, which means that the roots will have excess moisture around them.
The roots can’t absorb that amount of water, so the soil decomposes and the roots suffocate as a result.
The Pot Doesn’t Have Drainage Holes
Another problem with the pot could be a lack of drainage holes in the bottom, which leads to poor drainage. The easiest way to avoid overwatering is by ensuring good drainage.
A great way to get rid of excess water is by using a pot with drainage holes.
What happens if the pot doesn’t have these holes? The excess water can’t find a way out, so it remains at the bottom of the pot and causes the soil to become more compact.
The roots absorb as much water as they need, but because they constantly receive more water they eventually suffocate.
Underwatering
It’s interesting how a lack of water can also cause root rot. However, dry soil can’t directly cause the disease.
If you forget to water your Monstera, or you decide to water it less to avoid overwatering, you are also harming your plant.
The roots will adapt to dry soil in that they’ll shrink to store the water they still have. As a result, some soil parts will become rootless, so once you add water it’ll take more time to evaporate and lead to root rot.
An Underwatered Monstera will also display browning or yellowing leaves, wilting, stunted growth, and leaf curl.
Fungal Infection
Root rot is considered to be a fungal infection mainly caused by the Pythium, Rhizoctonia, and Fusarium fungi.
The fungus may already be present in the soil, but won’t activate unless it’s waterlogged.
These fungi spread pretty fast via insects and in the air. Therefore, if one of your houseplants has fungus in its soil it will probably spread to your other plants.
It won’t develop or harm anything unless the soil is soggy.
Overfertilization
Plants need water and food. Just like with water, we can go over the top with feeding.
If you add more fertilizer than you should, it’ll prevent the roots from absorbing water properly.
If you add nitrogen-rich fertilizer or too much organic matter to the soil, the roots will get smaller, making it harder for them to absorb water from the soil.
So you keep watering your plant, and the excess water stays in the soil because the roots can’t absorb it and eventually rot.
Swiss Cheese Plant Root Rot Treatment
Now you know the symptoms and causes of Monstera root rot, so I’m sure you’ve worked out what the issue is with your plant. Now the only thing left is to fix root rot.
I’ll show you a few simple steps for removing affected roots, and you’ll also find out how to propagate your plant if that’s all you can do.
Here is the equipment you’ll need to treat Monstera root rot:
• Gloves
• Pruning shears
• Sterilizing solution (rubbing alcohol, bleach solution)
• Fungicide (hydrogen peroxide)
• New pot
• New potting mix
Let’s find out more!
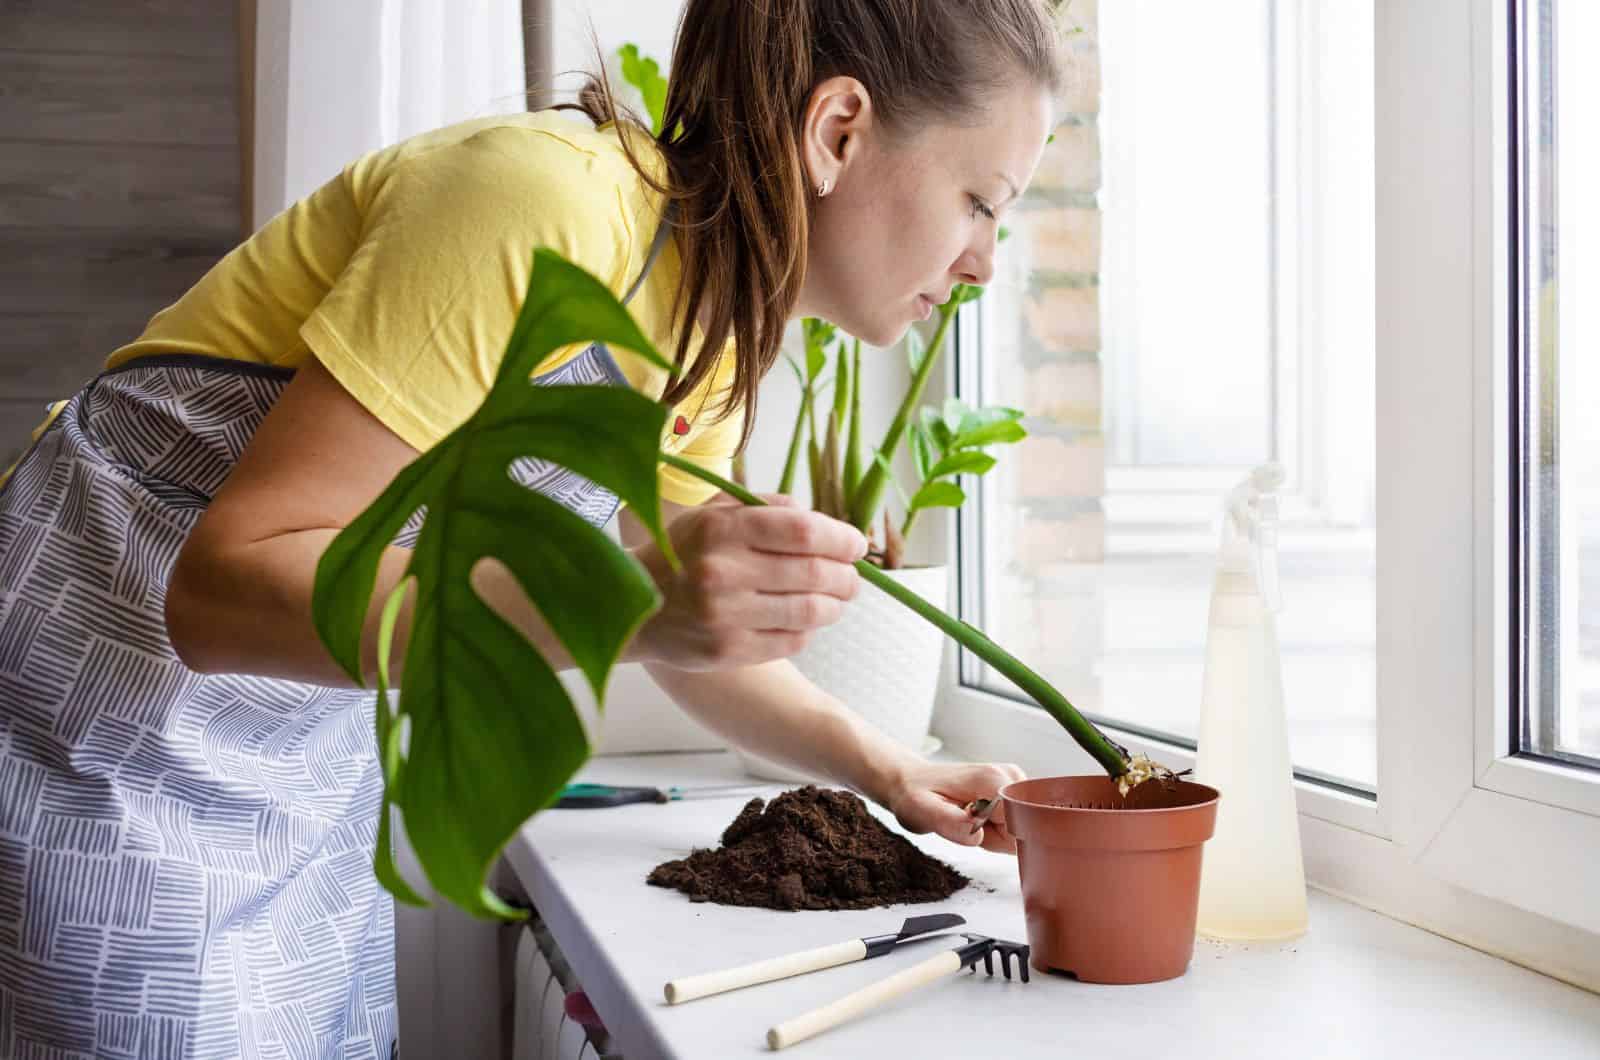
Remove Your Monstera From The Pot
To remove the diseased roots, your Monstera needs first to be removed from its pot. The roots should be exposed so you know what to cut off.
First put gloves on to prevent the infection from spreading even more.
Remember that your plant is pretty weak right now, so please don’t pull it! Instead, carefully lean the pot on its side and let your Swiss cheese plant slide out.
You can tap the pot, but do so gently because the last thing your Monstera needs is more damage!
When the plant is out, it’s time to expose the roots. Your goal is to remove as much soil from around the roots as you can. Some of the severely infected roots will come off with the soil, but don’t worry about it.
The most important thing is to discard the infected parts. Don’t add them to your compost pile, but seal them in a bag and throw them in the trash bin instead.
After you expose the roots, wash the remaining roots with water. If you have a mature Monstera deliciosa, you’ll need a garden hose. If your plant is still small, use a sink or bathtub.
Remove The Affected Roots
Now that the root system is visible, it’s time to remove any decaying and dead roots.
You’ll need pruning shears and a sterilizing solution. You can use rubbing alcohol or a bleach solution for sterilization. The essential thing is to sterilize the cutting tools before each cut.
Remember, this fungus spreads quickly, and you must try your best to prevent it from spreading.
Now remove the diseased roots slowly and safely. Double check if any of the diseased roots remain.
I mentioned above that sometimes all the roots might be dead, so after you remove them you’ll end up with a rootless Monstera. The only thing you can do is propagate it in this case.
Dip The Healthy Roots In Hydrogen Peroxide
You must let the healthy roots dry well before planting them in the new soil. I highly recommend dipping the roots in hydrogen peroxide before allowing them to dry.
You need a cup of water and a tablespoon of hydrogen peroxide.
After soaking the roots in peroxide, allow them to dry completely.
In the meantime, prepare the pot and potting mix for repotting. If you are using the old pot, make sure you disinfect it. Use bleach, rubbing alcohol, or hydrogen peroxide for sterilization.
I always use a new and clean pot to avoid even the slightest chance of root rot. Discard the infected old soil using the method I showed you above.
Other Natural Fungicides
You don’t have to use hydrogen peroxide for disinfection. There are other ingredients you can use for this purpose, most of which are commonly available in households.
Neem Oil
You will have heard of neem oil if you’ve had problems with pests. This horticultural oil can also help you eliminate root rot if you use it as a soil drench.
You’ll need a gallon of water and 2 tbsp of neem oil. Follow the instructions on the package and add the solution once you’ve watered your plant.
Baking Soda
Another great natural fungicide is baking soda. Add 3 tbsp of baking soda to a gallon of warm water so that the soda can dilute.
Pour the solution into a spray bottle and apply it to the stems and soil.
Cinnamon
Are you a fan of cinnamon rolls? Well, save some cinnamon for your plants as it can prevent fungus from spreading!
This ingredient can also be used as a rooting agent.
After you remove the affected roots, you can dust the remaining roots with cinnamon to stop the fungus from attacking other parts of the plant.
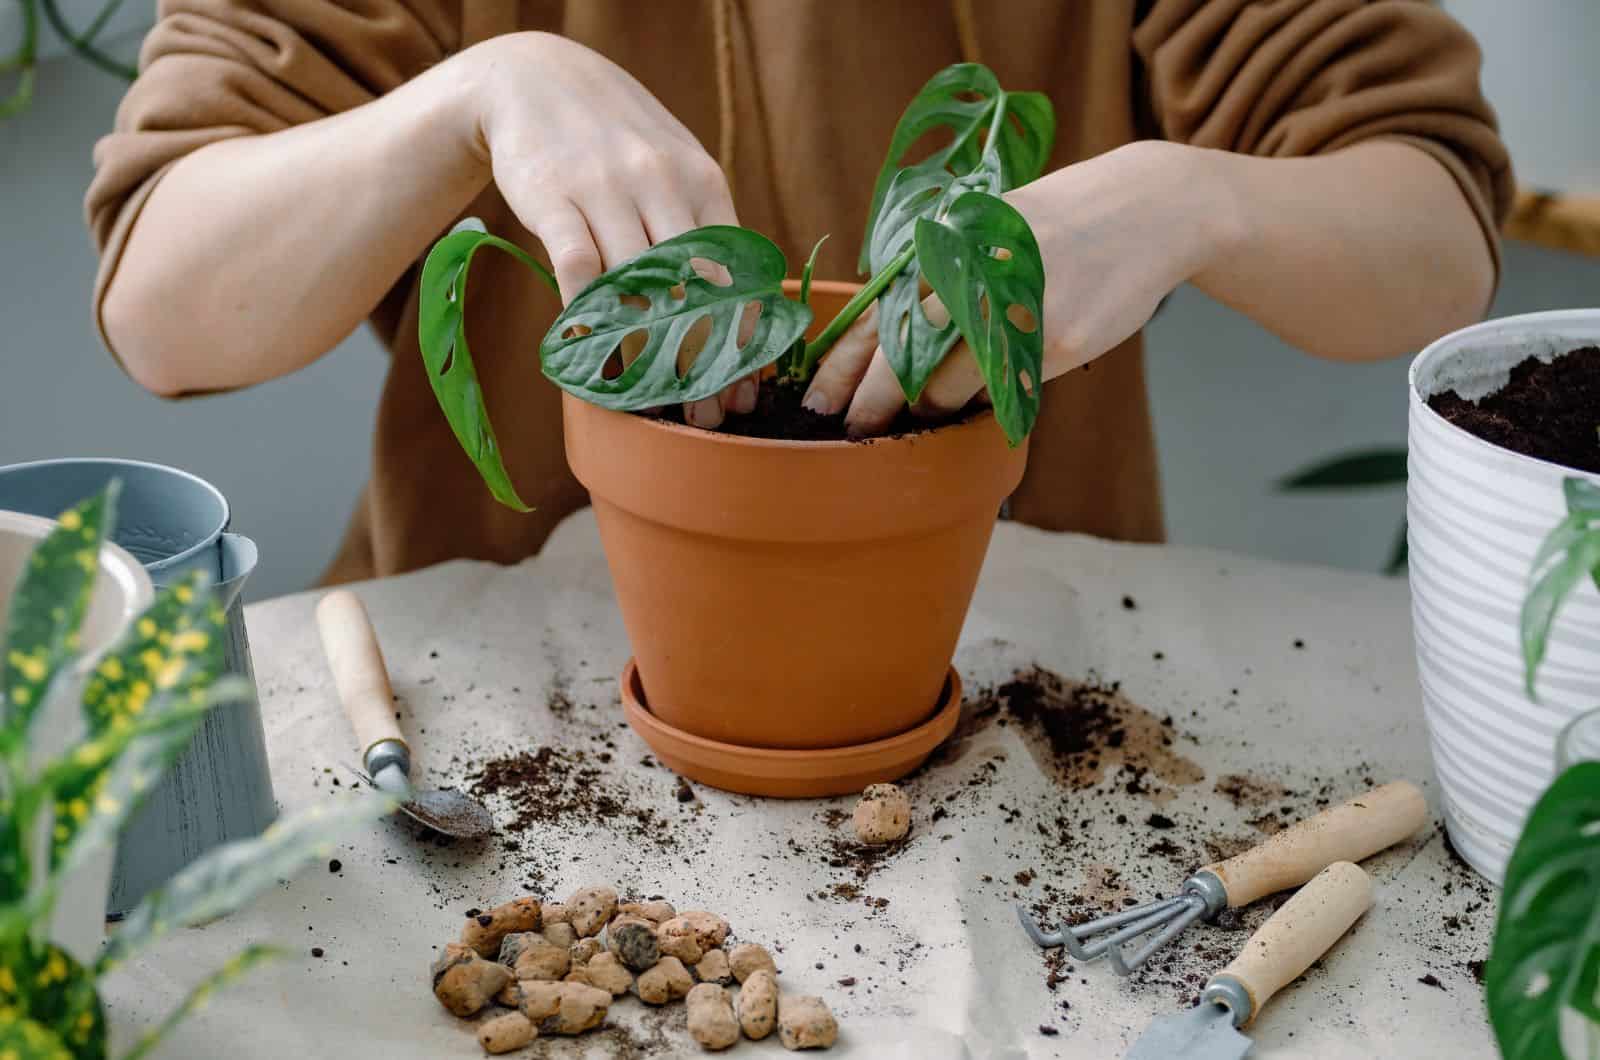
Repot Your Monstera Plant
The healthy roots are dry and the pot is clean, so now you need to fill the pot with a new potting mix.
The best option is to add well-draining materials to the potting soil, such as perlite, sand, pumice, and orchid bark.
Soggy soil is the perfect environment for fungus, so prevent it at all costs!
Place your Monstera in the soil mix and add more soil until the root system is completely covered.
Remove Damaged Leaves
Removing the affected leaves is essential because they are still using the nutrients and water from the root system.
There aren’t many roots at this stage, so there’s not enough food and water for all the leaves.
Use sanitized tools and try not to damage the healthy leaves.
Find A New Spot
After repotting, your Monstera will need a lot of bright light to recover. This is especially important for variegated Monsteras such as the Monstera albo.
Light helps the plant uptake water and grow healthier and faster. If the light level is too low, your Monstera will be more prone to root rot.
On the other hand, don’t expose your plant to direct sunlight because it may cause sunburn.
Always place repotted plants in bright indirect light.
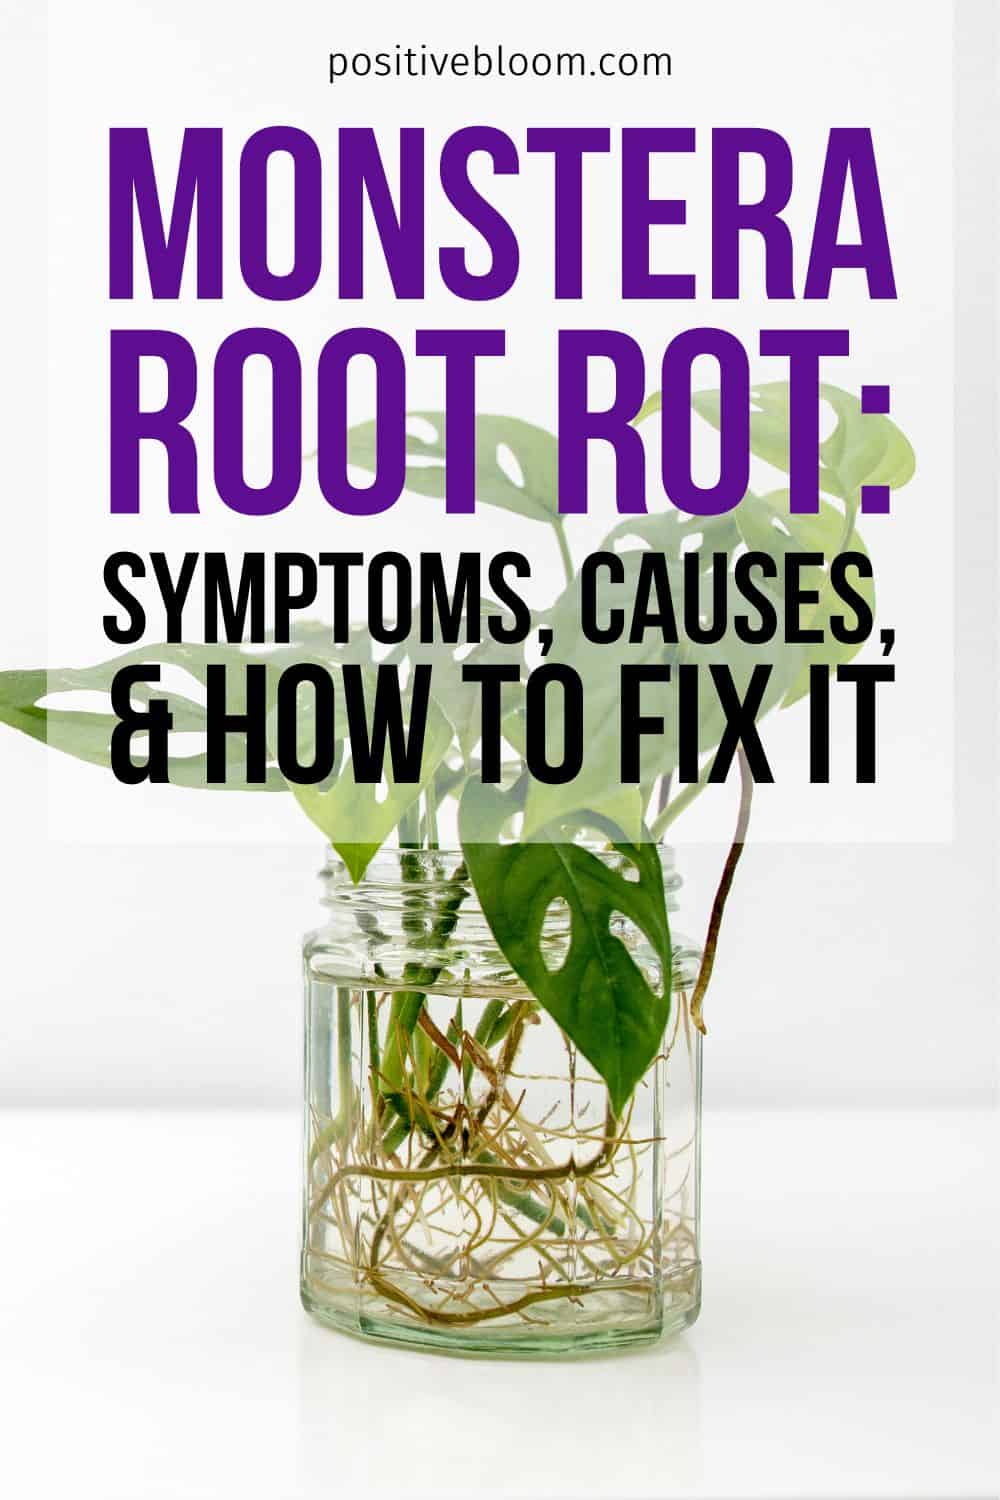
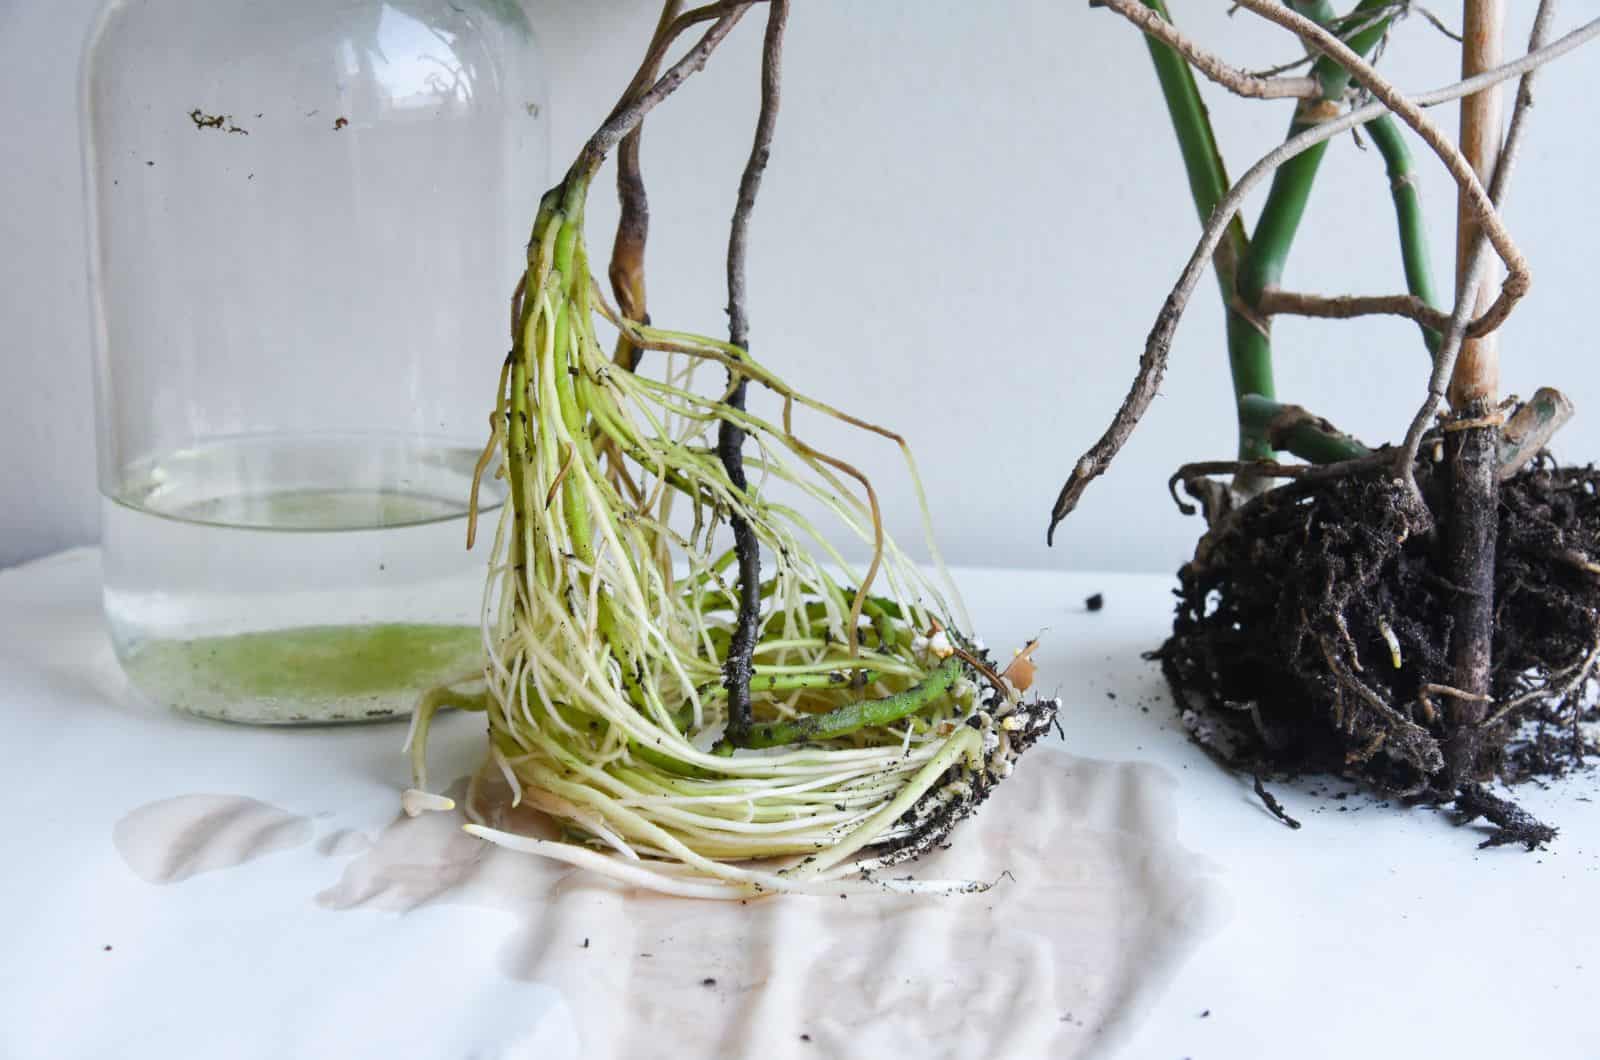
Propagation
If you can find a healthy part of plant stem that has a node, then you can propagate it. Remember that you can’t propagate a Monstera if it doesn’t have a node.
One of the easiest and best ways to propagate your Monstera is by stem cuttings in water.
Use sanitized pruning shears to cut the stem with the node and place the cut end in a jar of water.
Make sure the water is always fresh by changing it every two to three days. When you notice new growth of the roots, it’s time to plant them in the soil.
Even though you couldn’t recover your Monstera, I’m sure you’ll feel great when you see your thriving and healthy new Monstera plant!
Can A Monstera Recover From Root Rot?
Whether or not a Monstera can recover from root rot depends on several factors.
The first and most important is the severity of the infection and what parts of the plant are infected.
Of course, the earlier you detect the issue, the bigger the chances of recovery. For example, if only two or three roots have been infected and the plant still looks healthy without displaying significant changes, it should recover soon.
You’ll still need to remove the diseased roots, but your Monstera should get back on track. The essential thing is to change your watering habits because the wrong watering schedule easily leads to root rot.
After you repot the plant, new growth should occur pretty soon, however, if a couple of weeks pass and nothing is going on, your plant likely still has root issues.
In this case, I recommend propagating it because removing it from the pot again will stress it too much.
What Is The Best Way To Prevent Root Rot For A Monstera?
Indoor plants can’t live independently. We are responsible for them and we should try our best to help them grow healthy and be happy.
I always say that preventing diseases is the best way to cure them. Yes, it sounds like a cliche, but it works.
In order to prevent root rot, you’ll need to promote drainage and aeration, change your watering habits, and inspect your plant regularly.
Let’s see some care tips for Monstera plants!
Ensure Good Drainage
The soil must drain well, and you’ll need to do anything you can to achieve good drainage.
Purchase a new pot for your Monstera that’s large enough to fit your plant, but not too large. This is because too much soil around the roots may cause them to rot.
The pot must also have drainage holes. When searching for pots on Amazon, you’ll notice that the majority of them don’t have drainage holes, at least the prettiest ones.
I know that you don’t want to put such a fascinating plant in an ugly pot, so you can purchase the pretty one and then put the plastic one with drainage holes inside it.
Ensure Good Aeration
Poor drainage often comes with poor aeration, so you’ll need to add materials that promote air circulation.
There should be enough air pockets in the soil for the Monstera roots to breathe in the oxygen they need. Water should also flow through these air pockets so the soil doesn’t get compact and susceptible to overwatering.
The best materials for air circulation are perlite and sand. These materials are available in all plant stores and are suitable for different soil mixes.
Change Your Watering Habits
We’ve seen that most problems with these plants are caused by inadequate watering.
Therefore, you need to create a perfect watering schedule that isn’t based on guesswork. The key to a good watering schedule is checking the soil regularly.
When To Water Monsteras
There are times when your deliciosa needs more or less water.
First, let’s start with the season.
Remember what I told you about dormancy? Well, winter affects watering frequency because the water needs more time to evaporate.
On the other hand, warm temperatures during summer cause the water to evaporate quickly, so your plant will be thirstier than usual.
Another factor is light – the lower the light, the less water your plant needs.
Humidity levels also affect watering frequency. If it’s lower, you should water more often.
The part of the day ideal for watering these plants is early in the morning. This will give the plant enough moisture during the warmest parts of the day.
How To Check If A Monstera Needs Water
There are numerous ways you can check moisture content.
The easiest way is by putting your finger in the soil. If the soil is wet to touch, you should delay watering and check again the next day. I know that this method doesn’t sound reliable, but trust me, it will be your go to once you become more experienced.
Another way is looking at the soil; yes, you read it right! The color of the topsoil can tell you if your Monstera needs a drink. If the soil is dark, don’t water it and check again the next day.
Many gardeners also lift the pot to determine whether the plant needs water. You can only use this method for young Monsteras. It would be impossible to lift a mature Monstera deliciosa or Philodendron gigas!
The last and most reliable method of checking soil moisture content is by using a moisture meter. You can buy one online or at your local nursery. They’re accurate and affordable.
What Is The Best Way To Water A Monstera?
These plants respond well to both bottom and top watering techniques. If it’s easier for you to water your plants from the top, the top watering method will do fine.
This method is also more suitable for adult plants because you can’t lift a Swiss cheese plant, and even if you could it wouldn’t fit in the sink!
So, take a watering can and start adding water to the soil. You’ll know you’re done when you see water pouring out of the drainage holes. Please don’t water the leaves because they don’t respond well to excess moisture on their surface. You’ll end up with leaf rot this way.
If your plant is still young, you can use the bottom watering technique. This technique is better for beginner growers as it helps you avoid overwatering.
You need to fill half the sink with water and put your plant into it. Allow the roots to absorb moisture for about 15 minutes, then take your plant out.
Inspect Your Monstera Regularly
Plants can be real drama queens sometimes! Believe it or not, they love attention – and the more you care about them, the happier they’ll be!
We’ve discussed everything about watering, but that’s not the only issue with these plants, although it is the most common.
Remember that indoor plants often get inhabited by tiny creatures, commonly known as pests. Always check the leaves from time to time to look for pests.
Don’t forget to check the undersides of the leaves, as these little nuisances love hiding there!
Wrapping Up
No matter if you’re a beginner or an experienced grower, the very thought of Monstera root rot must freak you out!
If your Monstera displays stunted growth, wilting yellow leaves, mushy soil, or discolored roots, it may be suffering from root rot.
The most common reason for this disease is overwatering. However, your plant may also be dealing with a fungal infection, underwatering, or overfertilization.
If you notice any of the signs above and determine the cause of root rot, you can help your Monstera recover using the methods in this article.
Good luck and until next time!
Like this post? Share or pin it for later!