Peace Lily Leaves Turning Black: Reasons & Solutions
The peace lily plant was one of my first plants, and I thought I had a type of lily. However, I was actually wrong because this isn’t a real lily; it belongs to a different family and genus.
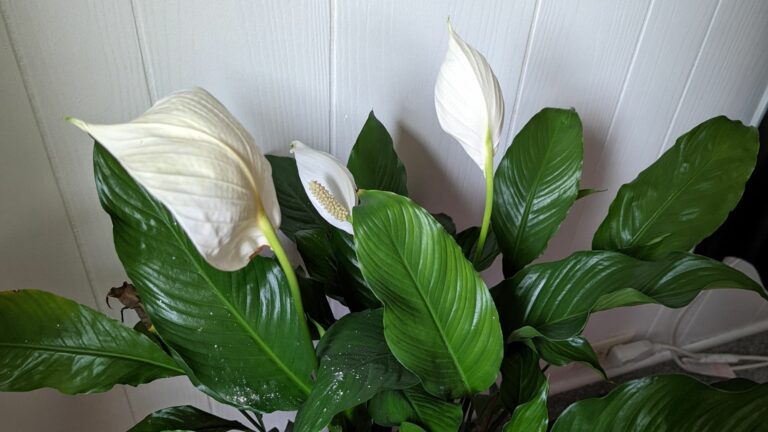
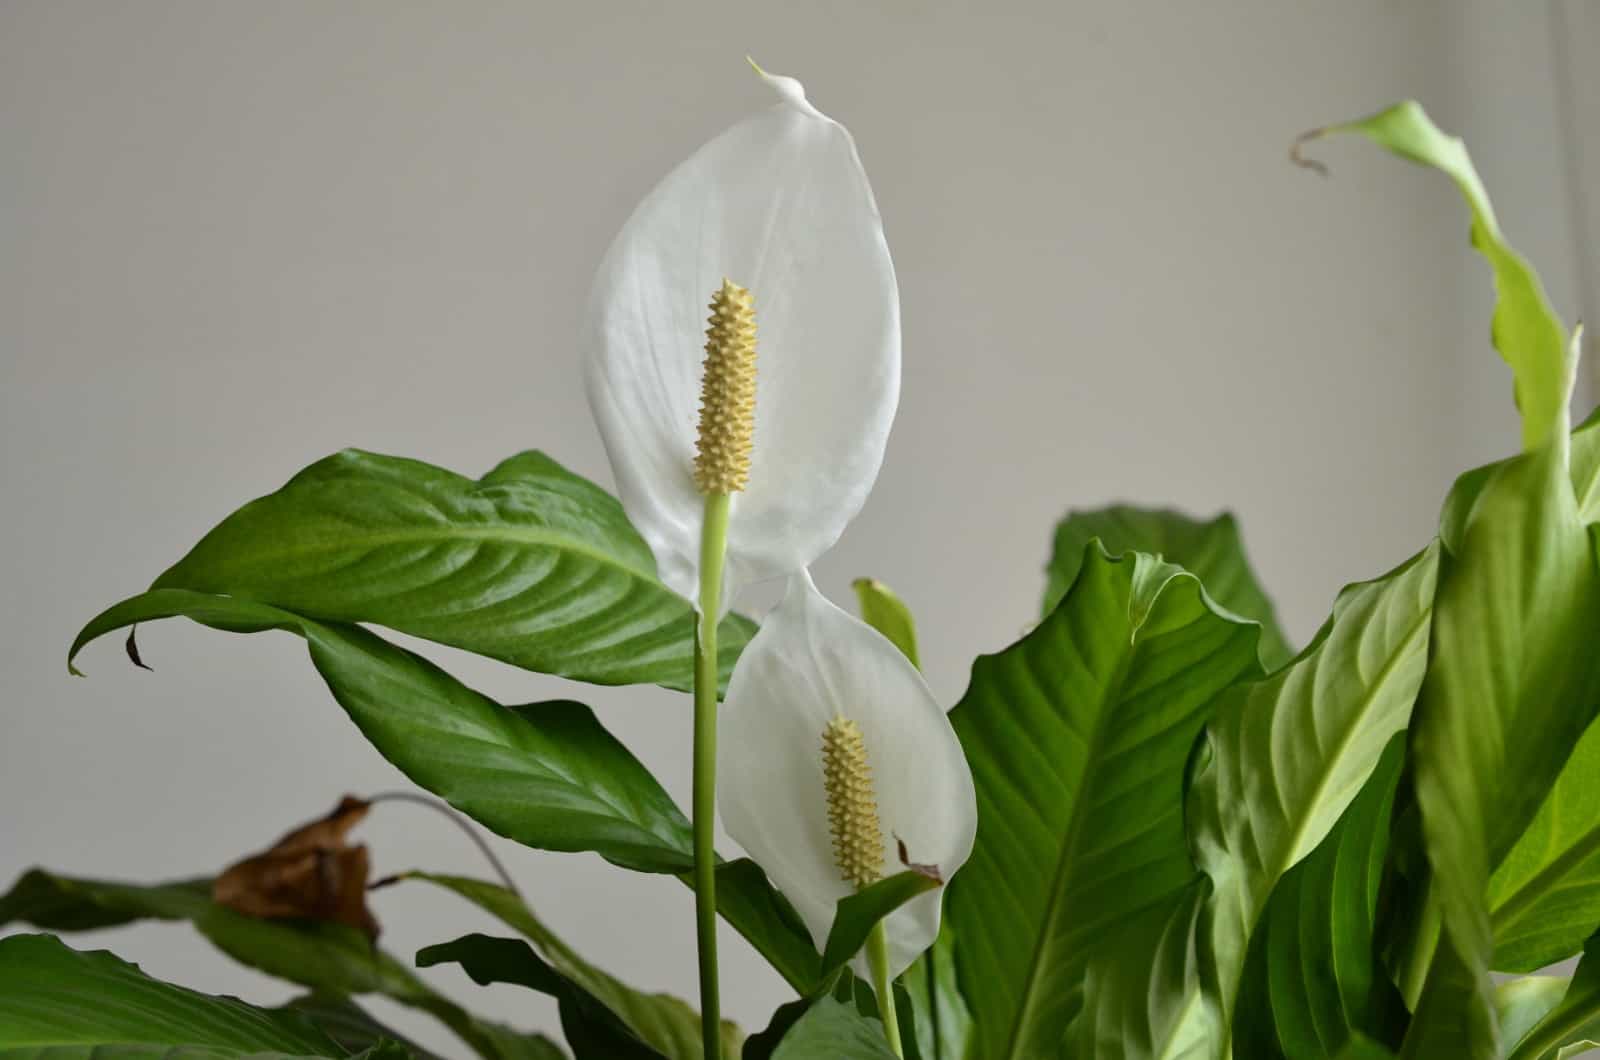
Scientifically known as Spathiphyllum, the peace lily is a popular houseplant and shouldn’t face many issues if given the right conditions.
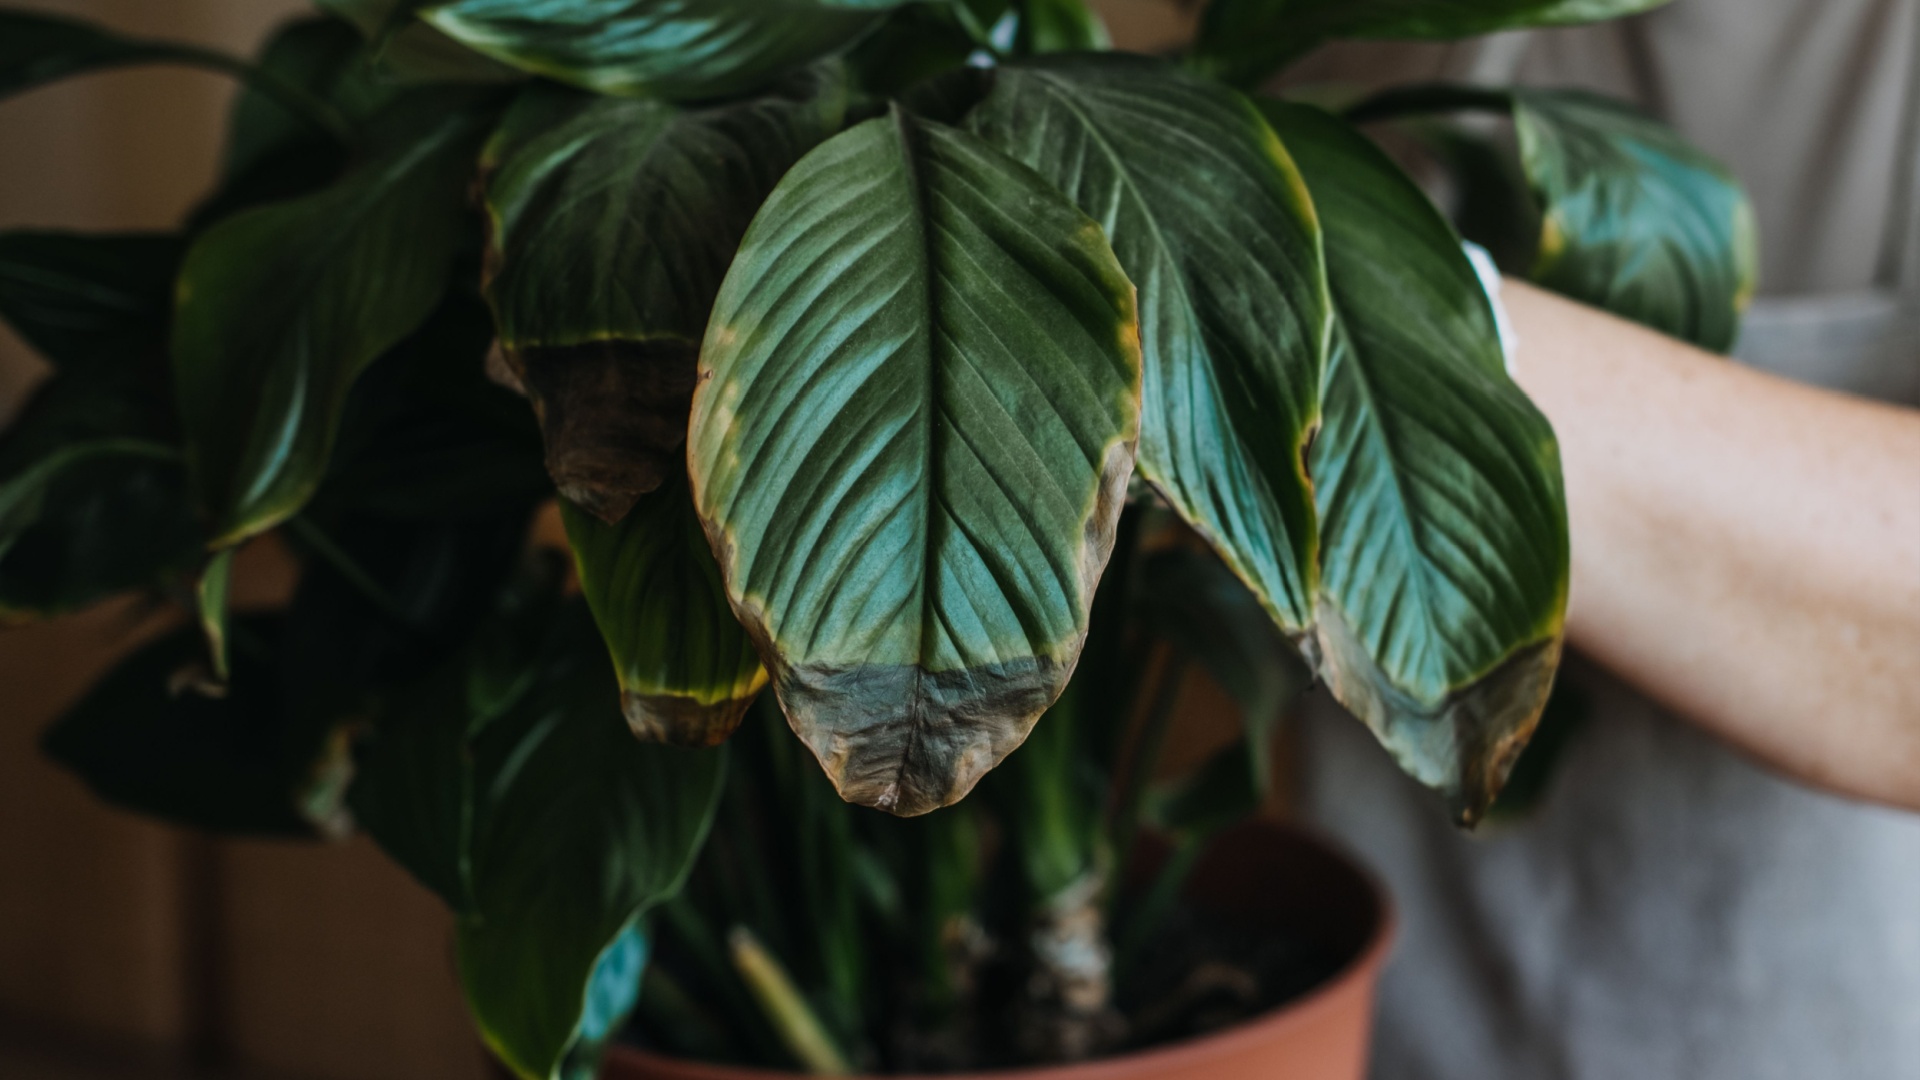
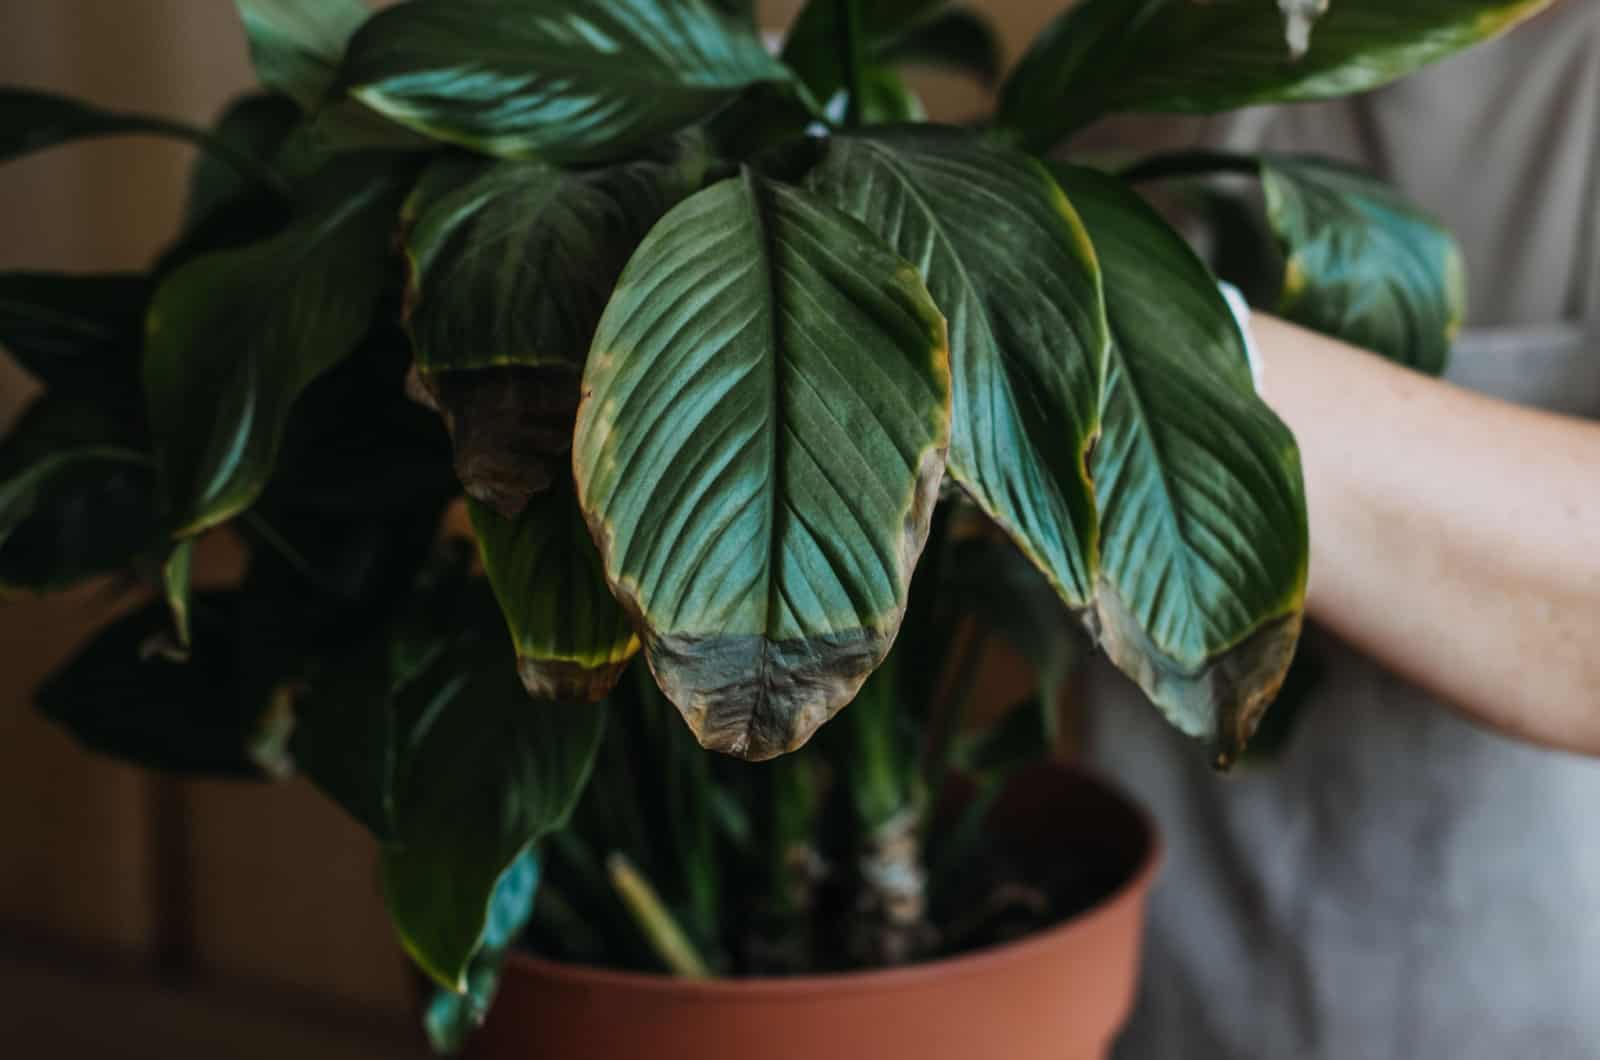
However, a common problem is the peace lily leaves turning black. Although it may sound scary, and the plant may have a dying appearance, if you discover the cause and start fixing the problem ASAP your plant should be OK.
I wrote this article to help you determine the cause of your peace lily’s black leaves and how to solve the issue.
The best idea would be to prevent the leaves from blackening in the first place, so we’ll also discuss that.
Let’s get started!
Peace Lily Leaves Turning Black: Reasons
The essential aspects of plant care are watering, light, humidity, temperature, feeding, and soil type.
The tricky thing is that any of the conditions above may cause blackening if they aren’t appropriate.
If your peace lily leaves are turning black, it may be due to overwatering, underwatering, water quality, fungal infection, root rot, overfertilization, temperature shock, humidity, low light, and/or pest infestation.
Even though it sounds almost impossible to discover the reason, you’ll find a detailed description in this article, so you’ll be able to successfully discover and deal with the issues.
Let’s get started!
Overwatering
Too much water in the soil causes the majority of plant problems as most houseplants are susceptible to overwatering.
The peace lily isn’t an exception. It’s originally from tropical regions, so many assume it has high watering needs. That’s partially true, but there is a big difference between more water and too much water.
If water accumulates around peace lily roots, they are likely to suffocate. The roots are the source of nutrients and water for the peace lily, so if they are suffocated they can’t send anything to the leaves, flowers, or stem.
You can probably guess what happens next – the leaves turn black!
Read on to find out more about the overwatered peace lily.
Underwatering
Too much water is dangerous and may have fatal consequences for the peace lily, but underwatering is no picnic either.
The roots need water to send to other parts of the plant, and if the soil lacks water, the roots will also lack water. As a result, the roots will stop sending water to the other parts of the plant.
The leaves will then turn black as a result.
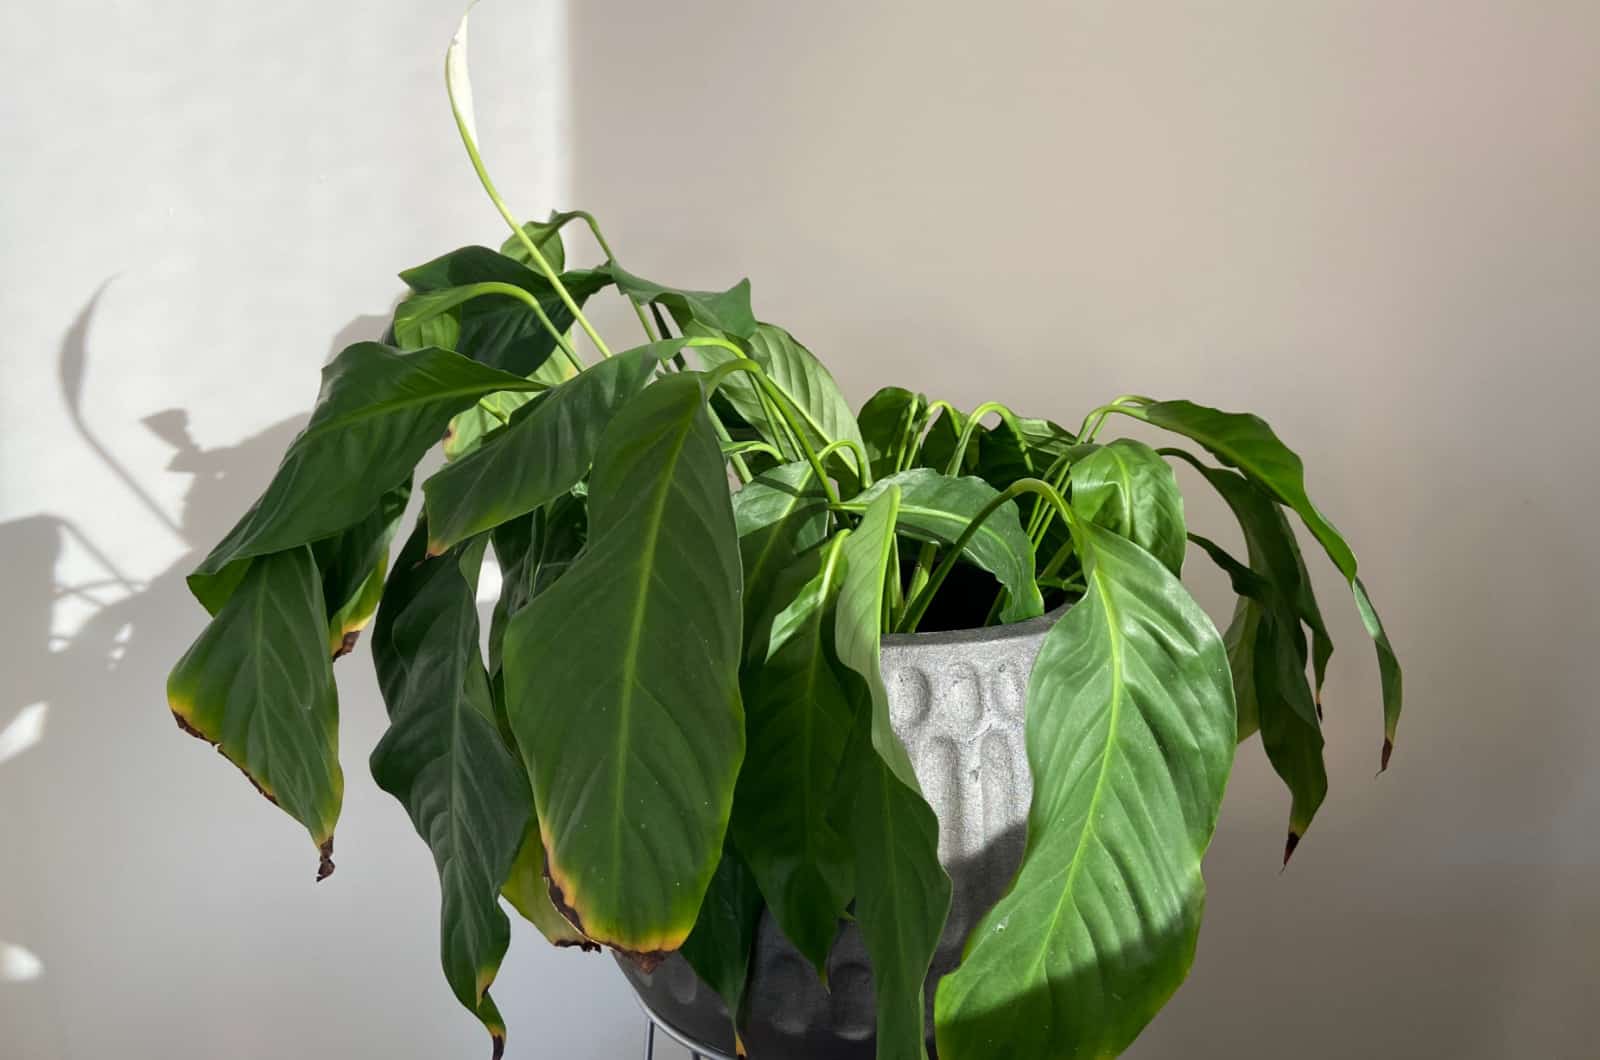
Underwatering is also one of the most common reasons for a peace lily drooping.
Let’s now find out how to differentiate between an overwatered and underwatered peace lily.
Overwatered vs Underwatered Peace Lily
It may sometimes be difficult to tell which water issue caused the blackening of the leaves, but there are some signs that can help you decide.
You should first take a look at the soil surface, and if your peace lily has too much water the soil will be mushy due to water accumulation below the soil line. The soil will also be dark brown and smell pretty bad.
On the other hand, if your peace lily is dehydrated, the soil will be light brown and crumbly.
If you touch your peace lily leaves, they’ll be soft, which is not the case when the leaves lack water. If the leaves are crispy and wilting, you are dealing with a dehydrated Spathiphyllum.
Another telltale sign of an overwatered peace lily is yellow leaves, though underwatering may also cause yellowing. You’ll know your peace lily has had too much water if the lower leaves turn black first.
In both cases, your peace lily will display poor growth and may die if you don’t do something about it.
Water Quality
You shouldn’t use tap water to water your plants as it may contain harmful substances.
Chemicals such as fluoride, chlorine, and other impurities are frequently present in tap water, and they may affect your peace lily.
We refer to it as salt buildup, and it’s dangerous because these salts take water from the soil. Consequently, there isn’t any water left for the roots, so they die.
Another issue is a deficiency of other vital minerals for optimal peace lily growth. When sodium or chlorine ions dissolve, they supersede other vital elements found in peace lily soil.
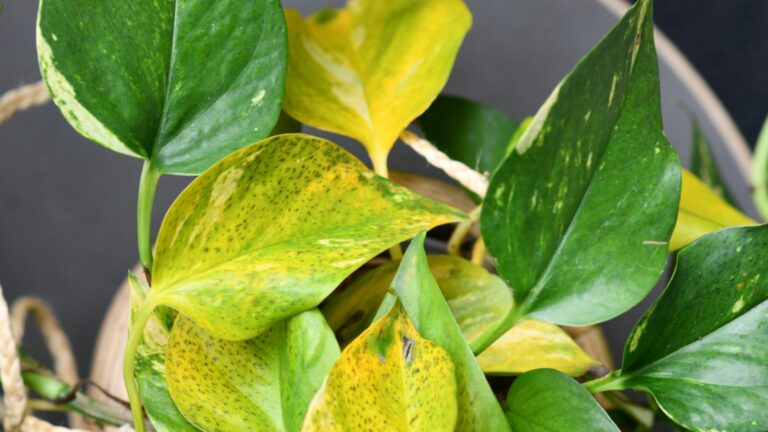
If your peace lily lacks magnesium or potassium, it’ll display leaf discoloration. Yellow leaves or black spots are the most common signs of poor water quality.
Fungal Infection
A fungal infection is very dangerous for your plants! When it comes to the blackening of peace lily leaves, it can actually be caused by fungal infections more often than water issues.
How do fungal infections occur? Fungi will thrive if the peace lily soil is too wet for too long, though overwatering isn’t the only cause of water accumulation.
Water won’t evaporate if the humidity or temperatures are too low.
There are a few fungi that cause black spots on peace lily leaves, and we’ll discuss the most common ones below.
1. Cercospora Leaf Spots. This fungal disease is characterized by yellow spots surrounded by dark edges.
2. Phyllosticta. Fungi from the genus Phyllosticta cause the leaves to develop dark edges.
3. Rhizoctonia. The fungus that causes brown/black spots on the leaves; it’s soilborne and quickly spreads to other plants.
Root Rot
All indoor plants, especially those originally from tropical rainforests, are sensitive to root rot.
This disease is, in most cases, the consequence of poor watering habits and overwatering.
The fungus responsible for this disease is Cylindrocladium, a pathogen already present in the soil that activates if the plant receives too much water or food.
The problem arises when we don’t inspect the roots as soon as we spot the first symptoms of root rot, such as yellow leaves or mushy soil.
The only way to determine if your peace lily has root rot is by taking it out of its pot. As the disease progresses, yellow leaves will start blackening and the plant will start wilting.
Overfertilization
Excess fertilizer, especially nitrogen, makes the peace lily soil more acidic, which leads to a chemical imbalance and prevents the delicate roots from absorbing the minerals they need.
Too much fertilizer burns the roots, which causes the leaf tips and edges to turn black and progressively spread across the entire leaf surface. The earliest symptoms of overfeeding appear on the leaves of the peace lily.
Additionally, excessive fertilizer causes the soil to become salty, which dries out the peace lily plant by absorbing water. Under such circumstances, the plant finds it challenging to absorb vital nutrients like magnesium, potassium, and manganese.
The lack of nutrients causes the peace lily to develop leaf necrosis, which manifests in the blackening of specific sections of the leaves. The leaves typically appear burned and your peace lily will start wilting.
Your peace lily might die if you don’t intervene, so you should take this issue very seriously and act immediately if you notice these symptoms.
Temperature Shock
Peace lilies are tropical plants, which means they aren’t used to cold temperatures. If the temperature is too low, the roots won’t be able to perform their primary function and the water evaporation rate will decrease.
In other words, the peace lily’s metabolism is disrupted and it may start wilting.
Once you warm things up, i.e., increase the temperature, your peace lily will develop black spots as a result of temperature shock, so make sure to do so gradually.
Humidity Issues
The growers of tropical plants often face humidity issues. Humidity is much higher in tropical rainforests than in regular households, so it’s expected that plants can’t adapt to such conditions.
Dry air will increase the water evaporation rate, so the peace lily will absorb moisture faster and eventually display blackening.
Avoid placing your Spathiphyllum plant near devices that dry out the air, such as heaters and air conditioners.
The peace lily flowers will also turn black if the air is too dry. If you don’t intervene, your peace lily will display shriveling due to dehydration.
Too Much Or Not Enough Light
When I think of tropical plants, the first thing that comes to my mind is the sun! When I first started growing plants, I thought tropical plants required a lot of direct sunlight.
Well, I was very wrong! In its natural habitat, the peace lily is protected from intense sun rays by the dense foliage of taller plants. Consequently, it prefers partial shade when grown indoors.
If you expose your peace lily to direct sunlight, it will get sunburned. The water evaporation rate will also increase, resulting in the blackening of leaves.
Be careful with the light level too, because although the peace lily doesn’t like too much sun, it can’t tolerate low light levels either.
The green leaves need light to maintain their color, so when they don’t receive enough light, they’ll start yellowing and eventually turn black.
Pest Infestation
Indoor plants aren’t resistant to pests because the infestation quickly spreads from plant to plant. If pests infest one of your houseplants, you risk all your other plants also becoming infested.
You may frequently encounter pests such as spider mites, mealybugs, and scales. Some insects, like spider mites, prefer dry conditions, whereas mealybugs thrive in wet conditions.
These naughty little fellows will settle on peace lily plant leaves and use them as a source of food, which means they’ll form colonies in no time.
They’ll suck out all the nutrients from your peace lily, and the plant will respond by displaying blackening. Severe cases of infestation may have fatal consequences, so deal with them as quickly as possible!
Peace Lily Leaves Turning Black: Solutions
If your plant has an issue you should try to find a solution as soon as possible, and it’s essential to find out the cause because you don’t want to fertilize an overfertilized plant, for example.
Once you have closely inspected your peace lily and determined the cause of the blackening, take a look at the solutions below to learn how to revive your plant. If your peace lily isn’t severely affected, it will be back on track pretty soon!
In extreme cases your plant can’t be saved, so you’ll need to dispose of it.
Let’s go through everything you can do for your peace lily to help bring it back to its old glory.
Solution To Watering Issues
Let’s first discuss how to deal with an underwatered peace lily. Your precious plant will need several good soaks!
You might think that frequent watering at this stage may lead to another more serious issue, but don’t worry; remember that your plant is dehydrated, so the chances to overwater it are pretty low at this point.
Give your peace lily a good soak, and keep doing so until the soil is wet enough and the plant no longer has a wilting appearance.
I recommend removing any severely damaged leaves so that they don’t take food and water from the healthy ones. Please don’t forget to sterilize your knives/shears/scissors before cutting.
If you are dealing with an overwatered peace lily, you’ll need to decrease watering frequency until all excess water evaporates from the soil.
If you want to speed things up, i.e., help the peace lily dry out faster, I highly recommend you don’t! Increasing temperatures or putting your peace lily in direct sunlight to dry faster is the worst thing you can do at this point.
Let the soil drain naturally, and regularly check the soil moisture content. Once your peace lily is healthy, you’ll need to change your watering habits. Keep reading to find out how to check the soil moisture and learn the perfect watering schedule and technique for your peace lily!
Solution To Poor Water Quality
We mentioned that tap water isn’t the best choice for your peace lily. You’ll need to ensure the best water type for plants, which means imitating its natural surroundings.
Tropical plants get rainwater in their natural habitat, so the best idea would be to prepare buckets or similar containers to collect rainwater. I use this type of water for all my plants.
The alternative to rainwater is distilled water. You can also install water filters that will remove harmful substances from tap water.
If you can’t use any of the alternatives to tap water, I recommend leaving tap water out overnight. Although not all the harmful chemicals will evaporate, the concentration will decrease and make tap water safer for use.
Solution To Fungal Infections
If you determine that your peace lily is turning black due to a fungal infection, you have two options to choose from.
You can either use baking soda or purchase fungicides. I have to mention that the first option is less harmful as it has anti-fungal properties but doesn’t contain chemicals.
If you decide to use baking soda, just add one tsp to a liter of water and fill a spray bottle with the solution.
Remember that you should spray each infected section thoroughly, and repeat the procedure until you get rid of the infection.
If you go with fungicide, you need to know the exact type of fungus that caused the blackening or the solution won’t work.
Please follow the instructions and don’t add more fungicide than suggested on the packaging.
Most fungicides should be applied only once, so again, please pay attention to dosage and frequency unless you want to kill your peace lily instead of saving it.
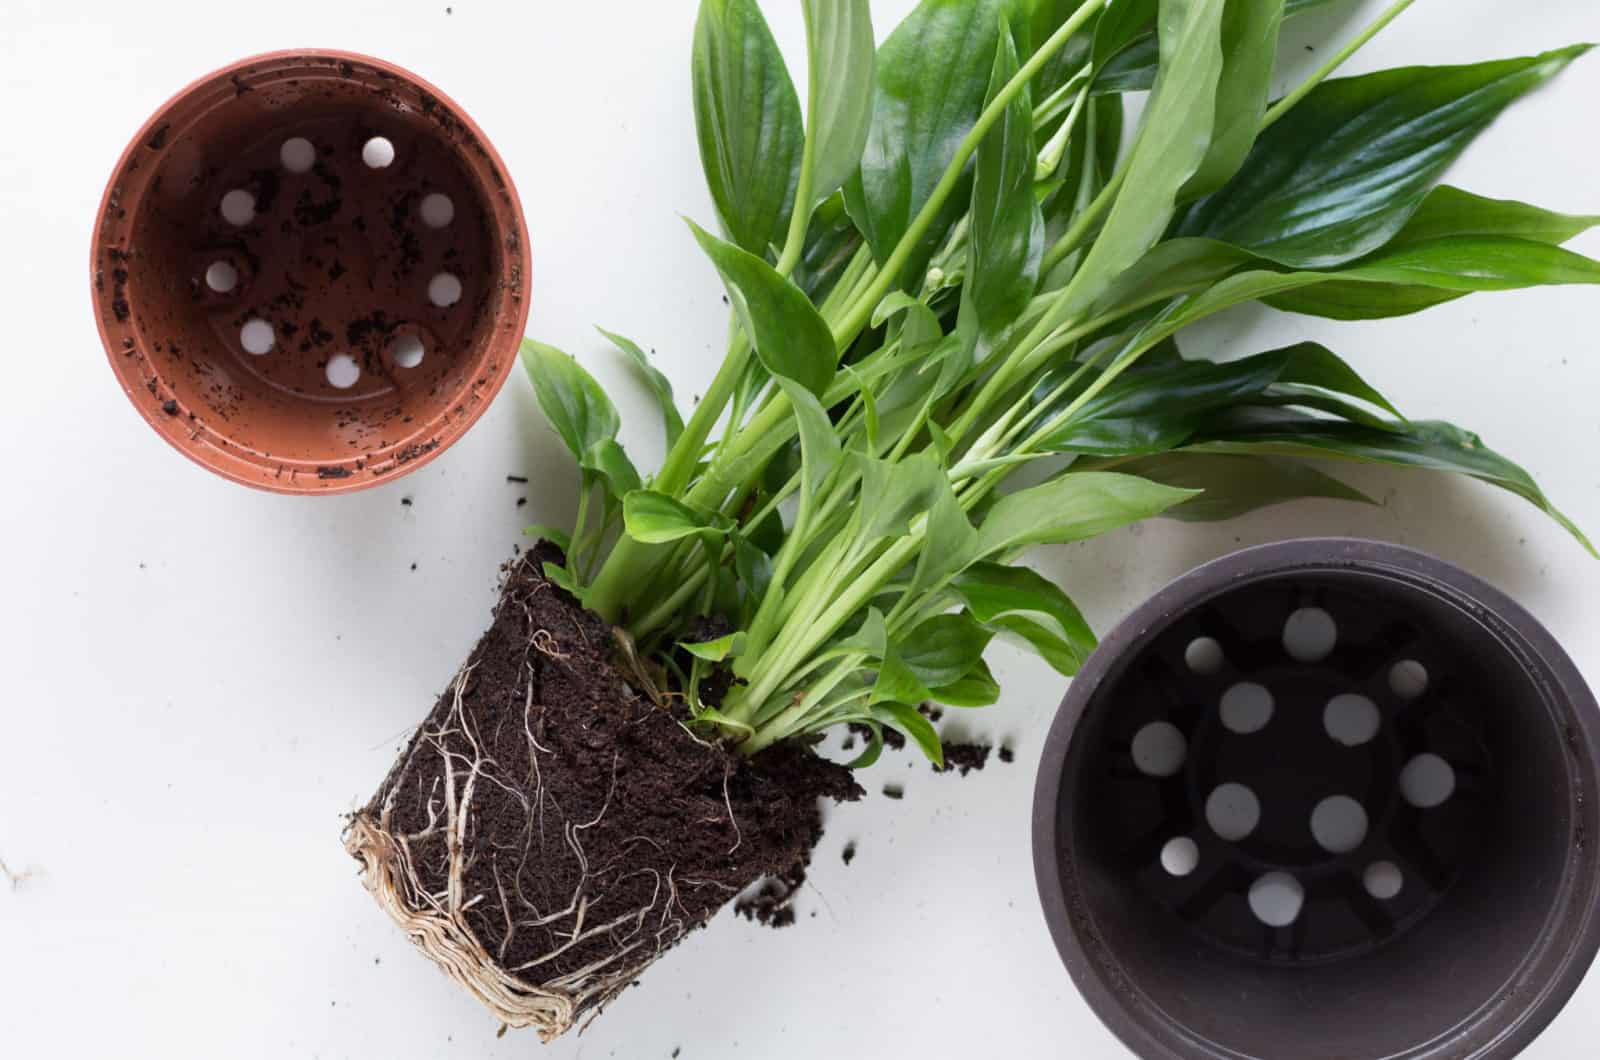
Solution To Root Rot
Is your peace lily turning black due to root rot? If so, the best idea would be to repot it.
Here is a step-by-step guide on how to repot your Spathiphyllum plant:
1. Gently remove your peace lily from the pot by holding its stem.
2. Wash away the soil around the peace lily roots.
3. Remove any leaves and damaged branches that have any visible symptoms of the disease.
4. Sterilize the cutting tools with bleach or rubbing alcohol, and cut away all the infected roots.
5. Apply fungicide to the healthy root system or dip it in hydrogen peroxide.
6. Prepare a new pot for your peace lily and ensure the pot has drainage holes in the bottom.
7. Fill 1/3 of the new peace lily pot with an appropriate potting mix, place the plant in it, and then add the remaining soil mix.
8. Place your repotted Spathiphyllum in indirect light.
Solution To Overfertilization
If you are dealing with an overfertilized peace lily, you’ll need to get rid of the excess nutrients from the soil.
The easiest way to do so is by washing the salts away using distilled water and ensuring proper drainage.
Consider using alkaline water to raise the pH level.
Solution To Temperature Shock
Start by moving your peace lily to a warmer location. Pruning off dead leaves should be delayed.
This is because you risk even further damage if you cut the leaves right away.
If your peace lily suffered from a cold injury during winter, I highly recommend removing any diseased leaves in the early spring so that a callus can develop where the injury occurred.
I recommend keeping the temperatures between 68 and 85 degrees Fahrenheit, and never letting them drop below 60 degrees.
Solution To Humidity Issues
Many growers struggle with low humidity because tropical plants require much higher levels than those in most households.
Luckily, there are some great ways to increase humidity so your peace lily can grow healthy.
Here are 4 ways you can increase humidity in your home:
1. Misting: A great method for maintaining the right humidity levels for tropical plants is by misting them. You’ll need clean water and a spray bottle. Spray the leaves frequently, but let them dry well after misting.
This method doesn’t last long, so if you decide to use it you’ll need to do so a few times a day.
2. Microclimate: Don’t worry, this method isn’t as complicated as it sounds! It refers to grouping your houseplants. Place all your plants near each other to raise humidity.
3. The pebble-tray method: Do pebble trays really work for humidity? Well, the humidity won’t increase significantly, but if combined with other methods the pebble tray works just fine.
4. A humidifier: If you are looking for a 100% efficient way of raising humidity, I recommend buying a humidifier. These devices are available on Amazon, and some can even monitor humidity levels. I think this is a great investment for your plants.
Solution To Low Light
The peace lily can’t withstand too much light, but won’t tolerate low light either. Where to place it, then?
The best thing you can do for your peace lily is place it in indirect sunlight. You’ll need to choose a sunny spot where the strong sun rays can’t reach the peace lily leaves.
A west or east-facing window will give your peace lily enough bright indirect light. Your plant will also receive some morning sun, which isn’t strong enough to damage the leaves.
If you decide to place your peace lily near a south-facing window, you can protect the leaves from the intense sun with sheer curtains (also available on Amazon).
Although a north-facing window doesn’t receive enough light you can place your peace lily near it, but you should use grow lights to compensate.
Solution To Pests
You can control pests during flowering with a couple of great methods. First, you should try removing the pests by spraying them off your peace lily.
Even though all the pests won’t go away, it will reduce the number so it’s easier to get rid of them later.
You can use insecticidal soaps diluted in water by spraying them over your peace lily. Repeat the procedure until you destroy them all.
I mostly use neem oil as it has proven effective against most pests. However, be careful with dosage and concentration to prevent neem oil from burning leaves.
How To Keep Peace Lily Leaves From Turning Black
It’s always better to prevent peace lily leaves from turning black in the first place. I’ll show you a couple of ways to avoid blackening of the leaves, as well as many other issues related to inadequate care.
Change Watering Habits
Improper watering causes most peace lily issues, so you need to know when and how to water your plant.
There’s no exact time or day of the week that you should water your peace lily, and you’ll need to consider many things before you water your plant.
Never water your peace lily if you haven’t checked the soil moisture content first, because if the temperature or humidity is low the water will evaporate slower, so your peace lily will need less frequent watering.
The best idea would be to wait until the top inch of the topsoil is dry and then proceed with watering. This way, you’ll avoid overwatering and the soil will be moist all the time, which is exactly what your peace lily needs.
Please don’t spare water, and always give your peace lily a good soak until the water starts pouring out of the drainage holes.
Ensure Good Drainage
Drainage holes aid in drainage, but if you don’t have the right type of potting soil you also risk watering issues.
The best potting soil for the peace lily plant would be nice and fertile, so I recommend adding compost to the potting mix.
Additionally, it would be best if you used perlite, pumice, orchid bark, or similar materials to aid drainage.
Pay attention to pot size; your peace lily will be way easier to overwater if the roots have too much soil around them.
Regular Inspection
No matter what type of plant you grow, the key to healthy growth is regular inspection.
Observe the soil, leaves, stem, and flowers ,and if something isn’t right you can intervene to prevent the issue from spreading.
Brown leaves, black spots, yellow leaves, mushy soil, wilting, or drooping are signs that your plant has too much or not enough of something.
Regular inspection is also the best way to avoid pest infestation.
Wrapping Up
Knowing the possible causes of peace lily leaves turning black is essential. If you spot the issue on time and apply the right solution, your peace lily has a high chance of recovery.
The key to a healthy and happy peace lily is regular inspection. You’ll easily determine the watering needs or other requirements by observing your plant.
Always try to prevent the issues from occurring, as there’s nothing better than a healthy and thriving peace lily!
Until next time!
Like this post? Share or pin it for later!