12 Perennials You Should Divide This Fall (And How To Do It)
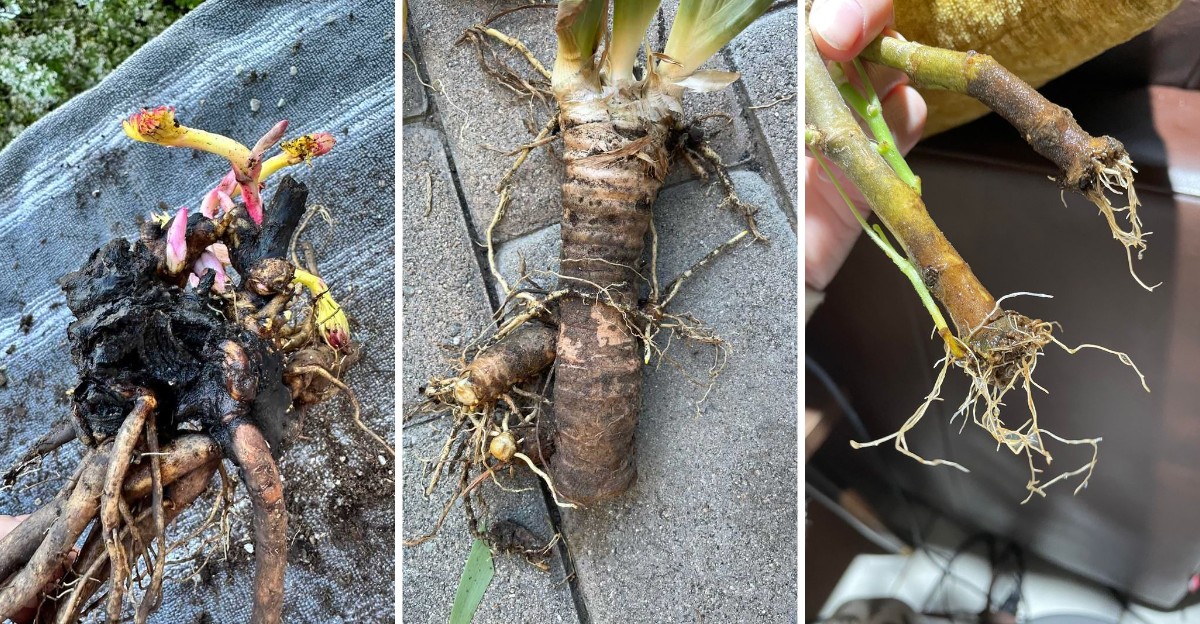
Your favorite perennial clump could be running out of room while you’re not watching. Crowded roots steal water and light until the section closest to your porch starts to sulk.
Beneath the soil, that tangle already wants a new home before you even notice. September opens a narrow window that lets you step in before the ground shuts down for winter.
Sharp tools and steady hands can turn that stubborn mess into several thriving starts for your beds. Handled the right way, that same tangle multiplies your garden without you buying another plant.
That kind of payoff rewards your patience more than any packet of seeds ever could. Somewhere close by, a patch of green in your yard already knows the trick you don’t.
1. Hosta Clumps That Beg For Breathing Room
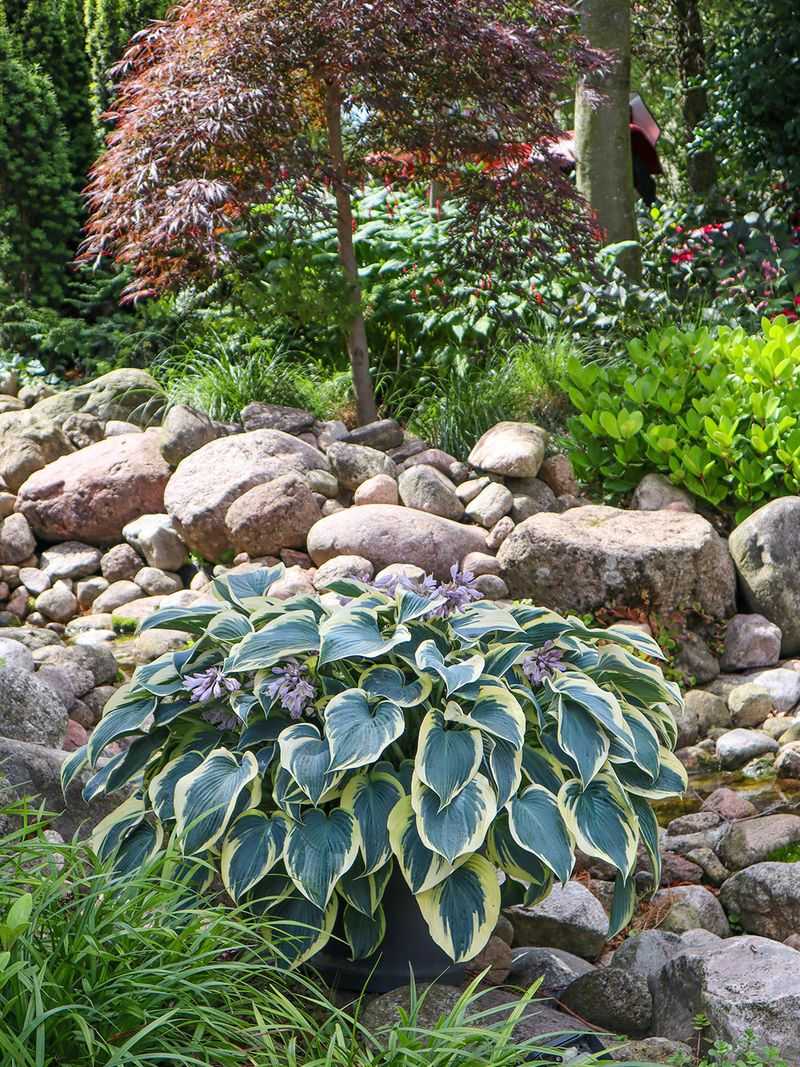
Last fall, my neighbor split one giant hosta into nine plants and gave them away like party favors. Hostas are some of the easiest perennials to divide, even for brand-new gardeners.
Early to mid-September works well, while the soil is still warm and roots can settle in. Aim to finish about four to six weeks before your first hard frost.
Water the plant well the day before, then dig a wide circle around the whole clump. Lift it out with a spade or garden fork, keeping as many roots as possible.
Hosta roots are tough, so a sharp knife or even a spade can slice them apart. Make sure each new piece has at least two or three leafy buds, called eyes.
Fun fact: in Japan, young hosta shoots are cooked and eaten like a spring vegetable called urui. Your slugs already knew they were tasty.
Replant the divisions at the same depth they grew before, and space them for their full size. Give them a deep drink and a thin layer of shredded leaves.
Some leaves may flop or yellow for a week, which is normal after surgery. By spring, you will have fresh, full clumps and maybe a few extras for friends.
2. Daylilies With Roots Like A Tangle Of Spaghetti
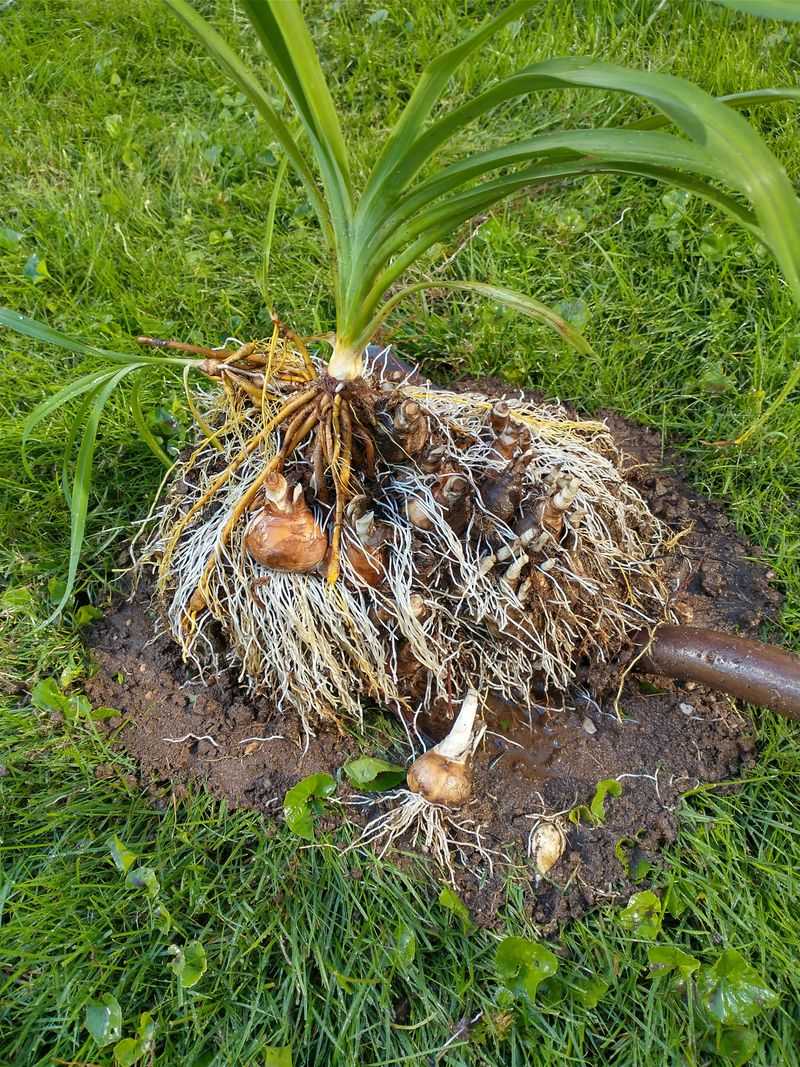
Pull up an old daylily clump and you will find a knot of chunky roots that looks like cold spaghetti. Crowded daylilies bloom less, so fall splitting brings the flower show back.
Most gardeners split them every three to five years, once the center looks thin. September is ideal because summer blooms are finished and the ground stays workable.
First, trim the leaves down to about six inches so you can see what you are doing. Then dig around the clump and pry it up with a sturdy garden fork.
Here is a neat trick: push two forks back to back into the middle and pull the handles apart. The clump pops open like a book without much cutting.
Each new section, called a fan, should have a few leaves and a healthy bunch of roots. Rinsing off the soil with a hose helps you spot the natural dividing lines.
Plant the fans so the crown, where roots meet leaves, sits just an inch below the soil. Water deeply and keep the soil moist until the ground freezes.
Daylilies are famous for being hard to hurt, so do not stress about a few snapped roots. Each flower lasts only one day, but a happy clump makes dozens.
3. Peonies Need A Gentle Hand And A Shallow Hole
My grandmother’s peony bloomed by her porch for forty years before anyone dared to move it. Peonies can live for decades, so they only need splitting when blooms fade or you want more.
Fall is the one season when peonies accept this kind of fuss. Wait until mid-September or later, when the leaves start turning yellow and bronze.
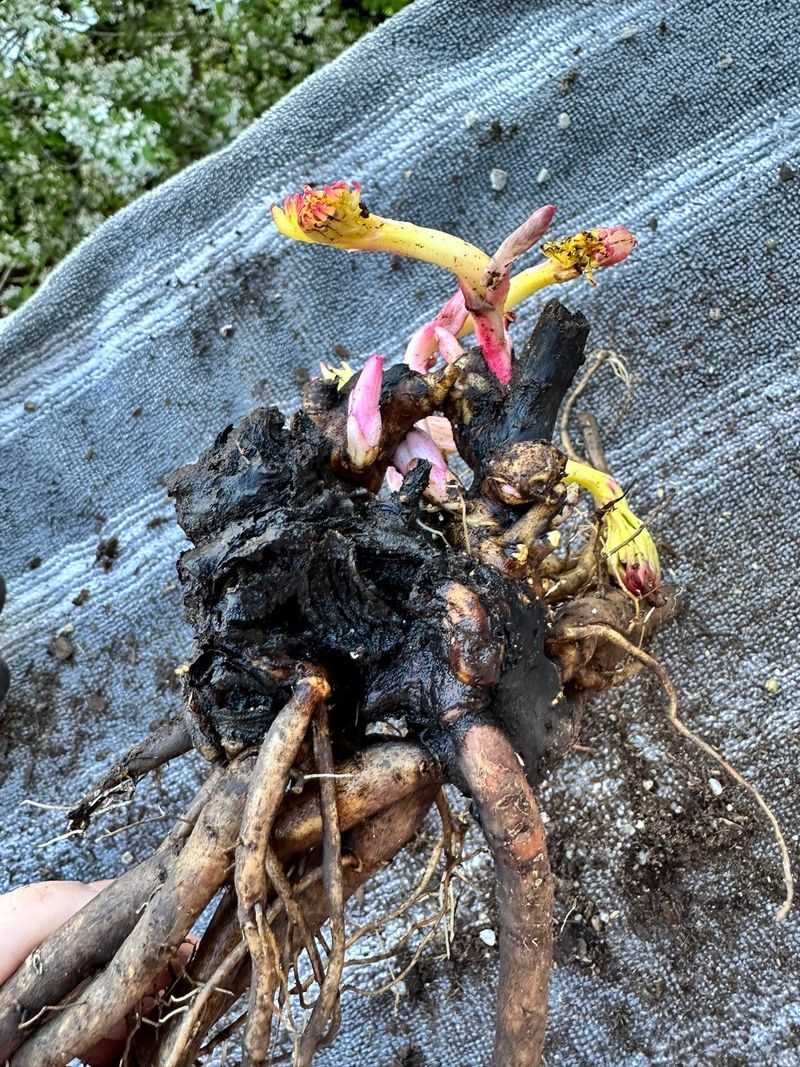
Cut the stems to the ground, then dig a wide circle about a foot from the crown. The roots are thick and brittle, like big carrots, so lift slowly.
Look closely and you will spot little pink or red buds called eyes near the top. Use a clean knife to cut sections with three to five eyes each.
Planting depth matters more with peonies than almost any other flower. Set the eyes no deeper than two inches, or the plant may grow leaves but skip blooming.
Pick a sunny spot with good drainage, since soggy soil can rot those fleshy roots. Water well after planting, then let autumn rain handle most of the work.
Be patient, because new divisions often take two or three years to bloom heavily. The wait feels long, but those first fat buds feel like a family reunion.
4. Bearded Iris Rhizomes That Crawl Right Out Of The Ground
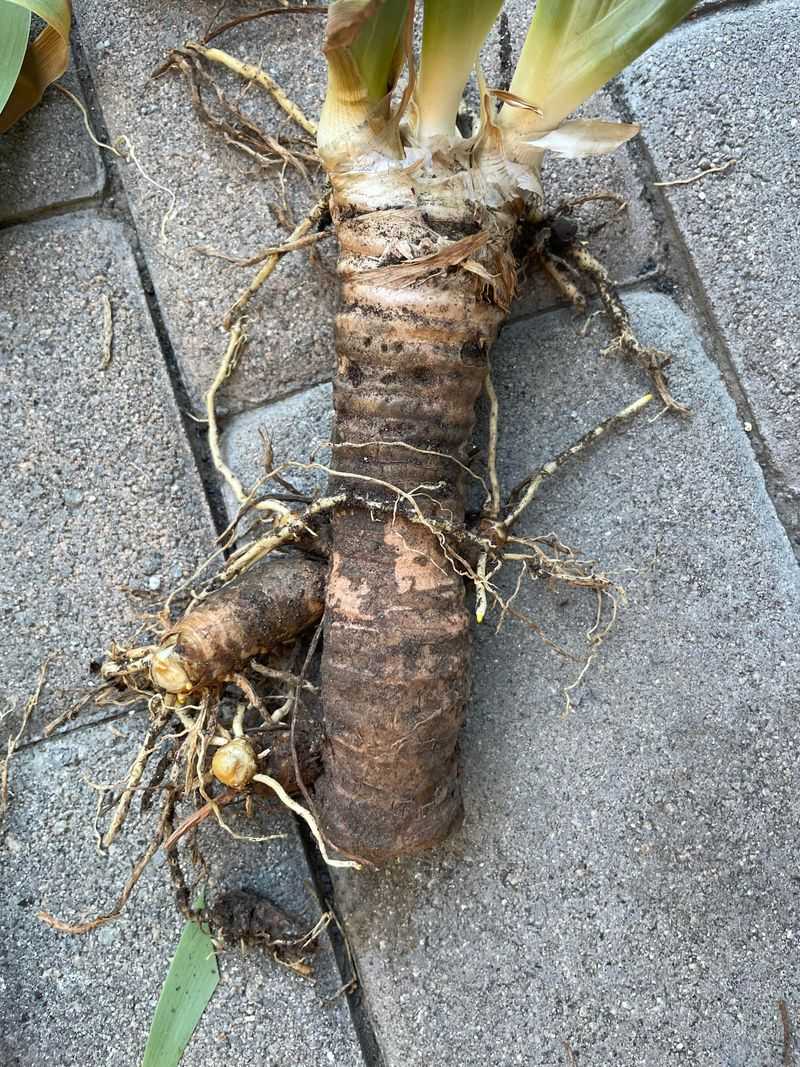
Bearded irises grow from fat, potato-like stems called rhizomes that creep sideways across the soil. After a few years, they pile on top of each other like kids in a bounce house.
Late summer is prime time, but early September still works in most regions. Just finish soon so the new pieces root before chilly weather arrives.
Dig up the whole clump and shake off the dirt so you can see each rhizome. The old center pieces are usually woody and leafless, so toss those.
Keep the healthy outer sections that have a fan of leaves attached. Check for soft, smelly spots or tiny holes, which can signal rot or iris borers.
Trim the leaves into a short fan about six inches tall, which helps roots settle without tipping over. Let cut pieces dry in the shade for a day before planting.
Here comes the weird part that surprises most beginners: do not bury them. Set each rhizome so its top peeks above the soil, like a sunbathing alligator.
Point the leaf fans in the same direction for a tidy, flowing look next spring. Water once to settle them, then hold back, because irises hate wet feet.
5. Hardy Geraniums For Easy Splitting In A Snap
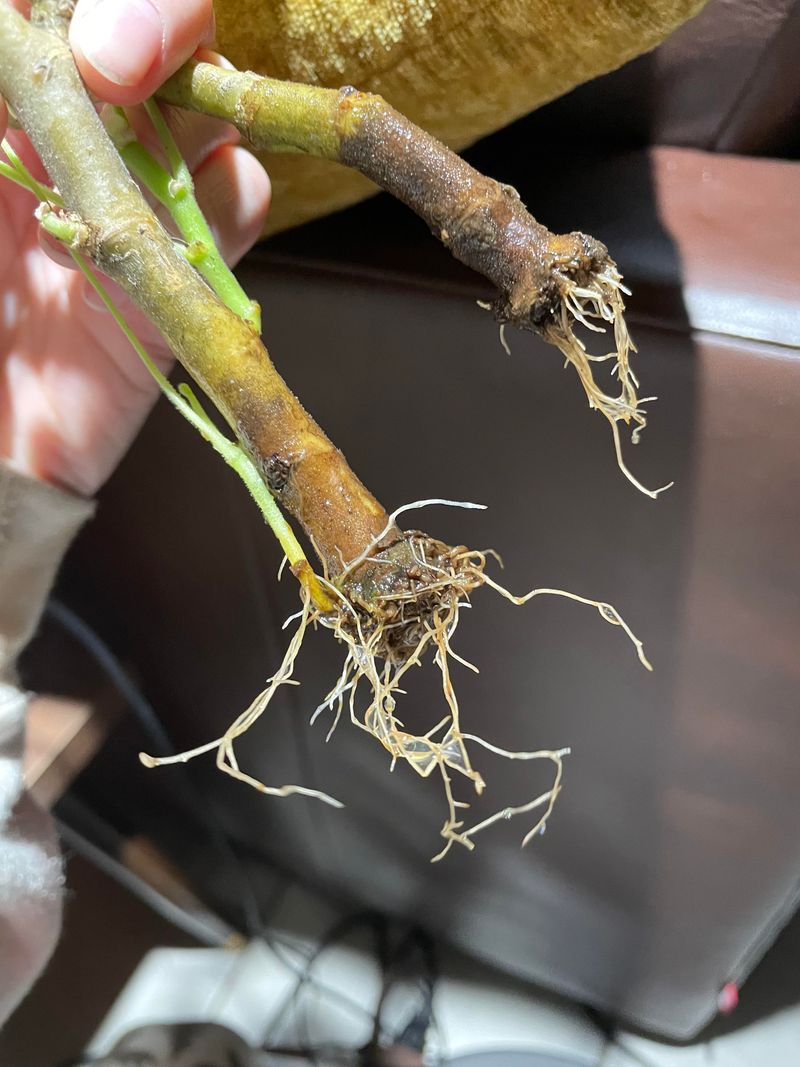
If you have ever wanted a no-drama plant to practice on, hardy geraniums are your new best friend. Also called cranesbill, they spread into wide mounds that eventually open up in the middle.
The name comes from their seed pods, which look like the long beak of a crane. Gardeners love them for months of blue, pink, or purple flowers.
Cut back any floppy stems first, leaving a neat clump about four inches tall. Then dig around the edges and lift the mound with a garden fork.
Many types split easily by hand, like tearing a loaf of bread. Tougher clumps may need a quick chop with a spade or an old serrated kitchen knife.
Toss the woody center and keep the young outer pieces, each with roots and a few shoots. Fist-sized chunks bounce back fastest and fill in by next summer.
Replant them about a foot apart in sun or part shade, at the same depth as before. Water well, and add a light layer of mulch to keep roots cozy.
Hardy geraniums make a lovely groundcover along paths or under roses. Split one plant this fall, and you could edge a whole flower bed next year.
6. Black-Eyed Susans Spreading Sunshine Across The Yard
Those golden petals with chocolate centers once covered wild prairies, feeding bees and butterflies long before backyards existed. Today, black-eyed Susans spread so happily that clumps get crowded within three or four years.
Signs of overcrowding include smaller flowers, weak stems, and a patchy center. Late September, after most blooms fade, is a smart window for splitting these cheerful plants.
Consider leaving a few seed heads standing for hungry goldfinches, who treat them like a snack bar. You can snip the rest to make digging easier.
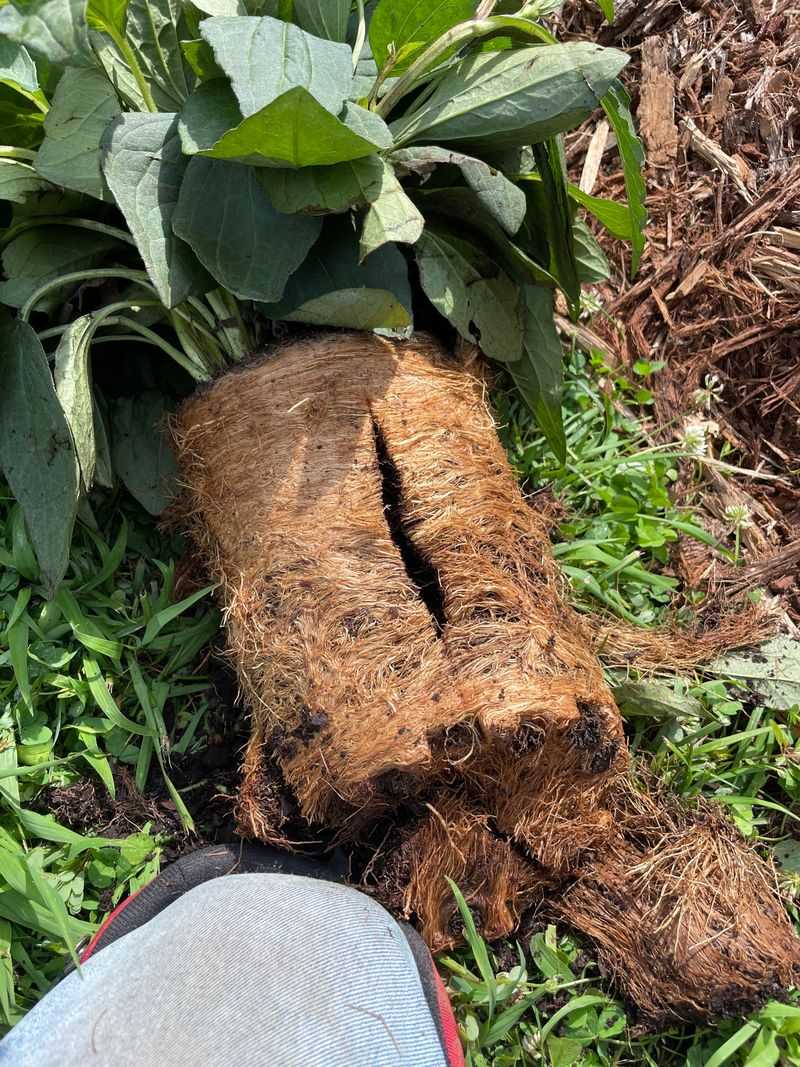
Dig around the clump about six inches out, then lift it gently. The roots are fairly shallow and fibrous, so this part usually goes quickly and smoothly.
Pull or cut the clump into sections, each with a healthy tuft of leaves and plenty of roots. Small rosettes along the edges make excellent new starts.
Replant in full sun, spacing pieces about eighteen inches apart for good airflow. Better air movement helps prevent powdery mildew, a fuzzy white coating common in humid summers.
Water the new plants every few days if autumn turns dry and warm. Next July, your garden will glow like someone spilled a jar of sunshine across it.
7. Coneflowers And The Careful Art Of Splitting
Honestly, coneflowers are a bit fussy about being split, and plenty of seasoned gardeners skip it. Still, a crowded four-year-old clump often benefits from a careful fall division.
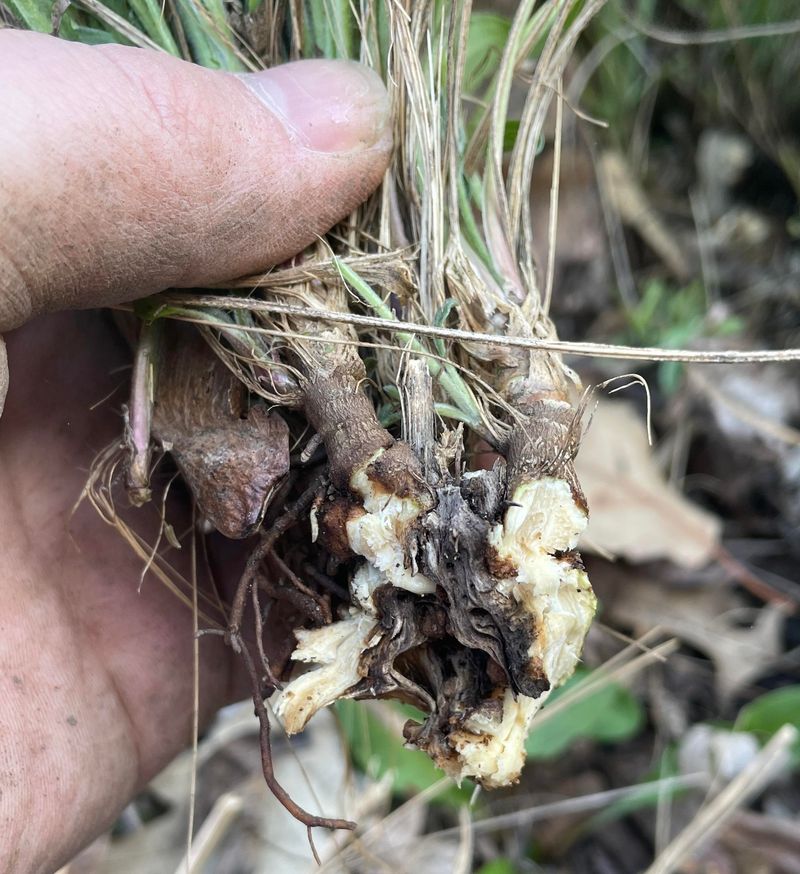
Purple coneflowers grow a deep, stubborn taproot, while many newer hybrids form clumps with several crowns. Clumping types split much more easily, so check which kind you have first.
Wait until early fall when flowering slows down, and pick a cool, cloudy day if you can. Water the plant well the evening before to soften the soil.
Dig deep and wide, since coneflower roots reach farther down than you might expect. Lift the clump and look for natural gaps between the separate crowns.
Cut along those gaps with a clean, sharp knife, keeping a good chunk of roots with each crown. Bigger divisions have a much better chance of thriving next year.
Replant right away in a sunny, well-drained bed, and water deeply at the base. Skip fertilizer for now, because coneflowers prefer lean soil over rich, pampered ground.
Fun bit of history: Native American tribes used Echinacea for remedies long before it reached store shelves. Today, bees and butterflies treat it like a busy roadside diner.
8. Sedum Clumps That Flop Open Like A Tired Umbrella
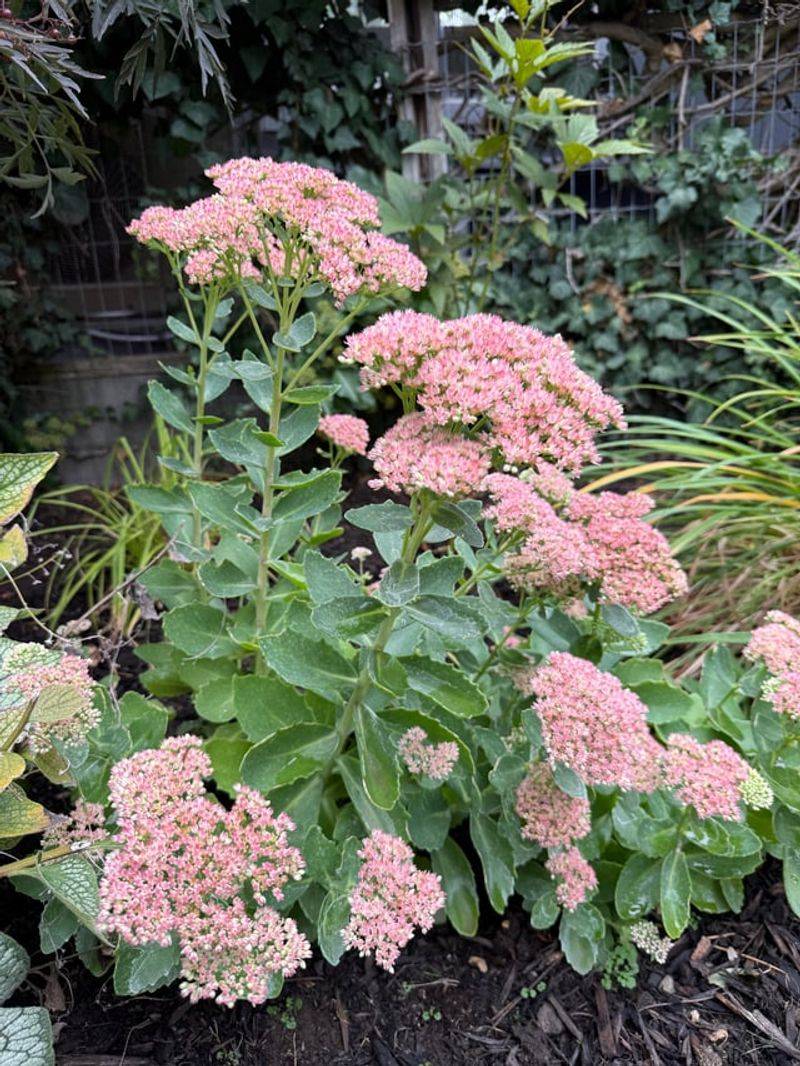
As tall sedums like Autumn Joy age, they flop open in the middle like a tired umbrella. Splitting the clump fixes that sprawl and keeps stems standing tall.
Since many sedums bloom in September, timing takes a little thought. In mild areas, divide right after flowers fade, or mark the plant now for early spring.
Sedum might be the toughest plant on this list. Its thick, juicy leaves store water, so it shrugs off rough handling better than most.
Dig up the clump and use a spade or knife to cut it into wedges, like slicing a pie. Each wedge should hold several stems and a healthy wad of roots.
Replant in full sun with sandy or gravelly soil that drains fast. Rich, soggy soil actually makes sedum stems weak and floppy, which defeats the purpose.
Water once after planting, then mostly leave it alone. Overwatering is a bigger threat to sedum than a surprise cold snap.
Want free plants without digging at all? Snap off a stem, poke it into moist soil, and it will often grow roots within weeks.
Leave the dried flower heads standing through winter for texture. They look lovely wearing a little cap of frost or snow.
9. Shasta Daisies Deserve A Fresh Start Every Few Years
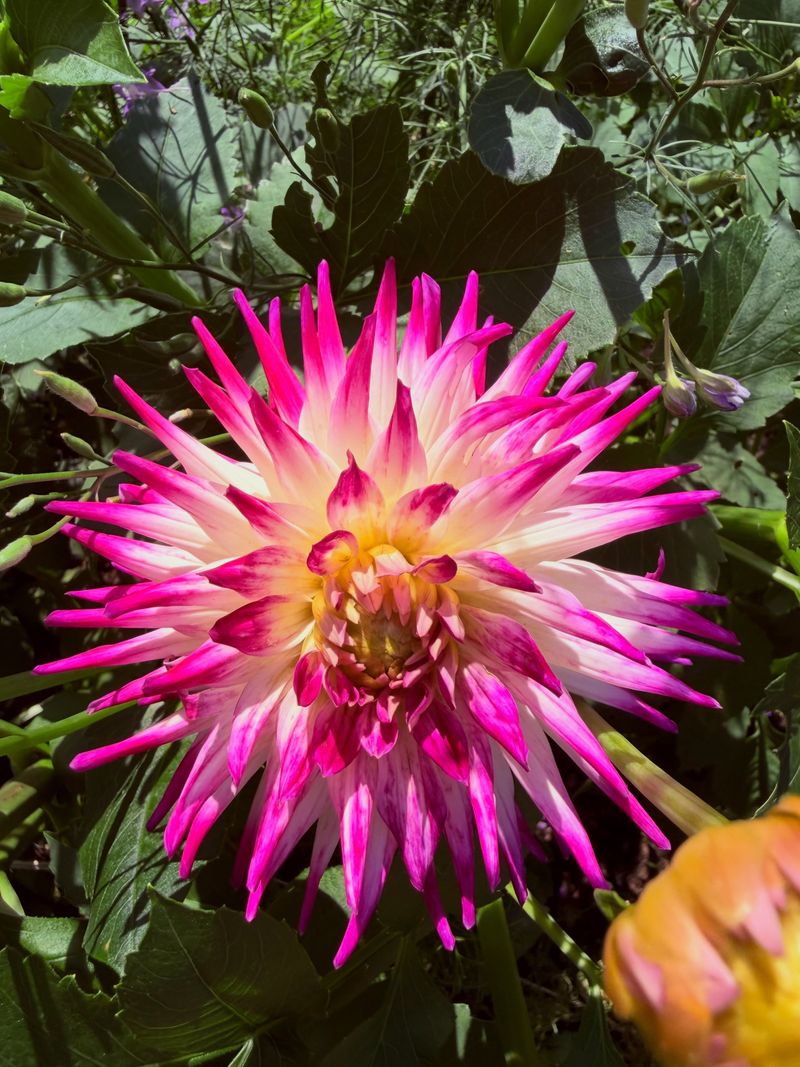
Plant breeder Luther Burbank created the Shasta daisy in California and named it after snowy Mount Shasta. Over a century later, gardeners still love those crisp white petals.
Unlike some long-lived perennials, Shasta daisies tend to fade out after a few seasons if left alone. Splitting them every two or three years keeps the patch young and blooming.
Early fall is a great time, since the plants have finished their big summer show. Cut the stems down to a few inches before you start digging.
Lift the whole clump with a fork and look at the center. If it looks brown, woody, and bare, that part has simply run out of steam.
Pull away the green, leafy sections around the outside, each with a clump of roots. Throw the tired middle into the compost pile, where it can still be useful.
Replant the young pieces a foot or two apart in full sun and soil that drains well. Mix in a scoop of compost to give them a friendly welcome.
Water every few days until the weather turns cold. Shasta daisies dislike soggy winter soil, so skip heavy mulch right on top of the crowns.
10. Astilbe Plumes That Love Shade And A Good Soak
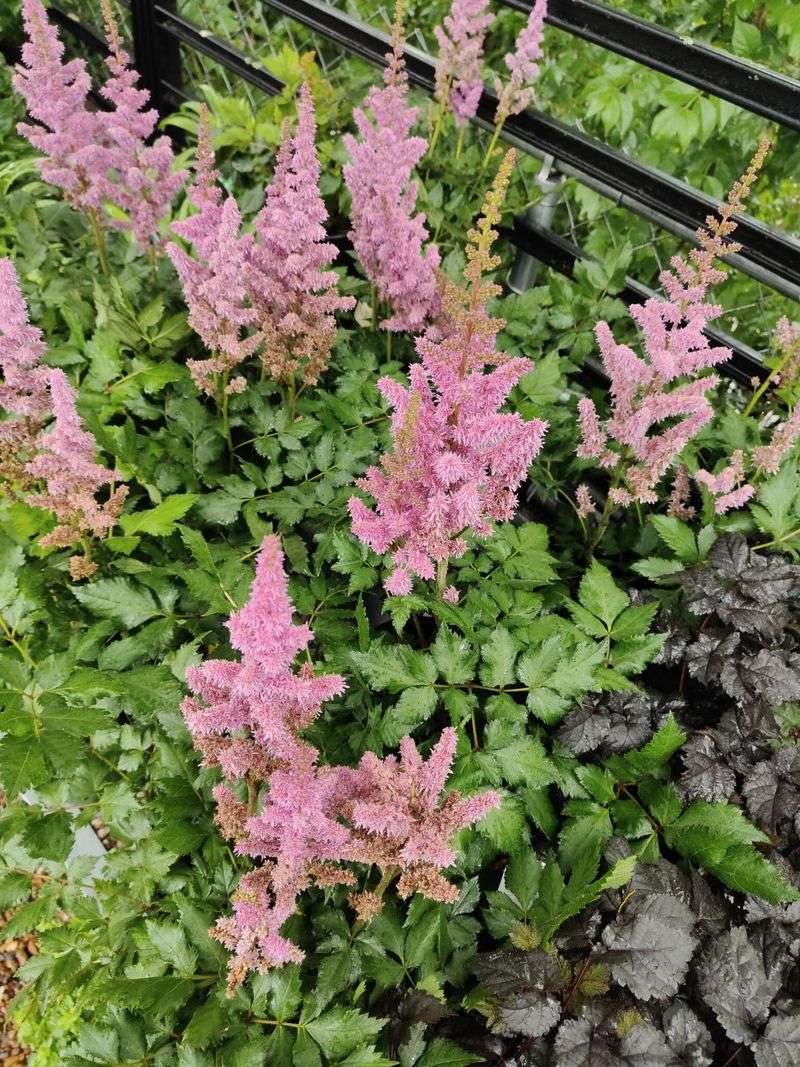
Feathery astilbe plumes light up shady corners like pink and white fireworks. After three or four years, though, the crowns rise up out of the soil and flowers shrink.
That lifting crown is your cue to split the plant this September. Cooler days and steady moisture give the new pieces time to settle before winter.
Astilbe roots are dense and woody, almost like a tough scrub brush. You will likely need a sharp spade or a saw-toothed garden knife.
Soak the soil the day before, then dig up the clump and cut it into pieces. Keep at least three buds and a good handful of roots in every section.
Replant in part shade, with the crowns sitting right at soil level instead of poking up. Rich soil with plenty of compost or leaf mold makes astilbe feel at home.
Moisture is the big secret here, since astilbe sulks the moment its roots dry out. Water deeply after planting, and check the soil often during dry autumn spells.
A two-inch layer of shredded bark helps hold that moisture in. Leave the brown flower plumes standing, since they look like tiny copper feathers on frosty mornings.
11. Bee Balm That Wanders Off And Needs Rounding Up
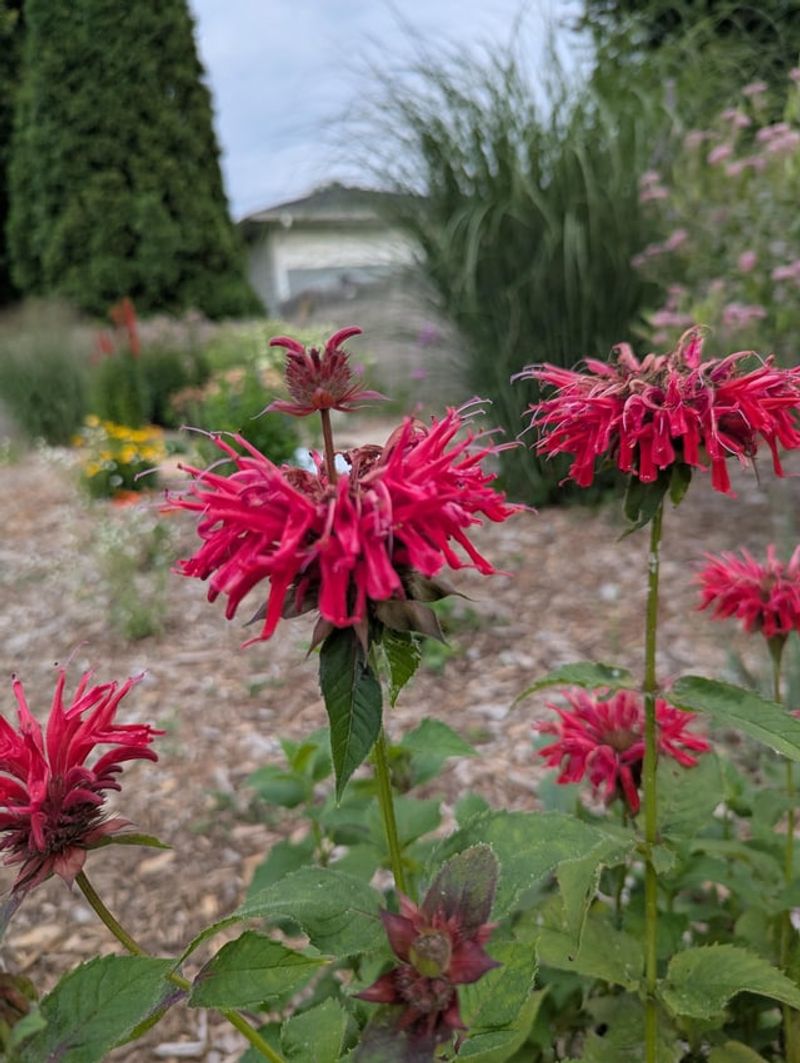
Bee balm belongs to the mint family, and it spreads like it has somewhere important to be. Within a few years, the middle thins out while new shoots march across the bed.
Hummingbirds adore those shaggy red and purple blooms, so keeping the plant healthy pays off. Splitting every two or three years keeps it tidy and full of flowers.
Here’s a tasty bit of history: early colonists brewed its leaves into tea when British tea became hard to come by. Its other nickname, Oswego tea, honors the Native people who first shared it.
In September, cut the stems back and dig up the whole patch. The roots are shallow and spread sideways, so lifting takes little effort.
Compost the woody old middle and save the lively outer pieces with fresh green shoots. Each chunk should be about the size of your palm.
Replant them two feet apart in full sun, giving plenty of room for air to flow. Crowded bee balm often gets powdery mildew, which coats the leaves in white dust.
Water well and keep the soil evenly moist through October. Share any extras, and your neighbors will soon have hummingbirds buzzing around their porches too.
12. Ornamental Grasses Growing A Ring With An Empty Middle
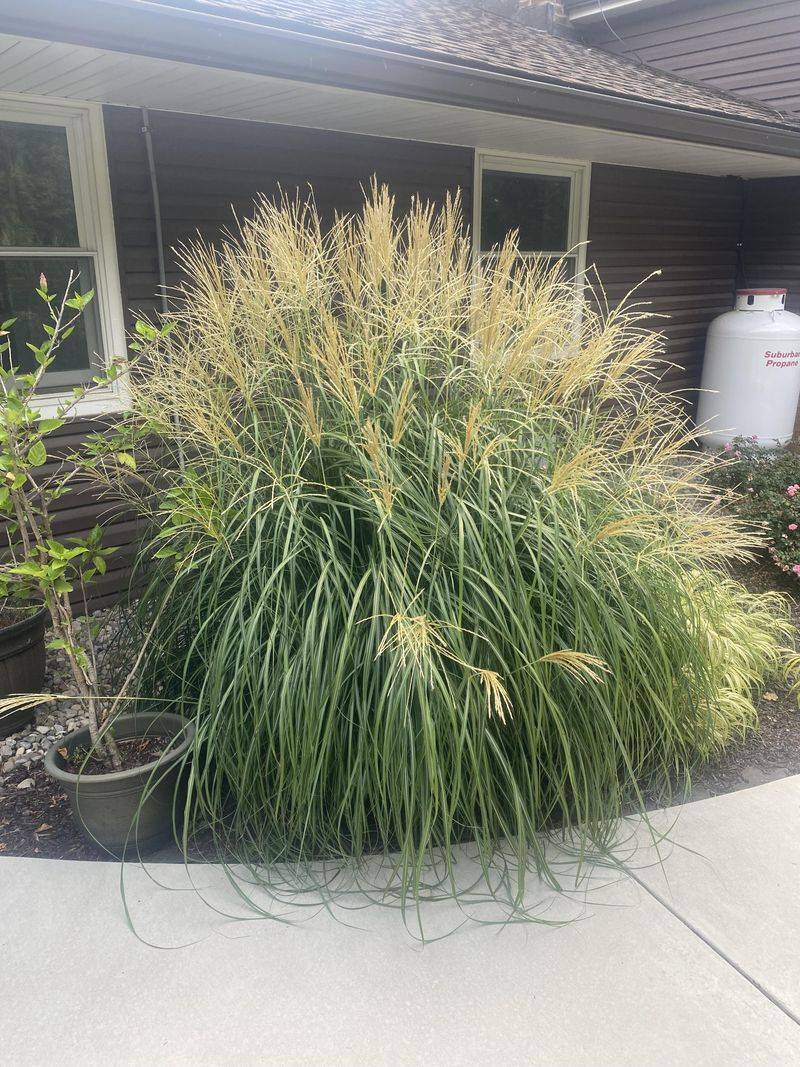
Few garden jobs feel as heroic as wrestling a giant clump of grass out of the ground. Older grasses often grow in a ring, leaving an empty, floppy hole in the center.
Timing depends on the type of grass growing in your yard. Cool-season grasses, like feather reed grass and blue fescue, handle fall splitting well.
Warm-season types, such as switchgrass and miscanthus, prefer to wait until spring. Cool types green up early in spring, while warm types peak in late summer heat.
Tie the leaves into a bundle with twine so they stay out of your face. Then cut the clump down to about six inches before any digging begins. Some gardeners use a heavy-duty pruning saw instead, and nobody judges them.
Slice the clump into chunks with healthy roots and green shoots, discarding the hollow center. Replant at the same depth, water deeply, and keep the soil moist.
Your reward is a handful of fresh plants for borders, pots, or privacy screens. By next fall, those swaying plumes will catch the light like golden sparklers.