Detailed Step By Step Guide To Repotting Monstera Plants
If you have been growing a Monstera plant for some time now, and you notice that it has stopped growing and the roots are coming out of the drainage holes, it’s time for repotting!
Don’t worry, repotting Monstera is not such a complicated task, though it might be troubling if you are growing a large Monstera like the Monstera deliciosa (in this case, you might need to ask a friend for help!).
It is important to know when and how to repot a Monstera plant, and the care guide for after transplanting as it might suffer from transplant shock.
Luckily, we are here to explain everything you need to know!
Repotting Monstera: Step-by-step Guide
Preparing the necessary tools, pot, and potting soil is half the job. I also advise that you choose a suitable location for repotting because it can get a little dirty!
As soon as you understand the fundamentals of repotting, it will become much simpler, so be sure to carefully study this step-by-step guide.
Let’s begin with the potting soil!
Step 1: Prepare The Potting Mix
High-quality soil is essential. Your plant must have healthy soil in order to get the water and minerals it requires.
Each plant has different nutritional and water requirements. Most Montera plants require soil that drains efficiently and retains water effectively.
For optimum growth, there must be adequate airflow.
Please note that the pH levels of the soil should range from 5.5 to 7.0, and that the soil should be rich in organic matter!
You can either use a store-bought potting soil that is suitable for your Monstera deliciosa plant, or try and make one on your own!
You’ll find a great recipe for an ideal soil mixture that will make your plant happy below!
DIY Soil Mix
Our goal is to make well-draining soil that is loose and allows air to reach the Monstera’s roots. You can use the previous mixture, though I always advise using fresh soil when repotting Monstera deliciosa.
This is because the soil might be contaminated with various pests and fungi (such as Monstera root rot), and when you use fresh soil, you are making sure that there aren’t any contaminants that could possibly harm your plant.
Top-dressing is also practiced, which involves adding a fresh and nutrient-rich layer of soil annually, even if the plant is rootbound.
You can use a soil mix formulated for aroid plants with peat moss and perlite for moisture retention and enhanced drainage. Even though peat moss lowers pH, your Monstera plant will thrive in it due to its high nutrient content.
You can combine 50% general-purpose potting soil, 30% orchid bark, 10% peat moss, and 10% perlite.
One part each of peat moss and coco coir, perlite and vermiculite, and sphagnum moss also makes a fantastic potting mix!
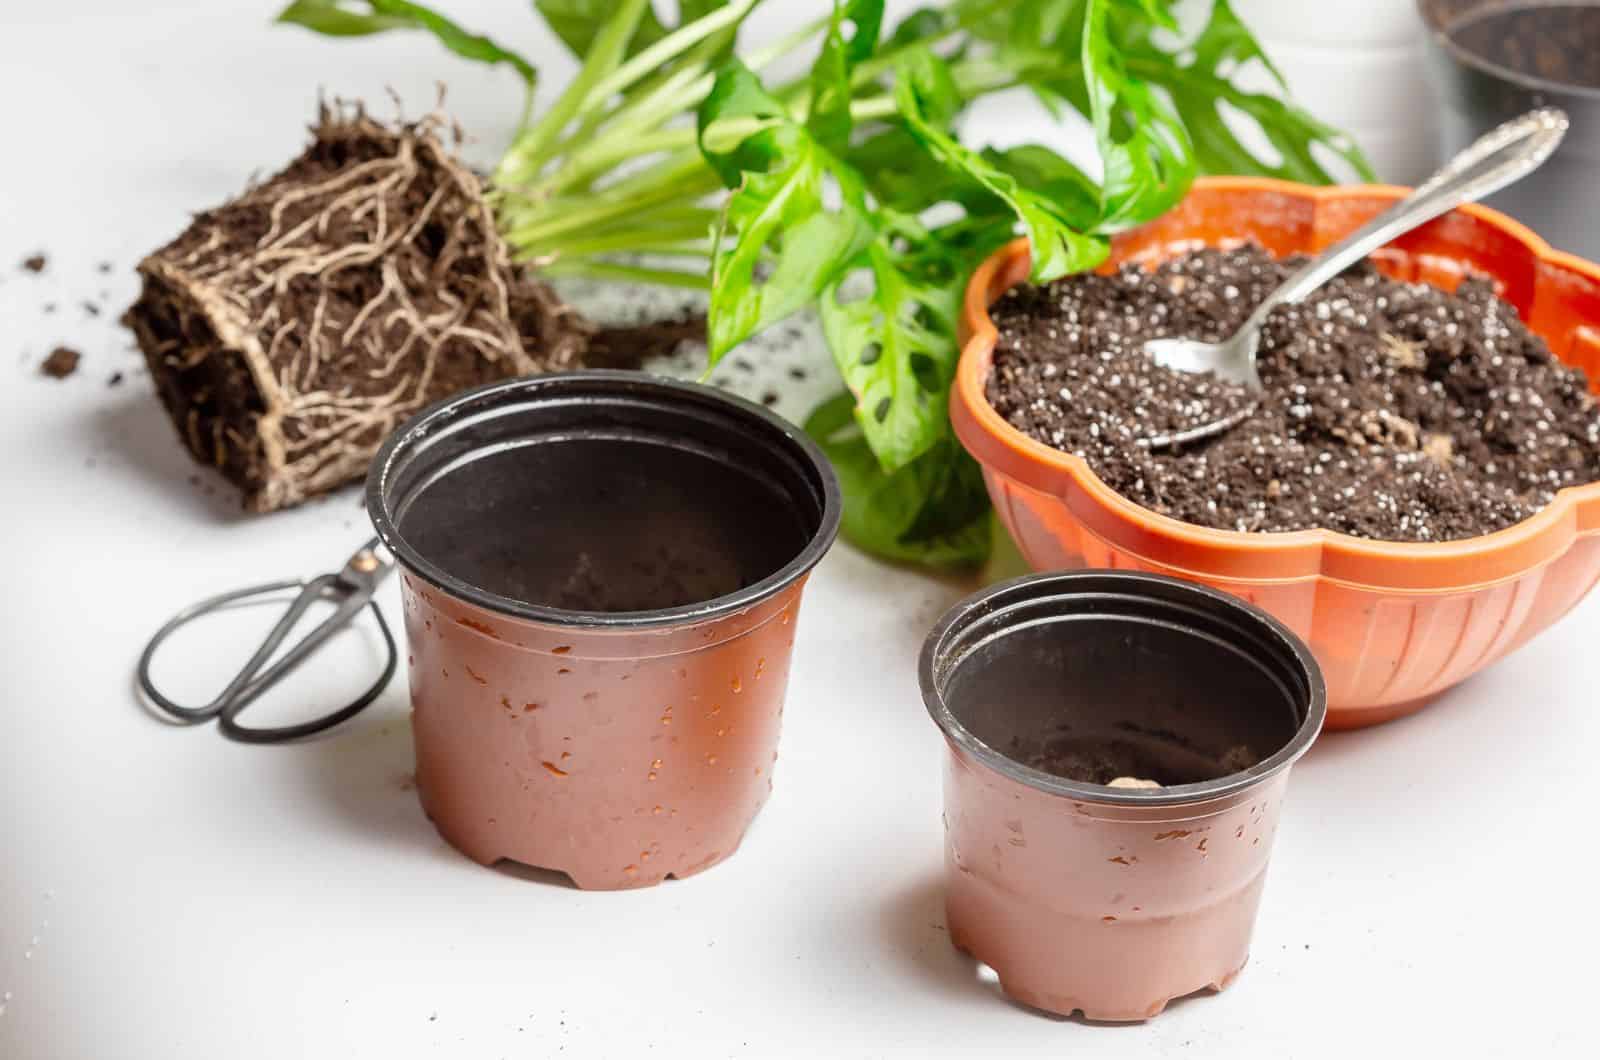
Step 2: Choose A New Pot
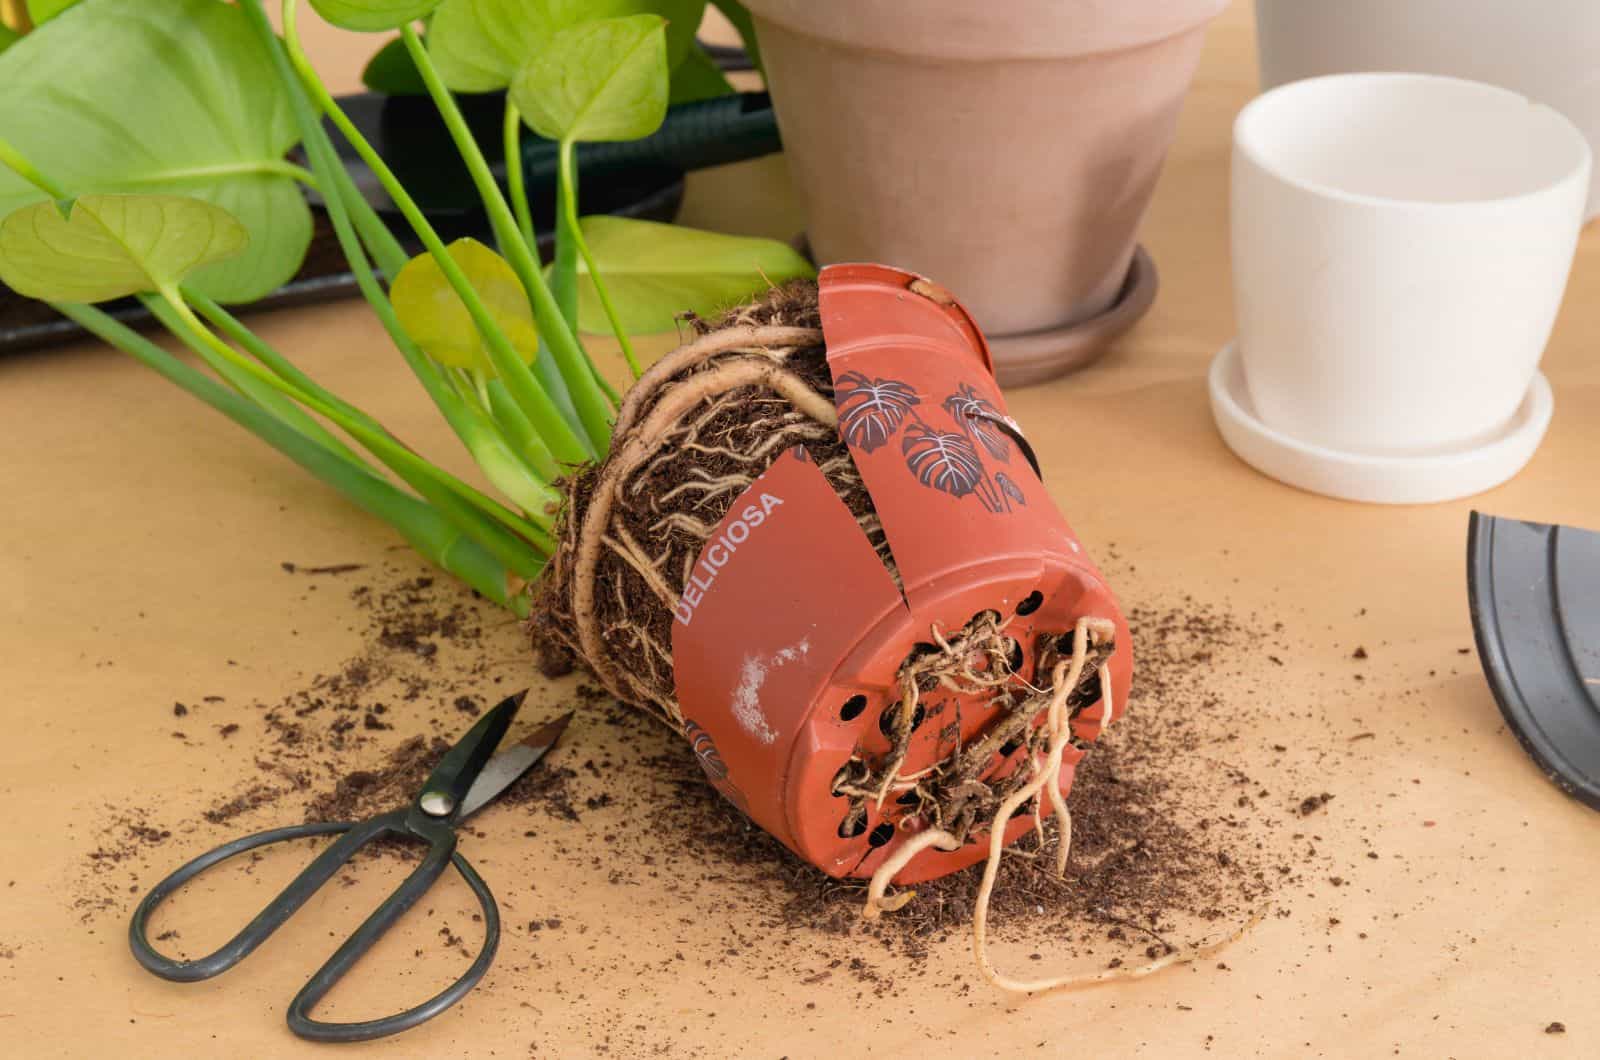
One of the main reasons you’ll need to repot a plant is because it has outgrown its current pot!
When the plant is growing and new leaves emerge, what we don’t see is the plant’s root ball also growing. Once the roots have filled all of the leftover space in the pot, it’s time for repotting!
You will have to buy a new and larger pot, but there are a few other things that you have to take into consideration besides pot size. However, when it comes to pot size, I recommend buying one that is only 2 inches larger than the previous one (this includes width and depth).
Now, let’s find out what pot material suits your Swiss cheese plant the best!
Pot Material
Pot material greatly affects plant growth. It is important that you take into consideration your plant’s needs over aesthetics — but don’t worry, there are still lots of pretty pots also suitable for growth.
Pot materials are usually divided into porous and non-porous options.
Porous containers are ideal for preventing overwatering. There won’t be any additional moisture retention because of the numerous tiny holes in them that allow air and water to pass through. Typically, these come in the form of clay, concrete, or terracotta pots.
Non-porous pots are made of water-resistant materials, and are impermeable to both air and water. They consist of wooden, metal, fiberglass, stone, and ceramic pots with glazes.
As we mentioned before, these plants need some water retention, however, excess water in the soil can easily lead to overwatering, and Monstera plants don’t like growing in soggy soil!
Therefore, porous pots are the best types of pots for Monstera plants.
In my opinion, terracotta pots are probably the most suitable for Monstera plants. Once I repotted my Split-leaf Philodendron in a terracotta pot, and it completely flourished — the old pot was made out of wood, so it’s logical that my plant would look more lively.
Luckily, there are many different shapes and sizes of terracotta pots, so I’m sure that everyone can find one that suits their style.
Please note that every pot should have drainage holes in the bottom — these are crucial for proper drainage and removing excess water from the soil. If you use a cachepot that doesn’t have drainage holes in the bottom, then you might easily overwater your plant.
An overwatered Monstera usually has yellow and wilting leaves, which ruins the aesthetics. Luckily, your Monstera leaves can look as good as new if overwatering issues are fixed immediately. However, in the case of root rot, repotting is necessary!
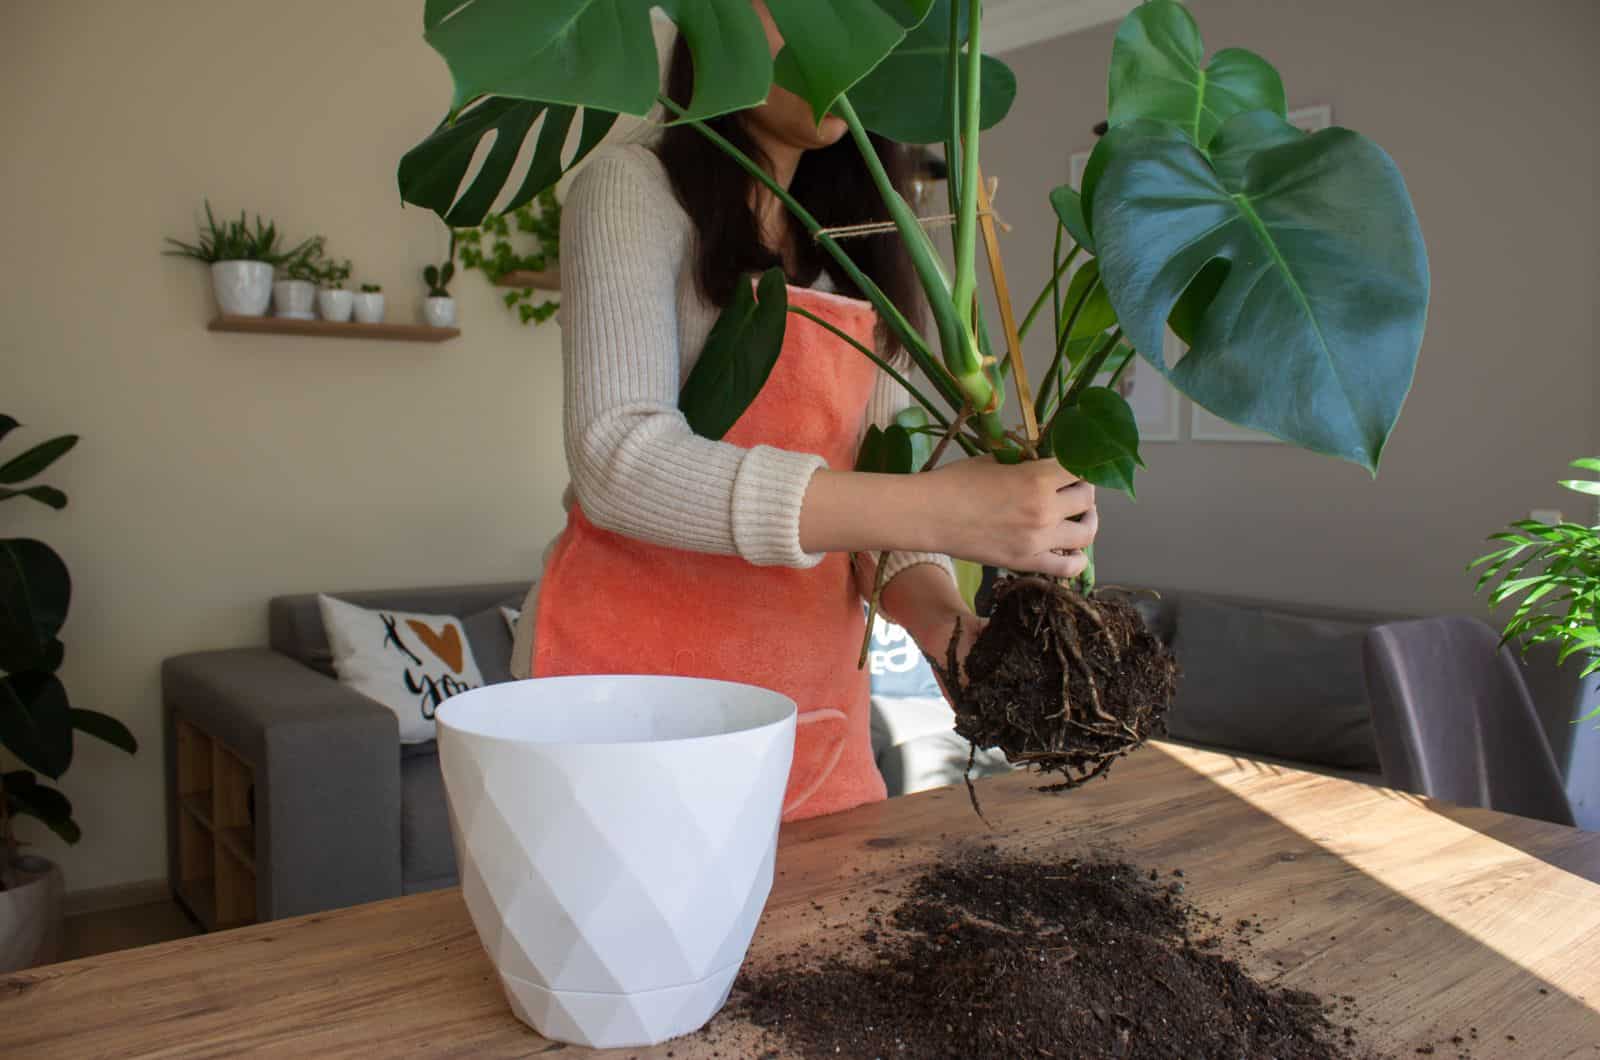
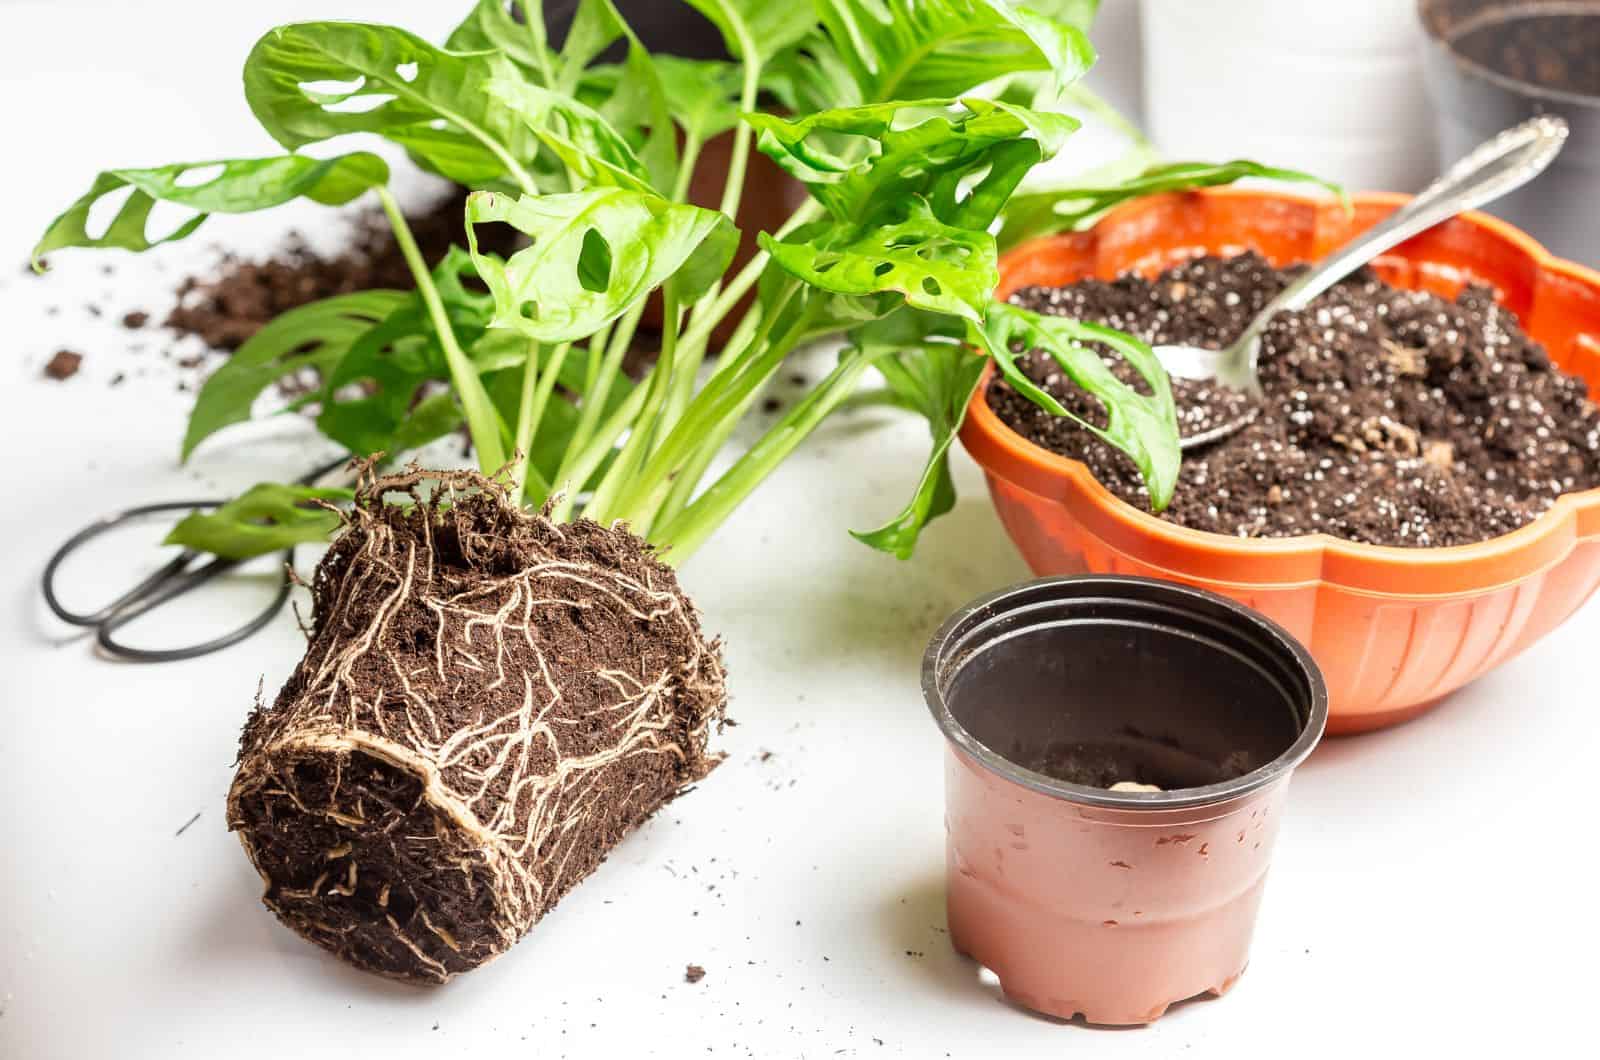
Step 3: Remove The Monstera Plant From The Old Pot
It can be challenging to transfer plants into new containers, especially if you prefer doing things quickly.
The worst thing you can do is simply grab your Monstera plant and pull as hard as you can, even if that seems like the best option.
Before you begin repotting, it is best to let the soil dry fully. This will make it simpler to remove the plant from the pot.
To remove the monstera plant from its container, turn the pot over and gently push it out of the pot. Try shaking the pot a little bit if it won’t budge, but whatever you do, don’t pull the plant!
If you are growing a large variety, for instance, a Monstera adansonii or deliciosa, you might need help from a friend (or maybe two friends if the plant has reached over 5 feet tall!).
One person should keep a hold of the pot, while the other takes care of the roots. If the plant is too big, you can ask a friend to help you secure the top of it. If your Monstera already has a moss pole installed, you should hold onto it while repotting.
Step 4: Remove Any Damaged Roots
Your Monstera plant should be placed in a new pot after you have thoroughly examined the roots. A plant with infected roots will frequently die if it is transplanted into a new container because it cannot adjust to its new environment with diseased roots.
If your plant doesn’t have any damaged roots, then skip this step.
While unhealthy roots are mushy and dark or brown, healthy roots should be grayish-white and firm.
Clean your pruning shears, scissors, and knife, then try and cut off all damaged roots.
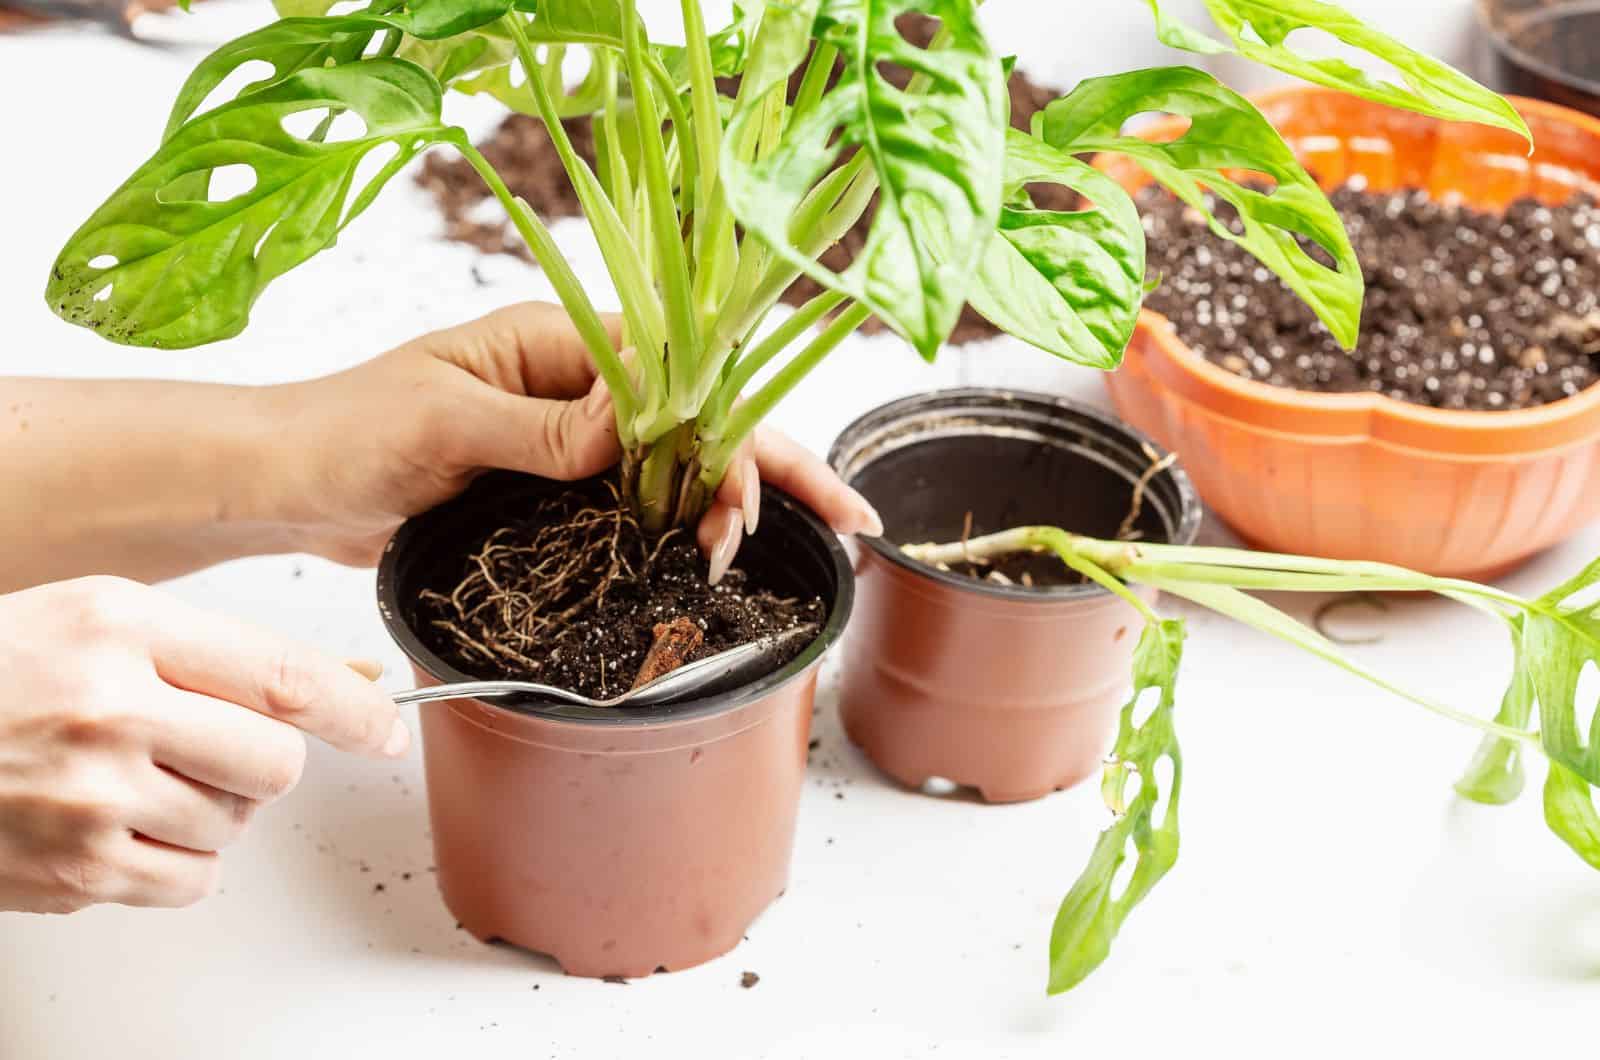
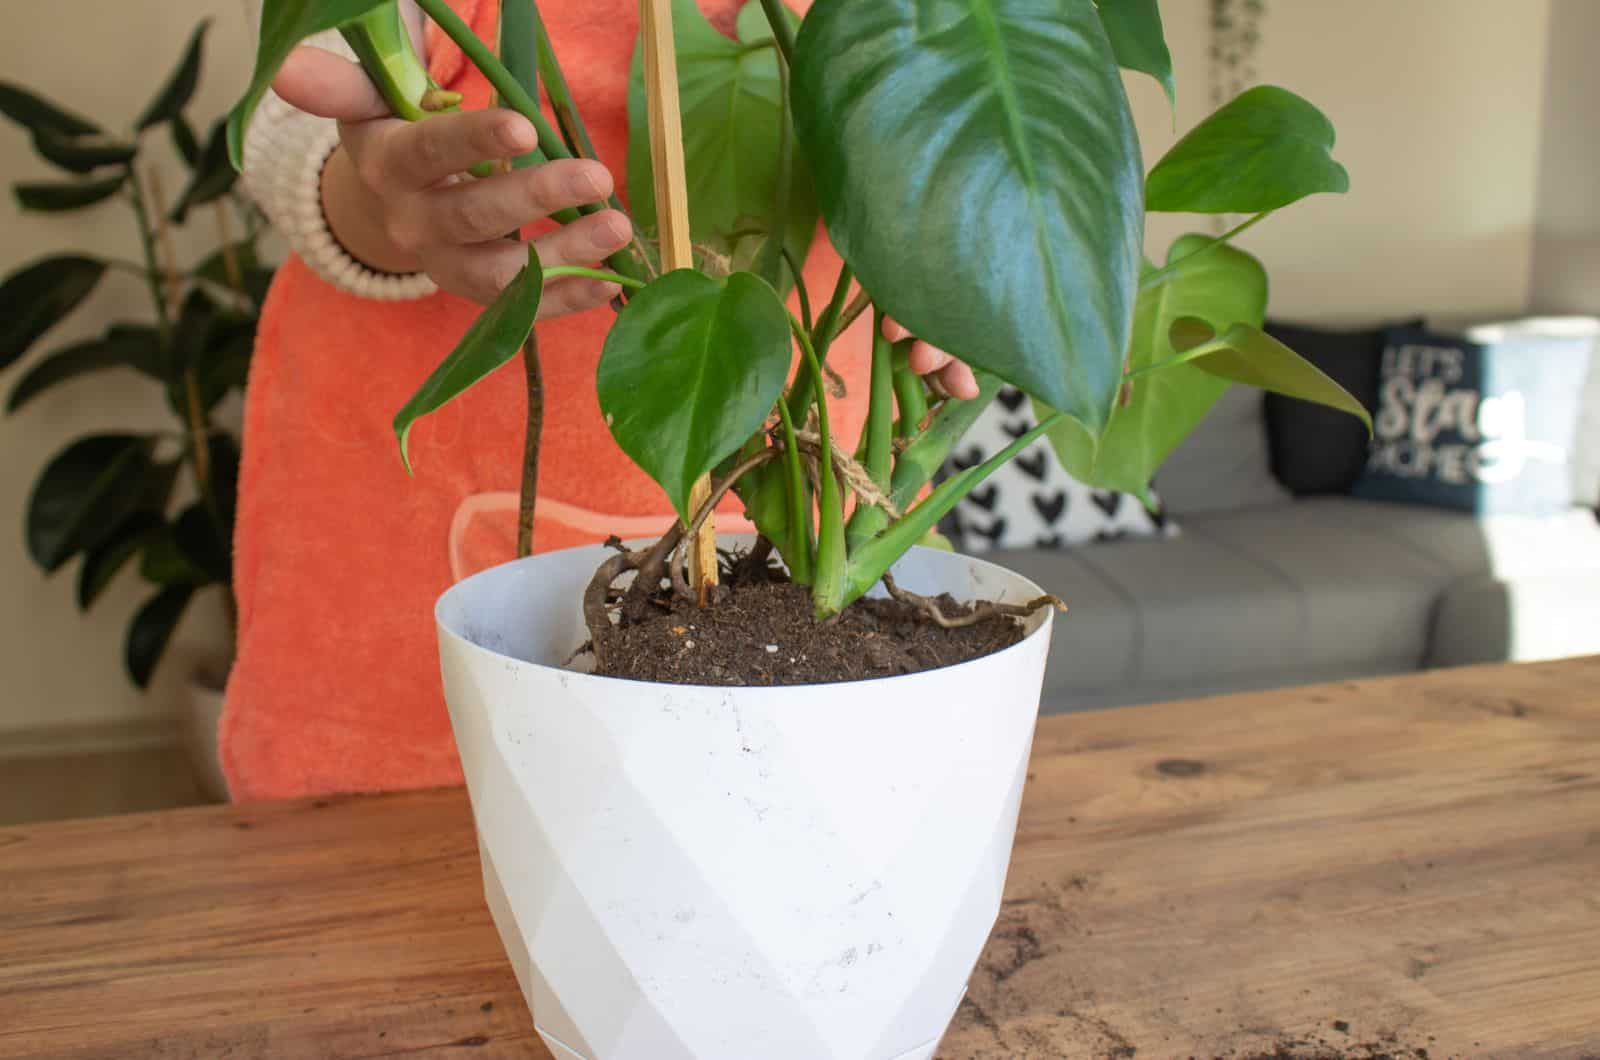
Step 5: Put Your Plant In The New Pot
If you are growing a large indoor plant, then you must provide it with some kind of support. This is especially important for Monstera plants because they produce aerial roots that serve as anchors to support the plant and allow it to grow upwards.
Young Monstera plants don’t usually have these aerial roots, but they will develop them as they continue to grow. These types of houseplants need support — you can either stake the plant, use a moss pole, or install a trellis.
If your Monstera already has a moss pole, then you should keep the plant attached and carefully put both the plant and pole into the pot. Make sure that half the pot is already filled with soil, and add the remaining soil to fill in the empty space between roots.
New growth should be expected during the growing season, so you should provide your plant with either a moss pole or a stake. Add a new stake or moss pole, and carefully arrange the plant around it.
If the roots have grown densely, you should dig a deeper hole that can fit both the pole and the roots. You can also use twines to make the stake more firm and secure. This is how you stake a Monstera plant, and now your plant will be able to grow and climb!
Step 6: Water Your Repotted Plant
Watering your plant after transplanting is the best strategy for assisting its adaptation.
Don’t skimp on the water; thoroughly water your Monstera plant, and allow it to drain well. You should wait until the water begins to come out through the drainage holes before you stop watering.
Check if the soil has dried before watering it again. You should also put your plant in an area with bright indirect light.
Don’t worry, your little monster will adapt quickly. You can now continue with regular plant care.
When To Repot A Monstera Plant?
Monstera plants are not fast growers. You will usually have to repot the plant every 2 or 3 years, unless you are growing a Monstera variety that has a higher growth rate.
In this case, you will have to look for signs that your plant needs repotting. For instance, stunted growth and yellowing of the leaves are signs repotting is required. However, if you are not completely sure, you can always check the bottom of the pot — if you notice any small roots coming out of the holes, then you should repot the plant.
In addition, the soil might also get too compact and become unable to absorb water. In this case your plant will start wilting because it isn’t receiving enough water.
You should repot the plant in early spring, which is the best time of year because it is at the beginning of the growing season, so your plant will have enough time to adapt to its new environment.
Monstera Deliciosa Care Guide
When it comes to Monstera houseplant care guides, it’s almost always the same — I mean, we are talking about the same plant species. You can use this care guide for a Monstera adansonii or Monstera marmorata.
If you have recently bought a new plant, you’ll be pleased to hear that it’s quite easy to take care of these plants. The best advice I can give you is to try and mimic their natural environment. As our little monsteras originate from tropical regions, they enjoy high humidity, warm temperatures, and indirect light.
Keep reading to learn more!
Soil Requirements
Well draining and loose soil works best!
You can check the section about DIY soil mix recipes, and try to make one on your own!
Temperature Requirements
This Monstera plant prefers a temperature range of 65 to 75 degrees Fahrenheit.
In the majority of households, maintaining these temperatures shouldn’t be too difficult.
Monstera plants can usually withstand temperatures as cold as 55 degrees Fahrenheit, and as hot as 85 degrees Fahrenheit. In case temperatures get any higher, you must hydrate your plant more frequently.
Sadly, these plants are not frost-resistant. If the temperature drops to below 50 degrees Fahrenheit, bring your Monstera inside.
Keep your plant away from vents and air conditioners as it can be easily damaged by cold drafts. These Monsteras cannot withstand abrupt temperature changes, so they should also be kept away from heaters like radiators and fireplaces.
Humidity Requirements
Most homes have humidity levels between 30% and 50%, but Monstera plants prefer humidity levels around 65%. Your indoor Monstera plant may start acting differently if the conditions are too dry for it.
Luckily, there are some simple ways that you can boost humidity indoors. For instance, you can invest in a humidifier. These devices are very helpful because you can set the minimum and maximum humidity levels, and they turn off automatically when the level is reached. They only cost $20 on Amazon, which makes them super affordable!
Another efficient technique is misting. All you need is a spray bottle and some water for this. Make sure to spray the leaves every other day, and always in the morning so that the water can evaporate throughout the day. If the water from the leaves doesn’t evaporate quickly enough and stays on the leaves for a long time, the leaves will become vulnerable to fungi that cause rot.
If you have many plants, another option is to group them. To increase humidity for your Monstera plants, put your Philodendrons or Snake Plants next to them.
This approach relies on the transpiration of plants. As the plants’ water evaporates, a humid microenvironment is created. However, it takes up a lot of room and requires a lot of plants!
The plant can also be placed in a room with high humidity, such as a kitchen or bathroom. Because these plants can’t grow properly in low light environments, you must make sure there is enough light for them.
Making a pebble tray is another inexpensive way to increase humidity. Add some pebbles and water to a tray, place your plant on top of the tray, and it will receive moisture as the water evaporates.
Light Requirements
It’s critical to remember that tropical plants benefit from shade provided by taller plants in their natural environment, so they receive less direct sunlight.
Although this Monstera plant may survive in low light, I suggest placing it in bright indirect light to promote faster and healthier growth. Monstera leaves won’t have their marvelous fenestrations if they are kept in low light areas.
Place the plant close to an east-facing window for best results.
This will allow your Swiss cheese plant to get the necessary direct sunshine in the morning without it being damaged, because it will only be exposed to indirect light the rest of the day.
Alternatively, place your plant close to a window that faces north. If you choose to place your plant here, you should think about transferring it over the winter if it won’t get enough light.
Consider purchasing grow lights if your deliciosa doesn’t get enough light overall (these are readily available on Amazon). However, if too much direct sunlight is an issue for the leaves of your Monstera plant, you can cover the window with a curtain to provide it some shade.
Water Requirements
The simplest approach to preventing water problems is letting the top 2-3 inches of soil dry out between waterings.
Temperature, light, and humidity have a significant impact on how frequently plants should be watered. Of course, your Monstera’s soil will drain more quickly the more direct sunlight it receives.
The same applies when the temperatures are higher, so throughout the hot summer months you’ll need to water your Monstera more frequently.
Delaying watering until the humidity rises will help the soil retain moisture. You should also make sure the soil never fully dries out, otherwise you will end up with an underwatered Monstera.
I suggest watering from the bottom or covering half the pot with water. Empty the saucer of any liquid after ensuring that all the extra water has drained out through the drainage holes.
Fertilization Requirements
During the growing season, fertilizing the Swiss cheese plant once a month is optimal.
An all-purpose liquid fertilizer is required for this Monstera, but make sure you dilute it to half strength first.
However, you can’t continue with this fertilizing schedule after you repot your Swiss cheese plant.
You should use new soil when repotting, and as this soil frequently contains fertilizer, you should wait around 6 months before using it.
When applying fertilizer, take caution and always follow the label’s instructions.
Pruning
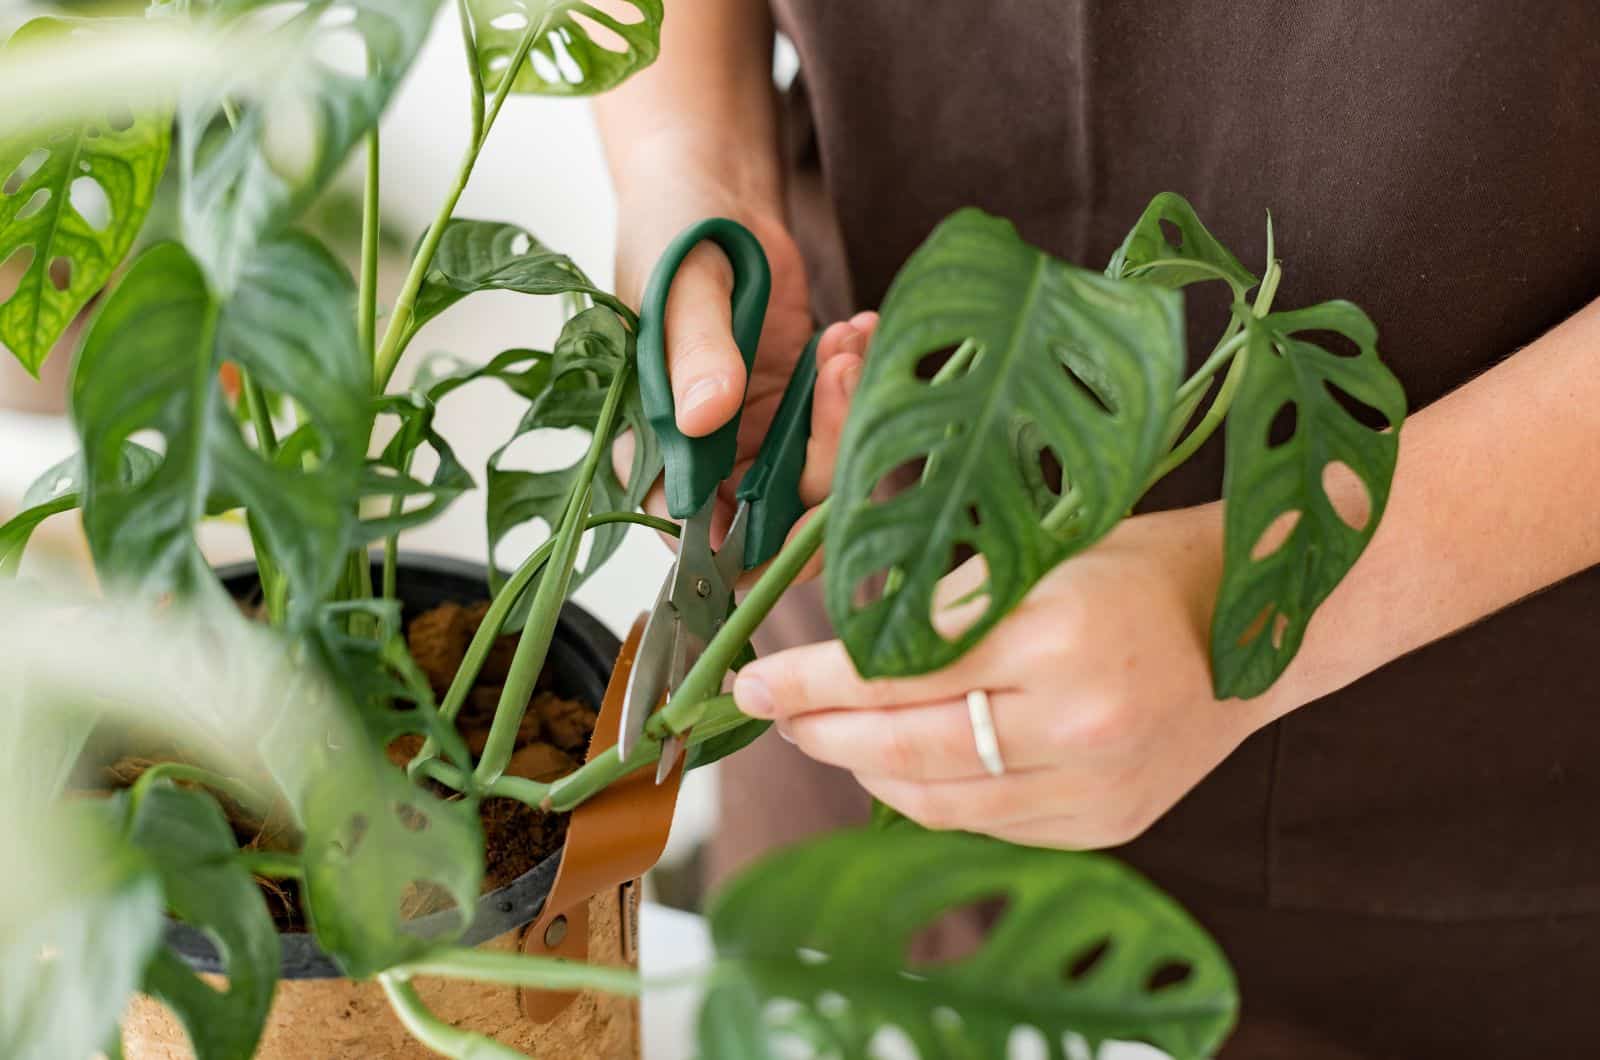
Pruning is not a crucial step in the Monstera plant care guide. I would recommend you remove any damaged or discolored leaves — there is no need to cut any beautiful, deep-green leaves!
By pruning a few branches at the start of the growing season, you can regulate the shape and growth of your plant.
You can be sure that your Monstera will look and grow better!
Propagation
Monstera plants are one of the easiest plants to propagate — if you are a gardener newbie, get yourself a Mini monstera and practice propagation!
There are several methods that you can use to propagate this plant. The most common method is by stem cutting, and you can use either soil propagation or water propagation.
Stem Cuttings
You must first learn how to take stem cuttings before you can use them for propagation. When I prune my Monstera, I always take cuttings.
Always sanitize gardening tools before using them. If you want the propagation to be successful, you must take a cutting that has at least one node.
It can either be soaked in water first or planted immediately in the ground, it’s your choice!
Water Propagation
These are the steps for water propagation:
1. After cutting the stem, dip it in rooting hormone. Then get a water-filled jug.
2. Immerse the bottom of the cuttings in water. Make sure that none of the leaves touch the water.
3. Place your jar somewhere with adequate diffused light.
4. Change the water every three days.
As soon as you observe fresh growth, which should happen quickly because you’ll see the little roots forming, you should plant the cutting in soil.
Soil Propagation
The optimal soil for this method of propagation is porous and has good drainage. You can find the ideal potting mix recipes above.
The steps are as follows:
1. Fill a container with soil.
2. Dip your Monstera cutting in rooting hormone to accelerate the rooting process.
3. Insert the cutting into a hole in the dirt. Make sure that one of the nodes is buried beneath the surface.
4. Cover the bottom of the cutting with a plastic bag (but not the leaves). Poke holes in the plastic bag to allow airflow.
5. Place the container in an area with bright indirect light.
6. Frequently water or spray the soil to keep it moist.
Common Problems
Improper watering is the worst enemy of a Monstera plant. Root rot and eventual death can result from overwatering. Drying out the root ball will prevent it from growing and developing normally.
Pests are another frequent problem. Despite the fact that your plant is a monster, little insects and bugs can infest it, and once they do, they spread like wildfire!
Spray it with water or insecticide to prevent them from settling on your plant. Sprinkle neem oil generously over the plant, paying particular attention to the leaves, to effectively repel these annoyances!
Wrapping Up
Repotting Monstera plants isn’t so difficult! All you have to do is be careful with the roots, and prepare a proper soil and pot!
Please make sure that the pot has drainage holes in the bottom as it is crucial for proper drainage, and also pay attention that you get the right soil.
Monsteras are beautiful houseplants that are pretty easy to maintain, and repotting them is necessary if you want them to keep growing and developing!
That’s all from us, I hope that this article was helpful. 🙂
Until next time!