11 Steps North Carolina Gardeners Take After Mums Fade for Fuller Plants Next Fall

Chinese gardeners were growing this fall favorite more than two thousand years before it ever reached European gardens. Yet thousands of those cheerful pots end up curbside every November, tossed out like faded holiday decorations.
You may be surprised to discover that many of them are hardy perennials across most of North Carolina. Those brown, crispy stems are often just a sleeping plant waiting quietly for warmer days to return.
In my garden, the clumps I nearly pitched years ago now come back bigger than anything sold at stores. I love that a few simple habits turn a cheap seasonal purchase into a lasting backyard friend.
The trick is knowing what to do once the show is over. A few simple post-season moves are all it takes for Tar Heel gardeners to coax a fuller, rounder splash of color out of them year after year.
1. Leave Those Faded Mum Stems Standing Through Winter

Those scraggly brown stems might look messy, but they work like a cozy winter coat for the crown. I used to chop mine right after the blooms faded, and my plants struggled every single spring.
Old stems trap fallen leaves and a little snow, which helps shield the plant base from harsh cold. They also tell you exactly where your clumps are hiding once everything goes brown and quiet outside.
Extension experts generally suggest waiting until late winter or early spring before you do any serious cutting back. Late winter trimming down to six or eight inches works fine, and early spring cuts can go lower.
If the bare look bothers you, tuck a few pinecones or ornamental cabbages nearby for some winter interest. Neighbors rarely notice the stems once the rest of the garden settles into its sleepy season.
One exception matters, though, because stems showing mold or dark spots should come out right away instead of lingering. Diseased material can harbor problems through the cold months, so bag it rather than adding it to compost.
Healthy stems, on the other hand, can stay put and do their quiet job until new shoots appear. Honestly, it’s the easiest step on this list, since it mostly asks you to do nothing at all.
Laziness rarely gets rewarded in gardening, but this is one happy time when patience pays off nicely. Your future fall display starts right here, with stems you simply leave standing through the chilly months.
2. Pile Thick Shredded Leaf Mulch Around Mum Roots

Frost heave sounds like an Arctic weather report, yet it happens in plenty of Southern flower beds. Soil freezes and thaws over and over, slowly pushing shallow mum roots right up out of the ground.
Mums have fairly shallow root systems, so they’re especially likely to get heaved during those wild temperature swings. Exposed roots then dry out in cold winds, and the plant often fails to wake up in spring.
A thick blanket of mulch, about four inches deep, keeps soil temperatures steadier through those up and down weeks. I like to spread it once the ground has cooled, usually after a few hard frosts have passed.
Shredded leaves are my favorite choice because they cost nothing and break down into rich soil later. Pine straw is another handy option across the state, and it rarely packs down into a soggy mat.
Straw and shredded bark also work well, as long as the material lets water and air move through easily. Whole oak leaves can mat together, so run them over with the mower before you spread them.
Pull the mulch back slightly from the stems so moisture doesn’t sit right against the crown all winter. In spring, rake some away as shoots appear, letting the soil warm up and the new growth breathe.
Gardeners in the mountains benefit the most, since their winters bring harder freezes than the coast does. Still, even Piedmont beds see enough freeze and thaw cycles to make this step worth the effort.
3. Ease Up on Watering Mums After Blooms Fade

Soggy winter soil worries me more than cold snaps, because mum roots hate sitting in cold, wet dirt. Once the flowers fade, the plant slows way down and simply doesn’t drink like it did in summer.
That means your regular watering routine can take a well-earned break for the next few months. Rainfall usually handles the job in our part of the country, since winter storms roll through fairly often.
Still, dry spells do happen, and a plant with parched roots heading into a freeze can struggle badly. Moist soil actually holds heat better than dry soil, which gives roots a little extra protection.
My simple test involves pushing a finger two inches into the soil near the base of the clump. If it feels dusty and dry after a couple of rainless weeks, give the plant a slow drink.
Water during the warmest part of a mild day, so moisture soaks in before temperatures drop overnight. Skip watering when a hard freeze is forecast for that night, since icy puddles help nobody.
Plants tucked under eaves or deep porches miss most of the rain, so check those spots more often. Heavy clay beds deserve extra caution, because they hold water much longer than sandy coastal soils do.
Think of winter watering as a gentle balancing act rather than a chore with a strict schedule. Damp but not drenched is the sweet spot that keeps roots healthy until spring wakes them up.
4. Move Potted Mums Into a Cool Garage or Porch

Clay pots sitting on a breezy porch offer about as much winter protection as a paper umbrella. Roots in containers face the cold from every side, while roots in the ground stay much more sheltered.
That’s why potted mums need a little extra planning once their blooms turn brown and crinkly. You have two solid choices, either planting them in the ground early or tucking them somewhere sheltered.
Planting works best about six weeks before your first hard frost, giving the roots time to settle in. If that window has already passed, a cool and frost-free shelter becomes your best friend for winter.
An unheated garage or a sturdy cold frame usually works nicely for mums taking their long winter nap. Avoid warm living rooms, since indoor heat confuses the plant and encourages weak, spindly winter growth.
My own pots spend the winter in a chilly corner of the garage, right beside the rakes. I check them every few weeks and add a splash of water whenever the soil feels too dry.
Aim for soil that feels like a wrung-out sponge, which means barely moist but not dusty dry. Too much water in a cold, dim space invites rot faster than you might expect from such tough plants.
Once spring arrives and frost danger passes, bring the pots back outside into gradually brighter light. A week of easing them into full sun helps prevent scorched leaves on that tender new growth.
5. Clear Diseased Mum Leaves and Debris From the Bed

Fungal spores are sneaky little hitchhikers that happily spend the winter snuggled inside fallen, spotted leaves. Come spring, rain splashes them right back onto fresh shoots, and the whole cycle starts over again.
A quick cleanup now breaks that cycle before it gets a head start on next year’s plants. I grab a bucket and gloves on a mild afternoon and make it a relaxing little project.
Look for leaves with dark blotches or powdery white coatings, which often signal leaf spot or mildew trouble. Mushy stems near the soil line are another warning sign, especially in beds that stayed wet this fall.
Bag all that infected material and send it out with the trash instead of tossing it into compost. Most home compost piles don’t get hot enough to reliably break down disease organisms hiding in leaves.
If pests or disease caused trouble this year, consider replacing the old mulch around those plants too. Fresh material gives you a cleaner starting point and removes spots where problems like to hide.
Wipe your pruners with a household disinfectant between plants, so you don’t carry problems from one clump to another. It takes seconds, and it’s one of those small habits that quietly pays off all season.
Healthy stems can stay standing for winter protection, so focus your cleanup only on the sickly stuff. Your bed will look tidier, and next year’s shoots will start life in a much cleaner neighborhood.
6. Trim Old Mum Stems Back When Green Shoots Appear
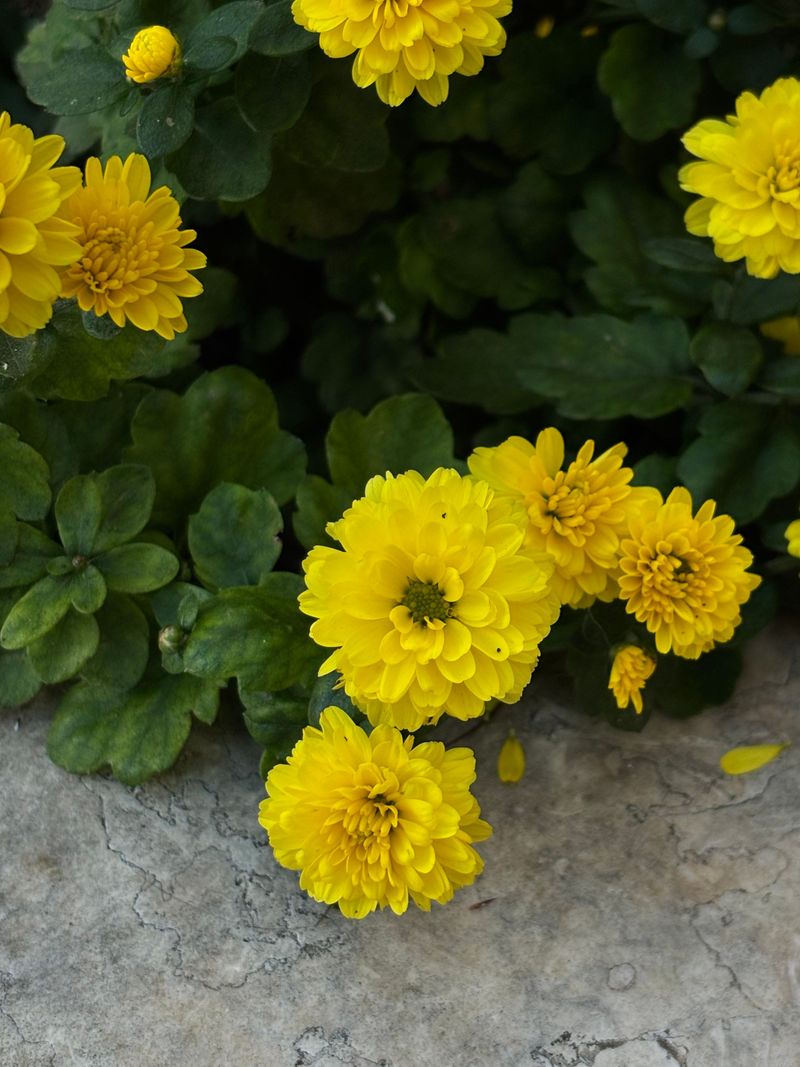
Tiny green rosettes peeking up through brown stems are my favorite early spring surprise in the flower bed. Those fresh shoots are your signal that it’s finally time to grab the pruners and tidy things up.
Wait until the threat of hard frost has mostly passed, which varies quite a bit across the state. Coastal gardeners may start in early March, while mountain folks often hold off until late April.
Cut last year’s stems down to about three or four inches above the ground, or remove them at soil level. Either way, be careful not to nick the new growth clustered around the base of the plant.
Removing that old wood lets sunlight reach the crown and pushes the plant to send up fresh stems. More stems mean more branching later, which eventually translates into a fuller mound of fall flowers.
I like using sharp bypass pruners, since dull blades crush stems instead of slicing them cleanly. Clean cuts heal faster and give fungal troubles fewer openings to sneak into the plant early in the season.
Once the old stems are gone, pull back some of the winter mulch to let the soil warm. Toss the healthy clippings into your compost pile, where they’ll break down nicely by summer’s end.
Honestly, the bed looks a little bare for a few weeks, and that’s perfectly normal at this stage. Give those shoots some warm days, and they’ll fill in faster than most beginners would ever guess.
7. Dig and Divide Crowded Mum Clumps in Early Spring

Crowded mum clumps often develop a hollow center, like a doughnut with all its sprinkles around the edge. That bare middle is the plant’s way of saying it’s tired of sharing space with itself.
Dividing every two to three years refreshes the plant and gives you free mums to share or replant. Early spring works best, ideally when the new shoots stand about one to three inches tall.
Dig around the whole clump with a spade, then lift it out and gently shake away the loose soil. You’ll see the woody old center surrounded by younger, healthier shoots growing around the outer rim.
Those outer pieces are the real treasure, so pull or cut them apart, keeping roots attached to each one. The tired woody middle can head to the compost pile, since it rarely performs well again.
Replant your divisions about eighteen to twenty-four inches apart to give each one room to spread out. That spacing also improves airflow, which helps reduce leaf diseases during our famously humid summer months.
Pick a sunny spot with at least six hours of direct light and soil that drains well after storms. Heavy red clay benefits from a few shovels of compost mixed in before you set the plants.
Water the new divisions well right after planting, then keep the soil evenly moist for several weeks. Last spring I turned one sad clump into five vigorous plants, and my neighbors got the extras.
8. Feed Spring Mums With a Balanced Garden Fertilizer

Mums are hungry growers, and they pack on most of their leafy bulk between spring and midsummer. Feeding them at the right moment is like handing a growing kid a good breakfast before school.
Start fertilizing once the last frost has passed and new shoots are actively growing, usually around March through May. Feeding earlier mostly wastes fertilizer, since cold roots can’t absorb much while the plant is still sleepy.
A balanced granular fertilizer works nicely, and water-soluble options like 20-20-20 are easy to use too. Some growers prefer a phosphorus-rich blend like 5-10-5 in early spring to encourage strong root growth.
A soil test through the state’s Department of Agriculture can tell you exactly what your beds need. Testing is free for residents during much of the year, though a small fee applies in peak winter months.
Scatter granules around the plant, keeping them a few inches from the stems, then water them in well. Liquid feeds can go on every few weeks, following the label directions carefully to avoid burning tender roots.
Stop feeding by late summer, because fall fertilizer pushes soft growth that struggles once cold weather arrives. Extension guides generally discourage fall feeding for mums, and my own plants have agreed with that advice.
Too much nitrogen can make mums tall and floppy, so resist the urge to overdo it. Steady, moderate meals create sturdy stems that hold up a heavy crown of blossoms each autumn.
9. Pinch Mum Tips Until Early July for Bushy Plants

Garden centers sell those perfect dome-shaped mums, and the secret behind them is surprisingly simple pinching. Growers snip off growing tips several times, forcing each stem to split into more branches and buds.
You can copy that trick at home with nothing more than your thumb and a fingernail on a sunny morning. Once new shoots reach about four to six inches tall, remove roughly an inch from each growing tip.
Every pinched stem usually sends out two or more side shoots within a couple of weeks. Repeat the process every four to six weeks as those new branches stretch out a few inches.
The timing matters most here, so mark early to mid-July on your calendar as the final pinch date. Mums set flower buds as nights grow longer, and late pinching can remove those future blooms.
Skipping this step often leads to tall, leggy plants that flop open after the first heavy rain. I learned that lesson with a sprawling clump that looked more like a tossed salad than a mound.
Toss the soft tips into compost, or try rooting a few in moist potting mix for extra plants. Mum cuttings root fairly easily, which makes this step feel like a fun little bonus experiment.
By early fall, you’ll notice tight, rounded plants loaded with buds instead of a few lanky stems. That full silhouette is the reward for a few minutes of fingertip work each month all summer.
10. Water Mums at the Base During Hot Summer Weeks
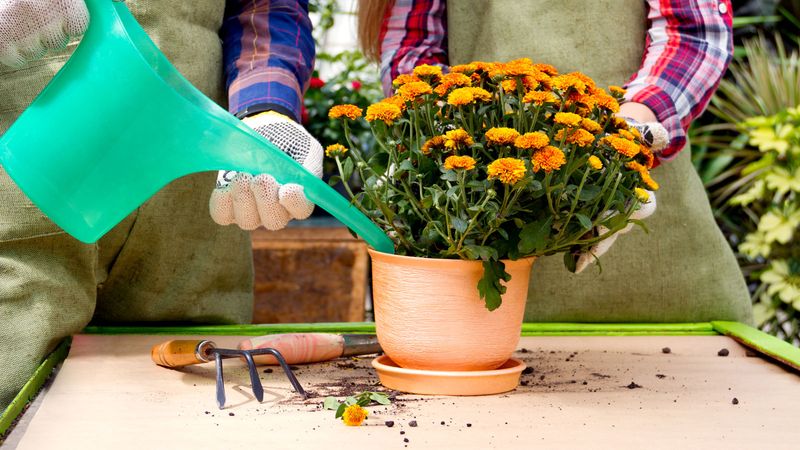
Southern summers can flip from flooding thunderstorms to crispy dry spells in about a single week. Mums with shallow roots feel those swings quickly, often wilting by afternoon when the soil turns dusty.
Steady moisture through spring and summer helps them build the leafy framework that supports fall flowers. Stressed plants tend to produce fewer buds, so consistent watering pays off later in the season.
Aim the hose or watering can right at the soil, rather than sprinkling the leaves from above. Wet foliage in our muggy climate is an open invitation for powdery mildew and leaf spot.
Soaker hoses are my favorite shortcut, since they deliver water slowly where the roots can use it. Early morning watering also helps, because any splashed leaves dry quickly once the sun rises higher.
Newly planted divisions need extra attention, so check them every couple of days during their first month. Established clumps usually do fine with a deep soaking about once a week when rain is scarce.
Container mums dry out much faster than ground plants, sometimes needing water every single day in heat waves. Lift the pot occasionally, because a surprisingly light container is a quick clue that it needs a drink.
Overwatering causes its own headaches, so let the top inch dry slightly between deep summer drinks. Yellowing lower leaves with soggy soil usually mean the plant wants a little less help from you.
11. Scout Mum Leaves for Aphids and Spider Mites
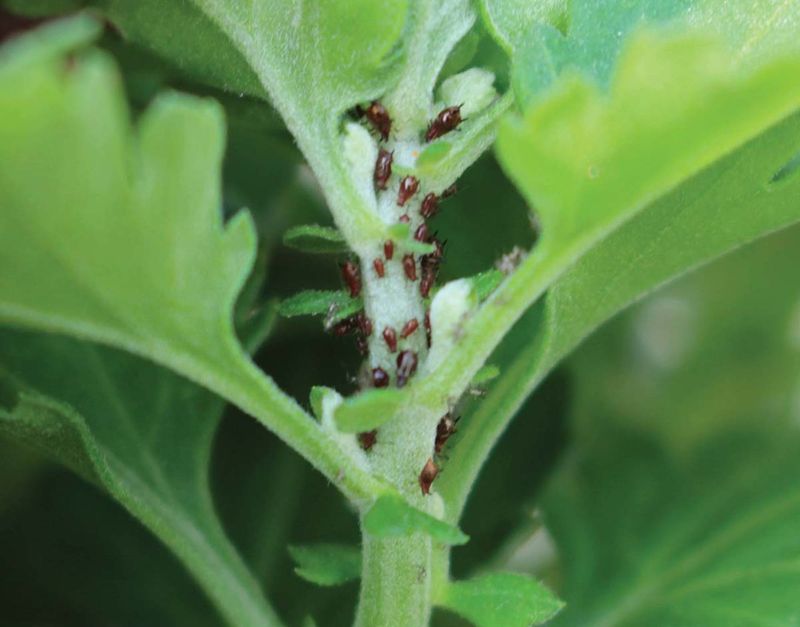
Aphids can give birth to live young without mating, so a few bugs become a crowd surprisingly fast. Tender mum shoots in spring are exactly the kind of juicy buffet those tiny insects love to find.
A weekly stroll through the garden with your eyes on the leaf undersides catches trouble early. I usually make mine a morning ritual, coffee mug in one hand and a magnifying glass nearby.
Spider mites thrive in hot, dry weather, leaving pale speckles and fine webbing across the foliage. Tap a branch over white paper, and moving specks that look like pepper usually confirm their presence.
A strong spray of water from the hose knocks off many aphids and mites without any chemicals. Insecticidal soap or horticultural oil can help with heavier infestations, as long as you follow label directions.
Diseases deserve a watchful eye too, especially powdery mildew and bacterial leaf spot during humid stretches. Pull off spotted leaves promptly and toss them in the trash, rather than leaving them on the ground.
Good airflow is your best protection, so give plants room and thin crowded stems when needed. Ladybugs and lacewings also gobble aphids, so go easy on broad sprays that harm these helpful hunters.
Your county office of N.C. Cooperative Extension can help identify mystery bugs if you bring a sample. Catching problems early means healthier summer growth and a much fuller show of blooms next fall.