Turtlehead Seed Pods Are Forming In Your New Jersey Garden, So Here Are 8 Things To Do Before Winter
A bumblebee has to shove its whole fuzzy body inside one particular white flower just to reach the nectar.
That clumsy wrestling match ends weeks later with plump green capsules swelling along sturdy stems in New Jersey gardens.
Those capsules are slowly turning brown right now, and each one holds dozens of tiny seeds with papery wings. The flowers themselves earned their quirky nickname because each bloom looks a lot like a reptile peeking out.
I have to admit that I ignored those pods for years, then wondered why my patch stayed so small. You might notice the same thing in your own damp corners of New Jersey this October.
A few easy chores right now can turn those little brown packages into more plants and happier wildlife. Which jobs matter most before the first hard freeze settles over your garden beds this year?
1. Turtlehead Seed Capsules Turn Brown And Split Open
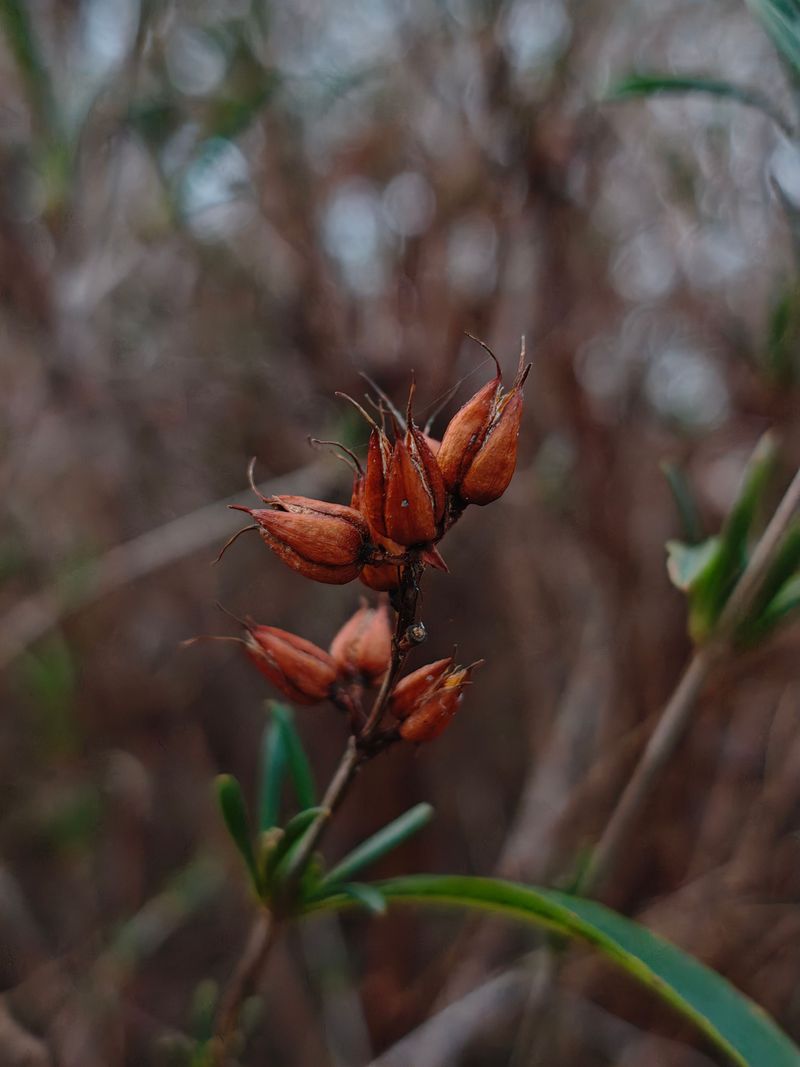
Each turtlehead seed capsule looks like a tiny pointed egg, and I love squeezing one gently to hear it rattle. Those plump little vessels sit tightly along the stem where the white flowers bloomed in late summer.
White turtlehead, known to botanists as Chelone glabra, is a native perennial found in wet meadows and stream banks. It grows well in USDA zones 3 through 8, which covers every corner of our state.
Early in fall the capsules stay green and firm, so they are not ready for collecting yet. As October moves along, they slowly fade to tan and then a deep, papery brown color.
Once fully ripe, the tip of each capsule splits open and releases flat seeds with thin, circular wings. Those wings help the seeds drift short distances or float along on water near their streamside homes.
Personally, I walk my turtlehead patch every few days in October just to check on their progress. A quick peek tells you whether the pods are still green or already starting to split at the tips.
Timing matters because split capsules start dropping seeds right away, especially after windy days and heavy rain. You might find a few already empty, which simply means nature beat you to the job this year.
The stiff brown stalks also look surprisingly handsome in a fall garden, especially when frost coats them. I think they deserve a slow, appreciative look before you grab the pruners or a collecting bag.
2. Snip Ripe Turtlehead Stalks Into A Paper Bag
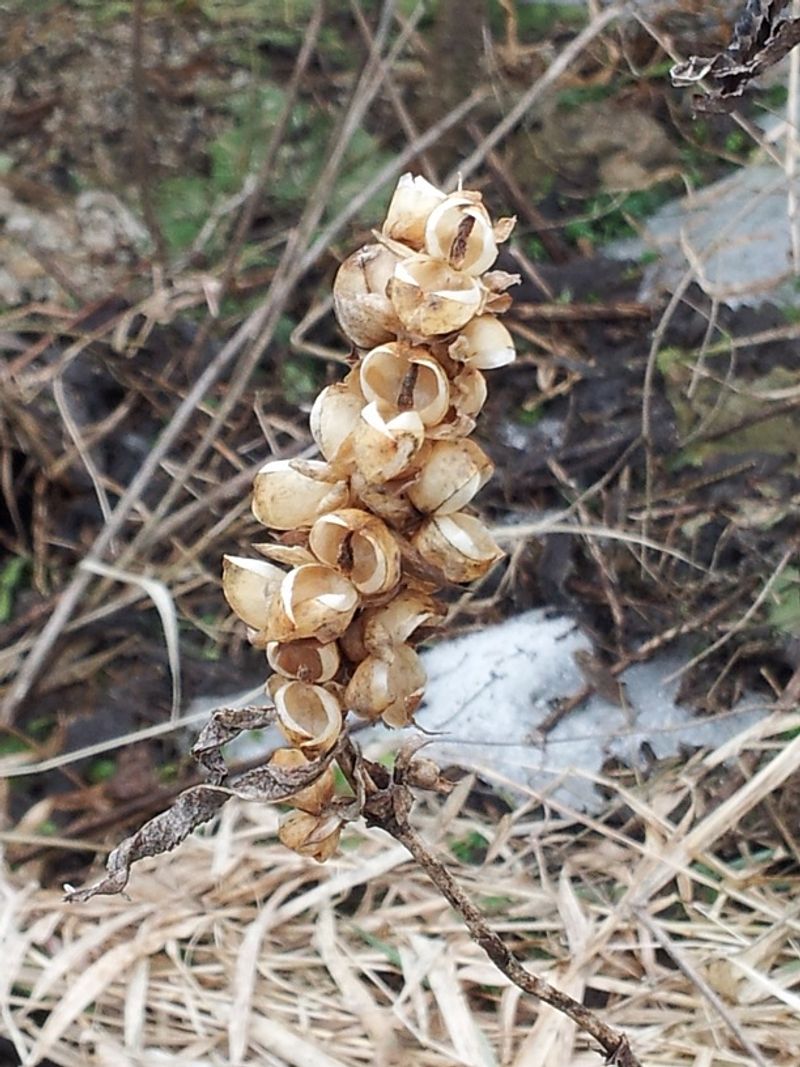
Collecting turtlehead seed feels a bit like a treasure hunt, because the best pods hide under drooping leaves. The ideal moment arrives when capsules turn brown and dry, usually around the first light frost of fall.
Native plant growers usually suggest harvesting when the capsules darken and the very tips begin to crack open. Green pods often hold seeds that are not mature, so patience pays off with this particular plant.
Grab a pair of clean pruners and snip the whole seed stalk a few inches below the capsules. Then tip the stalk upside down into a paper bag so loose seeds land inside instead of on the ground.
Your New Jersey Garden Changes Every Week. Your Plan Should Too.
Gardening in New Jersey changes quickly throughout the season. Every Friday you’ll receive a simple weekly plan showing exactly what to plant, prune, fertilize, harvest, and protect so you never miss the right timing.
Paper works better than plastic because it lets moisture escape, which helps prevent mold from spoiling your harvest. I like to write the date and plant name on the bag with a fat marker.
Set the bag somewhere cool and dry for a week or two while the capsules finish drying out. A garage shelf or a basement table works nicely, as long as curious mice cannot reach it.
Give the bag a firm shake afterward, and most of the winged seeds will tumble right out. You can pour everything onto a white plate to separate seeds from bits of crumbly capsule.
One healthy stalk can produce a surprising pile of seed, more than most home gardeners could ever use. Sharing extras with a local seed swap or a native plant group spreads this lovely plant around.
3. Chill Turtlehead Seeds Before Spring Sowing
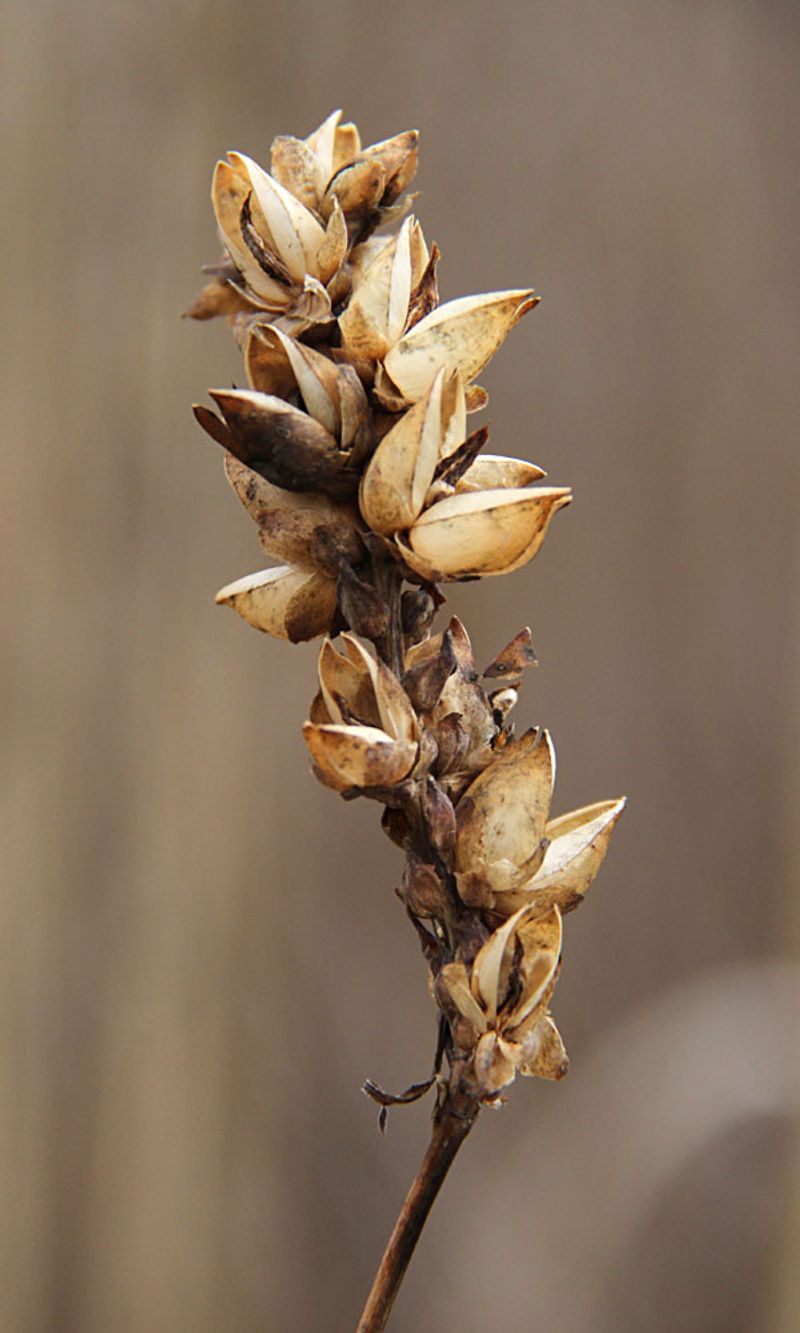
Turtlehead seeds are stubborn little sleepers, and most of them wait to sprout until they feel a long chill. Gardeners call this process cold moist stratification, and it copies the winter conditions seeds face outdoors.
Many native plant sources recommend about 60 days of cold, moist treatment for Chelone glabra seeds. Without that chilly rest, germination rates often stay low and the seed trays sit bare for weeks.
The easiest method for most of us is sowing seeds directly outdoors in late fall or early winter. Press them lightly onto moist soil, and let rain and snow handle the rest through the cold months.
Turtlehead seeds are tiny and need light to germinate, so avoid burying them under a thick blanket of soil. A light sprinkle on the surface usually does the job much better than a deep planting hole.
I prefer the refrigerator method myself, mostly because squirrels and birds cannot raid my seed stash there. Mix the seeds with a handful of damp sand, then seal everything inside a labeled plastic bag.
Tuck the bag into the back of your fridge, away from fruit, and check the moisture every couple weeks. Around two months later, the seeds should be ready for sowing indoors under lights or in pots.
Seedlings grow slowly at first, so expect a year or two before your new plants bloom. That wait feels long, but I promise the first bumblebee visit makes every bit of patience worthwhile.
4. Leave Some Turtlehead Stems Standing For Winter Wildlife
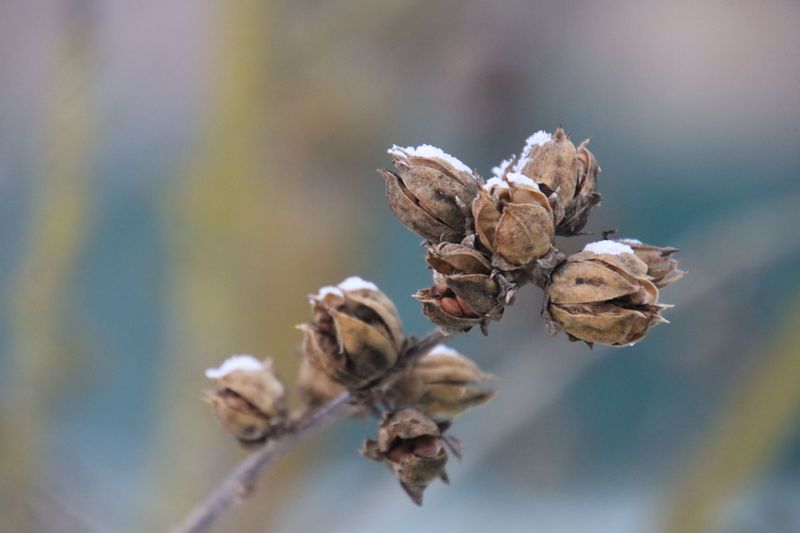
Brittle brown stems may look messy to some neighbors, but many tiny insects see them as cozy winter shelter. Leaving part of your turtlehead patch standing is one of the easiest favors you can do for wildlife.
Extension experts and the Xerces Society encourage gardeners to delay fall cleanup to protect overwintering insects. Some beetles and spiders tuck themselves into dried stems or the cozy leaf litter piled below.
Birds may also poke around the standing stalks, hunting for insects and any seeds left behind. Turtlehead seeds are not a major bird food, so I would not promise a crowd of finches.
Still, every patch of standing plants adds structure, and wrens or chickadees often explore that kind of cover. I enjoy watching them flit between stalks on gray November mornings from my warm kitchen window.
A balanced approach works well if you want some seed for yourself but still care about habitat. Collect pods from a few stalks, then leave the rest of the clump standing until spring.
Snow sitting on those brown stems also looks wonderful, giving your garden some shape during the bare months. A tidy border edge or a small sign can show neighbors that the mess is on purpose.
Once temperatures stay above 50 degrees for a while next spring, you can cut stems back safely. Leaving cut pieces loosely piled in a back corner gives late sleepers a little extra time to emerge.
5. Protect Baltimore Checkerspot Caterpillars In The Leaf Litter
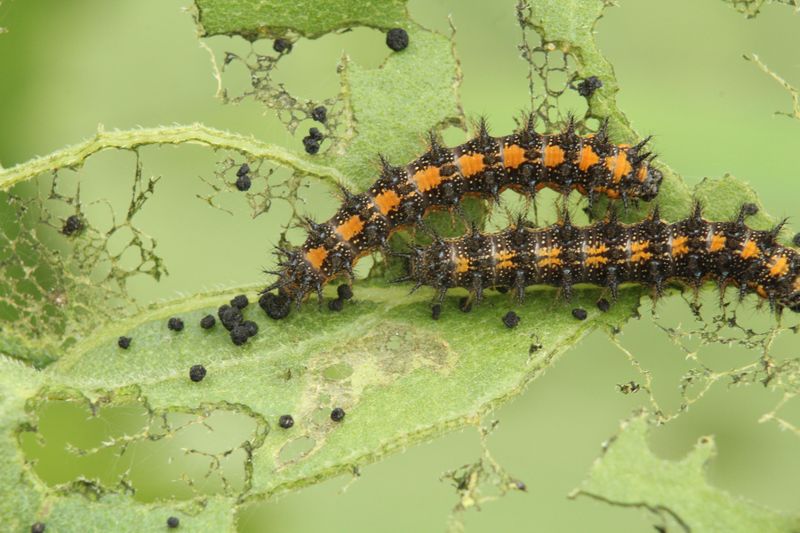
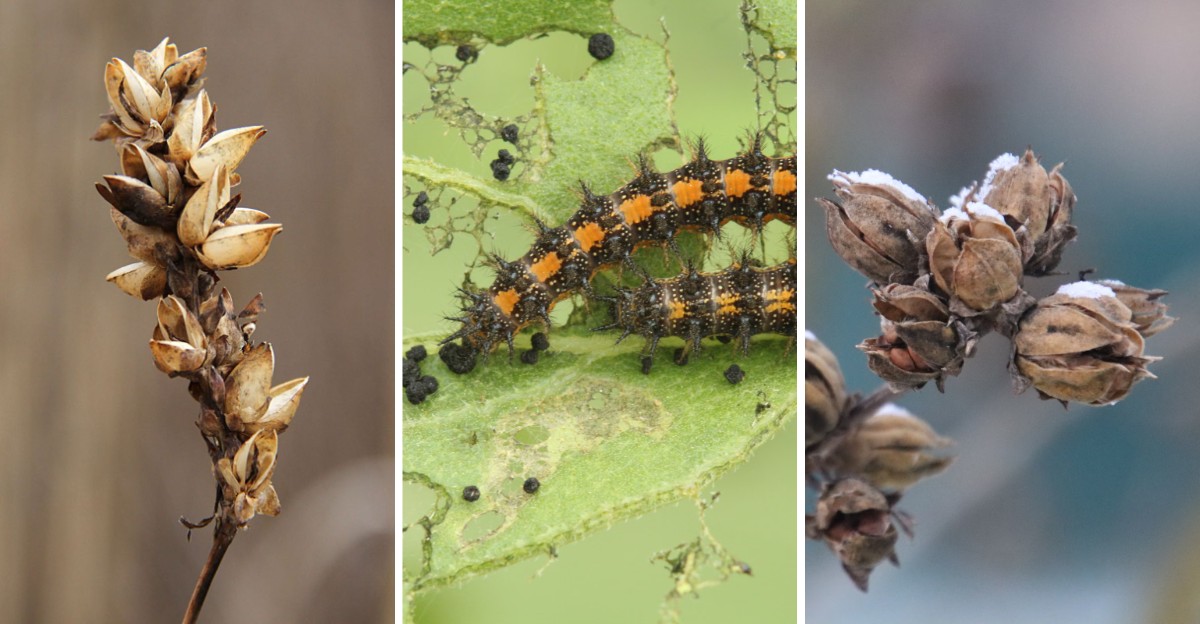
Orange and black Baltimore checkerspot butterflies depend heavily on turtlehead, and their caterpillars may be hiding nearby right now. Spotting their spiky little bodies in a home garden would honestly make my whole gardening year.
Females lay clusters of eggs on turtlehead leaves in early summer, and the young caterpillars feed together inside silky webs. By late summer they stop eating and settle into the leaf litter for the long winter.
Those partly grown caterpillars spend the cold months tucked in fallen leaves near the base of host plants. Raking that area bare in October could remove them before they ever get a chance to finish growing.
In New Jersey, this butterfly is mostly found in wet meadows and fens where turtlehead grows naturally. Local colonies tend to be small and scattered, so every patch of host plants can help a little.
Garden plantings near natural wetlands have the best odds of attracting a female looking for egg-laying spots. Even so, I would plant turtlehead anyway, because bumblebees adore it whether butterflies show up or not.
Spring caterpillars sometimes switch to other plants such as English plantain after they wake up in April. Turtlehead still matters most, though, since mothers mostly choose it for their eggs in early summer.
Skip pesticides around your turtlehead patch, and leave a soft layer of leaves resting under the stems. That small bit of laziness might shelter a future butterfly you get to admire next June.
6. Spread Shredded Leaf Mulch Around Turtlehead Roots
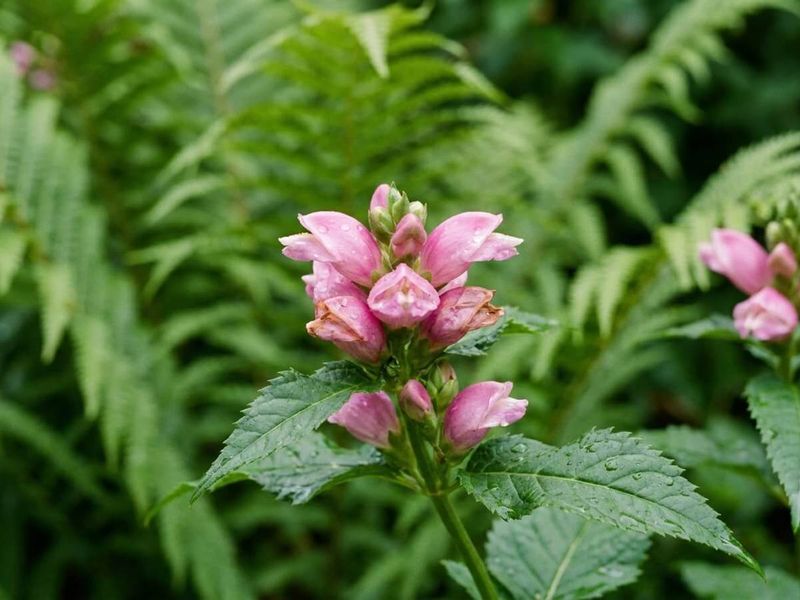
Fallen oak and maple leaves are free mulch, and turtlehead roots seem to love that crunchy brown blanket. This native plant grows wild in damp spots where leaves pile up naturally every single autumn.
Turtlehead is very cold hardy, so mulch here is less about warmth and more about steady moisture. A layer also helps soil avoid repeated freezing and thawing, which can heave shallow roots upward.
Most extension guides suggest roughly two to three inches of organic mulch around established garden perennials. Keep it pulled back an inch or so from the crown so the stems do not rot.
Shredding leaves first with a mower keeps them from matting into a soggy layer that blocks air. I run over my leaf piles a couple times, then rake the bits straight into my beds.
If checkerspots or other insects might be sheltering nearby, leave whole leaves right at the base instead. Shredded mulch works best for the wider bed, while unbroken leaves give tiny creatures a safer hideout.
Avoid dyed wood chips or fresh grass clippings, since they can heat up or change soil conditions quickly. Turtlehead prefers rich humusy soil that stays damp, and rotting leaves build exactly that over time.
By next spring, much of that mulch will have softened into dark, crumbly organic matter around the plants. Earthworms do most of the hard work for you, which feels like a pretty fair trade.
7. Water Turtlehead Deeply Before The Ground Freezes
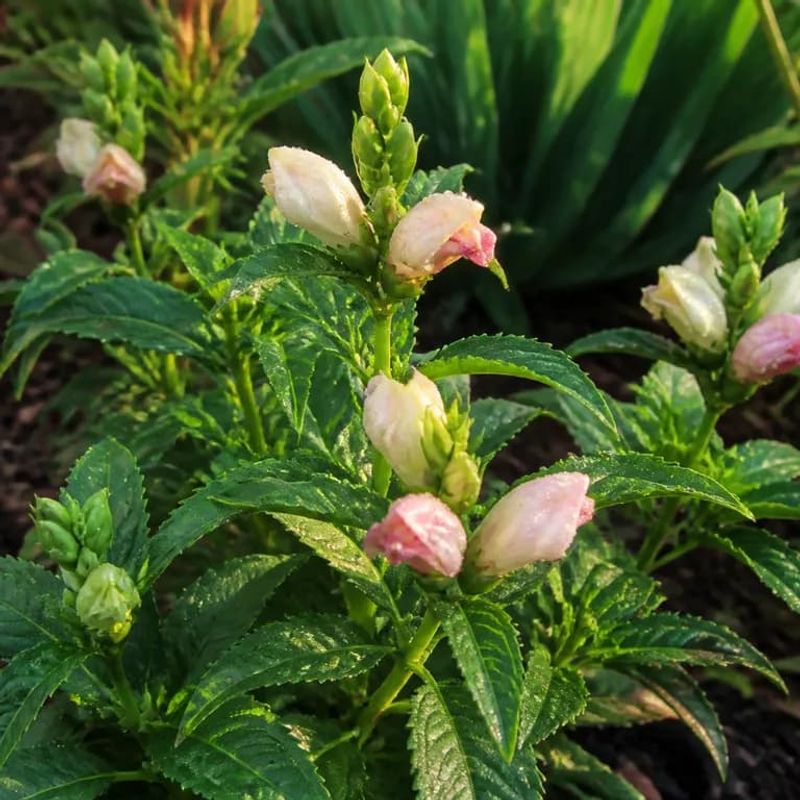
Turtlehead is a swamp-loving plant at heart, and a dry fall can leave its roots surprisingly thirsty. Autumn in New Jersey sometimes brings stretches of dry, sunny weather that can stress damp-loving perennials.
In the wild, Chelone glabra grows along stream banks and swampy woods where soil rarely dries out. Garden plants in average beds often need extra help when rainfall drops off in October and November.
Push a finger a couple inches into the soil near the clump to test the moisture yourself. If it feels dry, give the area a long, slow soaking rather than a quick sprinkle.
Roughly an inch of water each week is a common rule of thumb for perennials before winter. A soaker hose or a watering can held low delivers water right where the roots need it.
Morning watering works best, because leaves dry off during the day and chilly nights stay less soggy. I keep watering whenever the soil is dry until the ground begins to freeze later in the season.
Moist soil also holds heat better than dry soil, which can help buffer roots during sudden cold snaps. Combined with that leaf mulch, a good soaking sets your plants up for a strong start in spring.
Planning a new turtlehead bed next year is easier when you choose a low spot that collects rain. Part shade helps too, since these plants handle full sun best when their roots stay consistently wet.
8. Mark Your Turtlehead Clumps Before They Go Dormant For Winter
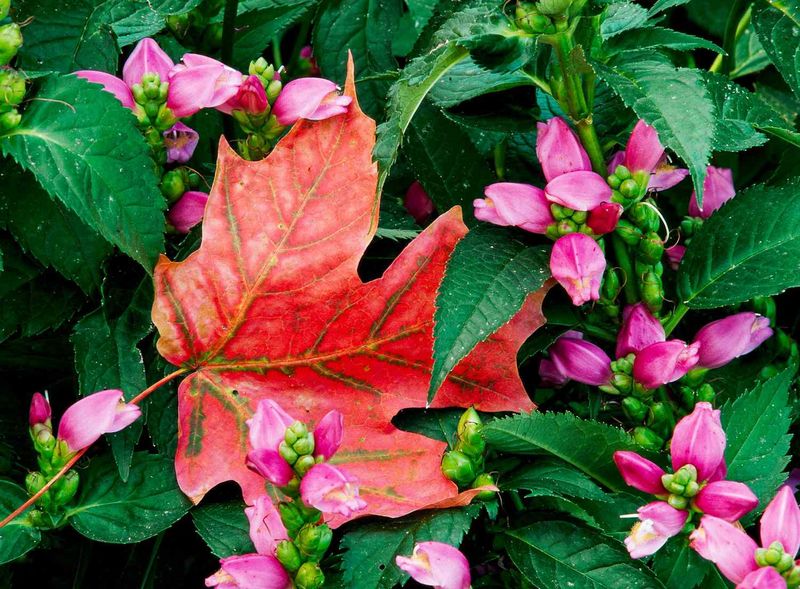
Turtlehead wakes up late in spring, and I once nearly planted tomatoes right on top of my clump. A simple marker placed now saves you from that kind of embarrassing shovel accident next April.
Sturdy metal plant tags or painted rocks work well, as long as they can handle snow and frost heave. Write the plant name and the color if you grow both white and pink turtlehead types.
Pink turtlehead, Chelone lyonii, is native to the southern Appalachians, while white turtlehead is native here. Both are well-behaved garden plants, but white turtlehead is the one Baltimore checkerspots rely on locally.
Marking clumps also helps you plan spring division, since older turtlehead patches can be split every few years. Spring is a great time to dig and separate them, right as fresh shoots poke through the soil.
Another handy spring trick is pinching the stem tips once plants reach about a foot tall. Pinching creates bushier plants that are less likely to flop over in wet late summer storms.
I also jot quick notes in a garden journal about which clumps produced the most flowers this year. Those scribbles help me decide where to sow saved seed or move divisions once the weather warms.
Deer usually ignore turtlehead, so the clumps you mark this fall should still be waiting for you next spring. That reliability makes it one of my favorite native plants for damp corners across New Jersey.