3 Warning Signs That Your Peace Lily Needs Repotting And How To Do It
One of the most stressful things for a Peace lily plant parent is seeing it lose its gorgeous appearance and vigor.
Many growers start to panic and forget that plants aren’t dying every time they display certain unhealthy-looking changes.
Instead of panicking, remember the last time you changed the pot and soil of your Peace lily. In this article, I’ll show you the 3 warning signs that your Peace lily needs repotting.
If the plant displays any of these signs and it has been two (or more) years since you repotted it, you have the answer. Don’t worry, I’ll show you the repotting steps and give you some pro tips on maintaining Peace lilies.
Let’s get started!
1. Roots Poking Through Drainage Holes
The easiest way to check if your Spathiphyllum plant needs repotting is by observing the roots. You must be wondering how it’s possible to see the roots if they’re in the soil?!
Well, if the roots of this tropical beauty are poking through the drainage holes, they don’t have enough space to spread within the pot.
Additionally, if your Spathiphyllum is rootbound, you may also notice the roots poking through the soil surface.
The thing is that Spathiphyllum plants like being slightly rootbound. The problem arises when the tangled roots cause the soil to become compact as it affects the water and nutrient absorption.
To save your Peace lily from additional issues and damage, you’ll need to change the soil and container, i.e., repot it.
2. Hard And Crumbly Soil
In some cases, the Peace lily roots may not poke through the holes or surface but the plant will still need repotting.
If the growing substrate looks depleted of nutrients, the only way to fix the issue is to replenish the soil.
Another way to tell if the soil isn’t in good condition is by checking the water retention. When you irrigate your Peace lily and the water just runs straight out through the drainage holes, the soil doesn’t have the capacity to hold water.
You can try to aerate the soil by making a few holes with a chopstick before irrigation. If that doesn’t help, you’ll need to repot your Spathiphyllum.
3. Discolored Leaves
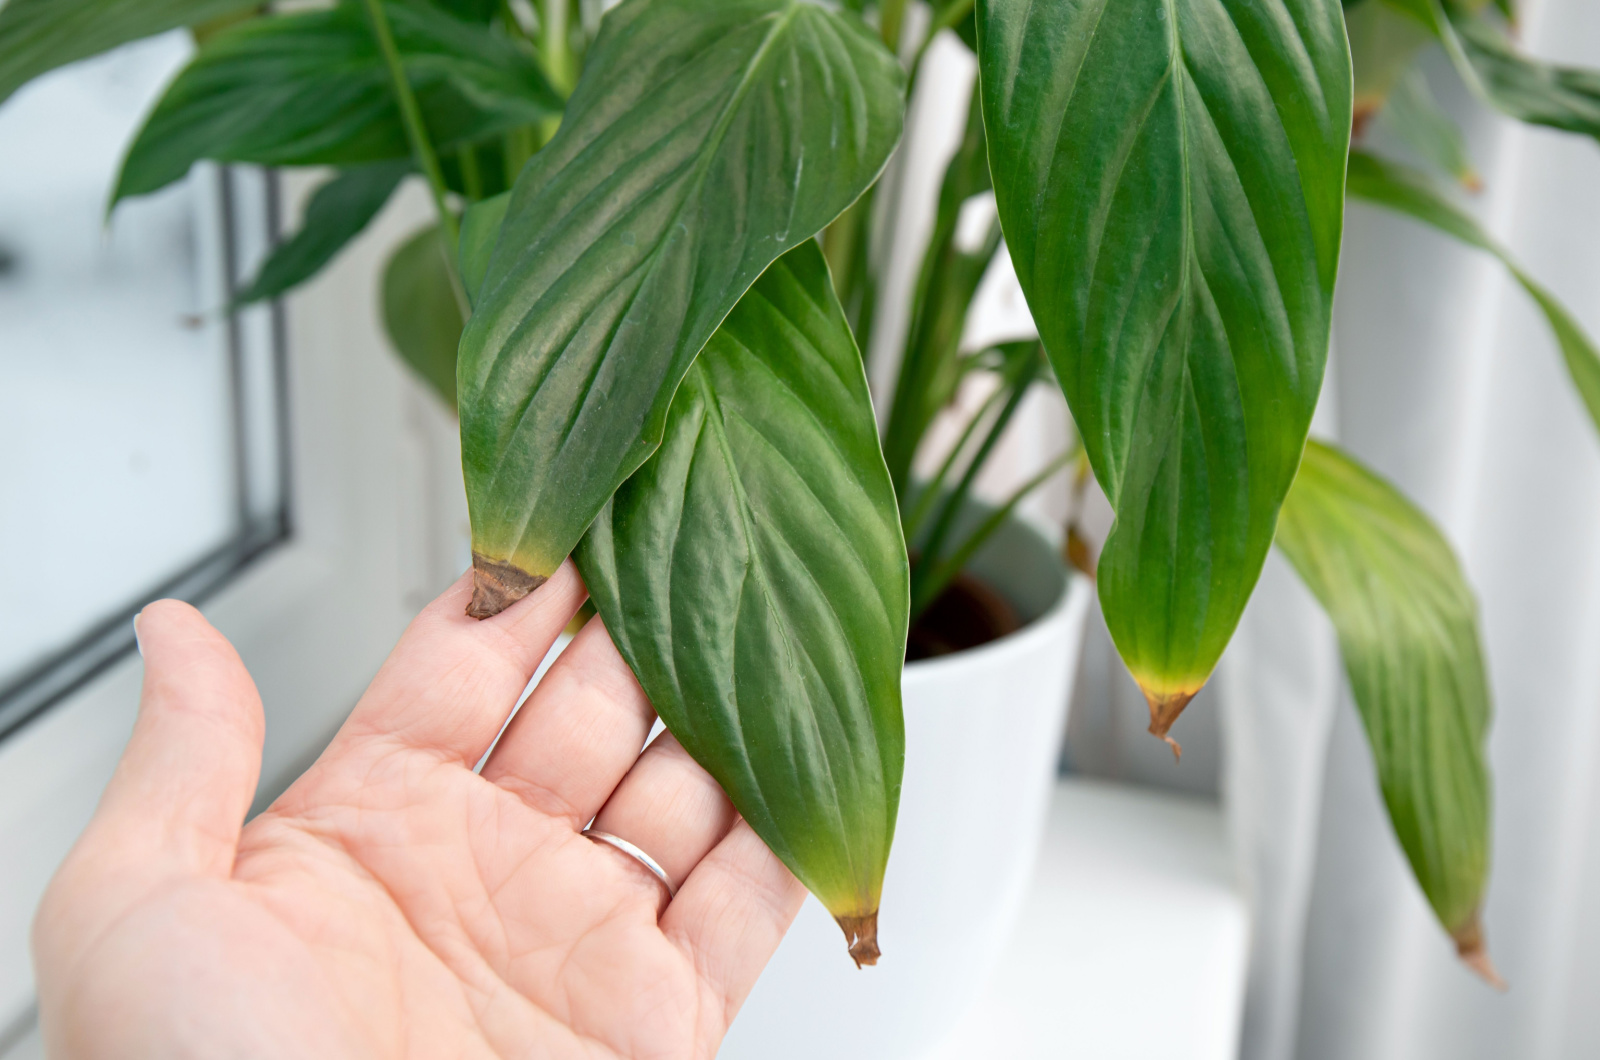
One of the first signs we notice on distressed plants is discoloration of the leaves. The biggest problem is that this condition may indicate many serious conditions in your Peace lily.
For instance, if the leaves of your Peace lily are turning brown or yellow, the most common cause is overwatering.
Discoloration primarily occurs if the roots can’t send nutrients and water to the leaves. Your Peace lily may be in serious danger of root rot disease in this case.
It’s hard to determine the true reason for this disease but here are the most common ones:
1. A Peace lily was planted in a container with poor drainage.
2. You irrigated it too frequently.
3. The container was placed in water for too long after irrigation.
Many plant parents think that the plant lacks water if it displays discoloration and add more water to fix it. This makes things even worse and puts the Peace lily plant in danger.
The only solution for this problem is repotting your prized plant.
Now let’s see how to do it!
How To Repot
Repotting Peace lily plants isn’t a hard task and all you need to do is follow the steps below.
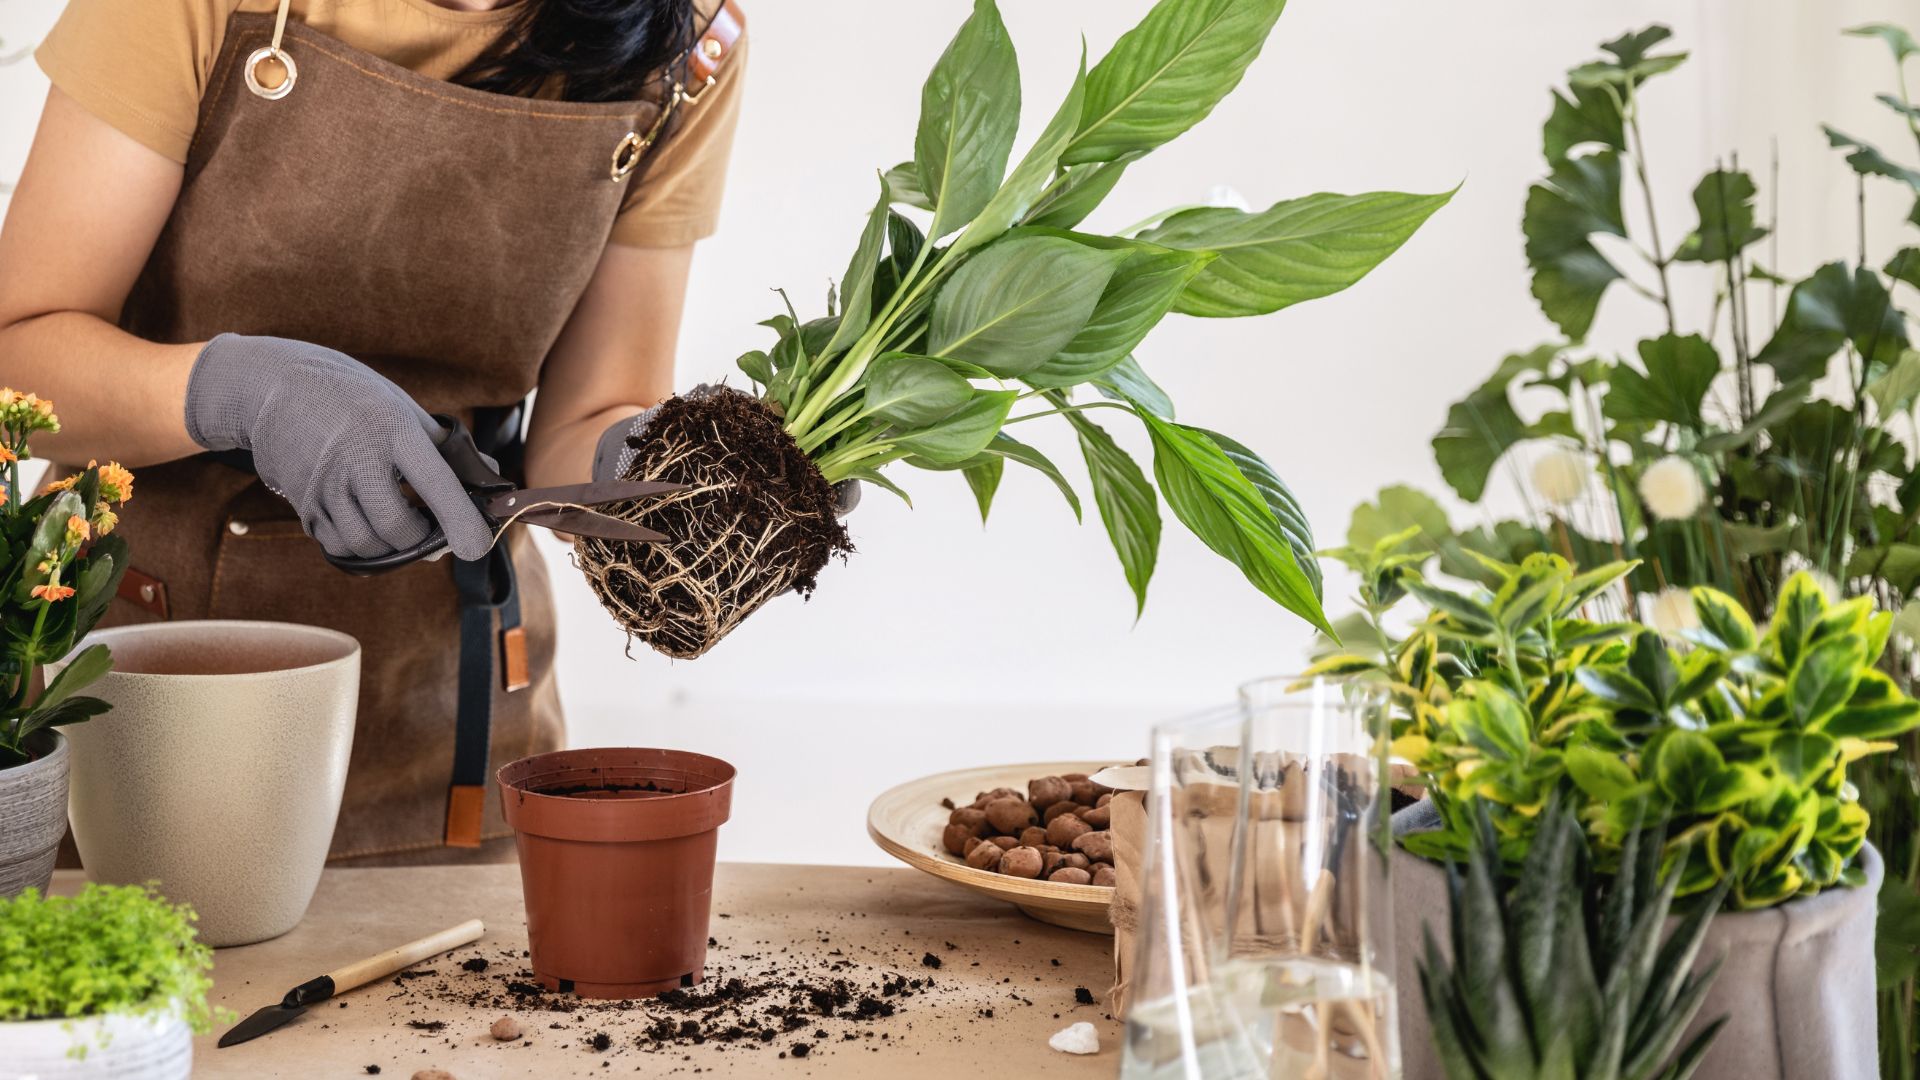
Step #1: Take The Plant Out Of The Pot
The first thing you should do is let your Spathiphyllum dry out for a few days. This will make it easier for the plant to come out of its current container.
Many houseplants may get stressed if they use this approach, but remember that the Peace lily is a tough plant and that’s why we love it so much.
Gently squeeze the sides of the pot and pull your Spathiphyllum while holding it by the stems. You can shake it carefully if the roots are stuck in the drainage holes.
If it doesn’t come out, take a knife and slide it around the container’s edges.
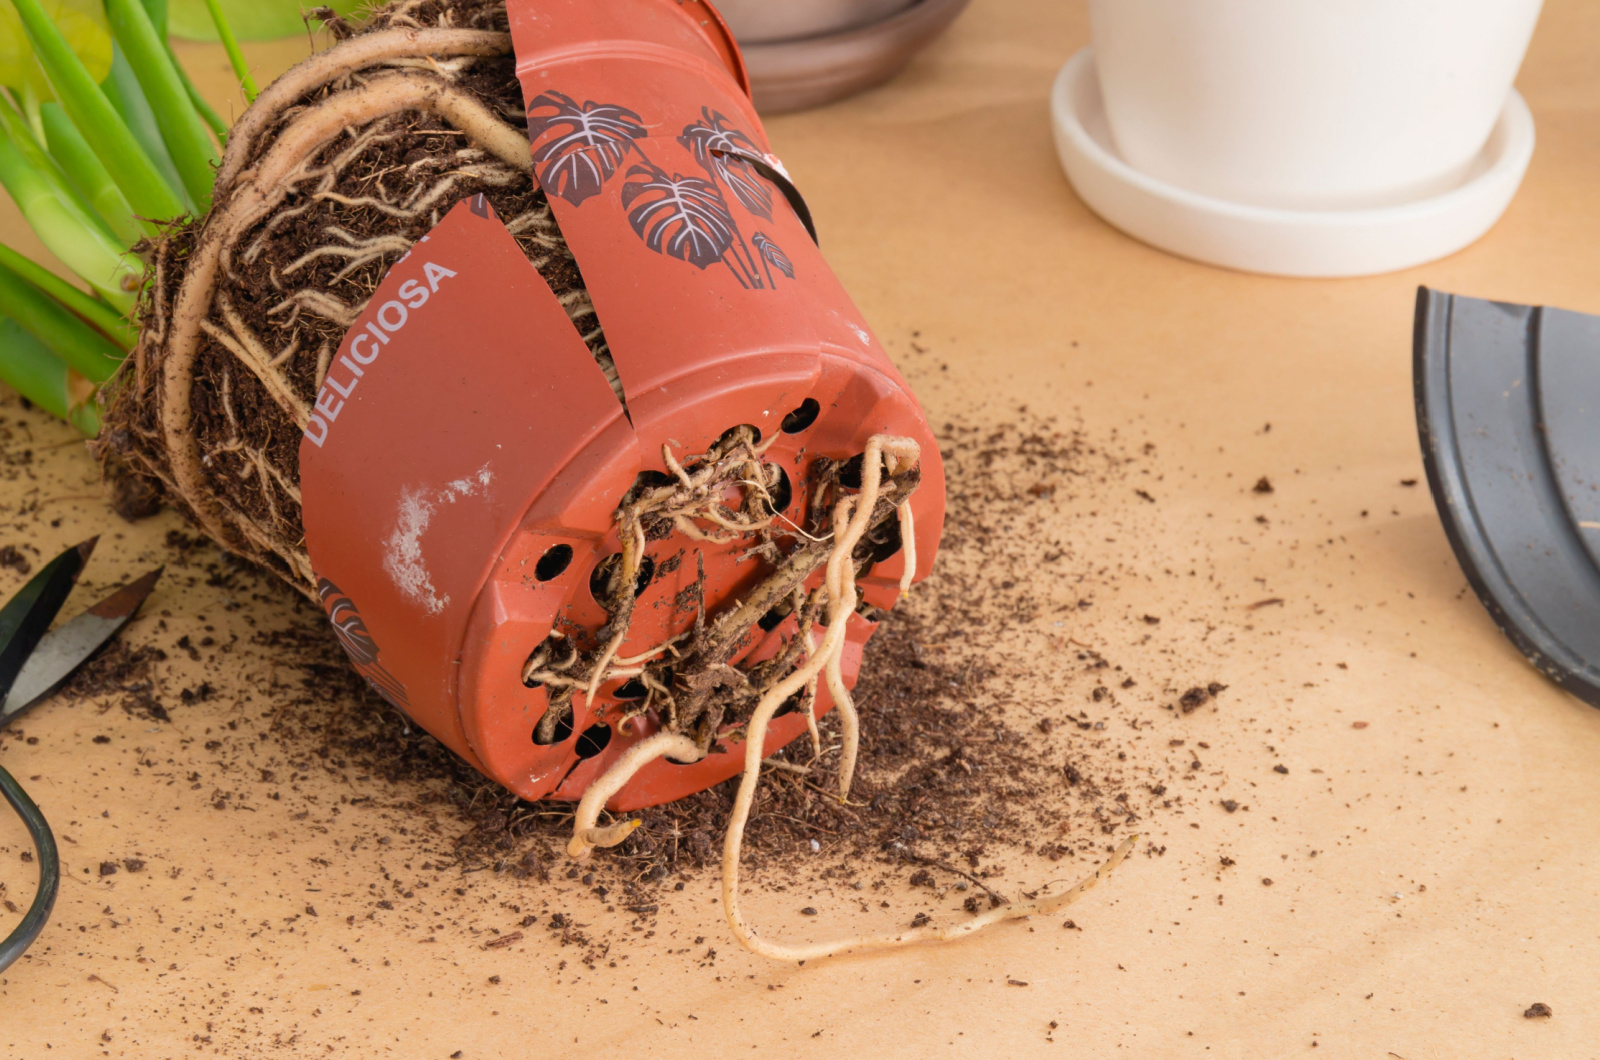
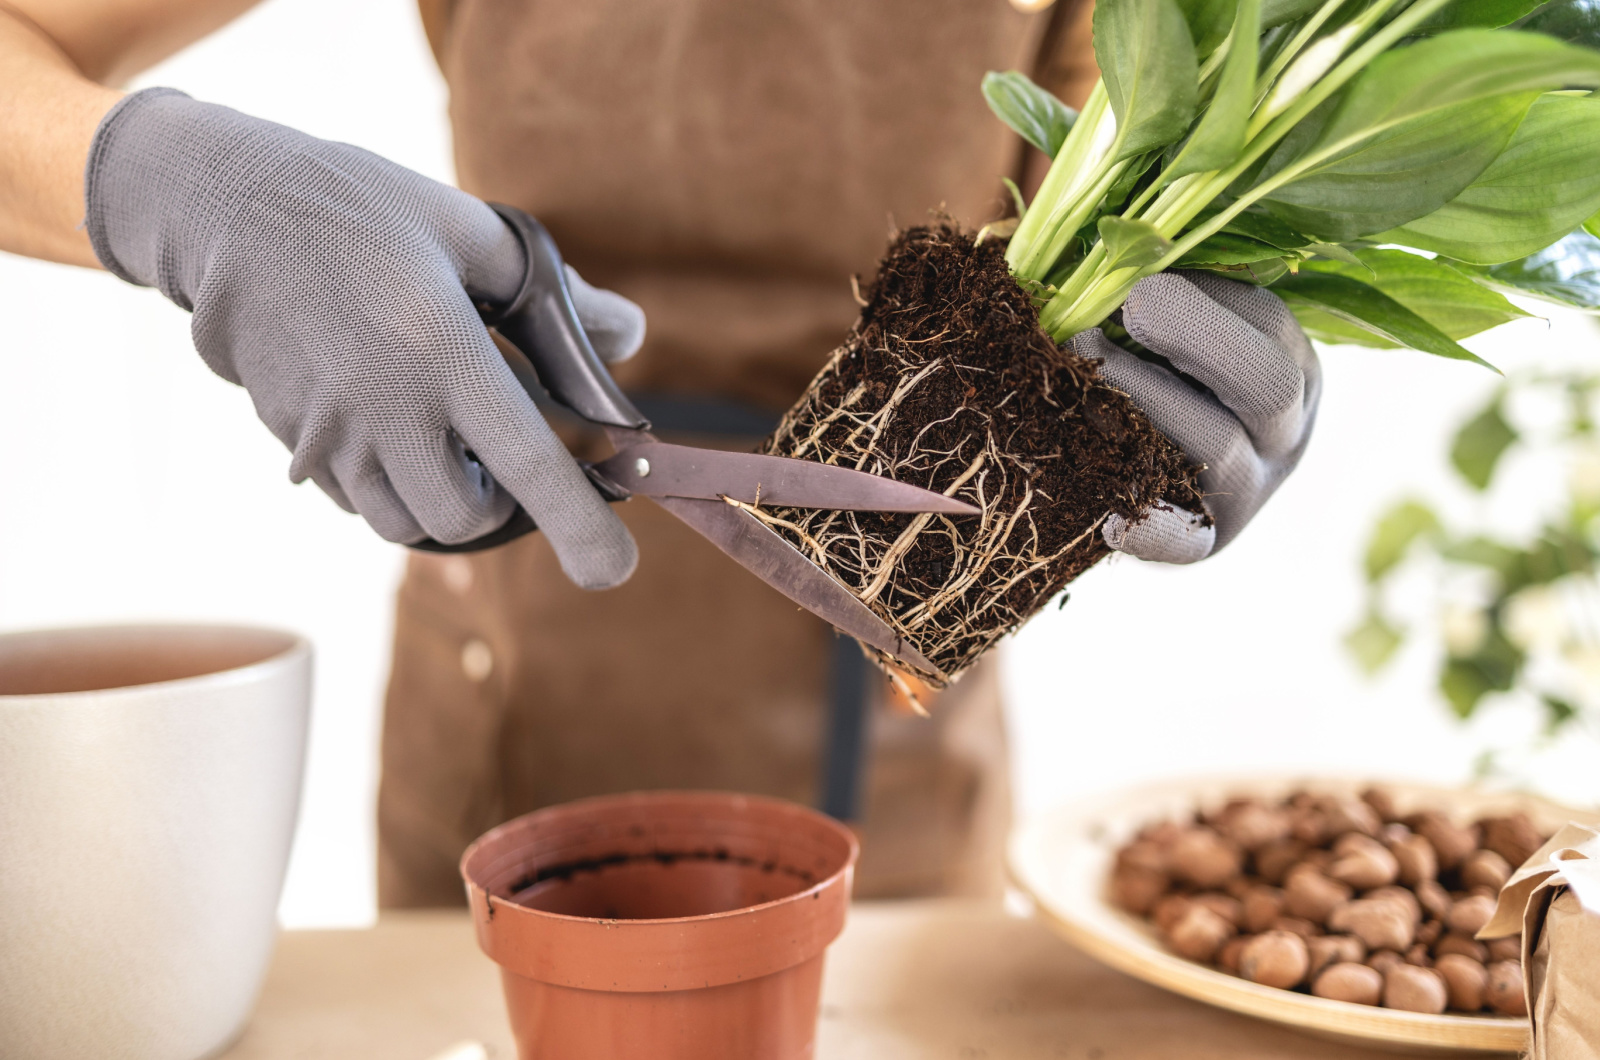
Step #2: Inspect The Roots
Root inspection is an essential step in repotting, especially if the reason for this gardening technique is leaf discoloration.
Remove as much soil from around Peace lily roots as possible so that you can clearly see their color and structure.
If the roots are white and firm, you can proceed with repotting. Mushy, discolored, and smelly roots indicate infection or pest infestation and this requires special treatment.
You must cut off the infected parts using a pair of sterilized and sharp scissors. Dispose of the diseased Peace lily parts along with the soil.
Never, ever reuse soil in this condition or add it to your compost pile!
Step #3: Divide The Roots (Optional)
I have a suggestion for all of you who would like to expand your Peace lily collection. Once the plant is removed from the pot and the root system is healthy, you can divide it and use it for propagation.
This step is optional and you can skip it if you like the size and shape of your beloved Spathiphyllum.
So, for this propagation method, look for the roots that have sent small offshoots (root nodes). Cut off the section using a sharp pair of scissors and plant it into a small pot.
If you have a large Peace lily, you can divide it into as many sections as you want (as long as each section has roots).
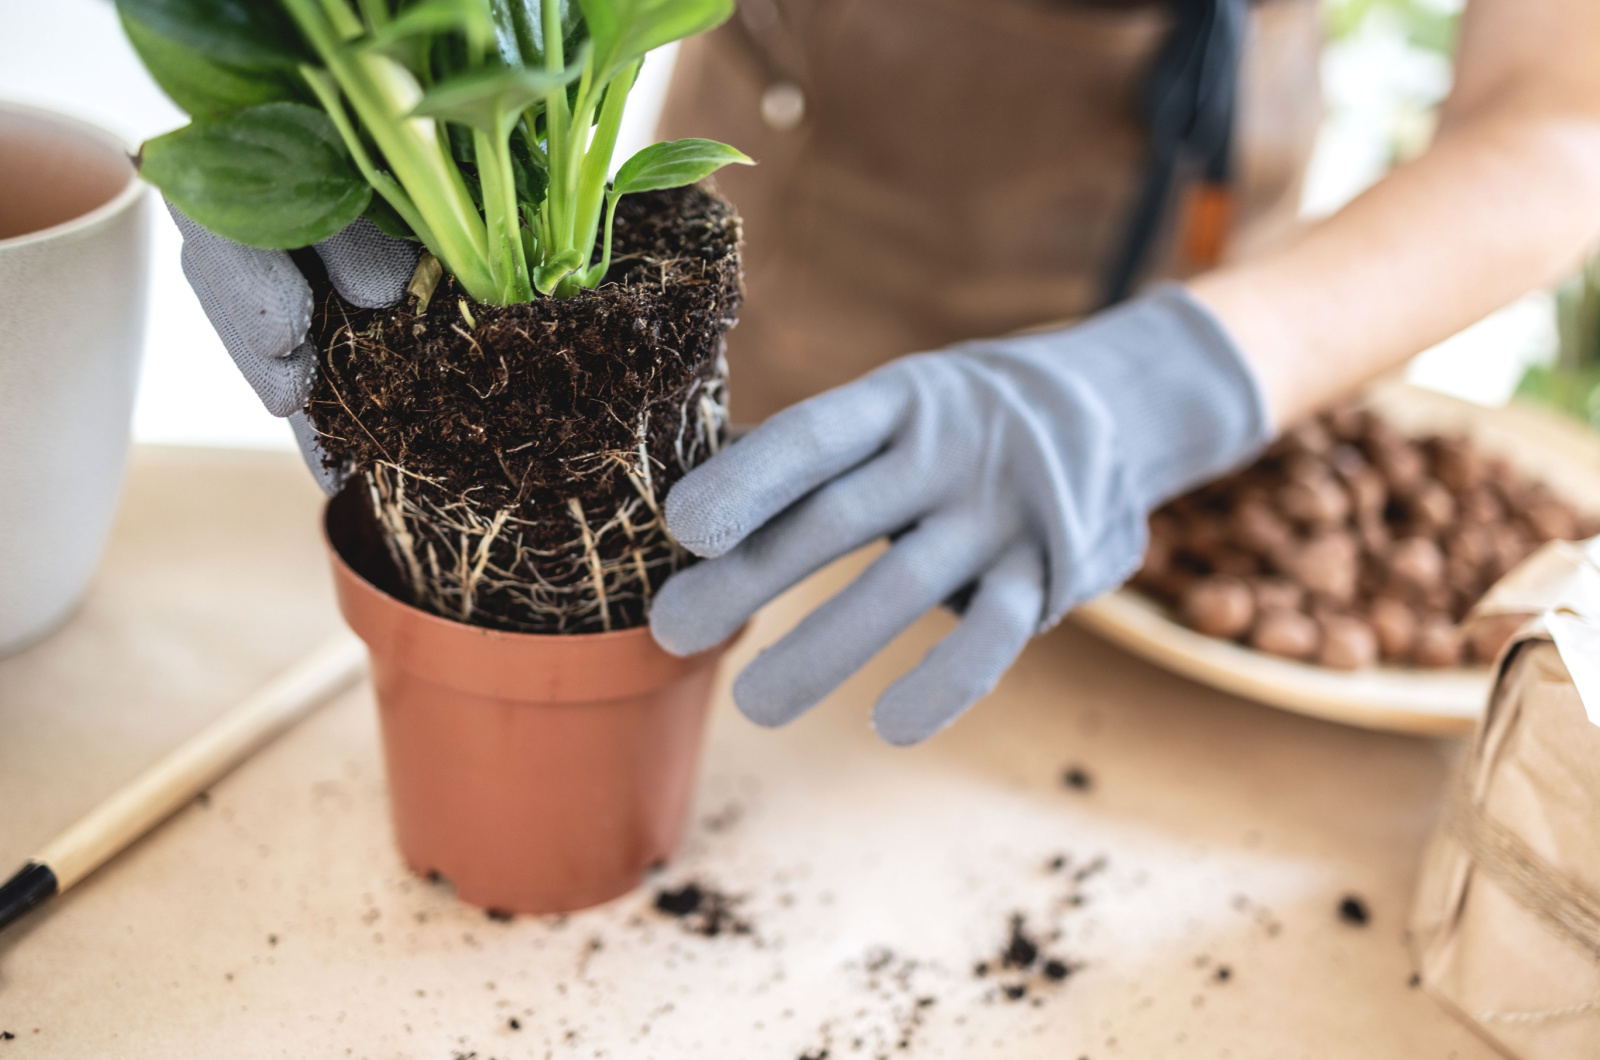
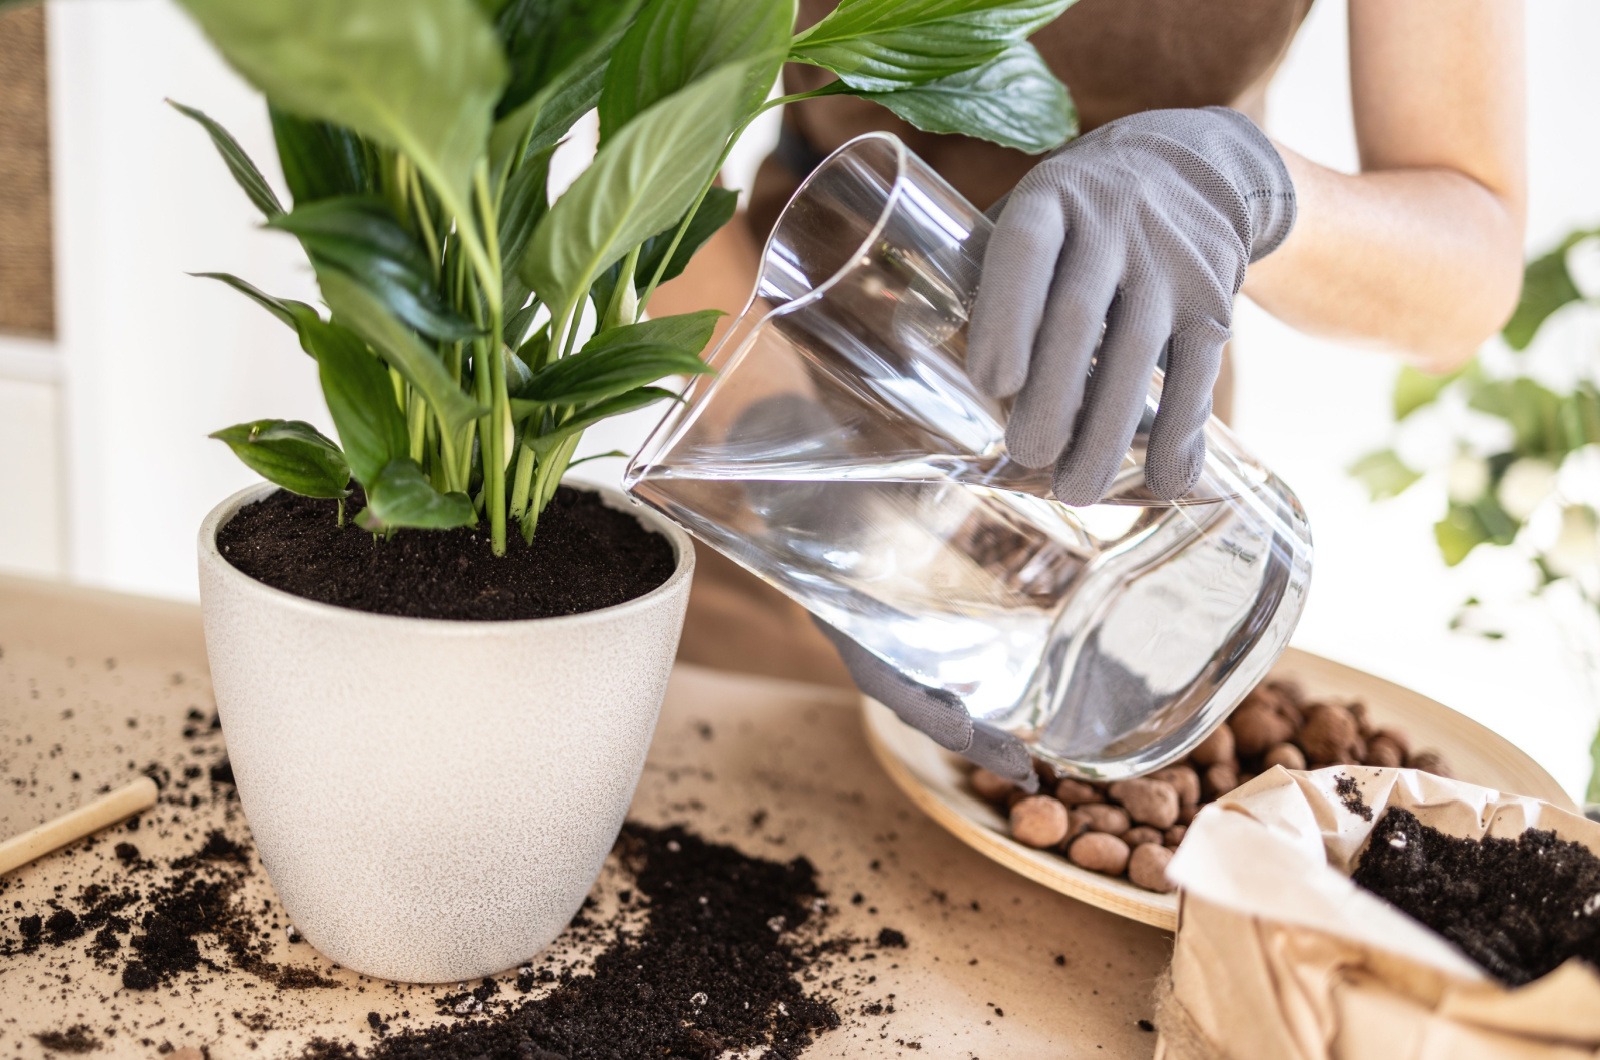
Step #4: Repot
Before you put your Spathiphyllum in new soil, you should prepare the container. If the plant hasn’t overgrown the pot and you’re just repotting to replenish the soil, you can reuse the container (make sure to clean it well).
For rootbound plants, select a container that’s about 2 inches larger in diameter than the current one.
Now prepare the soil; never use old contaminated soil or garden soil. Pathogens from the contaminated soil will transfer to your freshly repotted plant and it could die.
Garden soil is too compact and the amount of water it retains is simply too much for Spathiphyllum plants.
Purchase standard potting soil and, to improve its drainage, add a handful of perlite.
Fill one-third of the container with prepared potting soil and carefully place your Peace lily on the top. Add more soil, pack it well, and give the plant a good soak.
Step #5: Meet The Requirements
Your Peace lily may droop or show other signs of transplant shock. To minimize this, make sure to keep the plant in a warm spot exposed to bright indirect light.
Pay attention to the amount and the way you irrigate your Peace lily; wait until the top 2 inches of the growing substrate dry out and then irrigate.
Repotting techniques may be challenging to beginners, so make sure to follow our guidelines carefully. And remember, your Spathiphyllum will be healthier and happier after repotting and that’s your main goal!