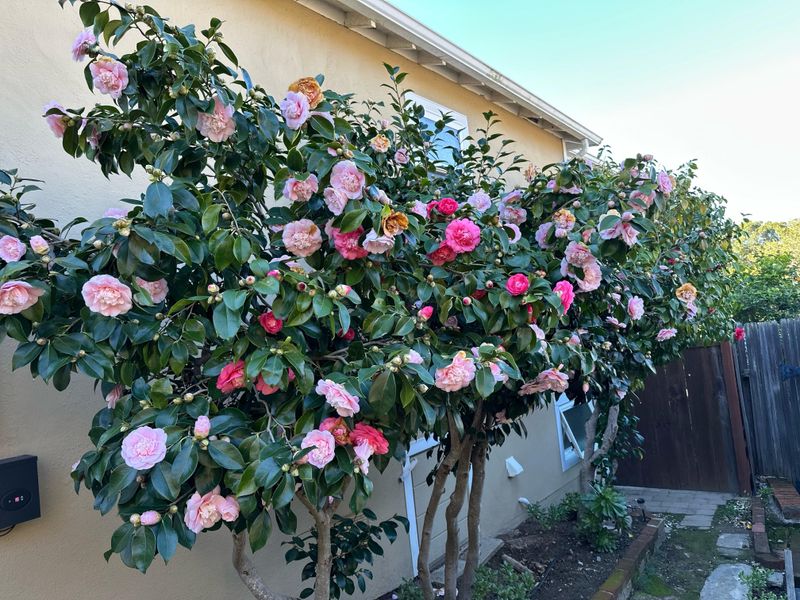
What Oregon Gardeners Should Do After Camellias Finish Blooming

That moment when your camellia drops its last bloom is honestly a little bittersweet. One day your garden is covered in those big, lush flowers that make the whole Pacific Northwest winter feel totally worth it, and then just like that, the show is over.
Most gardeners shrug, walk back inside, and forget about the plant until next season. And that right there is the mistake costing them the best blooms of their gardening life.
What you do in the weeks right after your camellia finishes flowering is arguably more important than anything you do while it’s actually blooming.
This is the window where the plant is quietly deciding how spectacular next year’s display is going to be, and it needs a little help making the right decisions.
The good news is that the post-bloom care routine for camellias is straightforward, totally doable, and genuinely makes a huge difference come next spring.
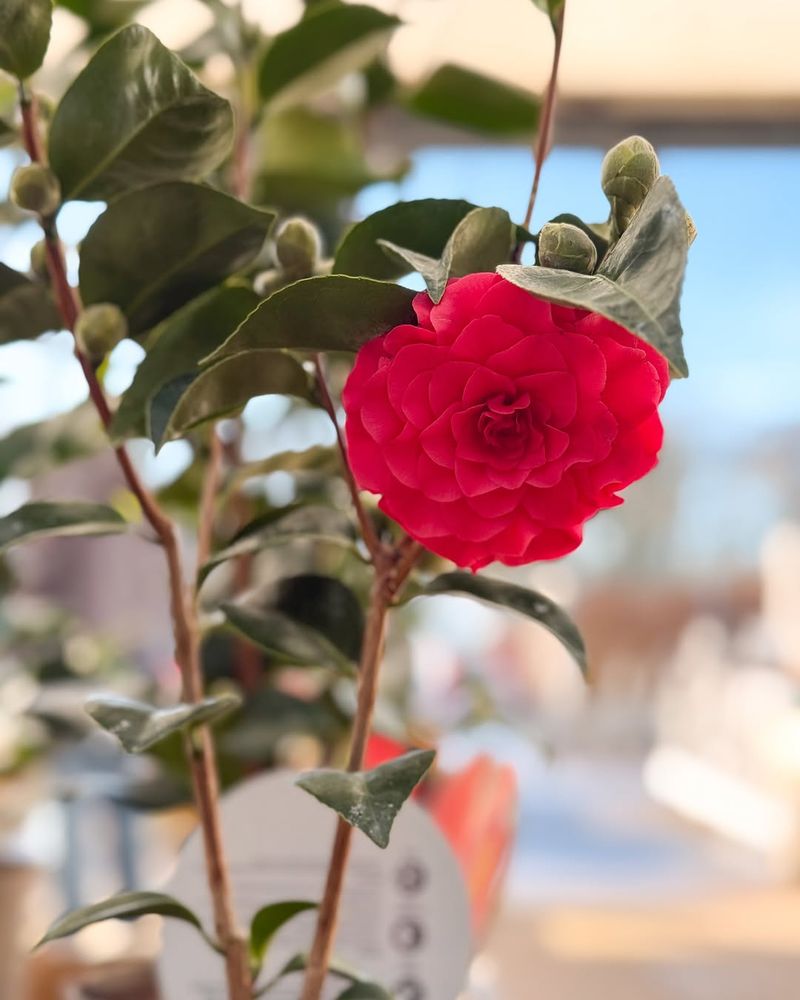
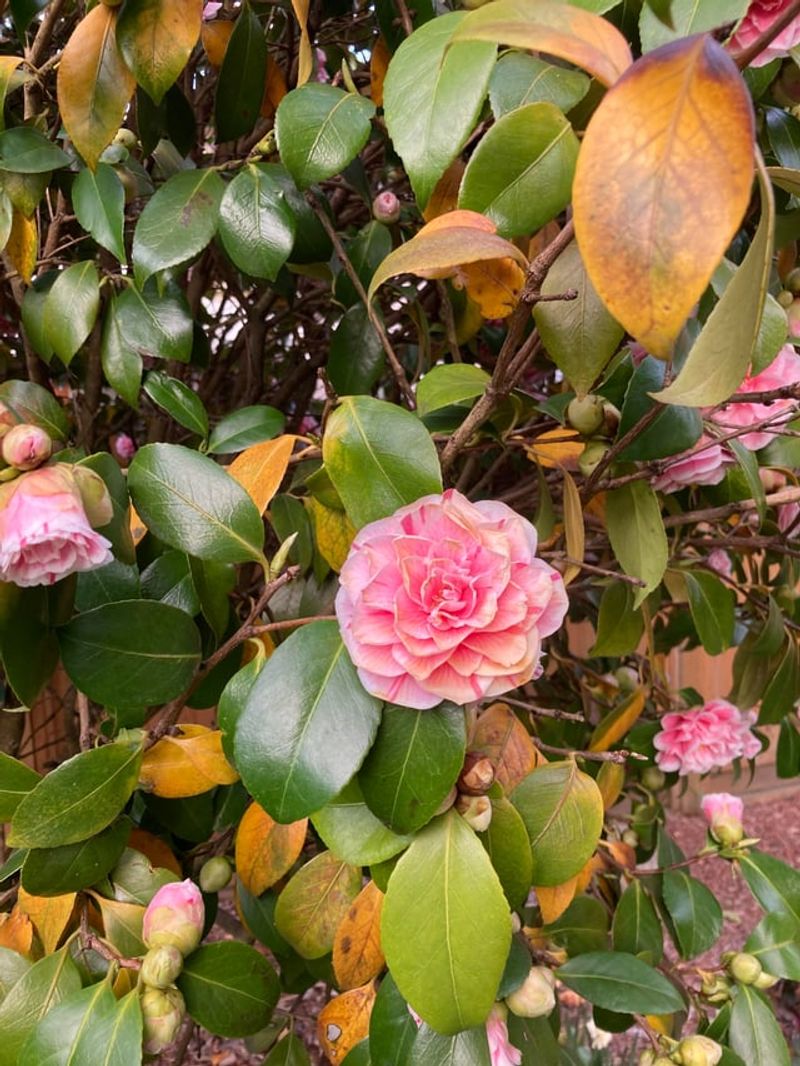
1. Remove Spent Camellia Blooms
After the flowers fade, those old brown blooms do not fall off on their own like some plants, they do need some help. They cling to the branches and can look messy if left behind.
Picking them off by hand is one of the easiest and most rewarding jobs in the garden.
In Oregon, the wet spring weather can cause spent blooms to rot right on the plant. That rotting can spread fungal problems to nearby healthy leaves and buds.
Removing those old flowers quickly helps prevent that kind of trouble before it starts.
You do not need any special tools for this task. Just walk around your camellia every few days and gently pull off the faded blooms.
Drop them into a bucket or garden bag rather than leaving them on the soil below.
Fallen petals and old blooms left on the ground can also invite fungal issues. Keeping the area around the base of your camellia clean makes a big difference.
Oregon gardeners who stay on top of this simple chore tend to have much healthier, better-looking shrubs all season long.
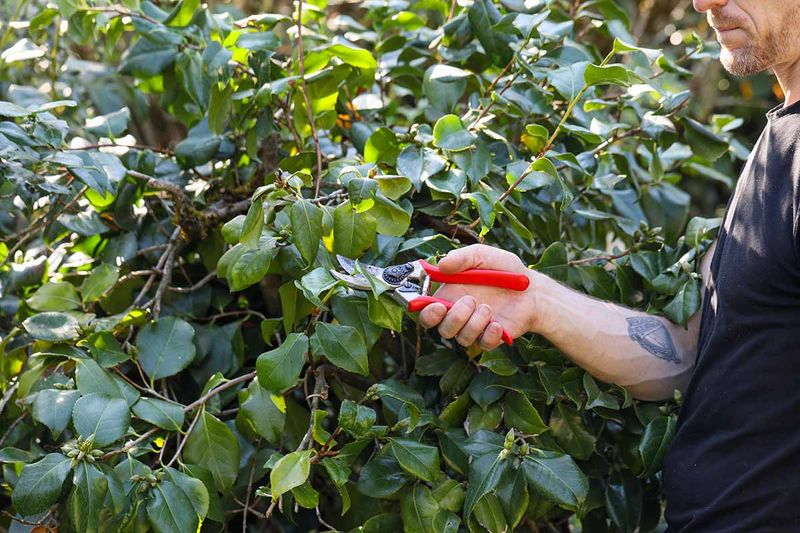
2. Prune Right After Flowering
Timing is everything when it comes to pruning any shrub and the rule goes for camellias as well. The best window is right after the last flower drops, usually in late winter or early spring here in Oregon.
Waiting too long means you risk cutting off the new buds that are already forming for next year.
Pruning at the right time encourages strong, healthy new growth. That fresh growth is exactly where next season’s flower buds will develop.
Missing that window by even a few weeks can cost you a whole year of blooms.
Use clean, sharp bypass pruners for any cuts you make. Dull or dirty blades can crush stems and introduce disease into your plant.
Wipe your blades with rubbing alcohol before and after working on each shrub.
Focus on removing any dead, crossing, or awkward branches first. Then step back and look at the overall shape before making any additional cuts.
Your Oregon Garden Changes Every Week. Your Plan Should Too.
Gardening in Oregon changes quickly throughout the season. Every Friday you’ll receive a simple weekly plan showing exactly what to plant, prune, fertilize, harvest, and protect so you never miss the right timing.
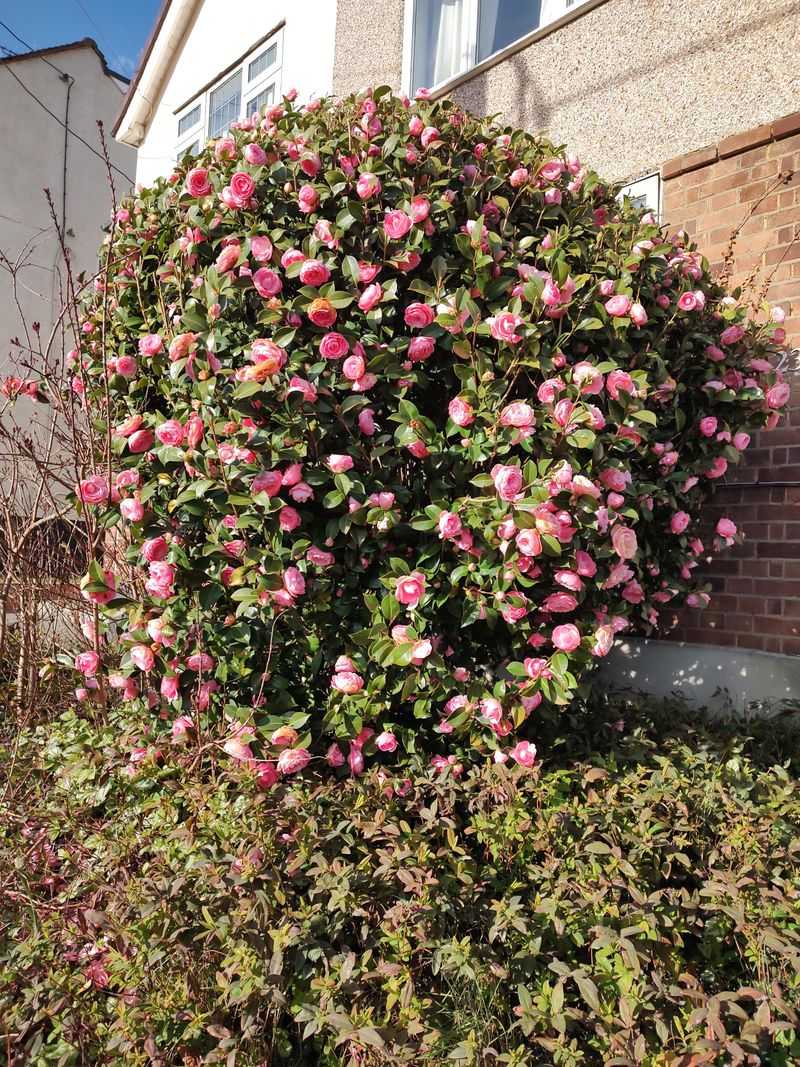
Oregon gardeners with older, overgrown camellias can take this opportunity to slowly bring the plant back to a manageable size without stressing it too much all at once.
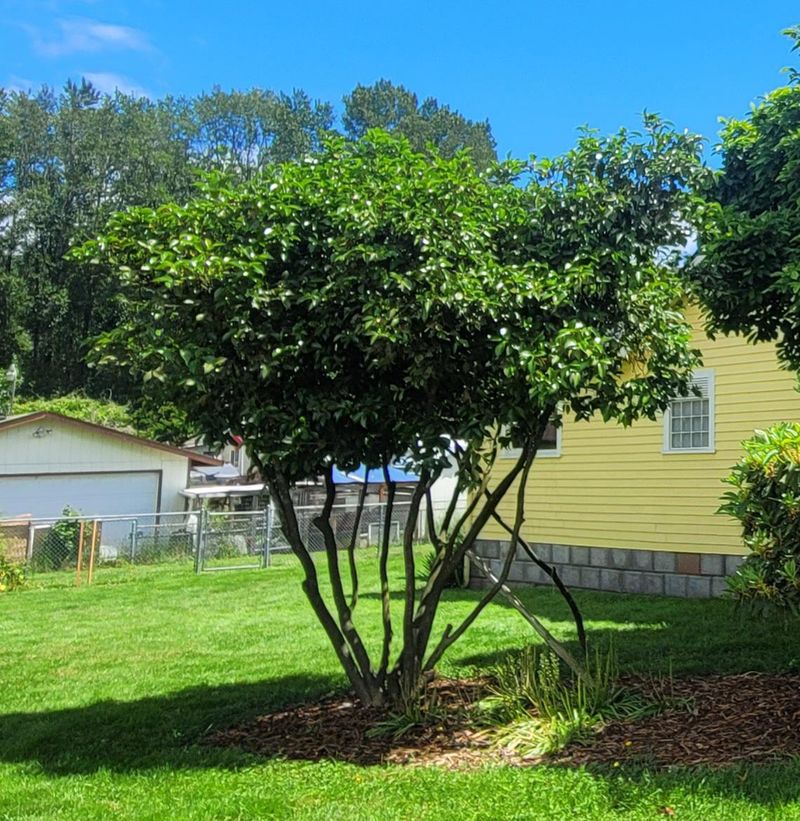
3. Shape Lightly, Not Harshly
One of the biggest mistakes Oregon gardeners make is cutting their camellias back too hard all at once. Camellias are slow growers, and aggressive pruning can leave them looking bare and stressed for a long time.
A light touch almost always gives better results.
Think of shaping your camellia like giving it a haircut, not a complete makeover. You want to clean up the edges, remove a few wayward branches, and encourage a pleasing natural form.
Most camellias look best when they keep their naturally rounded or upright shape.
Avoid cutting into old, thick wood unless you absolutely have to. New growth sprouts best from younger stems.
Cutting back too far into old wood can leave stubs that are slow to recover and sometimes never fully bounce back.
Step back often while you work to check your progress from a distance. It is easy to get carried away once you start snipping.
Oregon’s cooler spring temperatures are actually helpful here because the plant is not under heat stress while you work, giving it a better chance to push out healthy new growth quickly.
4. Check For Winter Damage
Even in Oregon’s relatively mild climate, winter can leave its mark on camellias. Cold snaps, hard frosts, and icy winds can all cause damage that may not show up clearly until the blooming season ends.
Early spring is the perfect time to take a close look.
Brown or blackened leaf tips are a common sign of frost burn. Soft, mushy stems near the base can point to more serious cold injury.
Gently scratch a small section of bark with your fingernail to check if the wood underneath is still green and healthy.
If you find damaged branches, prune them back to healthy wood right away. Leaving damaged growth on the plant wastes its energy and can invite pests or disease.
Oregon coastal gardeners tend to see less winter damage, but those in the Willamette Valley or higher elevations should check more carefully.
After removing any damaged growth, give the plant a little extra care with water and fertilizer to help it recover. Most camellias bounce back quickly once the bad wood is removed.
A healthy plant going into summer will reward you with a spectacular bloom display the following year.
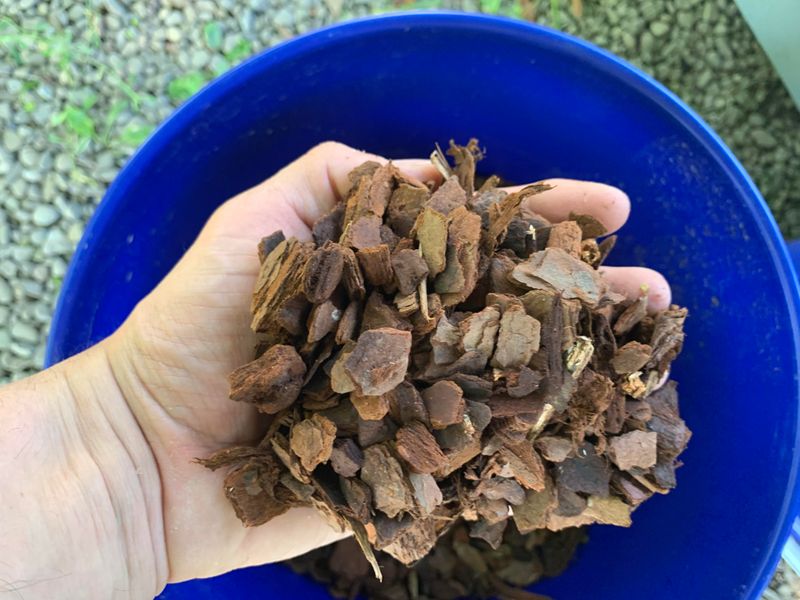
5. Refresh Acidic Mulch
Camellias love acidic soil, and Oregon’s native soils are often naturally on the acidic side, which is great news. But mulch breaks down over time and loses its effectiveness.
Refreshing the mulch layer after blooming ends gives your camellia a real boost heading into the growing season.
Pine bark, pine needles, or shredded oak leaves all make excellent mulch choices for camellias. They break down slowly, feed the soil with organic matter, and help keep the pH in the sweet spot that camellias prefer.
Avoid using lime-based or alkaline materials anywhere near these acid-loving shrubs.
Spread a fresh two to three inch layer of mulch around the base of the plant. Keep the mulch a few inches away from the main stem to prevent rot and pest problems.
Extending the mulch out to the drip line of the plant gives the widest root zone the most benefit.
Good mulch also helps retain soil moisture during Oregon’s dry summer months. Once the rainy season ends, camellias can struggle without consistent water.
Starting with a fresh mulch layer in spring sets your plant up for success long before the heat of summer arrives.
6. Feed With Camellia Fertilizer
Right after blooming is one of the best times to feed your camellias. The plant is putting energy into new growth, and giving it the right nutrients at this stage makes a noticeable difference.
Camellias need a fertilizer made specifically for acid-loving plants.
Look for products labeled for camellias, azaleas, or rhododendrons at your local Oregon garden center. These blends contain the right balance of nitrogen, phosphorus, and potassium along with trace minerals like iron and magnesium.
Using a general-purpose fertilizer can throw off the soil pH and cause yellow leaves.
Follow the package directions carefully and never apply more than recommended. Over-fertilizing can actually burn the roots and cause more harm than good, and we don’t want that.
Spreading it evenly under the drip line of the shrub rather than right at the base gives the roots the best access.
Water the fertilizer in well after applying it. Oregon gardeners can take advantage of natural spring rainfall to help move nutrients into the root zone.
Avoid fertilizing after midsummer because late-season feeding can push out soft new growth that may not harden off before cooler fall temperatures return.
7. Water Before Summer Dryness
Oregon is famous for its rainy winters and springs, but summer is a different story. By July and August, many parts of the state go weeks without measurable rainfall.
Camellias that are not watered during this dry stretch can drop buds before they ever get the chance to open.
Start paying attention to soil moisture as early as late May or June. Stick your finger a few inches into the soil near the base of the plant.
If it feels dry, it is time to water, even if it rained recently at the surface.
Deep, slow watering is always better than quick, shallow sprinkles. Slow watering encourages roots to grow down deep into the soil.
Deep roots help the plant handle dry spells much better than shallow roots ever could.
A drip irrigation system or soaker hose set up around your camellias is a smart investment for Oregon gardeners. It delivers water right to the root zone without wetting the leaves, which helps prevent fungal issues.
Getting into a consistent watering routine before summer fully arrives means your camellias head into their next bloom cycle strong, healthy, and full of potential.