Why Indiana Gardeners Plant Garlic In Fall For A Richer, More Flavorful Summer Harvest
Slice into a head of homegrown garlic. The difference hits you instantly, sharp, alive, and nothing like the pale imitations lining grocery store shelves.
You already know something is off about the garlic you buy. It sits in a plastic net bag under fluorescent lights for weeks before it ever reaches your kitchen, and the flavor reflects every single day of that journey.
What if the fix starts on a quiet October afternoon with a handful of cloves and a patch of bare Indiana soil? No complicated amendments.
No elaborate timing charts. Just you, a dibber, and a vegetable that does its most important work while the rest of the garden sleeps through winter.
For anyone working Indiana ground, fall planting is the shift that transforms your entire relationship with garlic. One harvest. That is all it takes.
Plant At The Right Time For Your Part Of Indiana

October is garlic’s best friend. Planting between mid and late October gives your cloves exactly the right amount of time to settle in before the ground freezes solid.
In Indiana, that sweet spot lands roughly four to six weeks before the first hard frost, which arrives in early to mid-October across most of the state. This timing is not random.
It gives roots a chance to anchor deep into the soil while the tops stay dormant and protected. Roots need cold to trigger the bulb-forming process called vernalization.
Without that cold period, garlic simply will not split into full, plump cloves the way you want. Planting too early means green shoots push up too high before winter, leaving them exposed to frost damage.
Planting too late means roots never get strong enough to survive a hard freeze. Think of it like tucking a seed in for a long winter nap with just enough blanket to stay cozy.
Soil temperature should ideally sit between 50 and 65 degrees Fahrenheit at planting time. A simple soil thermometer from any garden center makes this easy to check.
Northern Indiana gardeners should aim for late September to early October. Central Indiana gardeners should target mid-October.
Southern counties near the Ohio River can plant into late October or early November. Fall planting feels counterintuitive the first time you try it.
But once you taste the results next July, you will wonder why you ever waited until spring. Getting the timing right is the single biggest factor in a strong harvest.
Wait Until After The First Fall Frost Before Planting

Frost is your green light. For central and northern Indiana, planting around the first light frost aligns perfectly with the ideal October window.
Southern counties may plant slightly earlier since their first frost arrives later. That first frost signals that soil temperatures have dropped enough to slow top growth while still allowing root development underground.
Planting right after a frost means your garlic focuses all its energy downward instead of sending up green shoots that will get caught by the next cold snap.
Your Indiana Garden Changes Every Week. Your Plan Should Too.
Gardening in Indiana changes quickly throughout the season. Every Friday you’ll receive a simple weekly plan showing exactly what to plant, prune, fertilize, harvest, and protect so you never miss the right timing.
Soil that has felt a frost also holds moisture better around new roots. In Indiana, the first fall frost typically arrives between early and mid-October across most of the state.
Southern counties near the Ohio River tend to see it closer to late October. Checking the Old Farmer’s Almanac or your local extension office for average frost dates in your specific area is a smart move.
Apps like Weather Underground also show hyperlocal frost forecasts that are surprisingly accurate. Once that first frost hits, give the soil a day or two to recover, then get those cloves in the ground.
Some gardeners make the mistake of planting the moment they buy their seed garlic, regardless of the weather.
Patience here pays off in a big way come harvest season. Letting nature give you the signal is one of those old-school gardening instincts that still holds up perfectly today.
Plant Cloves 2 To 3 Inches Deep With Pointed End Up

Depth matters more than most gardeners realize. Pushing each clove 2 to 3 inches into the soil is the standard recommendation.
Gardeners in colder northern Indiana counties can go up to 4 inches for extra winter insulation.
Shallower planting leaves cloves too close to the surface, where freeze-thaw cycles can heave them right out of the ground.
Going deeper than 4 inches slows spring emergence and stresses the young plant. Keep it at 4 inches as your maximum, even in the coldest parts of the state.
The pointed end always goes up. That tip is where the green shoot emerges, and planting it upside down forces the plant to waste precious energy curling back toward the surface.
Upside-down cloves do sometimes survive, but they produce smaller, weaker bulbs with less flavor. A few seconds of attention at planting time saves weeks of disappointment later.
Use a dibber, a pencil, or even your finger to make individual holes at the right depth rather than pressing cloves into the surface.
This ensures consistent depth across your whole bed, which means more uniform sprouting in spring. For larger patches, a string line keeps your rows straight and evenly spaced.
Experienced growers sometimes mark their rows with small stakes so they know exactly where to expect growth in early spring.
Finding those first green tips poking up in March is one of the most satisfying moments in the gardening year. Get the depth right now and that reward is practically guaranteed.
Space Cloves 6 To 8 Inches Apart For Strong Bulbs

Crowded garlic is unhappy garlic. Six to eight inches of space per clove feels generous, but those roots spread surprisingly wide underground.
When cloves compete for nutrients and moisture, the bulbs they produce end up small and tight, with fewer layers and less punch.
Proper spacing lets each plant access all the phosphorus, nitrogen, and water it needs to build a genuinely impressive bulb.
Row spacing matters just as much as spacing within the row. Leaving eight to twelve inches between rows gives you room to walk through, weed, and check on your plants without trampling anything.
It also improves airflow, which reduces the chance of fungal problems like white rot that can wipe out an entire planting.
If you are short on space, raised beds are a great solution. The deep, loose soil in a raised bed lets roots go deeper, compensating for tighter horizontal spacing.
Some gardeners in small yards plant garlic in containers or even in flower beds alongside ornamental plants, where the spacing rules still apply.
Garlic also makes a decent companion plant near roses and fruit trees, naturally deterring certain pests.
Measuring your spacing with a simple ruler or a marked stick takes about thirty extra seconds per row. That small investment of time translates directly into bigger, bolder bulbs at harvest.
When you pull those heads in July and they are genuinely full-sized, firm, and packed with cloves, you will be glad you gave them room to breathe.
Use Well-Drained, Fertile Soil With Neutral pH For Best Results

Bad soil is garlic’s biggest enemy. Garlic needs well-drained, fertile ground to thrive through an Indiana winter and push out full-sized bulbs by summer.
Soil that holds too much water around the cloves invites rot, especially during wet spring months when the ground stays saturated for weeks.
Loamy soil with good structure drains excess moisture while still holding enough to keep roots hydrated between rains.
pH is the part most home gardeners skip, and it makes a real difference. Garlic prefers a neutral pH between 6.0 and 7.0.
Soil that is too acidic or too alkaline blocks the plant from absorbing key nutrients even when they are present in the ground.
A basic soil test kit from a garden center costs about ten dollars and takes fifteen minutes to complete. Your county’s Cooperative Extension office can also test your soil for free or at a very low cost.
If your soil tests too acidic, adding garden lime raises the pH over time. For soil that skews too alkaline, sulfur amendments bring it back toward neutral.
Making these adjustments in fall before planting gives amendments time to work before spring growth kicks in.
Sandy soils drain well but lack nutrients, so they benefit from added organic matter. Heavy clay soils hold too much moisture and need grit or compost to open up their structure.
Knowing what you are working with before you plant is the kind of preparation that separates a decent harvest from a truly great one.
Add Compost Before Planting To Feed Your Garlic All Season

Compost is a slow-release feast for your plants. Working two to three inches of finished compost into your garlic bed before planting is one of the highest-return moves you can make in the garden.
Compost improves drainage in clay-heavy soils, adds water retention in sandy ones, and delivers a steady stream of nutrients as it breaks down through winter and into spring.
It also feeds the beneficial microbes that make soil biology come alive, creating an underground ecosystem that supports strong root development.
Fresh manure is not a good substitute. It can burn young roots, raises food safety concerns, and may introduce pathogens that compromise plant health.
Stick with finished compost that is dark, crumbly, and earthy-smelling, whether you make it yourself or buy it bagged.
A layer worked in eight to ten inches deep gives garlic roots the full benefit throughout the whole growing season.
Some gardeners also side-dress with a light compost application in early spring when the first green shoots appear. This gives the plant a second boost right when it needs energy to start building that bulb.
Avoiding synthetic fertilizers high in nitrogen in fall is smart because too much nitrogen pushes leafy growth instead of root development, leaving the plant vulnerable to frost. Building your soil with organic matter is a long game that pays off every single year.
Garlic planted in compost-rich ground tastes noticeably more complex and aromatic than garlic grown in depleted soil. Feed the soil, and the soil feeds the plant.
Mulch With 3 To 4 Inches Of Straw After The First Hard Freeze

Straw is a winter blanket for your garlic. After the first hard freeze, lay three to four inches of straw mulch over your garlic bed to shield cloves from Indiana’s punishing temperature swings.
The goal is not to keep the soil warm but to keep it consistently cold, preventing repeated freeze-thaw cycles that heave cloves out of the ground and stress the roots.
Straw insulates without compacting, allows air circulation, and breaks down slowly into organic matter by spring.
Timing this step correctly is critical. Applying mulch too early, before the ground actually freezes, can trap warmth and encourage top growth that will get hammered by the next cold snap.
Waiting until after that first hard freeze ensures the ground is locked in and ready for a protective layer.
One bale typically covers roughly forty to sixty square feet at the right depth depending on bale size, making it an affordable option for most home gardens.
Avoid hay, which contains seeds that will sprout in your garlic bed come spring and create a weeding headache.
Come March, you will start to see green tips pushing through the straw, which is one of the most exciting signs in the gardening calendar.
Leave the mulch in place through spring to suppress weeds and hold moisture. That layer of straw is quietly doing serious work all winter long.
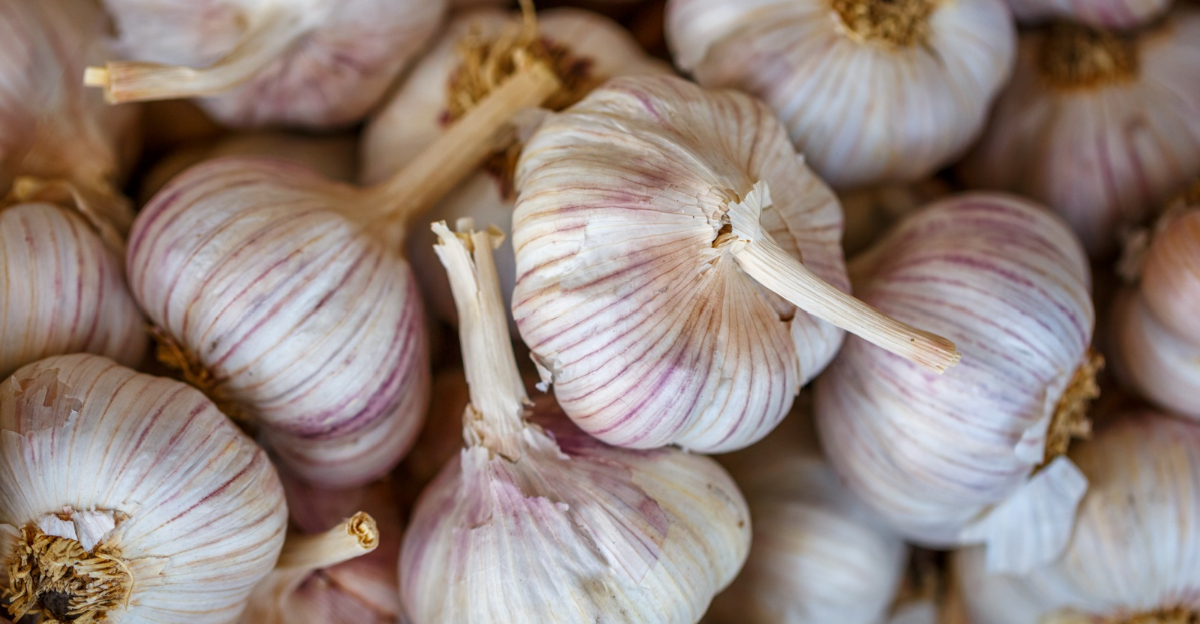
Choose Hardneck Varieties That Thrive In Cold Indiana Climates

Not all garlic is built for cold winters. Hardneck varieties handle cold, wet winters well and deliver bold, flavorful bulbs by midsummer.
Unlike softneck types that do better in mild climates, hardnecks need a cold dormancy period to develop properly, making them a natural fit for the Midwest.
Popular hardneck types include Rocambole, Purple Stripe, and Porcelain, each bringing a slightly different flavor profile and storage characteristic.
Rocambole is widely praised for its rich, complex flavor, though every variety brings something worth tasting.
The thinner skin makes cloves easy to peel, though storage runs four to six months, so plan to use them by late fall.
Porcelain varieties like Music or Romanian Red produce fewer but much larger cloves with a sharp, assertive flavor. They also store significantly longer, sometimes up to eight months.
Purple Stripe types sit in the middle, offering good storage life and a complex flavor that mellows beautifully when roasted.
All hardneck varieties also produce scapes in late spring, those curly green shoots you can harvest and use like garlic-flavored green onions in stir-fries and pestos.
Harvesting scapes redirects the plant’s energy back into building a bigger bulb. Always buy seed garlic from a reputable supplier, not the grocery store, for disease-free stock
The right variety matched to Indiana’s climate is the final piece of the fall planting puzzle. Choose well, and your summer harvest will speak for itself.