Why Wisconsin Tomato Leaves Turn Yellow (And How To Fix It)
Your tomato plants looked unstoppable in June. Then the leaves started going yellow, and suddenly that confident garden feels like a puzzle with missing pieces.
Take a breath. Yellowing leaves are your plant’s way of talking to you, not a verdict on your gardening skills.
Wisconsin’s climate throws a lot at tomatoes: soggy springs that drown roots, sneaky cold snaps that stress young plants, and humid summer stretches that create favorable conditions for fungal growth.
Add in soil quality swings across the state, from sandy central plains to heavy clay up north, and it’s no wonder Wisconsin tomatoes deal with more than their fair share of yellow leaves. But here’s the reassuring part.
Almost every cause behind this, whether it’s a nutrient gap, overwatering, or an early disease, has a clear fix once you spot the pattern. Let’s figure out exactly what your tomatoes are telling you.
Nitrogen Deficiency From Heavy Spring Rains
Rain is supposed to be a good thing, right? Not always, especially when it comes to your tomato plants in spring.
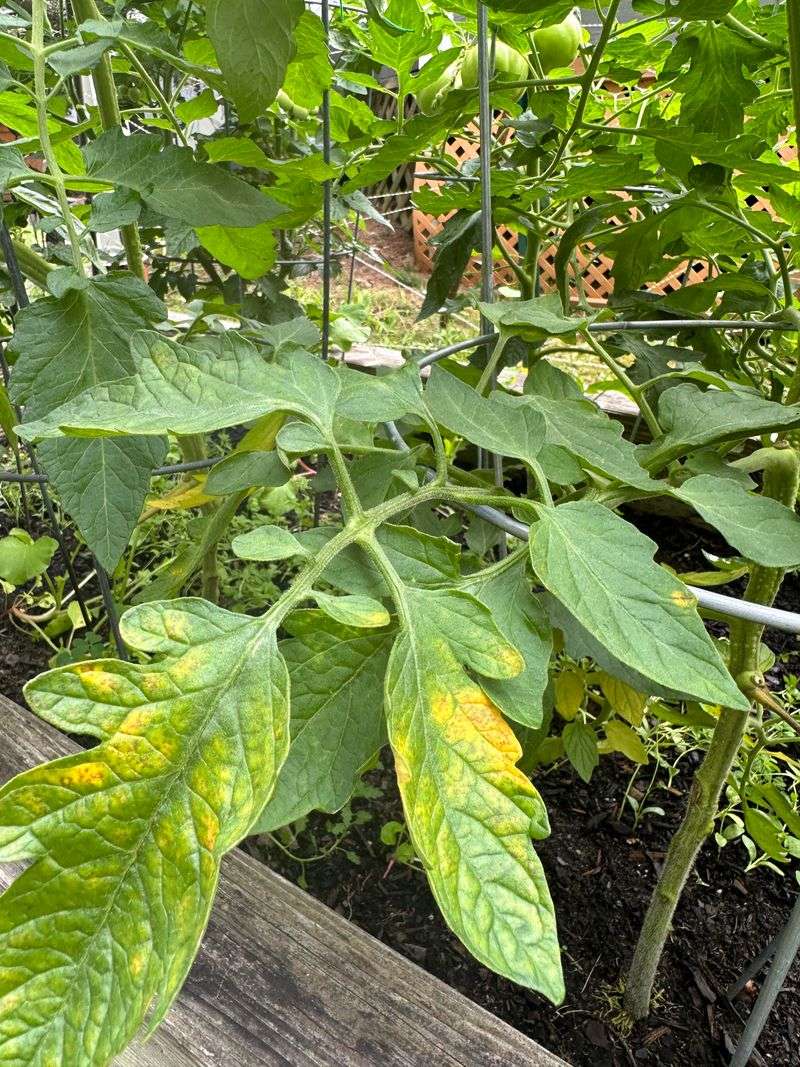
Heavy spring rains are a big deal in Wisconsin, and they wash nitrogen straight out of your soil. Nitrogen is the nutrient plants need most for green, leafy growth.
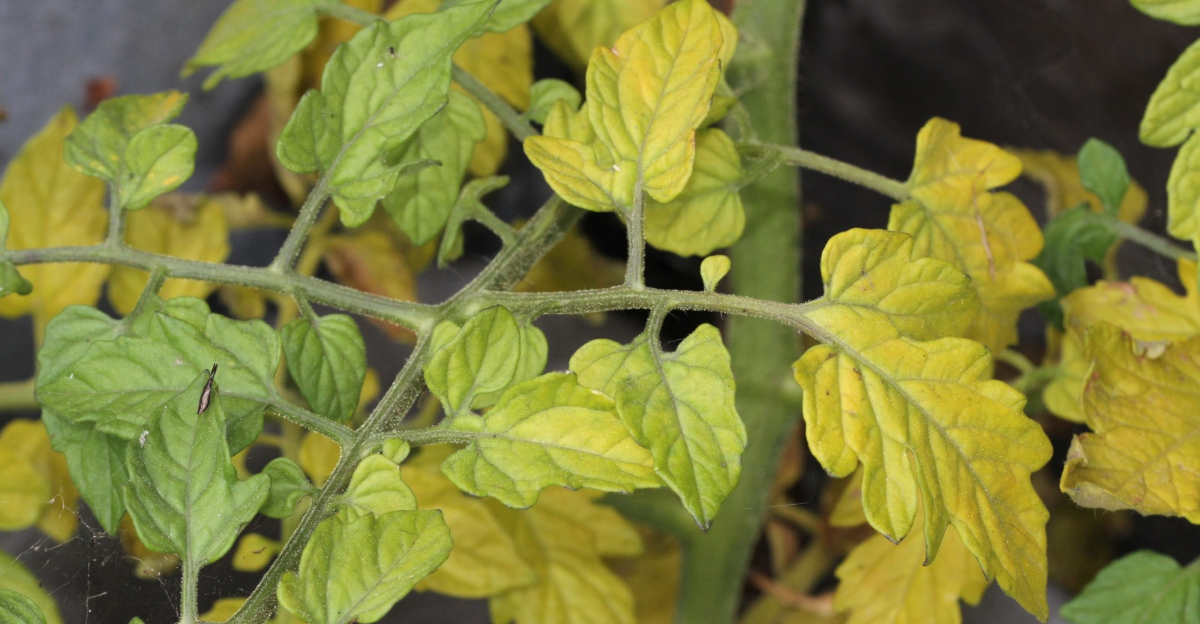
When it drains away, the lower leaves start turning yellow first. That yellowing creeps upward slowly, leaf by leaf, if nothing changes.
The pattern matters a lot here. If the yellowing starts at the bottom and moves up, nitrogen loss is almost certainly the cause.
Tomato plants are heavy feeders, meaning they burn through nutrients fast. A few hard rainstorms can undo weeks of good soil prep in just days.
The fix is simpler than you might expect. A dose of balanced fertilizer or a top dressing of compost can restore nitrogen levels quickly.
Blood meal is another fast-acting option that many Wisconsin gardeners swear by. Just scratch it gently into the soil around the base of each plant.
Avoid overloading the plant with nitrogen, though, because too much causes its own set of problems. Aim for steady, consistent feeding throughout the growing season.
Yellow tomato leaves caused by nitrogen loss bounce back surprisingly fast with the right fix. Give your plants a little boost, and those green leaves will return before you know it.
Overwatering Causing Root Rot In Clay Soil
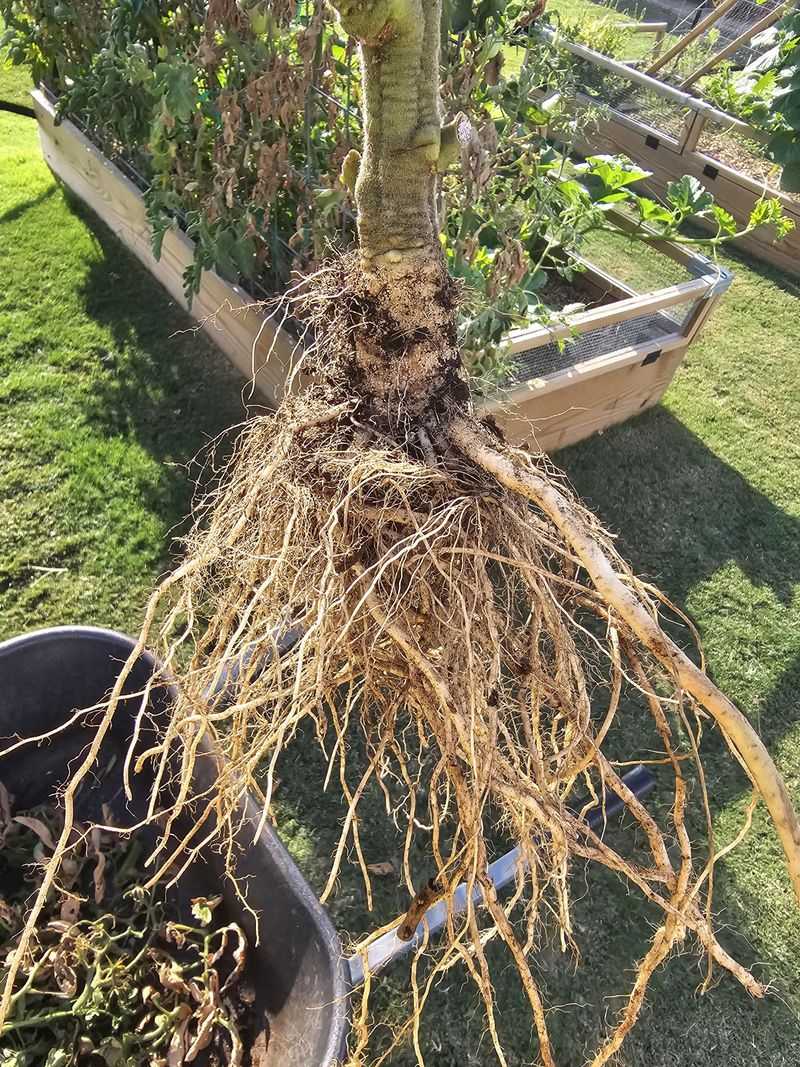
Clay soil holds water like a sponge that never fully dries out. That might sound helpful, but for tomato roots, it is a slow-developing problem.
Wisconsin has plenty of clay-heavy yards, and overwatering in that kind of soil creates the perfect conditions for root rot. Roots need oxygen just as much as they need water.
When soil stays soggy for too long, roots are deprived of oxygen and begin to break down. Once roots rot, the plant cannot pull up nutrients or water efficiently, no matter how much you give it.
Yellow leaves that look limp and sad are a classic sign of this problem. The plant looks thirsty even though the soil is soaking wet.
Your Wisconsin Garden Changes Every Week. Your Plan Should Too.
Gardening in Wisconsin changes quickly throughout the season. Every Friday you’ll receive a simple weekly plan showing exactly what to plant, prune, fertilize, harvest, and protect so you never miss the right timing.
This can be a confusing symptom to diagnose. Check the soil before you water again. Push your finger two inches down, and if it still feels damp, hold off for another day or two.
Improving drainage is a long-term solution worth considering. Mixing compost or coarse sand into clay soil helps break up the dense texture over time.
Raised garden beds are a popular choice for Wisconsin gardeners dealing with heavy clay. They give you complete control over soil composition and drainage from the start.
Cutting back on watering frequency is usually the fastest fix available. Deep, infrequent watering encourages roots to grow downward rather than staying shallow and vulnerable.
Healthy roots mean healthy leaves, and that starts with understanding your soil type. Your tomatoes will thank you for paying attention.
Early Blight Thriving In Humid Conditions
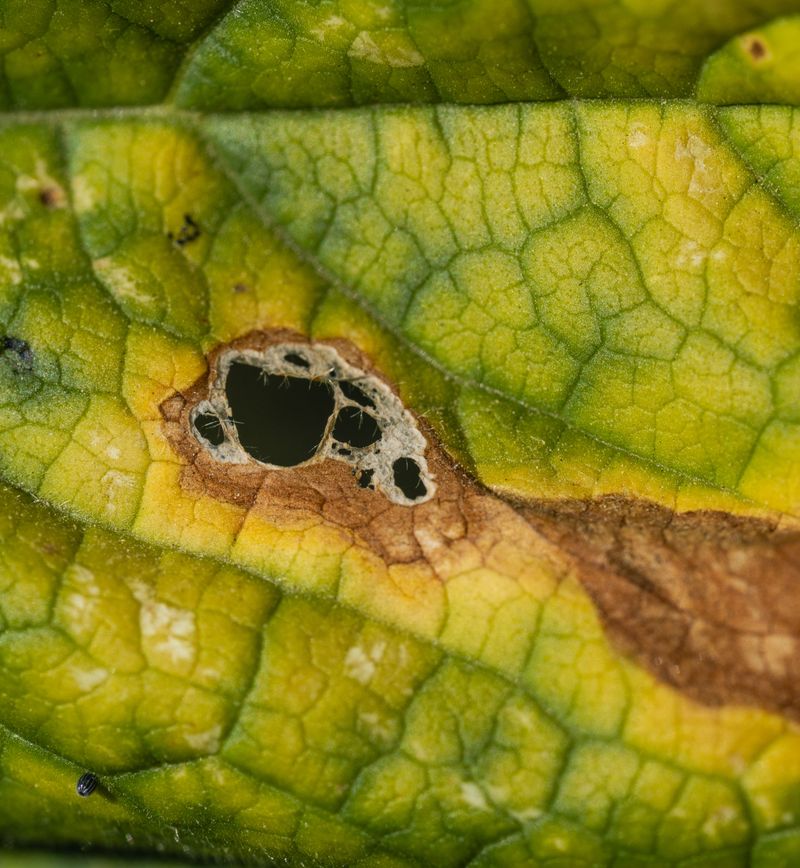
Spot a dark brown circle ringed with yellow on your tomato leaf? That is a typical sign of early blight. It can spread quickly.
Early blight is a fungal disease that loves warm, humid weather, which Wisconsin summers deliver in abundance. The spores travel easily through splashing water and wind.
It typically starts on the oldest, lowest leaves of the plant first. As the disease progresses, those leaves turn fully yellow and drop to the ground.
The telltale sign is the pattern of the spots. Look for concentric rings inside the brown patches, almost like a tiny target drawn on the leaf surface.
Humid nights combined with warm days create ideal conditions for fungal growth. Once blight takes hold in a garden, it can spread relatively fast under humid conditions.
Watering at the base of the plant rather than overhead makes a big difference. Keeping foliage dry reduces the chances of spores finding a moist surface to grow on.
Removing affected leaves immediately slows the spread significantly. Place them in the trash rather than the compost pile, since composting can keep spores alive.
Copper-based fungicide sprays work well as a preventive measure. They slow the spread rather than reverse existing damage.
Apply them before symptoms appear for best results. Crop rotation also helps, since blight spores can overwinter in your soil.
Moving tomatoes to a new spot each year breaks the cycle and keeps your plants stronger. Catching early blight before it spreads is the real win here.
Cool Temperatures Slowing Nutrient Uptake
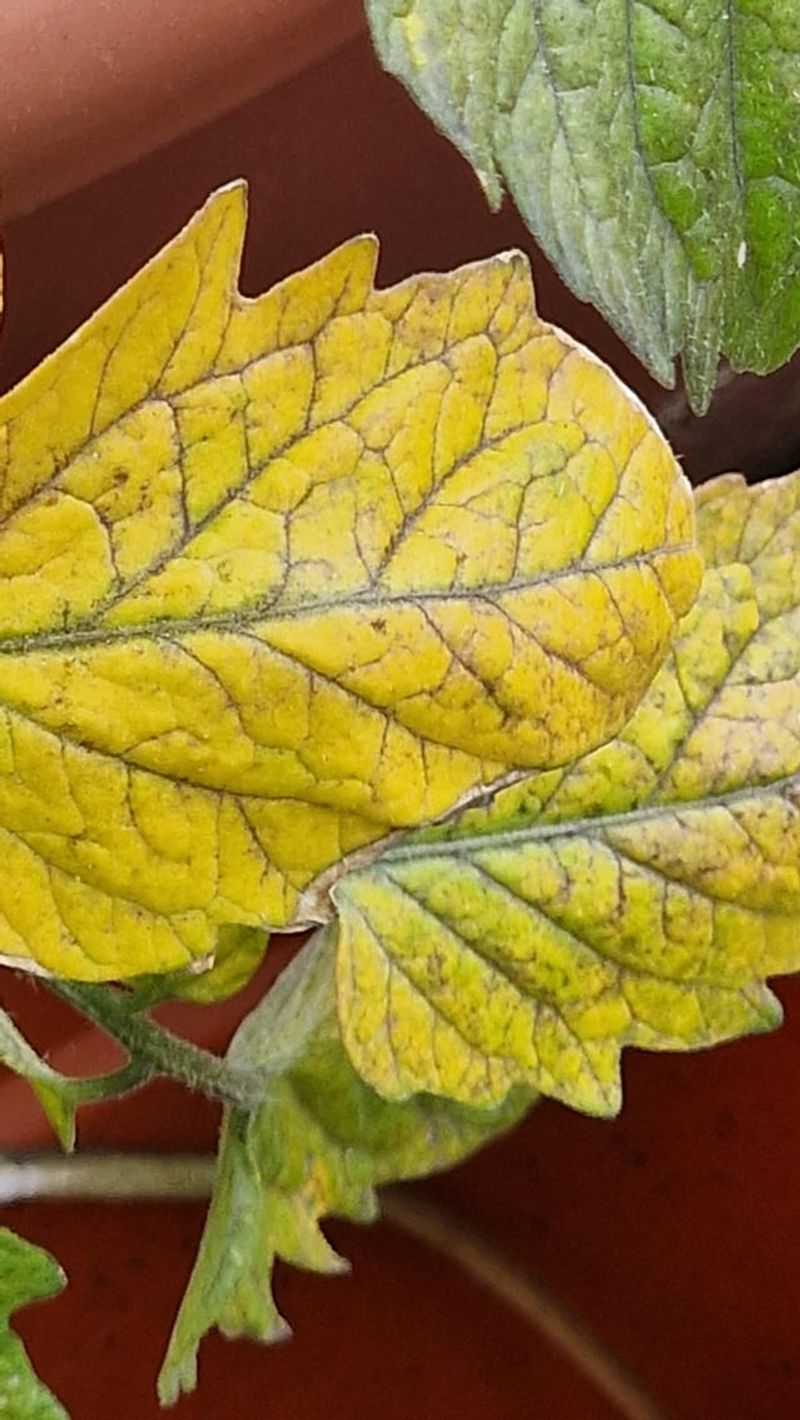
Wisconsin springs are beautiful, but they are also cold, and tomatoes are not fans of the chill. Temperature plays a huge role in how well plants absorb nutrients from the soil.
When soil temps drop below 55 degrees Fahrenheit, tomato roots slow way down. That slowdown means nutrients like phosphorus and iron stay locked in the soil, unavailable to the plant.
The result looks a lot like a nutrient deficiency, even when your soil is actually well-fed. Leaves turn yellow or develop a purplish tint, especially on younger growth near the top.
Many Wisconsin gardeners make the mistake of planting tomatoes too early in the season. A warm week in May can be deceiving because the soil beneath the surface is still very cold.
Waiting until soil temperatures consistently hit 60 degrees is the smarter move. A simple soil thermometer costs just a few dollars and saves a lot of frustration later on.
Black plastic mulch is a clever trick for warming soil faster in spring. It absorbs sunlight and transfers that heat directly into the ground beneath it.
Row covers and cold frames also help protect young plants during unexpected cold snaps. They trap warmth around the plant without blocking the sunlight plants need to grow.
Once temperatures rise and stabilize, most cold-related yellowing corrects itself naturally. The plant starts pulling nutrients again, and new growth comes in green and healthy.
Patience is genuinely one of the best tools a Wisconsin tomato gardener can have. Timing your planting right prevents a whole lot of yellow leaves before they even start.
Feed Plants With Balanced Fertilizer Or Compost
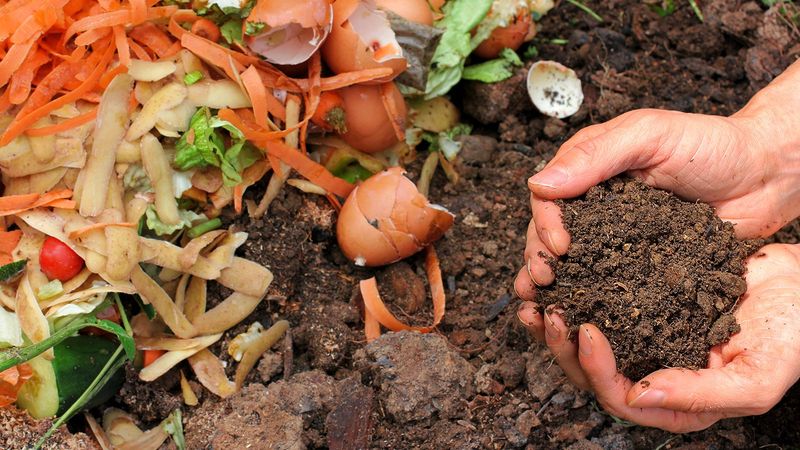
Yellow leaves are often a sign your plants need feeding. Feeding your tomatoes the right way can turn things around fast.
A balanced fertilizer, something labeled 10-10-10 or similar, gives plants equal amounts of nitrogen, phosphorus, and potassium. Each of those nutrients plays a specific role in keeping leaves green and growth strong.
Compost is another excellent option, especially for gardeners who prefer a more natural approach. It releases nutrients slowly over time, which means fewer dramatic swings in soil chemistry.
Apply compost as a top dressing around the base of each plant, keeping it a few inches away from the stem. Letting it sit on the soil surface allows rain and watering to carry nutrients down to the roots.
Liquid fertilizers work faster than granular ones, which makes them great for plants already showing yellow leaves. Mix according to package directions and apply directly to the soil, not the foliage.
Tomatoes are heavy feeders, so a feeding schedule matters more than most gardeners realize. Starting fertilization a few weeks after transplanting and continuing every two to three weeks keeps plants consistently nourished.
Avoid going overboard with nitrogen specifically, since too much of it pushes leafy growth at the expense of fruit. Balance is the goal, not just green leaves at any cost.
Soil testing is a smart first step before adding any amendments. Knowing exactly what your soil lacks helps you feed plants precisely rather than just guessing.
Well-fed tomatoes resist stress better and bounce back faster from setbacks. Give them what they need, and yellow leaves become a rare sight in your garden.
Water Deeply But Less Often
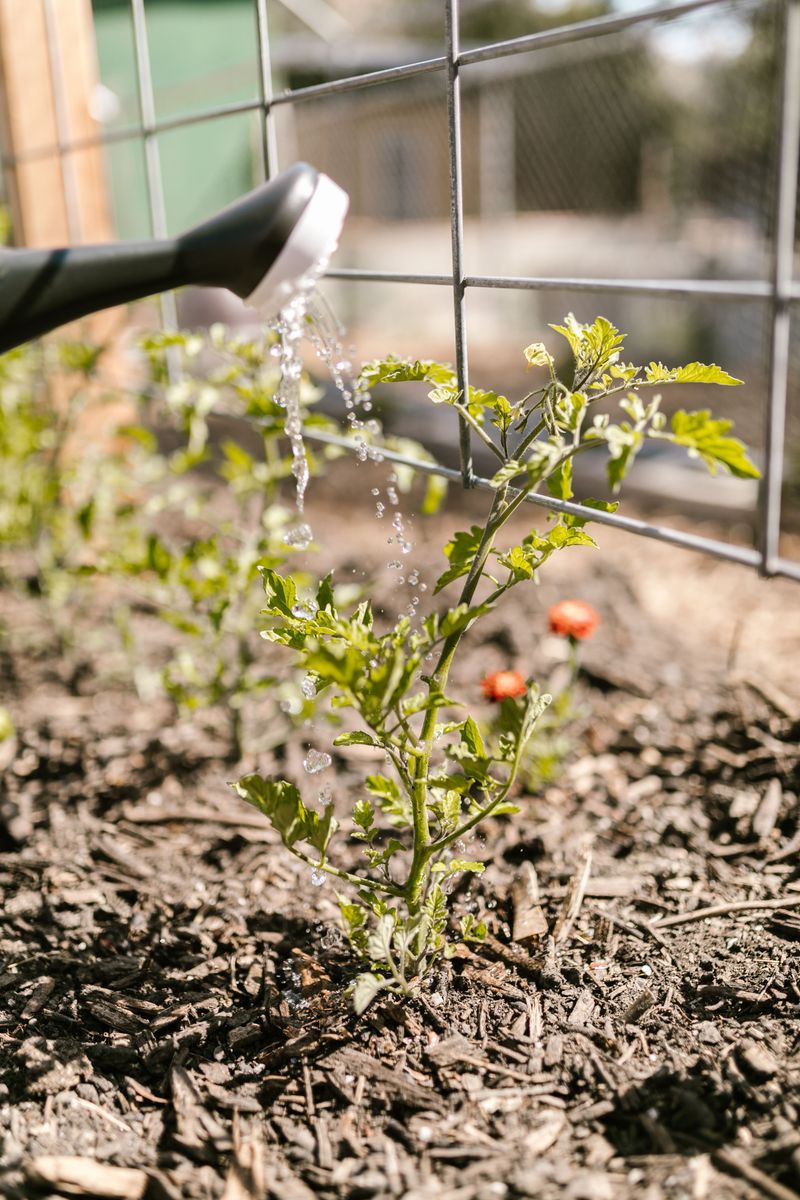
Watering every single day feels responsible, but for tomatoes it often causes more harm than good. Frequent shallow watering keeps roots near the surface, where they are vulnerable to stress.
Deep, infrequent watering trains roots to grow downward in search of moisture. That deeper root system makes plants far more resilient during dry spells and heat waves.
Watering needs vary by soil type, container versus ground planting, and weather. Two to three times per week is a common starting point for many Wisconsin gardens.
A simple way to check is the finger test. Push your finger two inches into the soil near the plant base, and if it still feels moist, skip the watering session that day.
When you do water, go slow and go deep. Let water soak in gradually rather than rushing it, which allows the soil to absorb moisture all the way down to the lower root zone.
Drip irrigation is one of the most effective systems for tomatoes specifically. It delivers water directly to the root zone, keeps foliage dry, and reduces the risk of fungal issues like blight.
Overhead watering with a sprinkler is the least ideal method for tomatoes. Wet leaves are an open invitation for disease, especially during humid Wisconsin summers.
Morning watering is always better than evening watering if drip irrigation is not an option. Leaves have time to dry out during the day, which cuts down on fungal problems significantly.
Consistent watering also prevents blossom end rot, a frustrating condition linked to calcium absorption. Yellow tomato leaves and other stress signs often ease up once a steady watering routine is in place.
Remove Affected Lower Leaves Promptly
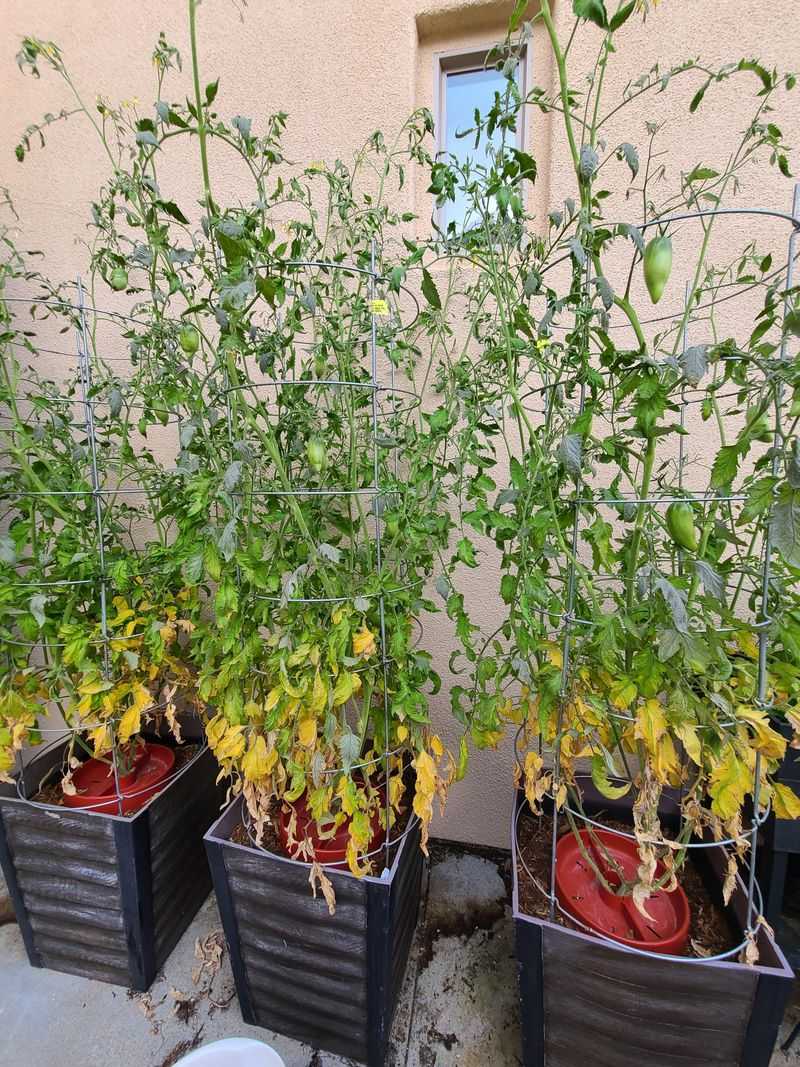
Those yellow leaves hanging near the bottom of your tomato plant are not just ugly. They are actively working against your plant’s health if you leave them in place.
Removing affected lower leaves is one of the fastest, easiest things you can do to slow the spread of disease. Fungi and bacteria love hanging out on damaged, aging foliage.
Start by pulling off any leaves that are fully yellow or show spots and browning. Use clean scissors or pruning shears rather than tearing leaves off by hand.
Tearing can damage the stem and create small wounds where pathogens enter easily. A clean cut heals faster and leaves the plant less exposed to additional problems.
Discard removed leaves in the trash, not the compost bin. Diseased material in compost can survive and reinfect your garden the following season.
Pruning lower leaves also improves airflow around the base of the plant. Better air circulation means foliage dries faster after rain or watering, which reduces fungal growth conditions.
Aim to keep the lowest set of leaves at least six to eight inches above the soil line. Soil splashback during rain carries fungal spores directly onto leaves that sit too close to the ground.
Some gardeners feel hesitant about removing leaves because it seems harsh. In reality, a cleaner plant redirects energy toward fruit production rather than maintaining declining foliage.
Make leaf removal a regular part of your weekly garden routine. Catching problems early and acting fast keeps yellow tomato leaves from becoming a garden-wide issue.
Mulch Around The Base For Moisture Control
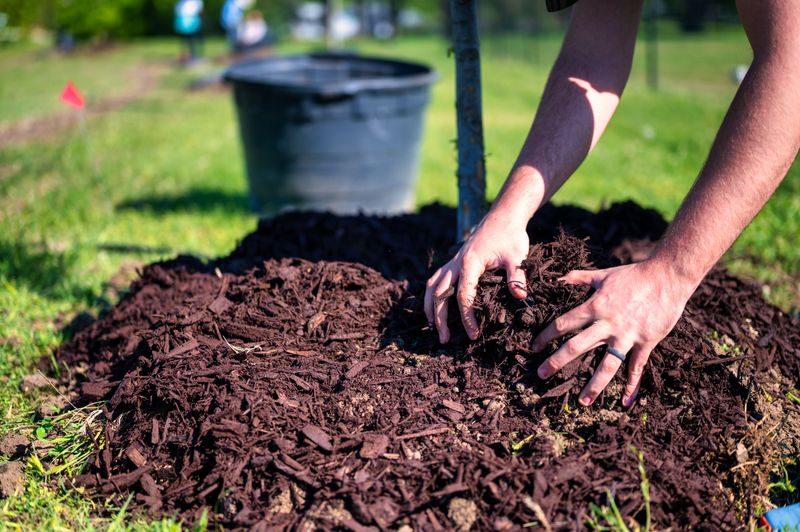
A layer of mulch around your tomato plants is one of the simplest upgrades you can make to your garden. It does several important jobs at once, and most gardeners underestimate it.
Mulch slows moisture evaporation from the soil, which means your plants stay hydrated longer between waterings. In a state where summer weather swings between dry spells and heavy downpours, that consistency matters a lot.
Straw, shredded leaves, and wood chips are all solid choices for tomato beds. Each one breaks down over time and adds organic matter back into the soil as a bonus.
Apply mulch in a two to three inch layer around the base of each plant. Keep it a few inches away from the main stem to prevent moisture buildup against the stalk.
Mulch also acts as a physical barrier between soil and foliage. That barrier reduces the splashback effect during rain, which is a major way fungal spores travel from ground to plant.
Soil temperature regulation is another underrated benefit of mulching. In spring, dark mulch warms cool soil faster, and in summer, it keeps roots from overheating during heat waves.
Weed suppression is an added perk that saves time and effort throughout the season. Fewer weeds mean less competition for the nutrients and water your tomatoes need.
Replenish mulch mid-season if it starts to thin out or break down. A fresh layer keeps all those benefits working consistently through the end of harvest.
Healthy soil beneath a good mulch layer produces plants that resist stress far better. Addressing yellow tomato leaves sometimes starts not with the plant itself, but with what surrounds it.