ZZ Plant Propagation: Best Methods And Pro Tips
I’m sure all growers would agree that the ZZ plant should be in every plant collection. You’ll see this plant in many households, and it’s adored for many reasons.
The ZZ plant is low-maintenance, so you won’t have many issues when growing it indoors. This unique plant is also an air purifier, so growing one in your home will help you get rid of harmful chemicals.
I don’t even need to tell you about its magical appearance, just look at a ZZ, and you’ll know what I’m talking about.
All these things are why so many growers want to learn more about ZZ plant propagation. I’ll describe the three best propagation methods in this article in great detail, including leaf cuttings, stem cuttings, and division.
I know that you want to get more ZZ plants ASAP, so let’s get started!
ZZ Plant Propagation: Leaf Cuttings
Although propagating the eternity plant isn’t rocket science, some things can go wrong if you don’t follow each step carefully.
The first method I’ll show you is with leaf cuttings; it’s straightforward, gives excellent results almost every time, and is fun.
Let’s look at detailed instructions on cutting, rooting, and transplanting ZZ plant leaf cuttings.
Prepare The Equipment
Many describe propagation as a messy activity, and that’s partially true as you’ll be dealing with soil. But preparing all the tools before you start the process will definitely make things easier and, well, less dirty!
Here is a list of all the equipment you’ll need for propagation.
A Healthy Mother Plant
Before doing anything, you’ll need to ensure that your Zanzibar gem is fully healthy to make sure the process isn’t doomed to fail.
Inspect your ZZ carefully because any damage on the leaves or stem won’t give you the desired result. Also check if there are any pests on your ZZ, and don’t start the process until you fix any issues.
Gardening Gloves
Even plant growers who have been handling plants for a long time don’t like getting soil on their hands. You can use gardening gloves as protection if you are one of them.
However, there’s one tricky thing about the gloves; ZZ leaves are pretty delicate, and if the gloves are too rough you may accidentally damage the leaves.
So, always choose the right size and material gloves.
Sterilizing Solution
I wouldn’t risk any unnecessary issues like contamination, so I highly recommend applying a sterilizing solution to your cutting tools.
You never know if some nasty fungus has infected the blade and is waiting to quickly inhabit your ZZ.
To avoid this, apply rubbing alcohol or bleach. These are widely available and affordable, and I’m sure you already have one in your home.
Cutting Tools
Shears and knives are a great choice, but only if they are really sharp and sanitized.
Why? We discussed sterilization, but sharpness is also an essential factor. If your tool is blunt, the possibility of breaking the ZZ leaves highly increases.
Rooting Hormone
Growers can be pretty impatient, and are always finding ways to do things faster.
This is especially true when it comes to propagation. Root development may take some time, so speeding it up sounds pretty attractive.
Rooting hormones have become popular, and you can find liquid or powder versions on Amazon.
Rooting Medium
It’s also important to choose an ideal rooting medium. The rooting medium depends on the type of propagation you’re doing.
For example, if you decide to propagate in water, you’ll need transparent containers like jars or clear vases.
For soil propagation, you’ll need smaller nursery pots.
Adequate Soil
Soil for the ZZ plant needs to be well-draining and porous in order to reduce the risk of root rot and similar issues.
Take The Cuttings
The procedure for taking ZZ plant leaf cuttings is quite simple. All you need to do is find where the stem and leaf connect, and snip!
This is where a new rhizome will develop, often referred to as the ZZ plant bulb.
Although a more common way of getting new ZZs is through stem cuttings, the leaf-cutting method can also give great results.
However, I suggest taking several leaf cuttings and rooting each separately in case a single leaf cutting doesn’t root.
Leave the cutting(s) for a couple of hours to callus.
Root The Cuttings
When you have a clean and healthy leaf, it’s time to root it. When it comes to leaf propagation, it may be tricky to root it, especially in water.
If you do it carefully, it will certainly develop healthy roots.
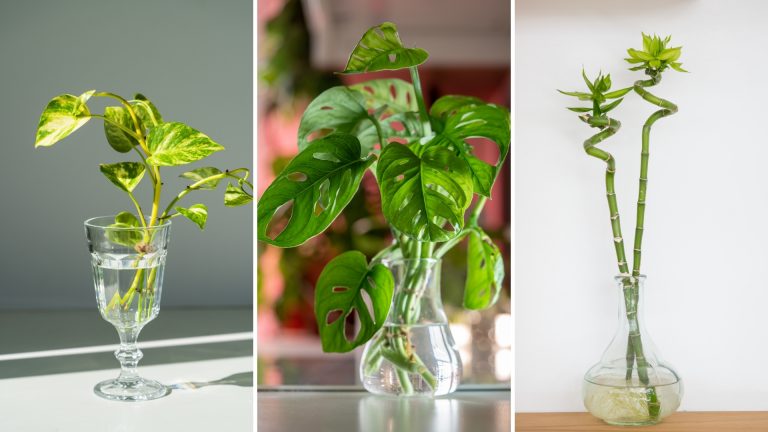
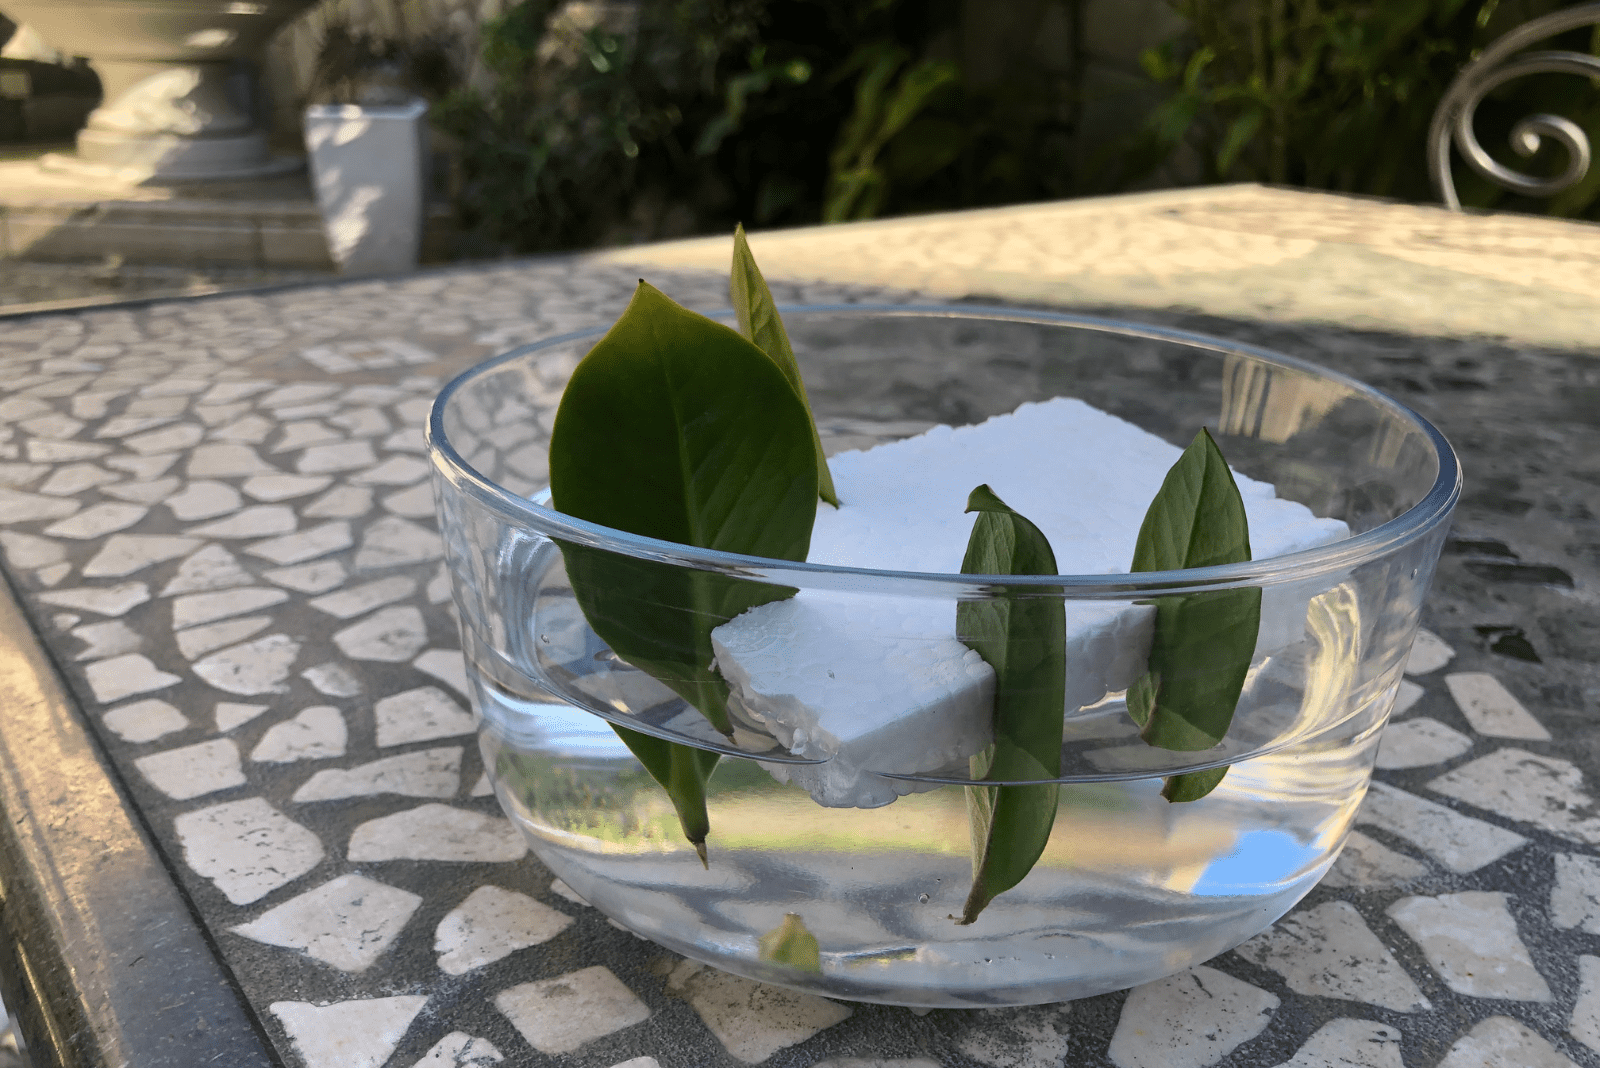
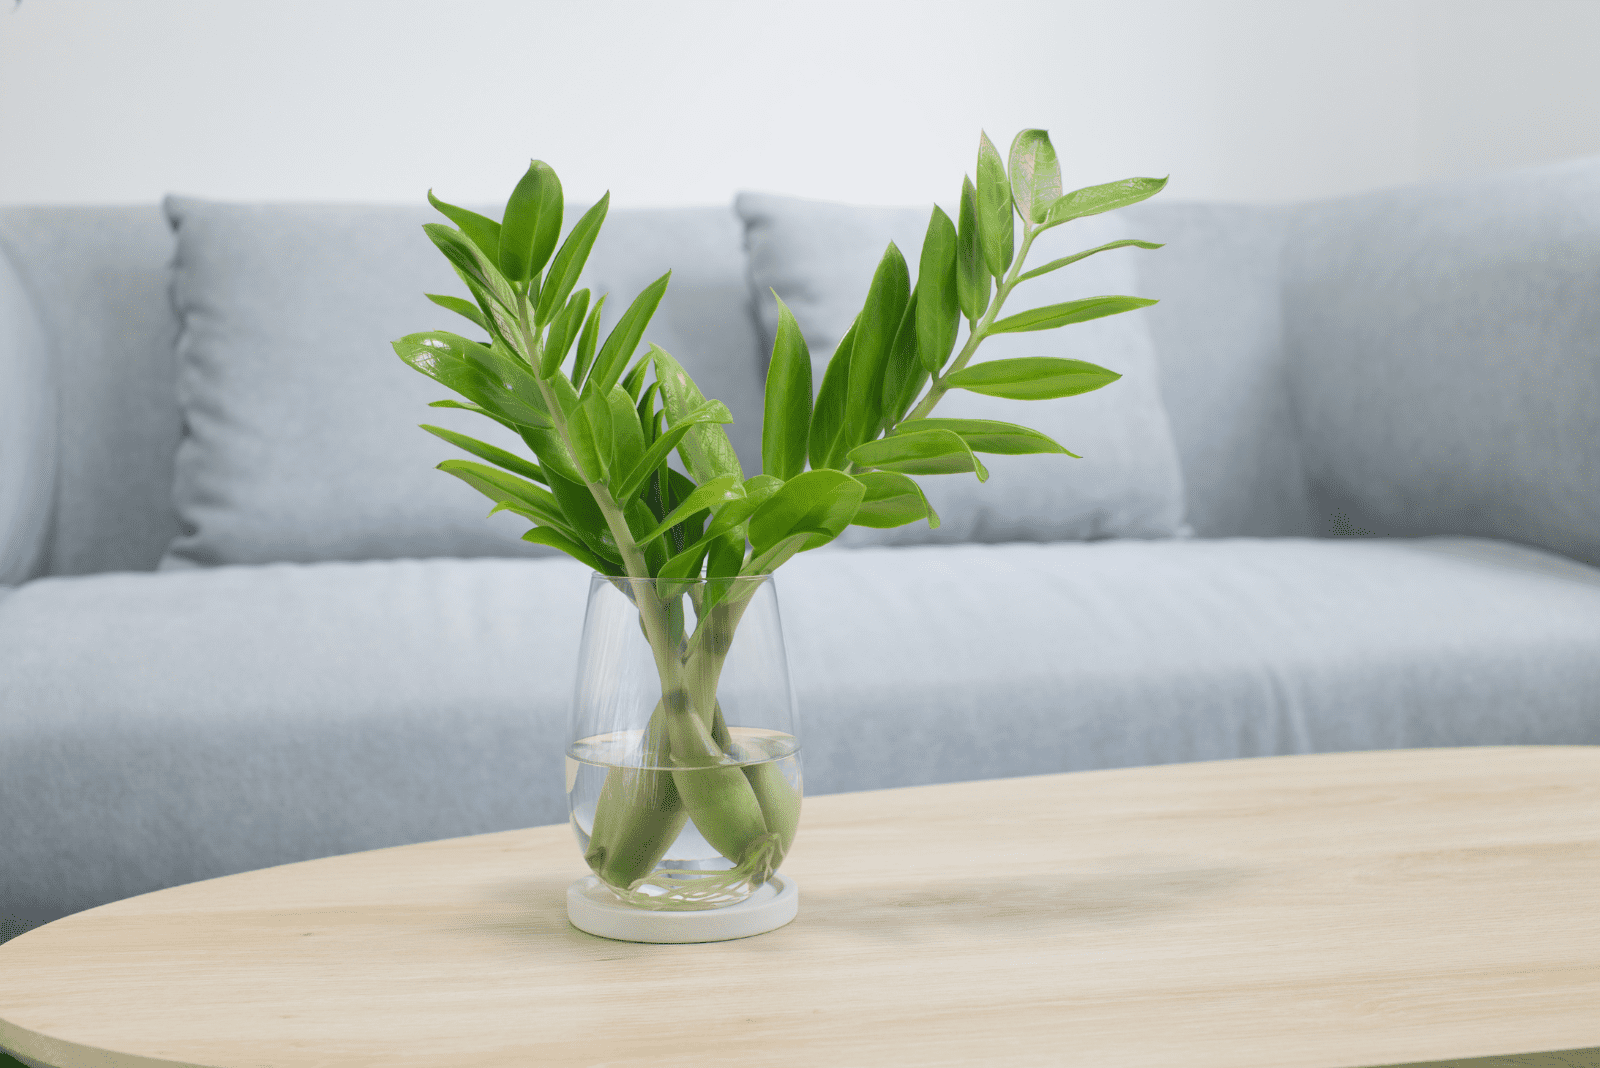
How To Root The Cuttings In Water
Here is a step-by-step guide on how to root the leaf cuttings in water:
1. Fill a new transparent container with fresh, lukewarm water. Ensure only the container’s bottom is filled with water.
2. Put the ZZ plant cutting in water carefully, and only put the cut end of the leaf in water. The leaf can easily rot if submerged in water.
3. Change the water every couple of days to reduce the risk of the leaf rotting.
4. Once the ZZ cutting develops rhizomes, it’s time to transplant it.
How To Root The Cuttings In Soil
Soil propagation of ZZ cuttings has more benefits than rooting in water. You don’t need to check the water constantly because the soil will retain enough moisture for healthy rhizome development.
Here is a step-by-step guide on how to root ZZ cuttings in soil:
1. Prepare the potting mix for your ZZ cutting. I recommend mixing peat moss and perlite for good drainage, aeration, nutrients, and moisture.
2. Make a small hole in the soil and insert the ZZ cutting. You can press the bottom part of the leaf a little bit so that it can stand upright. However, the majority of the leaf surface should be above the soil line.
3. Find a spot for the cutting where it can receive enough bright indirect light. The cuttings will develop rhizomes faster if the temperatures are high enough.
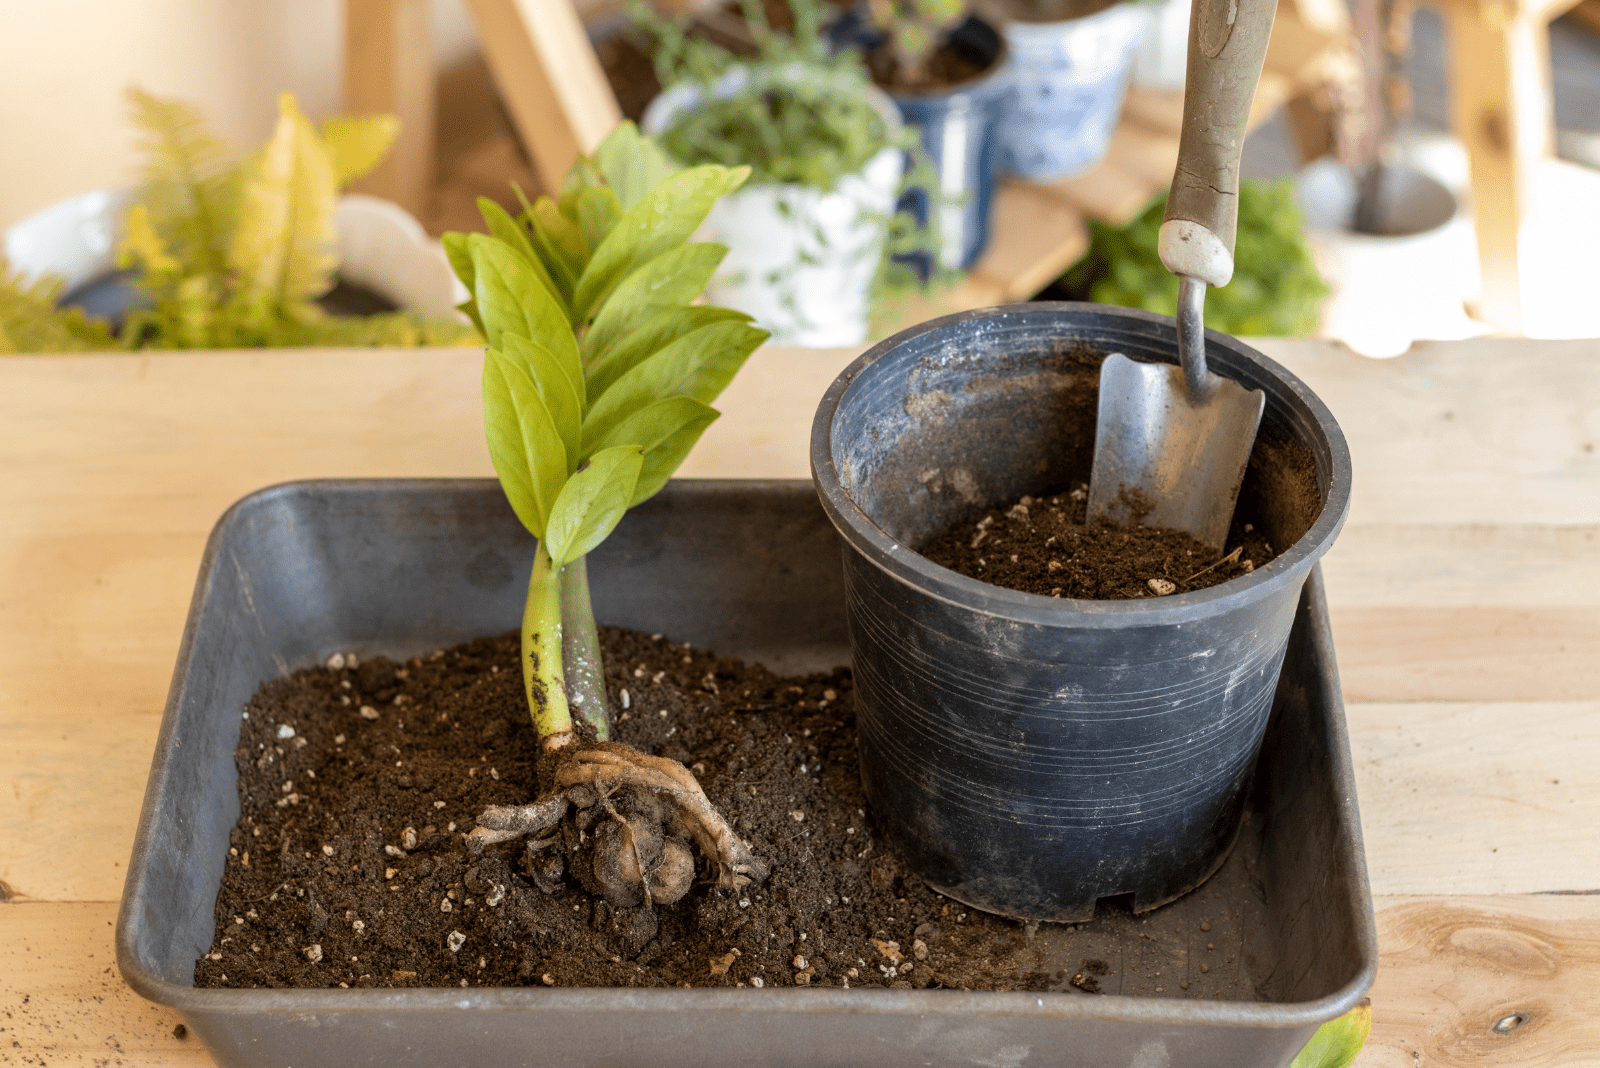
Transplant The Cuttings
No matter the method you use for getting new ZZs, the rooted cuttings will need to be transplanted.
If you have propagated in water, the rhizomes will develop small and delicate roots, so you’ll need to be extra careful when transplanting them.
I always wait for a few more once I spot new roots.
On the other hand, if you propagated in soil you’ll need to transplant the rooted cuttings to a larger pot with more soil so that new roots have enough space to spread.
Keep the soil moist and provide your rooted ZZ cutting with enough indirect light. New growth will be visible soon after transplantation.
Once new growth occurs, you should continue with adequate ZZ plant care.
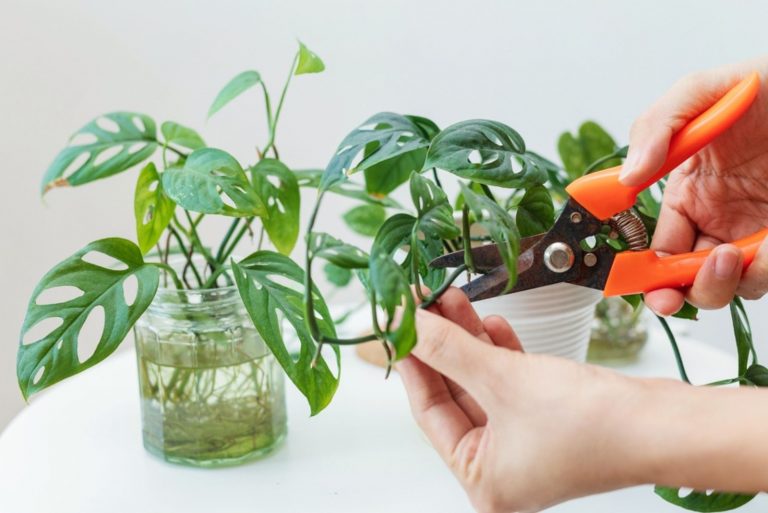
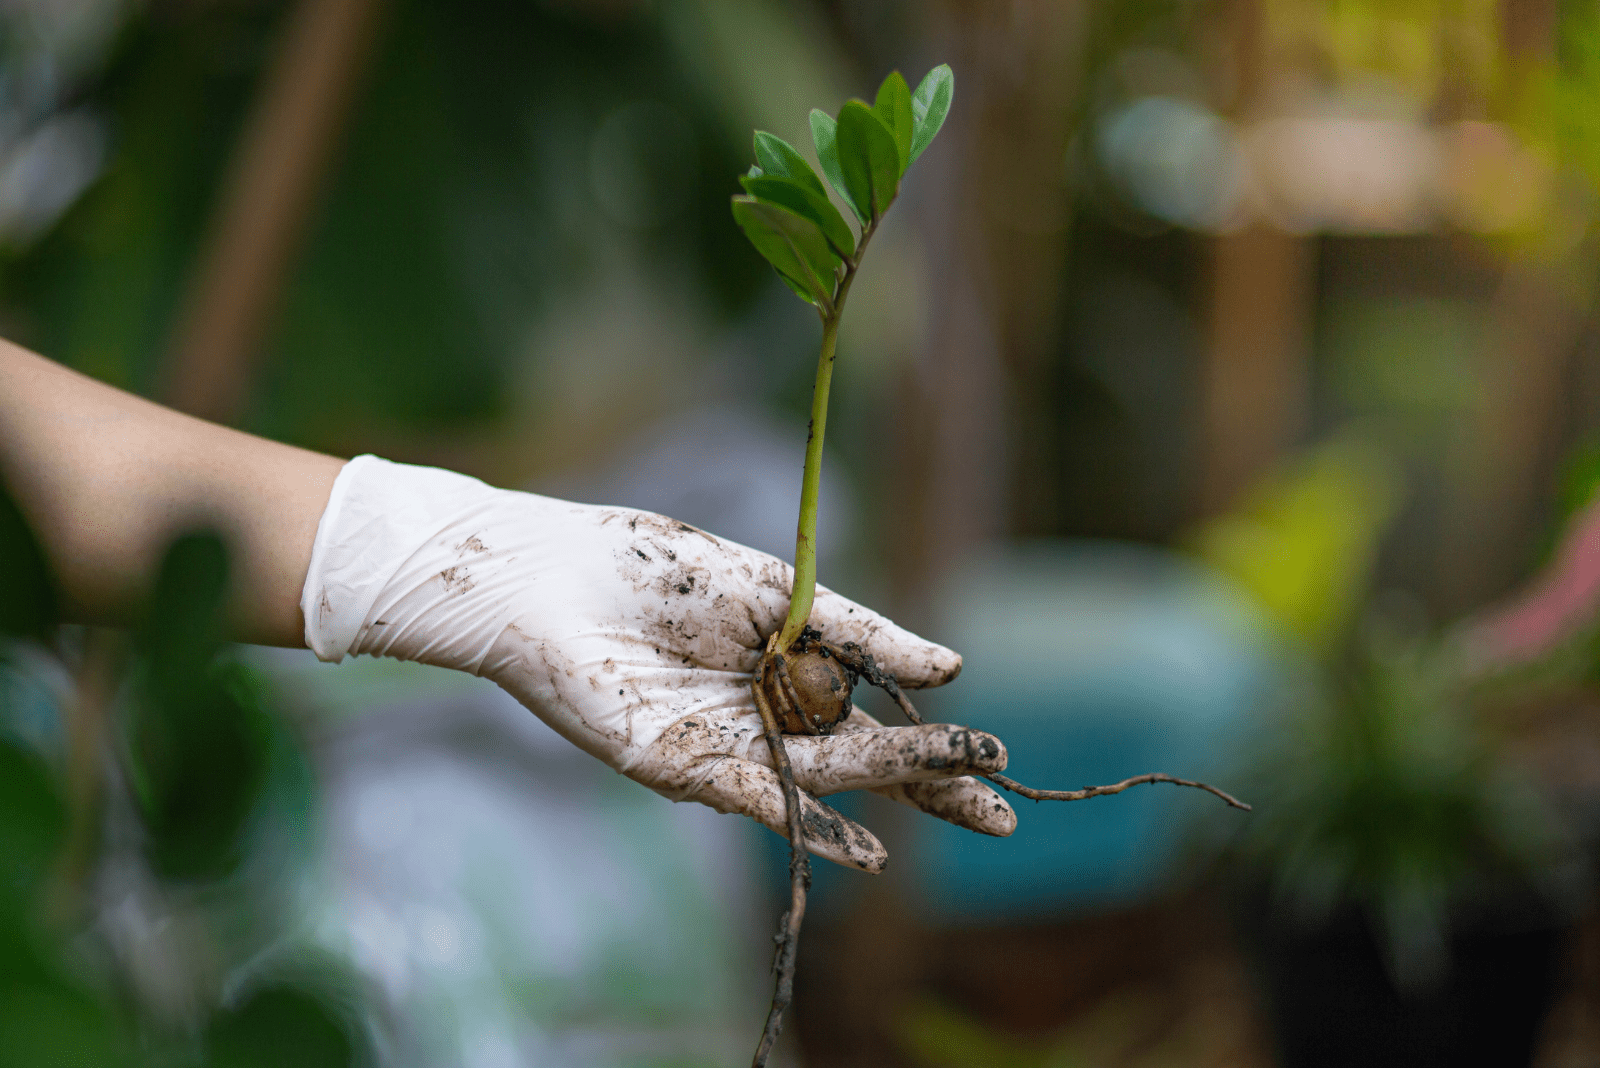
How To Propagate ZZ Plant By Stem Cuttings
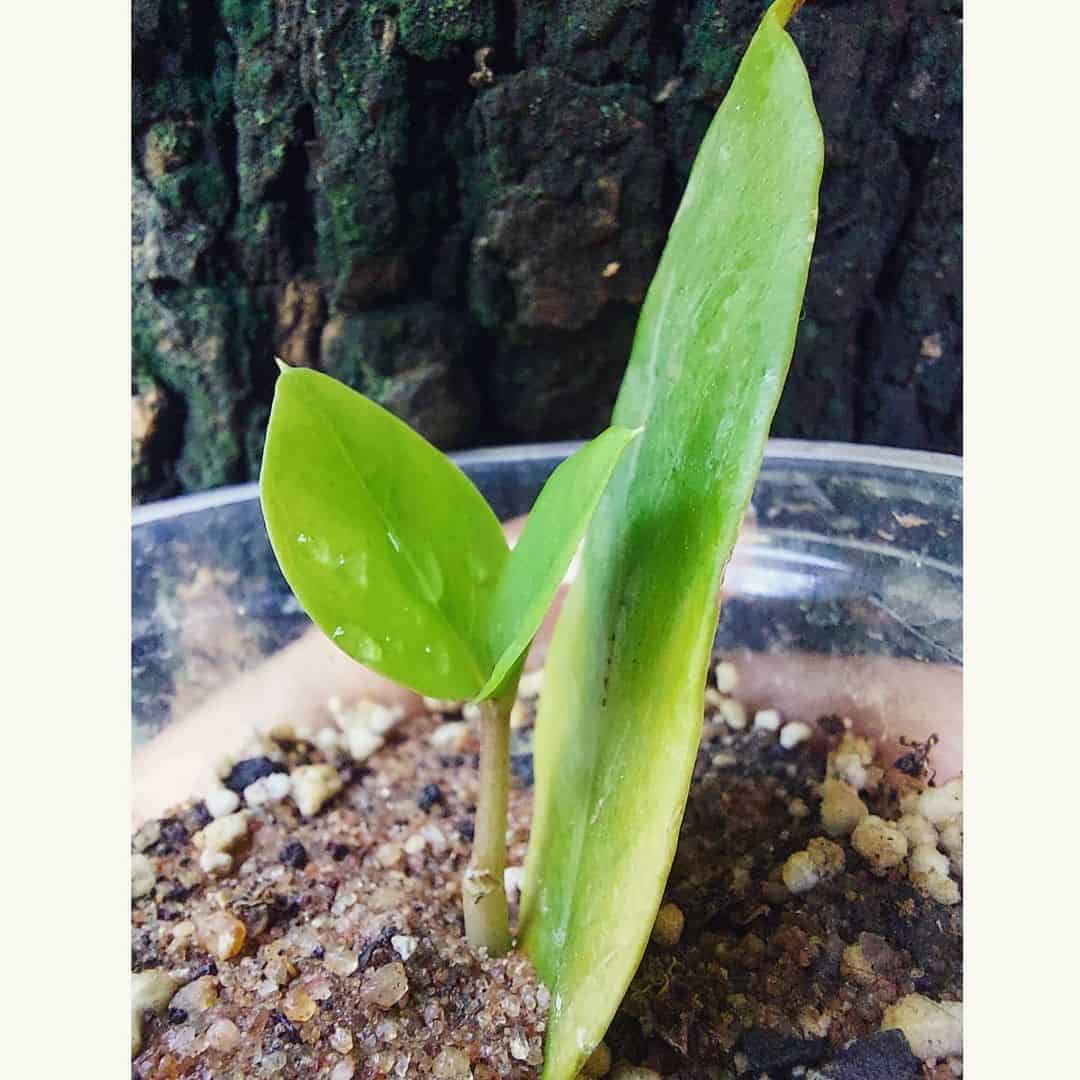
Photo from: @greenpeace368
I have great news; stem cutting is an even easier way to get a new ZZ than leaf cutting!
This is especially important for beginners because I know how it can be challenging to propagate plants without previous experience.
You’ll need pretty much the same equipment as what you used in the previous process, although a deeper glass will be required if you’re using water for rooting.
Just to remind you, your ZZ needs to be completely healthy because without a healthy stem, you won’t get the roots.
Let’s look at the entire procedure in more detail.
Take The Stem Cuttings
Here is a guide on how to take perfect cuttings:
1. Select a healthy stem. You can use several stems if you want to get more ZZs.
2. Take a pair of sharp shears and sanitize them. The ZZ will recover more quickly if the cut is clean.
3. Now you have two options; the first one is to remove the entire stem, and the second is to cut off only a few inches. Once clipped, the ZZ’s stem won’t regrow, so removing the entire stem will usually make your Zanzibar gem look better.
4. After removing the stem(s), divide the cutting(s) into 4-inches portions.
5. Your cutting will have several leaves attached, so you’ll need to get rid of the lower ones because they could quickly rot when you place the cutting in water or soil.
Use a knife, a pair of scissors, or your fingers to remove the leaves. The great thing is that you can use these leaves for the leaf-cutting method I described above.
Leave the stem cuttings for a couple of hours to callus.
Root The Stem Cuttings
You can use either water or soil, and I’ll describe each method in detail now.
How To Root Stem Cuttings In Water
Here’s how to root ZZ plant stem cuttings in water:
1. Fill the container (jar or vase) with fresh and clean water. You don’t need any bacteria at this point.
2. Put the cutting in water. The lower half of the ZZ cutting should be submerged and there shouldn’t be any leaves below the water line.
3. Place the container where the stem cutting can receive enough bright indirect light.
4. Change the water in the container every couple of days to prevent fungal growth that could destroy the cutting.
How To Root Stem Cuttings In Soil
Here are the steps for rooting ZZ stem cuttings in soil:
1. Make a mixture of peat moss and perlite or purchase ready made, well-draining soil.
2. Put the potting soil in the container and water it lightly.
3. Poke a couple of holes in the soil if you are using several cuttings.
4. Put the cutting(s) in the hole(s) and press the soil down around them so that they can stay firm and upright.
5. Find a place for the stem cutting so that it can receive a lot of bright light (indirect) to develop strong roots.
6. Mist the soil regularly and go easy on the water as you don’t want to risk waterlogging the soil and attracting fungi.
Transplant The Stem Cuttings
The rhizomes should develop approximately inch-long roots before transplantation. You now need a new pot that’s larger than the previous one and has drainage holes in the bottom.
You can use a regular soil mix or mix 2 parts potting soil, 1 part peat moss, and 1 part perlite to make your own.
Put the rooted cutting in the soil and tap the soil down so the cutting stands upright. This way, you’ll also close the air pockets new roots don’t need.
Finally, water your freshly transplanted cutting and continue with usual ZZ plant care.
How To Propagate Zamioculcas Zamiifolia By Division?
Another way to get a new ZZ plant is through division. This method will work if you have a mature and well-established Zanzibar gem.
I divide my ZZ plant each time I’m repotting it.
Cut back on watering a few days before you start with division because your ZZ will need to come out of its pot.
How To Divide A ZZ Plant
Here are the steps for the division and transplantation of a ZZ plant:
1. Remove your ZZ from its pot by carefully leaning it to one side and tapping on the pot gently. Your ZZ should slide out easier, but you can squeeze the pot a little bit if your ZZ has a hard time coming out of the pot.
2. You’ll need to expose the entire root system, so start by removing the soil around the roots with your hands. I always wash the roots to get a better view.
3. Observe the root system and determine the possible amount of sections. Remember that each portion should have sufficient roots to reduce stress and shock after transplantation.
4. Start separating the root system. I usually use my hands, but sometimes it may be pretty challenging to divide it, so instead of using force I simply take a sharp knife and cut the sections.
It might be challenging to figure out the simplest technique to separate your Zanzibar gem plant if it is severely overgrown. In this case, I recommend dividing it into smaller portions.
However, each portion should have plenty of roots to continue growing.
Cut directly into the rhizome using a clean, sharp cutting tool to minimize harm to the ZZ plant stem and roots.
Repotting
Before you start repotting, prepare new pots. The number of pots depends on the number of sections you got after the division.
Also prepare the right soil and fill each pot, leaving enough place for sections.
Gently place each section in the pot and then fill it with soil.
That’s it! Your new ZZs are ready to grow!
How Long Does It Take To Propagate A ZZ Plant?
The time needed for ZZ plant propagation mainly depends on the methods you use and the conditions you ensure.
For example, if using the leaf-cutting method, you’ll need to wait for about 8 months until your new ZZ is established.
If you don’t see any growth a few months after the process, there’s no need to panic.
Pay attention to factors such as light, temperature, humidity, and soil moisture, because proper conditions can boost and ensure healthy growth.
Keep reading to find out the best conditions for the Zanzibar gem plant.
What Is The Best Time To Propagate A ZZ Plant?
The ZZ plant, like most other houseplants, takes a rest during the winter months to save energy for the upcoming growing season.
Therefore, your ZZ will be ready for new growth once spring arrives. This is the best time to repot the Zanzibar gem, and also for propagation.
Indoor plants need some time to heal from cutting, division, or repotting, and spring is a great time to do all of those things because the growing season will last until fall.
ZZ Plant Care Guide For After Propagation
It’s essential to know which conditions your ZZ needs for healthy growth.
Below, you’ll find all the requirements for your ZZ.
Light
Eternity plants are among the best low-light indoor plants because they can thrive in a variety of light settings.
Although ZZs can grow in low light, bright indirect light is their preferred environment for growth.
Avoid placing your Zanzibar gem plant in a location that receives direct sunlight. The intense sun rays may scorch it and cause crispy, yellow leaves.
Light issues may also cause drooping of your ZZ plant.
Temperature & Humidity
You’ll need to ensure a temperature range from 60 to 70 degrees Fahrenheit if you want your ZZ to thrive.
Additionally, this plant prefers typical indoor humidity conditions. To help your plant maintain its unique glow, place it close to a humidifier if the air becomes excessively dry.
You can also place your Zanzibar gem near other plants, such as pothos, to create a microclimate and increase humidity.
Soil
ZZ plants don’t require any specific potting soil type. You only need to pay attention to good water drainage as the underground structures, incorrectly referred to as tubers, despise waterlogged soil.
Adding perlite or similar aerating and draining materials will help in water drainage.
Watering
The ZZ plant has succulent features, which means that it can grow well without water for a few weeks.
I recommend waiting until the soil dries out before watering your ZZ.
This houseplant is extremely sensitive to overwatering, which is one of the most common reasons for black spots on ZZ plants.
Fertilizing
The ZZ isn’t a heavy feeder and doesn’t require any fertilizer during the winter because of dormancy.
When fertilizing, use a balanced liquid fertilizer or 10 20 20 fertilizer.
The Benefits Of ZZ Plant Propagation
Did you know that ZZ plants are perfect for Feng Shui? If you are into Feng Shui, then getting more ZZs is a great idea!
We don’t propagate just to expand our plant collections, though.
For instance, you can propagate your ZZ to expand somebody else’s plant collection; gifting a ZZ is a great thing to do for your friends.
Be careful when gifting because the ZZ plant is toxic to cats.
You can also use the division method to give your ZZ a fresh start. The mother plant will grow better as you’ll be providing it with fresh nutrients.
One of my favorite things about this activity is that it’s free! Although the ZZ plant isn’t too expensive, why spend money if you can do it for free?
Finally, the Zamioculcas zamiifolia may sometimes suffer from some deadly disease and be beyond saving, so if you find any healthy portions, such as the leaves, stem (petiole), or rhizomes, you should use them to get new ZZs.
Of course, if you have a variegated ZZ, never miss the chance and propagate it!
Common ZZ Plant Propagation Problems
Nothing is problem-free; propagation may fail or you may face other issues.
The temperatures may be too low, and the chances of the cutting developing new roots will be pretty low in this case.
Another factor that plays an essential role in root development is light. If you don’t ensure enough bright indirect light, ZZ cuttings and sections can’t grow.
When you propagate in water, you’ll need to make sure the water is always fresh. If it’s brownish and has a bad smell, there may be some rotten sections.
The ZZ cutting may turn brown or yellow if it receives too much water.
If your cutting produced roots, and then suddenly stopped developing further, it may be suffering from root rot.
However, if all conditions are right and your cuttings or section aren’t developing any roots, don’t panic and just wait a little more. I know it takes a lot of time, but it’s definitely worth it!
FAQs
Can you grow a ZZ plant from a cutting?
Yes, you can grow a ZZ plant from a cutting. You can either use the leaves or the stems, and both methods will give good results if done correctly.
However, bear in mind that the leaf-cutting method may not be the quickest. Actually, it can take more than 8 months for the leaf to develop new roots and over a year to develop a new stem.
Is it better to propagate the ZZ plant in water or soil?
Water and soil propagation have benefits and drawbacks, so it’s up to you to decide which one to use.
For example, when rooting ZZ plant cuttings in water, you can see the root development, so if there are any issues you can spot them on time.
However, water roots are known to be more delicate, which increases the chances of rotting or breaking.
When rooted in soil, the cuttings will produce stronger and more resistant roots.
Can you propagate a broken ZZ stem?
Believe it or not, you can root a broken ZZ stem. Just remember that it needs to have some leaves on the upper part.
You’ll need to make a clean cut on the stem end and then root it using the methods above.
Wrapping Up
I’m sure you are in love with your ZZ, so I’m not surprised you are looking for methods for ZZ plant propagation!
Luckily, you have three methods to choose from, and each one will give great results if you follow all the steps above.
Take good care of your ZZ and enjoy the magnificent leaves for many years to come!
Good luck, and until next time!
Like this post? Share or pin it for later!