When And How To Fertilize Clematis For More Flowers In Georgia
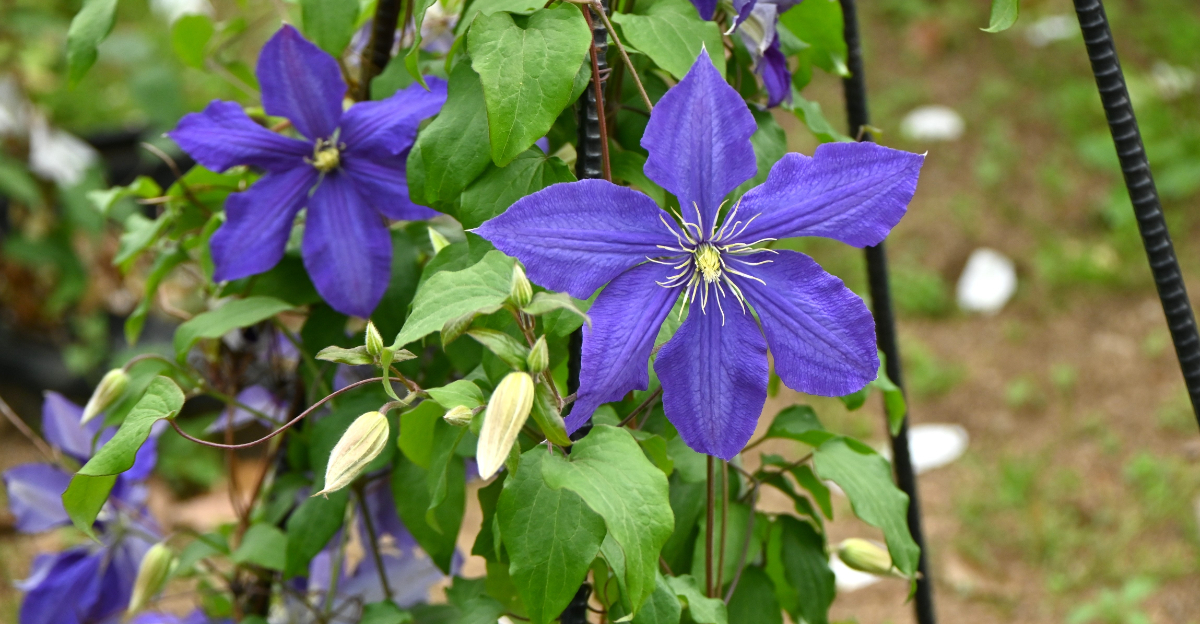
Clematis usually grabs attention fast once the vines start filling with large colorful flowers in spring.
Then summer arrives, blooms slow down, and many gardeners start wondering why the plant suddenly looks far less impressive than it did only weeks earlier.
Fertilizing mistakes are often part of the problem in Georgia gardens. Too much feeding can create lots of leafy growth with fewer flowers, while poor timing can leave vines struggling once temperatures and humidity begin rising.
Even healthy looking plants sometimes fail to bloom heavily when nutrients are not balanced properly.
Soil moisture matters too. Clematis roots prefer cooler conditions, especially once strong afternoon heat starts building through late spring and early summer.
Dry roots often lead to weaker flowering later on.
Getting the timing right usually makes the biggest difference. Healthy vines tend to stay fuller, greener, and much more colorful once feeding routines finally match the plant’s growing cycle.
1. Early May Is Still A Good Time To Feed Clematis

May feels like a second chance for gardeners who missed their early spring feeding window. Clematis is still actively pushing new growth at this point, and that hungry, fast-growing energy means nutrients get absorbed quickly and put to good use right away.
Early May in Georgia brings warm but not yet brutal temperatures. Roots are active, soil moisture is usually decent from spring rains, and the plant is not yet stressed by summer heat.
Feeding now gives the vine exactly what it needs before the hardest part of the season arrives.
A balanced fertilizer works well at this stage. Look for something with roughly equal parts nitrogen, phosphorus, and potassium, like a 10-10-10 formula.
Nitrogen helps fuel the leaf and stem growth that supports more flowering sites. Phosphorus supports root strength and bud formation.
Potassium helps the plant handle stress down the road.
Avoid going heavy on nitrogen alone. Too much of it pushes leafy growth at the expense of blooms.
A balanced approach keeps the plant developing evenly rather than just getting tall and green without flowers.
2. Slow Release Fertilizer Supports Longer Bloom Cycles

Not every feeding approach works the same way. Slow-release fertilizers are built differently from quick-release products, and that difference matters a lot when you want blooms that last across multiple weeks instead of just one short burst.
Quick-release fertilizers deliver nutrients fast. Roots absorb them rapidly, and you see results within days.
But that surge fades just as quickly, leaving the plant without support during later bloom cycles. Slow-release granules work by breaking down gradually over weeks or even months, providing a steady, low-level supply of nutrients the whole time.
For clematis, consistent feeding is more effective than occasional spikes. A vine that gets a steady nutrient supply keeps producing new buds rather than exhausting itself on one big flush and then struggling.
Slow-release products make that consistency easier to maintain without needing to remember frequent reapplication dates.
Products labeled for roses often work well for clematis too. Both plants are heavy feeders that benefit from phosphorus-rich formulas.
Your Georgia Garden Changes Every Week. Your Plan Should Too.
Gardening in Georgia changes quickly throughout the season. Every Friday you’ll receive a simple weekly plan showing exactly what to plant, prune, fertilize, harvest, and protect so you never miss the right timing.
Read the label before buying and look for a product that lists a release window of at least three months.
Apply slow-release granules once in early spring and again around midsummer if your variety blooms repeatedly. Two applications per season is usually enough for most clematis types.
3. Granules Should Be Spread Several Inches Away From Stems

Placement matters more than most people realize. Dropping granules right against the stem of a clematis plant can cause fertilizer burn, which damages the tissue near the crown and weakens the plant at its most vulnerable point.
Roots do not sit directly under the stem. They spread outward as the plant matures.
Spreading granules in a wide ring, starting about four to six inches away from the base and extending outward twelve inches or more, puts the nutrients right where active roots can actually find them.
Crown burn is a real risk with any granular fertilizer. Clematis crowns are sensitive, and concentrated fertilizer salts sitting against the stem can cause visible damage or slow the plant down significantly.
A little spacing during application is an easy way to avoid that problem entirely.
Use your hand or a small trowel to scatter granules evenly around the plant rather than piling them in one spot.
Even distribution means more roots get access to nutrients at the same time, which supports more uniform growth across the whole vine.
After spreading, gently scratch the granules into the top inch of soil if possible. This helps them stay in place during rain and speeds up the breakdown process.
4. Deep Watering After Feeding Helps Nutrients Reach The Roots

Fertilizer sitting on dry soil accomplishes almost nothing. Water is what activates nutrients and carries them down through the soil profile to where roots can absorb them.
Feeding without watering is one of the most common mistakes gardeners make.
A deep watering session right after fertilizing makes a measurable difference. Shallow watering only wets the top inch or two of soil, which is not enough.
Roots on a well-established clematis can reach down a foot or more. Getting water down to that depth ensures nutrients actually reach the plant.
Slow, deep watering is better than a quick spray. Let the hose run at a low trickle for fifteen to twenty minutes near the base of the plant.
This gives water time to soak in rather than running off the surface. Sandy soils in some parts of Georgia drain fast and may need even longer watering sessions to push nutrients deep enough.
Avoid overhead watering when possible. Wetting the foliage repeatedly can encourage fungal problems, especially during humid stretches of the season.
Directing water at the base of the plant is cleaner and more efficient.
If you have a drip irrigation system, use it after fertilizing.
5. Compost Around The Base Improves Moisture Retention

Compost is not a fertilizer in the traditional sense, but it does something fertilizers cannot fully replace.
It improves the soil itself, which helps the plant absorb nutrients more efficiently and hold onto moisture longer between watering sessions.
Georgia summers get hot fast, and soil moisture disappears quickly in raised beds or sandy soils. A two-to-three inch layer of finished compost spread around the base of the clematis acts like a sponge.
It slows evaporation and keeps the root zone cooler and more consistently moist.
Compost also feeds soil microbes. Healthy microbial activity in the soil breaks down organic matter into plant-available nutrients over time.
Plants growing in biologically active soil tend to perform better than those growing in depleted ground, even when both receive the same fertilizer inputs.
Use finished compost rather than fresh material. Fresh compost can be too hot and may contain pathogens or weed seeds.
Finished compost looks dark, crumbly, and smells earthy. It is ready to use without risking any harm to your plants.
Spread it in a wide circle around the plant, keeping it pulled back slightly from the stem. Compost piled against the stem can trap moisture and create conditions that invite rot or pest activity at the crown.
6. Thick Mulch Helps Protect Roots From Rising Heat

Clematis roots prefer cool, moist conditions even when the tops of the plants are thriving in full sun. Mulch is the simplest tool for maintaining that balance, especially once summer heat starts building across the Southeast.
A three-to-four inch layer of shredded bark, wood chips, or straw over the root zone keeps soil temperatures significantly lower than bare ground.
Apply mulch after fertilizing and watering, not before. Mulching over dry soil traps the dryness in.
Getting moisture into the ground first and then covering it with mulch locks that moisture in place and slows evaporation dramatically throughout the hottest weeks of the year.
Keep mulch pulled back about two inches from the main stems. Piling it directly against the crown creates a damp, dark environment that can encourage rot or attract pests.
A small gap around the stem allows for airflow while still protecting the wider root zone effectively.
Organic mulches like shredded hardwood or pine bark also break down slowly over time, adding organic matter to the soil. This improves soil texture gradually without any extra effort on your part.
Replenish the mulch layer each season as it breaks down and thins out.
7. Removing Spent Flowers Encourages More Bud Development

Spent flowers left on the vine are not just cosmetic clutter. A plant that is busy forming seed heads is directing energy away from producing new buds.
Removing those faded blooms redirects that energy back into flowering.
Deadheading is most effective on repeat-blooming clematis varieties. Large-flowered hybrids and viticella types often produce two or more flushes per season when managed well.
Cutting off spent blooms right after the petals drop encourages the plant to push new buds rather than setting seed.
Use clean, sharp pruning snips. Dull blades crush stems rather than cutting cleanly, which can introduce problems at the cut site.
Snip just above the first set of healthy leaves below the spent bloom. That node is where new growth and eventually new flower buds will emerge.
Not all clematis types respond the same way. Some varieties that bloom only once per season, typically in late spring, do not benefit much from deadheading for rebloom.
Check what type you have before expecting a second flush. Knowing your variety saves frustration and sets realistic expectations.
Combine deadheading with your regular watering and fertilizing routine.