What California Gardeners Should Do To Crape Myrtles Before June Ends
Crape myrtles can look amazing in early summer, then suddenly seem a little tired once the first flower clusters fade.
Those dry, messy clusters are easy to ignore, especially when the tree still has plenty of color left.
But leaving them in place can slow the fresh bloom show many California gardeners want later in the season.
A quick cleanup before June ends can help the plant look sharper and put its energy where it matters most.
The trick is knowing what to remove without cutting too much. This small task can make a big difference in how full, bright, and polished the tree looks through the hotter weeks ahead.
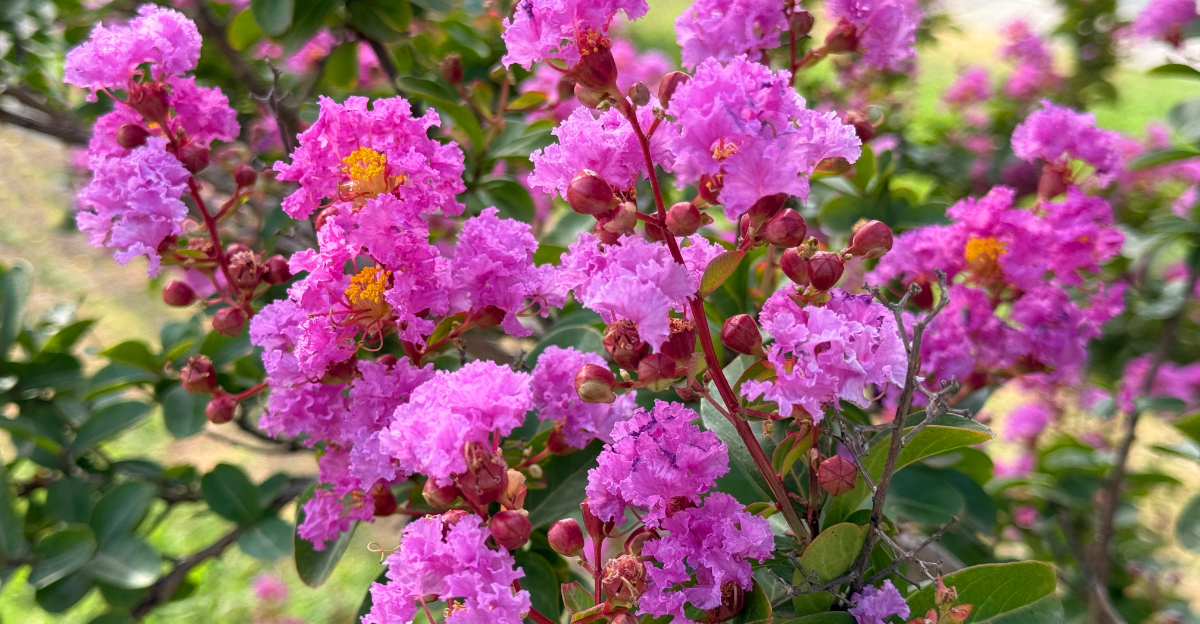
Deadheading spent crape myrtle flower clusters may be simple, but timing it right can keep summer color going strong.
1. Find The Faded Clusters

Before you grab your pruners, take a slow walk around your crape myrtle and really look at it. Faded flower clusters are easy to spot once you know what you are looking for.
They turn from bright and fluffy to dry, papery, and brownish as they age.
Most of the spent blooms will be at the tips of the branches. They may still look somewhat full, but the color is gone and the petals feel crispy to the touch.
Some clusters droop slightly under their own weight once they have finished blooming.
Checking both the inner and outer parts of the canopy matters too. Some faded clusters hide behind fresh leaves or newer blooms, so do not rush this step.
A thorough inspection helps you plan where to focus your effort.
Look for clusters that have fully dropped their petals and left behind small, round seed pods starting to form. Those are the ones to target first.
Catching them early prevents the tree from putting energy into making seeds instead of new flowers.
Good lighting helps a lot during this inspection. Morning light is ideal because it casts fewer shadows and lets you see the full shape of the tree.
Take your time, and you will feel much more confident when you start cutting.
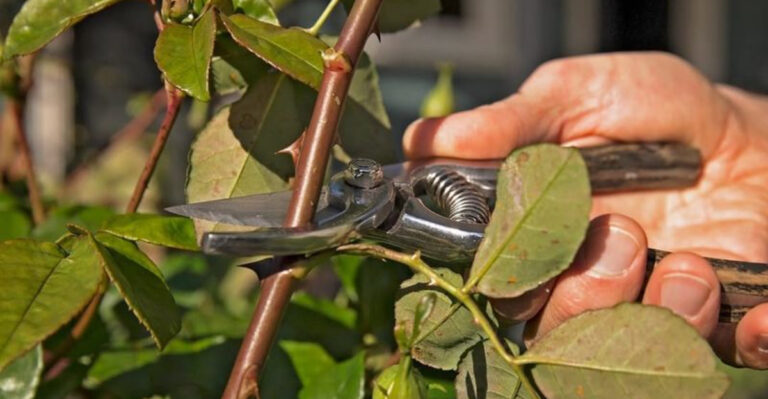
2. Snip Below The Bloom

Once you have found a faded cluster, the next move is simple. Cut the stem just below the base of that bloom head.
You do not need to cut far down the branch at all.
Keeping your cut close to the bloom keeps the branch long enough to support new growth. Cutting too far down removes healthy stem tissue that the tree needs.
Short, precise cuts are always better than long, aggressive ones on crape myrtles.
The goal here is to remove only the spent flower head and nothing more. Think of it like trimming a bad split end from your hair.
You take off the damaged part without touching the healthy part below.
Most gardeners find it helpful to hold the branch steady with one hand while cutting with the other. This gives you better control and cleaner cuts.
A wobbly branch leads to ragged cuts that take longer to heal.
Your California Garden Changes Every Week. Your Plan Should Too.
Gardening in California changes quickly throughout the season. Every Friday you’ll receive a simple weekly plan showing exactly what to plant, prune, fertilize, harvest, and protect so you never miss the right timing.
After each cut, you should see a clean, smooth stem end. If the cut looks torn or crushed, your pruners may need sharpening.
Clean cuts heal faster and reduce the chance of any disease sneaking into the wound. Snipping below the bloom is quick work once you get the rhythm of it, and your tree will reward you with fresh blooms in just a few weeks.
3. Cut Above A Leaf Node

Here is a detail that separates good pruning from great pruning. Whenever you make a cut on a crape myrtle, try to cut just above a leaf node.
A leaf node is the small bump or joint on the stem where a leaf grows out.
Cutting above a node encourages the tree to push new growth from that exact point. That new growth will eventually produce another flower cluster.
So every smart cut you make now is basically an invitation for more blooms later.
Nodes are usually easy to see on crape myrtle branches. They appear as slight swellings or joints along the stem, often with a leaf or small bud already attached.
Once you notice them, you will start spotting them everywhere.
The distance between your cut and the node should be small, roughly a quarter inch or less. Cutting too far above the node leaves a stub that does not serve the tree well.
Cutting too close can damage the node itself, which slows new growth.
With a little practice, finding and cutting above nodes becomes second nature. You will naturally start scanning for them before each cut.
This one habit alone can seriously improve how many times your crape myrtle reblooms in a single season. It is a small detail with a big payoff for your garden.
4. Remove Seed Pods Early

Seed pods are the tree’s way of finishing the job it started with each flower. Once a bloom fades, the plant naturally tries to form seeds.
That process takes a lot of energy that could go toward new flowers instead.
Removing seed pods early is one of the most effective ways to encourage reblooming. When the tree cannot complete seed production, it redirects its resources back into flowering.
More flowers mean more color and more beauty in your yard through the summer.
Seed pods on crape myrtles are small and round. They start out green and firm, then slowly turn brown and woody as they mature.
Catching them while they are still green is the ideal time to remove them.
You can pinch small pods off with your fingers or use pruners for larger clusters. Either way works fine as long as you are removing the pods before they harden.
Hard, mature pods are tougher to remove and the energy has already been spent making them.
Some gardeners skip this step because the pods seem harmless. But over a full season, leaving pods on the tree can noticeably reduce the number of new blooms you get.
A few minutes of pod removal now pays off with weeks of extra flowering later. It is one of the easiest ways to get more out of your crape myrtle this summer.
5. Don’t Cut Main Branches

One of the most common mistakes gardeners make with crape myrtles is cutting back the main branches. This practice is sometimes called crape murder, and it causes real harm to the tree’s natural shape and long-term health.
Main branches are the large, sturdy limbs that form the tree’s framework. They are not meant to be cut back hard each year.
When they are, the tree responds by sending out weak, fast-growing sprouts called water sprouts from the cut ends.
These water sprouts are floppy and cannot support the weight of heavy flower clusters. They also crowd the canopy, blocking airflow and light.
The result is a tree that looks strange, grows poorly, and blooms less effectively than it should.
The beautiful, smooth bark of a mature crape myrtle develops on those main branches over time. Cutting them off destroys that natural elegance and leaves behind knobby, scarred stubs that never look right again.
Before June ends, take a look at your tree and make sure you are only removing small stem tips and faded blooms. Leave all the main branches completely alone.
If the tree feels too large for your space, consider whether a smaller variety might be a better fit long term.
Protecting those main branches now protects the overall beauty and health of your tree for years to come.
6. Skip Heavy Summer Pruning

Summer is not the season for heavy pruning on crape myrtles. Once the warm months arrive and the tree is actively blooming, major cuts do more harm than good.
The tree is working hard right now, and big cuts interrupt that process.
Heavy pruning in summer forces the tree to spend energy healing wounds instead of producing flowers. It also removes mature wood that took years to develop.
That wood is where the best blooms tend to appear, so losing it hurts your flower display.
There is also a timing problem with late-season heavy cuts. New growth pushed out after a hard summer pruning may not have enough time to harden before cooler weather arrives.
In many parts of our state, that soft new growth becomes vulnerable to stress.
Light maintenance is always fine. Removing faded blooms, snipping off seed pods, and tidying up stray twigs are all perfectly acceptable summer tasks.
The key word is light. You are maintaining, not reshaping.
If you feel the urge to do a bigger prune, write yourself a note and save it for late winter or very early spring. That is the best time for any significant shaping work on crape myrtles.
For now, keep your cuts small and focused only on spent blooms and seed pods. Your tree will stay healthier and bloom more reliably when you respect its seasonal rhythm.
7. Use Clean Sharp Pruners

The tools you use matter just as much as the technique. Dull or dirty pruners can cause more damage than good, and many gardeners do not realize this until they see the results up close.
A dull blade crushes the stem instead of cutting cleanly through it.
Crushed stem ends take longer to heal and are more vulnerable to fungal problems. Crape myrtles are generally tough, but giving any potential infection an easy entry point is never a smart move.
Clean cuts close faster and keep the tree stronger. Dirty pruners can also spread problems from one plant to another.
If you have been working in other parts of your garden, wipe your blades with a cloth dampened with rubbing alcohol before cutting your crape myrtle.
This simple habit protects all your plants. Sharpening pruners is easier than most people think. A basic sharpening stone or a pull-through sharpener works well for most home gardeners.
Even a few passes on a sharpening tool can make a noticeable difference in how cleanly the blades cut.
Check your pruners before you head out to the garden. If the blades look dull, nicked, or rusty, take five minutes to clean and sharpen them first.
Good tools make the whole job easier and faster. Treating your pruners well means they will serve you reliably for many seasons of crape myrtle care ahead.
8. Deadhead Reachable Blooms First

Not every faded bloom on a crape myrtle is easy to reach. The tree can grow quite tall, and some of the best clusters end up high in the canopy where a standard reach just will not get you.
Starting with the blooms you can safely reach is the smart approach.
Working from the ground up keeps things safe and manageable. You can deadhead the lower and middle branches without needing a ladder, which reduces the risk of falls.
Garden safety is always worth thinking about, especially when you are working with tools.
Reachable blooms are also the ones that affect the visual impact of your tree at eye level. When those lower and mid-level clusters are fresh and colorful, the whole tree looks more vibrant and well-kept.
Passersby and neighbors will notice the difference immediately.
For the higher blooms, a pole pruner with an extendable handle can help you reach another few feet safely. These tools are widely available and not expensive.
They let you deadhead higher clusters without ever leaving the ground.
If some top blooms are truly out of reach, do not stress about it. The tree will still benefit greatly from the work you do on accessible areas.
Focus your energy where it counts most and where it is safe. A partially deadheaded crape myrtle still rebounds faster than one that gets no attention at all before the season peaks.
9. Leave New Buds Alone

Right alongside those faded blooms, you will almost certainly notice small, tight buds forming at the branch tips. Those are the next wave of flowers getting ready to open.
Whatever you do, leave them completely alone.
New buds are delicate and easy to knock off accidentally if you are not paying attention. When you are deadheading nearby spent clusters, work carefully around any buds you spot.
A little awareness goes a long way in protecting them.
These buds are the tree telling you that it is already working on the next round of blooms. That is exciting news for any gardener.
The faster you remove the old spent clusters, the sooner those new buds will open and fill the tree with fresh color.
Some new buds can be hard to distinguish from small seed pods at first glance. Buds tend to be pointed and feel slightly soft, while seed pods are rounder and firmer.
With a little practice, you will quickly learn to tell the difference.
Protecting new buds is really about patience and attention. Rushing through deadheading without noticing them is the most common way they get damaged.
Slow down near the branch tips, look carefully before each cut, and always double-check that what you are removing is spent and done.
Treat those new buds like tiny promises of color still to come, because that is exactly what they are.