Drip Irrigation Clues California Gardeners Should Check Right Now
Many drip systems in California are running right now with at least one problem the homeowner does not know about.
Not a dramatic failure. Something quieter. A fitting that lost its seal over winter. An emitter pushing water into gravel instead of roots. A cracked line that sprays a fine mist for forty minutes twice a week while the plant twelve inches away stays dry.
The math on that kind of invisible waste adds up fast in a state where water costs what it costs and conservation rules tighten every season.
Here is a question worth sitting with. When did you last actually watch your system run from beginning to end?
Not check the controller. Stand there and watch water come out of every emitter for a full cycle.
A drip system that looked fine in October may have spent the entire winter quietly developing problems that are impossible to spot from the back door. Here’s what to look for.
1. Look For Puddles That Signal Hidden Leaks

Wet soil in the wrong place is one of the clearest signals a drip system has a problem. Puddles near tubing joints, connection points, or along buried lines typically mean water is escaping before it ever reaches a plant root.
Walk the garden while the system runs. Look for spots where water pools on the surface rather than soaking in slowly.
Junction points where tubing connects to emitters, stakes, or mainline fittings are the most common failure locations.
Pressure pushes connections loose over time, particularly after a dry California winter when plastic contracts and expands repeatedly with temperature swings.
Fixing leaks is usually simple and inexpensive. Pressing loose fittings firmly back together, using barbed connectors to replace cracked sections, or adding a goof plug to seal an unwanted hole handles most situations.
Inspecting all fittings at the start of the irrigation season before running full schedules catches problems early.
A short section of half-inch poly tubing costs under two dollars to replace. Ignoring the same leak for a season means paying for hundreds of wasted gallons on the next water bill. Those are very different outcomes for the same amount of work.
Small drip leaks can waste thousands of gallons per season without producing any visible sign from a distance.
Checking for wet spots every time the system runs costs nothing. A water bill that reflects a missed leak costs considerably more.
2. Listen For Spraying From A Popped Emitter

Sometimes ears catch a problem before eyes do.
A popped emitter produces a distinct hissing or spraying sound during a drip cycle. Following that sound leads directly to the wasted water.
Emitters pop out of tubing when water pressure runs too high or when the emitter body cracks from extended UV exposure.
Drip systems work best operating between 15 and 30 PSI for most residential setups. Running above that range stresses fittings and causes emitters to push free from the tubing.
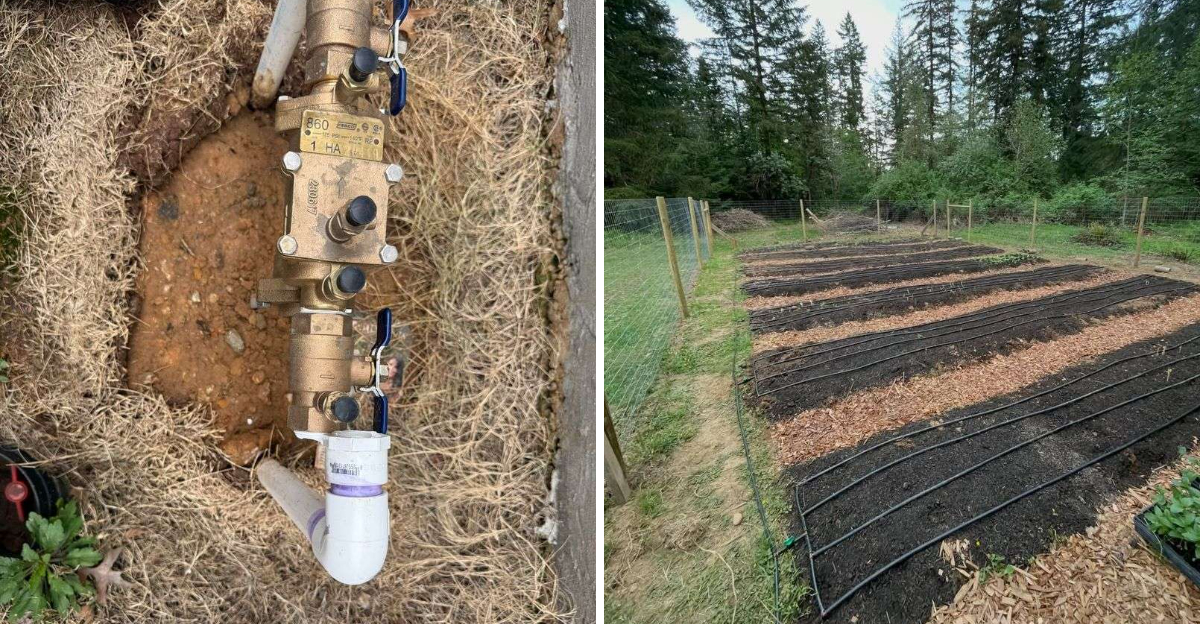
Pressure regulators added to systems years ago should be checked since regulators wear out gradually over time.
Reseating a popped emitter is quick. Press it firmly back into the hole in the tubing until it seats snugly.
A stretched hole or cracked emitter body calls for pulling the fitting out entirely and pressing in a fresh replacement. Standard emitters cost pennies each and most garden centers stock them in multipacks.
Emitters that pop repeatedly in the same section of line signal that the pressure regulator needs replacing rather than that individual emitters need repeated attention.
A functioning regulator protects the whole system and keeps water moving at the slow, steady rate that makes drip irrigation effective.
Chasing hissing sounds around the garden while the system runs is not the most dignified garden task. But it is considerably more pleasant than explaining a tripled meter reading to a water conservation officer in May.
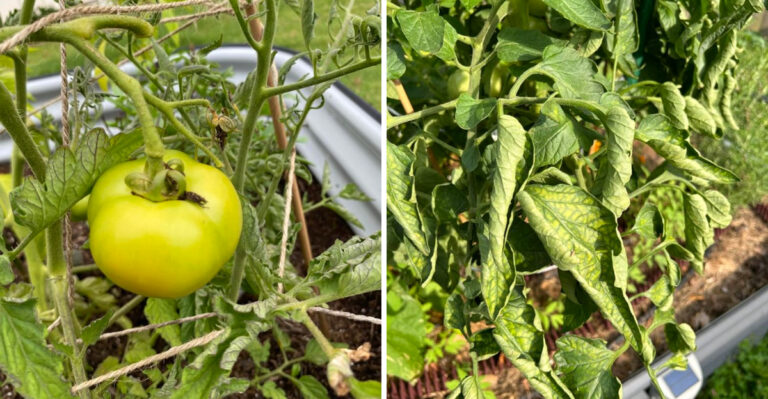
3. Check Dry Plants For Clogged Drip Lines

A plant that looks thirsty after a watering cycle is communicating something specific. Dry, wilted growth surrounded by otherwise healthy plants usually points to one emitter that has stopped flowing.
Clogged drip lines are among the most common problems in California gardens, particularly in areas with hard water containing elevated calcium and magnesium levels.
Mineral deposits build up inside emitter openings gradually, narrowing the flow until water barely moves or stops entirely. Algae and fine soil particles also work their way into lines when a line end is left open or a filter screen is missing.
Diagnosing a clogged emitter takes about ten seconds. Place a finger over the opening while the system runs. No pressure or very weak flow means the emitter is restricted.
A thirty-minute soak in white vinegar dissolves most mineral buildup. Rinse thoroughly and reinstall. An emitter that still flows weakly after the vinegar soak can be swapped for a fresh replacement.
For lines that seem sluggish across a larger section, a diluted acid flush designed for drip systems clears buildup from the tubing interior without affecting plants or soil.
Installing a quality inline filter at the system head and checking it once per season prevents most debris from reaching emitters in the first place.
Replacing worn emitters every two to three seasons keeps flow rates consistent across the whole system.
A single clogged emitter in a tomato bed can quietly undermine an entire growing season. The vinegar and five minutes of attention are a reasonable trade for that outcome.
4. Flush Tubing Before Summer Sediment Builds

Spring is the practical window for flushing drip lines, and most gardeners skip it entirely.
Over fall and winter, sediment, mineral scale, and organic debris settle inside tubing. Running the system in spring without flushing first pushes all of that material directly toward emitters, which is exactly the wrong direction.
The process is straightforward. Turn off all emitters or remove end caps from tubing ends and run the system for two to three minutes.
Discolored water, small particles, or cloudy flow typically comes out before the water runs clear. That visible material would otherwise have moved into emitter openings and started restricting flow across the zone.
Seasonal flushing extends emitter life and keeps flow rates consistent.
For gardens in areas with particularly hard water, including much of Southern California and the Central Valley, a flush at the end of the season as well prevents mineral deposits from hardening inside lines during dry months.
A mild citric acid solution run through lines once a year dissolves scale without affecting plants or soil biology.
After flushing, reinstall end caps securely and check that each emitter is seated properly before running full watering cycles.
A few minutes spent flushing now prevents hours of troubleshooting later when the summer garden is counting on every drop arriving on schedule.
The water that comes out during a first spring flush is sometimes surprising in both color and content. Consider it permanent motivation to never skip the step again.
5. Inspect Sun Cracked Lines Before They Split

California sun is genuinely hard on drip tubing. UV radiation breaks down polyethylene over time, turning flexible tubing stiff and brittle.
Lines that have been sitting on the soil surface for three or more years without protection are especially vulnerable.
A cracked line does not always announce itself with an obvious puddle. Running a hand along exposed tubing sections while the system is off reveals stiffness, chalky texture, or visible surface cracks indicating degradation.
Hairline cracks often only open under pressure, so walking the lines while the system runs and watching for fine misting or wet streaks along the tubing wall catches what a dry inspection misses.
Burying drip lines two to four inches below the soil surface or covering them with mulch significantly slows UV degradation and extends tubing life by several seasons.
A cracked section found in spring calls for cutting it out cleanly with tubing cutters and splicing in a fresh piece using barbed couplers. Tape patches get pushed loose by pressure over time and should not be considered a lasting repair.
Sections of tubing that appear uniformly brittle and discolored across a large area may justify replacing the entire zone rather than patching individual spots.
UV-stabilized tubing holds up considerably better than older black poly and is widely available at most irrigation suppliers.
Cracked lines found and fixed in spring stay functional all summer. Cracked lines found in August have already been wasting water for months. The timing makes the difference.
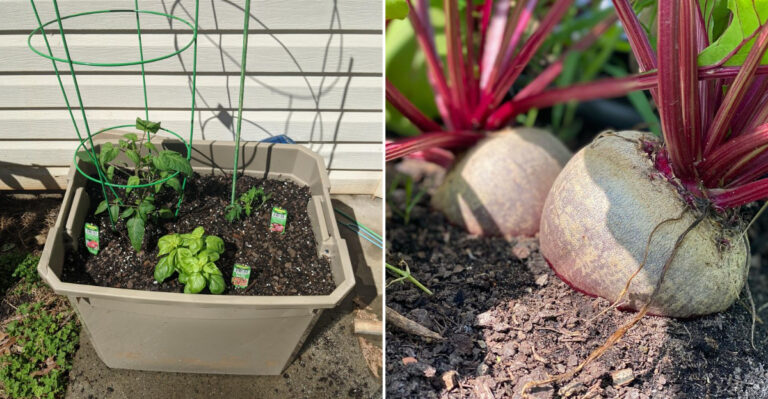
6. Match Emitter Spacing To Vegetable Roots

Placing emitters in the wrong spot is a quiet mistake that wastes water and limits plant performance at the same time.
Vegetables have specific root zones, and water delivered even six inches away from where roots actively grow may never get used by the plant.
Emitters placed within two to four inches of the plant stem suit transplants well. As plants mature and root systems expand outward, a single emitter at the stem base leaves outer roots without reliable moisture access.
Tomatoes, squash, and corn all develop wide root systems by midsummer. Adding a second emitter on the opposite side of the stem once a plant reaches full size addresses that expanding coverage need.
For row crops like beans or lettuce, in-line emitter tubing with emitters spaced every six or twelve inches delivers more consistent coverage than individual point-source emitters at intervals.
Soil type directly affects how water spreads from each emitter. In sandy soils common in parts of Southern California, water moves primarily downward rather than laterally.
Emitters need to be placed closer to the root zone to ensure adequate coverage. In clay-heavy soils, water spreads more laterally, which allows wider emitter spacing to still reach across the full root zone.
A simple soil texture test costs nothing and takes about five minutes. The result tells you exactly how closely emitters need to be spaced to avoid either waterlogging or dry patches.
Watering the correct spot sounds obvious. It is considerably less obvious when the emitter has been in the wrong position for two seasons without anyone checking.
7. Run The System Long Enough To Soak Deeply

Short watering cycles feel responsible. In practice, they train roots to stay near the surface, where they become vulnerable to heat and dry spells as summer builds.
Shallow roots follow surface moisture and never develop the downward reach that carries plants through dry stretches.
Deep watering encourages roots to follow moisture downward into soil that stays cooler and holds moisture longer between cycles.
For most vegetable gardens, drip zones should run long enough to wet the soil six to eight inches deep.
The practical check is simple. Turn the system off after a normal cycle, wait thirty minutes for water to redistribute, then push a wooden dowel or soil probe into the ground. The depth at which the wood comes out damp shows exactly how far water reached.
A probe showing moisture only two or three inches down signals that run times need to increase before summer arrives and that limitation starts showing up in plant stress.
Emitter flow rate affects run time calculations directly. A half-gallon-per-hour emitter needs considerably more time to wet deep soil than a one-gallon-per-hour emitter.
The flow rate is printed on the emitter body or listed in product specifications and takes about thirty seconds to find.
Many drip controllers allow multiple short cycles with a soak period between them, which helps water penetrate clay soils without running off the surface.
Deep roots manage California summer heat more reliably than shallow roots manage much of anything at all. The probe check is worth building into the routine before July makes the difference obvious.