8 Things Every Indiana Gardener Should Do When Daylilies Start Blooming
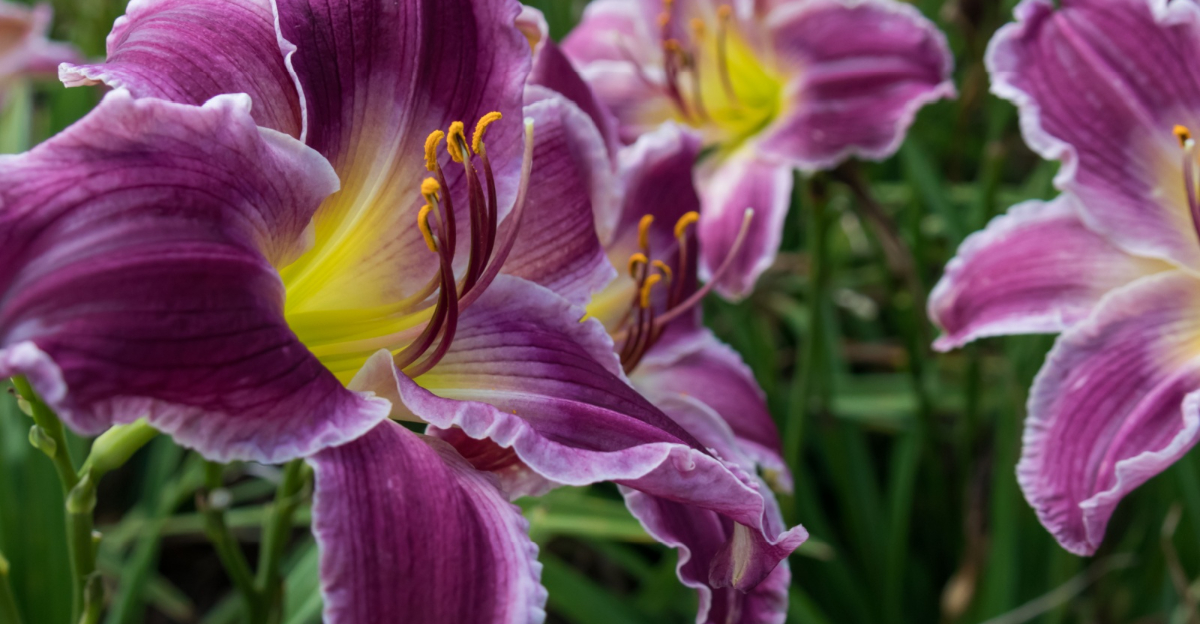
You’re standing in your Indiana garden when a daylily unfurls, crimson edges catching afternoon heat, and suddenly nothing else exists. Worries and to-do lists fade completely.
Just that impossible bloom, wide open and utterly unapologetic. Daylilies don’t ask permission and they never apologize for showing up bold.
One morning brings a tight bud, and the next delivers full blazing color that stops you mid-stride. That’s the agreement they make with you.
But here’s the thing: do you know what separates a two-week show from one that carries you through late summer? It’s not luck and it’s not soil.
It’s a handful of well-timed moves made during bloom season that most gardeners never think to try. Indiana gardeners who know them don’t just grow daylilies.
They conduct them. What follows is every trick, every technique, every small act that keeps your garden performing long after most others go quiet.
1. Remove Spent Blooms Daily

Yesterday’s bloom is ready to be cleared away. Each daylily flower lasts just one day, and leaving spent ones on the plant leaves the bed looking less vibrant.
When you snap off those shriveled blooms each morning, you do more than tidy things up. You send a signal to the plant that its job is not done yet.
The plant stops pouring energy into forming seed pods. Instead, it redirects that energy toward opening the next bud in line.
Removing takes less than five minutes per clump. Just pinch the spent flower right at the base of the bloom, not the bud or the scape.
Leave the healthy green buds completely alone. Touching those by mistake can knock off flowers before they ever open.
Check your plants every few days for best results. Step outside every few days and do a quick sweep of the bed.
For reblooming varieties, consistent removing can add a week or more to the overall display. That is not a small thing when you have been waiting all year for color.
Some gardeners skip this step and wonder why their patch looks ragged by mid-July. Now you know the answer.
When daylilies start blooming in Indiana, staying on top of spent blooms is the single fastest habit to build. It costs nothing but a minute of your time and pays back in spades.
2. Cut Scapes To The Base Once All Buds Have Opened

A bare scape standing in your garden bed is basically a flagpole with nothing to fly. Once every single bud on a scape has opened and faded, that stem has finished its entire purpose.
Leaving old scapes standing wastes the plant’s resources. The roots keep feeding a stem that will never bloom again.
Grab a clean pair of garden scissors or pruners. Cut the scape as close to the base as you can without slicing into the crown of the plant.
Cutting low keeps the bed looking neat and prevents any chance of disease developing in leftover stem tissue. A clean cut heals faster than a ragged one.
Do not yank the scape out by hand. Pulling can disturb the roots or accidentally damage nearby crowns that are still actively growing.
Check each scape carefully before cutting. Sometimes a second or third bud cluster is still forming lower on the stem, so patience here really pays off.
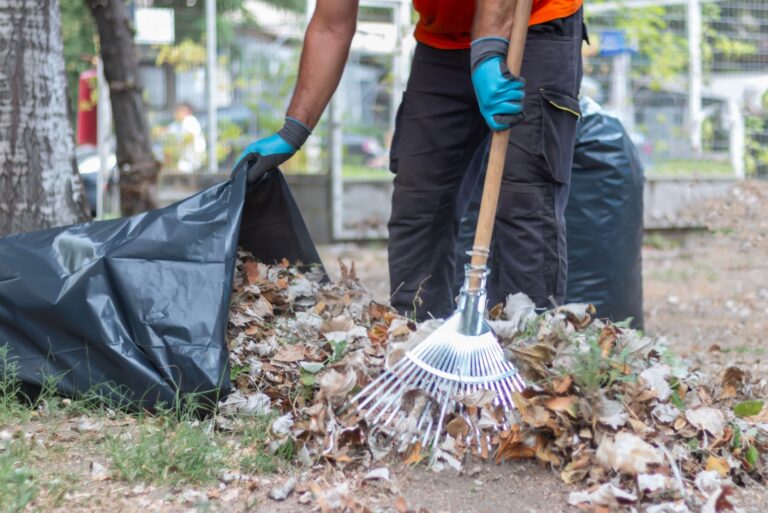
Once you have confirmed all buds are spent, cut it cleanly and toss it in the compost bin. Fresh stems break down quickly and add organic matter back to your soil.
This step pairs perfectly with your daily removing habit. While you are out there pinching blooms, scan each scape for ones ready to come all the way down.
Keeping scapes trimmed when daylilies start blooming helps the plant focus its strength on roots and future growth. A tidy bed is a productive one.
3. Apply A Low-Nitrogen, Bloom-Booster Fertilizer

Not all fertilizers are created equal, and bloom season is the worst time to grab the wrong bag. High-nitrogen fertilizers push leafy green growth, beautiful foliage, almost no flowers.
What you want during bloom time is a low-nitrogen, high-phosphorus formula. Look for numbers on the bag where the middle number is the largest, something like 5-10-5.
Phosphorus is the nutrient that supports root development and flower production. Giving your daylilies a boost of it right as buds are forming is like handing them a cup of strong coffee.
Apply the fertilizer according to the package directions, usually sprinkled evenly around the base of each clump. Keep it a few inches away from the crown to avoid burning tender tissue.
Water it in thoroughly right after application. Dry granules sitting on top of soil can cause fertilizer burn, especially during the warm Indiana summers.
One application at the start of bloom season is usually enough for most established clumps. Younger plants or those in poor soil may benefit from a second light feeding mid-season.
Avoid fertilizing during a heat wave or drought. Stressed plants cannot absorb nutrients efficiently, and the mineral salts in fertilizer may add stress to already-struggling plants.
Liquid bloom boosters are another solid option if you prefer faster absorption. Mix them according to label instructions and apply directly to the soil, not the foliage.
Feeding your daylilies the right way when they start blooming gives every bud the fuel it needs to open fully and stay vibrant longer.
4. Deep-Water At The Base, Not Overhead

Splashing water all over your daylilies might feel thorough, but overhead watering is one of the sneakiest ways to ruin a bloom display. Wet petals bruise, spot, and drop faster than dry ones.
Aim your hose or set your irrigation at ground level. Water should go directly to the root zone, not the leaves or flowers.
Daylilies have surprisingly deep root systems for a perennial. They need water to penetrate six to eight inches into the soil to reach those lower roots where it counts.
A slow, deep soak once or twice a week beats a quick daily sprinkle every time. Shallow watering trains roots to stay near the surface, making plants more vulnerable to drought.
Soaker hoses are a fantastic investment for daylily beds. They deliver moisture slowly and directly to the soil with almost no waste and no splash.
Water early in the morning if you must use an overhead sprinkler. Morning watering gives foliage time to dry before evening, which cuts down on fungal issues.
Check soil moisture by pushing a finger two inches into the ground near the crown. If it feels dry at that depth, it is time to water.
During Indiana’s hot July stretches, daylilies may need watering more frequently. Watch for slightly wilted foliage in the morning as an early sign of drought stress.
When daylilies start blooming, proper watering technique protects every flower from blemish and keeps each stem standing tall through the season.
5. Refresh Mulch Around The Crowns

Mulch is one of those things gardeners often set and forget, but bloom season is the perfect time to take a second look. Old mulch breaks down, compacts, and loses its ability to hold moisture effectively.
Pull back whatever is left from last season and check the soil underneath. If it looks dry, crusty, or bare in spots, a refresh is long overdue.
Add two to three inches of fresh mulch around each clump. Wood chips, shredded bark, and pine straw all work well for daylilies.
Keep the mulch a few inches away from the actual crown of the plant. Piling it right up against the base traps moisture and invites rot, which no gardener wants.
Fresh mulch does three important jobs at once. It holds soil moisture, regulates soil temperature, and suppresses weeds that compete with your plants for nutrients.
During Indiana’s summer heat, soil temperatures without mulch can spike high enough to stress roots. A proper mulch layer keeps things several degrees cooler underground.
Weeds are another enemy during bloom season. Every weed near your daylilies draws water and nutrients away from your plants.
Refreshing mulch also gives your garden bed a polished, finished look. Clean beds make colorful blooms pop even more against the dark, rich background.
Think of this step as tucking your plants in for a long, productive summer. A little effort now protects the whole season of blooms you have been waiting for.
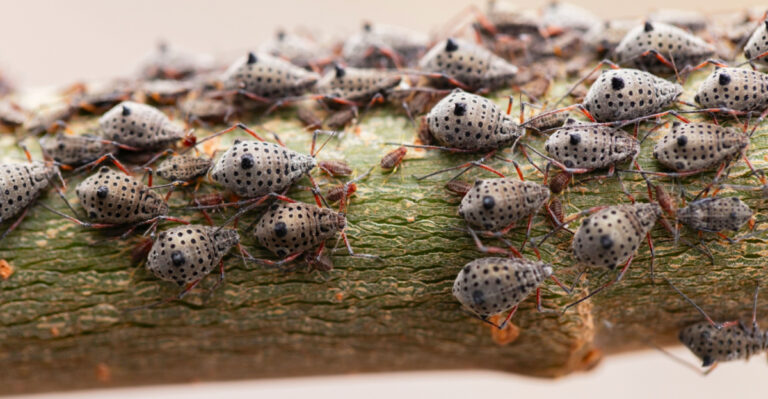
6. Scout And Treat For Aphids And Thrips

Pests tend to appear without much notice. One morning everything looks fine, and the next you spot a sticky, distorted bud cluster that tells you something has moved in.
Aphids and thrips are the two most common pest problems for daylilies during bloom season. Both are small, hard to spot, and quick to spread if left unattended.
Aphids cluster on tender new growth and bud stems, sucking plant sap and leaving behind a sticky residue called honeydew. That residue can attract ants and lead to sooty mold.
Thrips are even tinier and harder to spot. Look for streaked, silvery, or distorted petals as a clue that thrips have been feeding inside the buds.
Check plants every few days during peak bloom. Flip leaves over, inspect bud clusters, and look closely at any flower that looks off-color or misshapen.
For aphids, a strong blast of water from the hose knocks most of them off without any chemicals. Repeat every few days until the population drops.
Neem oil spray works well for both pests. Mix it according to label directions and apply in the early morning or evening to avoid burning foliage in hot sun.
Insecticidal soap is another safe option that breaks down quickly and does not harm beneficial insects once it dries. Spray directly on affected areas for best results.
Staying ahead of pests when daylilies start blooming means more perfect flowers and fewer frustrating surprises as the season rolls on.
7. Remove Yellowing Or Rust-Spotted Foliage Promptly

Yellow leaves on a daylily are not just ugly. They are a message. Your plant is telling you something is wrong, and the faster you listen, the better the outcome.
Rust spots are a different story and a more pressing one. Daylily rust is a fungal disease that spreads quickly from plant to plant through wind and water.
Orange or reddish-brown powdery spots on the underside of leaves are the telltale sign of rust. If you rub a spot and your finger comes away orange, you have rust.
Remove affected leaves immediately by cutting them cleanly at the base. Do not compost rust-infected material. Place it in a sealed bag and dispose of it in general waste.
Yellowing leaves without rust spots can signal overwatering, nutrient deficiency, or natural aging of older foliage. Remove them anyway to keep the bed tidy and well-ventilated.
Good airflow between plants slows fungal spread dramatically. Removing crowded or damaged foliage opens up the canopy and lets air move freely through the clump.
After removing diseased leaves, wash your pruners with rubbing alcohol before moving to the next plant. Skipping this step can transfer disease on the blade itself.
A fungicide containing azoxystrobin or mancozeb can help protect remaining healthy foliage if rust is present in your bed. Apply it as a preventive measure after cleanup.
Staying on top of foliage health when daylilies start blooming protects the whole planting and keeps your garden looking sharp all the way through late summer.
8. Tag Strong Reblooming Varieties For Fall Dividing

Bloom season is the best time to play favorites. When a clump produces wave after wave of flowers all summer long, that is a plant worth multiplying.
Reblooming daylilies are the overachievers of the garden world. They push out a second or even third flush of blooms after the main season, making them incredibly valuable in any bed.
The trick is marking them while you can still see exactly which clump is performing. By fall, all the foliage looks similar and memory gets fuzzy fast.
Grab a simple plant tag or even a popsicle stick with a marker note. Push it into the soil right next to the crown so it stays visible through the growing season.
Note the color, bloom frequency, and approximate height on the tag. That information will help you decide where to replant divisions in the fall layout.
Dividing daylilies every three to four years keeps clumps vigorous and productive. Overcrowded plants bloom less and compete with themselves for water and nutrients.
Fall is the ideal time to divide in Indiana because cooler temperatures reduce transplant stress. Roots have time to establish before the ground freezes.
Tagged plants are also easy to share with neighbors, donate to garden swaps, or move to new spots in your own yard. A good rebloomer deserves a bigger audience.
When daylilies start blooming, take five minutes to tag your stars. That small act now sets up a more abundant, better-organized garden for next season.