7 North Carolina Fern Planting Mistakes That Turn Dry Sunny Walkways Into Trouble Spots
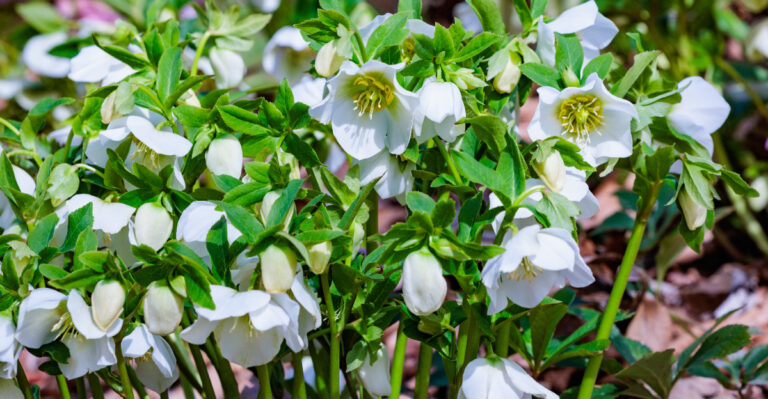
You planted ferns along the walkway because the photo looked incredible. Lush, green, cascading fronds lining a shaded path.
A month later, the fronds are brown at the edges, curling inward, and the whole planting looks like it gave up. Nothing obvious went wrong. You watered. You dug the holes. You even bought decent plants.
The problem is almost never the ferns themselves. North Carolina actually has the humidity and warmth ferns want.
What it also has are sun-baked walkways, clay-heavy soil, and summer heat that turns the wrong planting spot into a slow-motion failure.
Ferns evolved on forest floors under tree canopies, in deep, spongy soil rich with decomposed leaves. Put them in conditions that ignore that history and they struggle.
Seven specific mistakes cause most of the walkway fern failures across North Carolina, and every single one of them is fixable before you ever dig the next hole. Here they are.
1. Planting Shade Ferns In Harsh Sun

Many people pick ferns because they look spectacular in photos, then plant them in the sunniest open spot along the walkway. That is the first and most consequential mistake on this list.
Nearly every fern species common to North Carolina, including Southern Lady Fern, Cinnamon Fern, and Christmas Fern, prefers filtered light or full shade over direct sun exposure.
Hot afternoon sun from May through September in North Carolina is genuinely brutal. Walkway areas without overhead tree cover act like small ovens.
Fronds exposed to that level of heat curl, brown at the edges, and stop producing new growth. The plant spends all its energy trying to survive rather than establishing roots and spreading.
A spot that gets two to three hours of gentle morning sun and stays shaded the rest of the day is close to perfect for most fern varieties. Morning light and afternoon shade is the target. Full midday sun with no canopy is the opposite of that target.
Before committing to a planting spot, stand in that location at noon on a clear day and look up. Look around. Honestly assess how much direct sun hits that ground across an afternoon.
A sun-mapping app on a phone can track light patterns over several days if the answer is not immediately obvious.
That five-minute assessment before planting prevents weeks of watching fronds deteriorate and ultimately losing plants that never had a realistic chance in that spot.
2. Skipping Moisture Before Roots Settle

Watering a newly planted fern once and walking away is a reliable path to a crispy, struggling plant by the end of the first hot week.
Establishment watering is one of the most overlooked steps in fern planting, and it matters more than almost anything else in the first month.
A fern transplanted from a nursery pot into garden soil has had its root system disrupted. It needs consistent moisture to rebuild those connections and anchor itself in the new environment.
For the first four to six weeks after planting, the soil around ferns should stay evenly moist but never waterlogged.
The goal is soil that feels like a wrung-out sponge: moisture present throughout the root zone without standing water pooling at the base.
In North Carolina summers that can mean watering every other day during dry stretches, especially in well-draining sandy soils common to the Piedmont and coastal regions.
Push a finger about two inches into the soil near the base of the plant. Dry at that depth means water thoroughly. Cool and slightly damp means wait another day.
Deep, slow watering encourages roots to grow downward rather than staying shallow near the surface where they stay vulnerable to heat and dry spells.
Once a fern establishes, usually after a full growing season, it becomes far more tolerant of occasional dry periods. Getting through that first summer with consistent moisture is the real challenge.
The payoff is a fern that fronds out fully and spreads naturally for years without requiring constant attention.
3. Using Poor Soil With Little Organic Matter

Stick a fern into compacted clay or sandy soil with no organic matter and the plant faces an impossible situation from day one.
Ferns evolved on woodland floors where decades of fallen leaves, rotting logs, and decomposed plant material create a spongy, nutrient-rich growing medium.
Replicating that in a walkway bed is the single biggest improvement a North Carolina gardener can make for fern success.
North Carolina soils vary widely. Red clay dominates much of the Piedmont, sandy loam is common in the coastal plain, and mountain regions have rocky, shallow soils.
None of these are naturally ideal for ferns without amendment. The goal is soil that holds moisture, drains well enough to prevent root rot, and stays loose enough for roots to spread easily.
Working two to three inches of compost, leaf mold, or aged wood chip mulch into the top eight to ten inches of existing soil makes a dramatic difference in how plants establish and perform.
Leaf mold deserves specific attention here. It is simply decomposed leaves, costs nothing, and mimics the forest floor texture ferns naturally thrive in.
Pile fallen leaves in a corner of the yard and let them break down over one to two seasons. The result is exactly the growing medium ferns want, made from material most people rake to the curb every fall.
Soil pH matters too. Most North Carolina ferns prefer a slightly acidic soil between 5.5 and 6.5. A basic soil test takes the guesswork out of soil preparation completely.
4. Placing Ferns Against Hot Pavement

Pavement absorbs sunlight all day and radiates stored heat outward even after the sun goes down. Planting ferns right up against a walkway edge sounds like a charming design choice.
What it actually creates is a microclimate significantly hotter than the surrounding garden, and reflected and radiated heat stresses fronds in ways that shade alone cannot fix.
Surface temperatures on sun-exposed concrete can reach 140 to 160 degrees Fahrenheit on a hot North Carolina summer afternoon.
Even at six to twelve inches away, the ambient air near pavement is noticeably warmer than in a shaded garden bed further back. Fern fronds drooping onto or brushing against that surface take the full impact of it.
The fix is straightforward. Pull the fern planting line back at least eighteen to twenty-four inches from the walkway edge.
That buffer keeps roots away from the heat zone and prevents fronds from contact with the hot surface.
The gap between ferns and the walkway edge can be filled with a low-growing groundcover like creeping Jenny or a layer of pine straw mulch that holds less heat than bare soil.
Species selection also matters at this location. Christmas Fern is one of the tougher native options for spots near walkways because its leathery fronds handle brief heat exposure better than the more delicate Lady Fern or Maidenhair Fern.
Match the plant to the actual conditions it will face, not the ideal conditions that would be nice to have.
5. Crowding Fronds Along Narrow Paths

Squeezing too many ferns into a narrow strip along a walkway looks completely reasonable in spring.
Young nursery ferns are small, the gaps between them seem generous, and the planting appears well-spaced. Give those plants one good growing season with decent moisture and soil, and the situation changes fast.
Ferns spread. Southern Lady Fern can reach two to three feet wide at maturity. Planting two of them twelve inches apart along a narrow eighteen-inch walkway creates a competition problem from day one.
Fronds tangle, air circulation drops, and both plants weaken over time. By midsummer, fronds are flopping across the path and the whole planting looks more like an overgrown obstacle than a designed border.
Spacing guidelines are based on mature plant size, not the size at planting. For most medium-sized North Carolina ferns, eighteen to thirty-six inches center to center is the right starting range, adjusted for the mature spread of the specific species.
The bed will look sparse initially. Mulch between plants handles the visual gap while the ferns grow into their allotted space. Resist filling those gaps with extra plants.
Walkways need to function as walkways. A frond-free buffer of at least twelve inches between the outermost frond tips and the walking surface keeps the path usable and makes the planting look considered rather than crowded.
A well-spaced fern border looks intentional. An overcrowded one looks like the garden won.
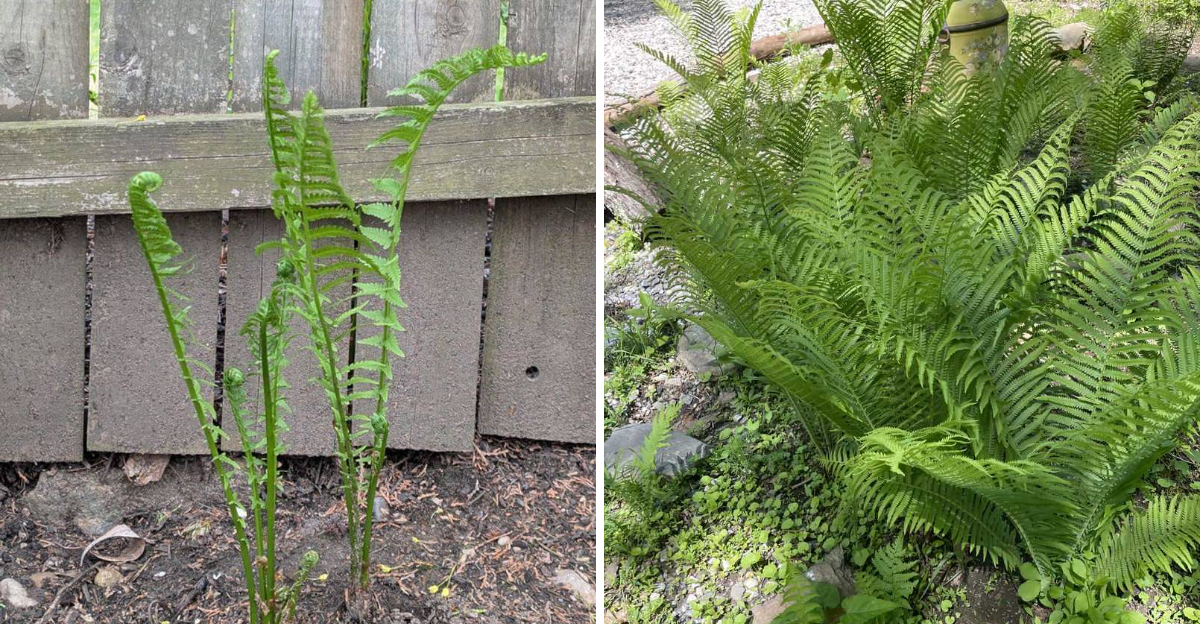
6. Ignoring Mature Fern Size

Picking a fern at the nursery based on how it looks in a one-gallon pot is a reliable way to create a future problem. What matters is the mature size, and that number is rarely what the plant looks like sitting on the nursery bench in April.
Ostrich Fern is a frequent example of this surprise.
Lush and manageable at twelve inches in the pot, it can reach four to five feet tall at maturity and spread aggressively through underground rhizomes in moist, shaded North Carolina conditions.
Planted along a narrow walkway, it takes over the path within two to three seasons. Royal Fern follows a similar pattern, hitting three to four feet in the right conditions with a spread that quickly outgrows a tight border.
More compact native options handle walkway plantings without the territorial behavior. Christmas Fern stays around eighteen to twenty-four inches tall and clumps rather than spreading.
Ebony Spleenwort tops out around twelve inches and works well along shaded stone paths. Autumn Fern, while not native, is a popular North Carolina landscape choice that stays manageable at roughly two feet and holds its color well.
The mature size information is on the tag for a reason. NC State Extension plant fact sheets list mature dimensions for most native ferns and are available free online.
Matching the right-sized fern to the actual space is a two-minute step that prevents years of overcrowding, path obstruction, and the kind of ripping-out sessions nobody enjoys.
7. Forgetting Mulch Around Shallow Roots

Fern roots are not deep adventurers.
Unlike trees or shrubs that push far into the earth, most ferns grow with a shallow fibrous root system that stays within the top few inches of soil.
That makes them directly vulnerable to temperature swings, drought stress, and soil compaction from foot traffic near walkway edges.
Skipping mulch at planting is one of the fastest ways to stress them out before they ever have a chance to establish.
Mulch handles several jobs at once. It holds soil moisture between waterings. It insulates against the dramatic temperature swings North Carolina summers and winters deliver.
It breaks down slowly over time, adding organic matter back into the soil and feeding the microbial activity ferns depend on. A two to three inch layer applied around each plant at planting time pays dividends through every season.
Pine straw is widely available across North Carolina and works especially well for ferns. It is lightweight, acidifies the soil slightly as it decomposes, and does not compact into a hard crust the way some wood chips can.
Shredded leaves are equally effective and essentially free. Avoid dyed wood mulch or rock mulch near ferns. Both hold too much heat and disrupt the moisture balance that ferns need to stay healthy.
Keep mulch a few inches back from the crown of each plant to prevent rot at the base. Refresh the layer each spring to maintain consistent depth.
Shallow roots that stay insulated and consistently moist establish faster, spread more readily, and produce the full, lush fronds that made ferns worth planting along the walkway in the first place.