Georgia Gardeners Growing Plumeria In Containers Are Seeing Better Results With This Approach
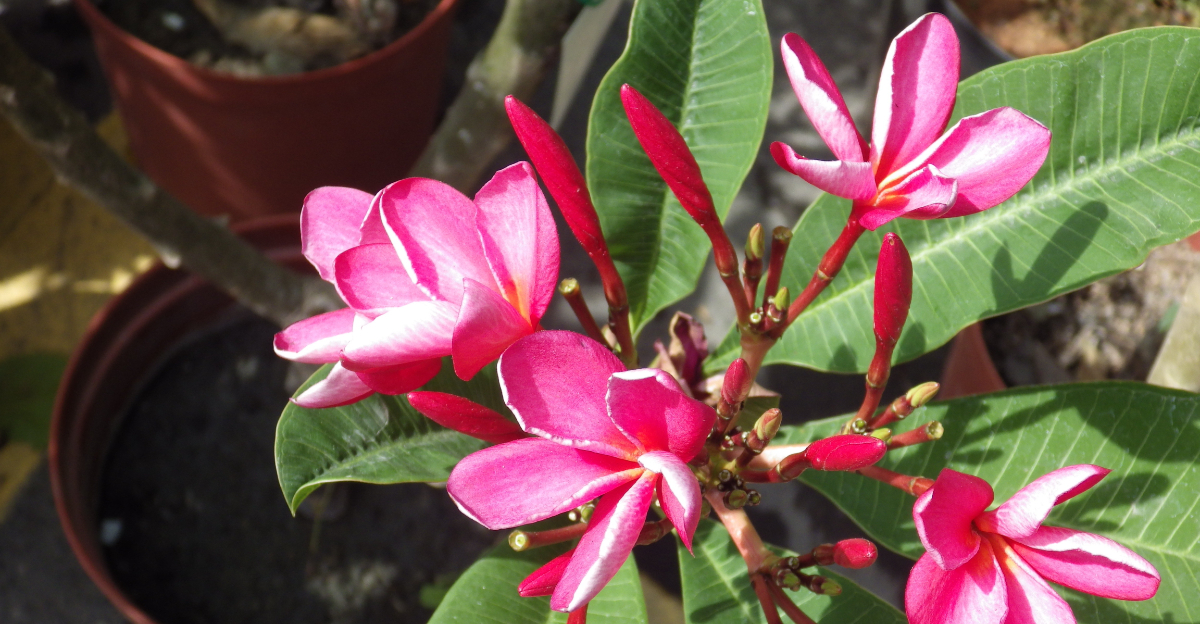
Growing plumeria in a container can be surprisingly rewarding, but it does not always go the way people expect. Some plants take off with healthy leaves and beautiful blooms, while others seem slow to grow no matter how much care they receive.
That difference often has less to do with luck than with the way the plant is grown from the start. Small decisions made throughout the season can have a much bigger impact than most gardeners realize.
Once those pieces come together, plumeria becomes much easier to grow and much more enjoyable to care for.
More gardeners in Georgia are seeing that firsthand by changing the way they grow plumeria in containers.
This approach helps the plants stay healthier, handle summer conditions more comfortably, and put more energy into strong growth and flowering.
It is a simple adjustment, but the results are convincing more people to make the switch.
1. Choose A Pot With Plenty Of Drainage

Bad drainage is the fastest way to lose a plumeria. Roots sitting in soggy soil will rot before you even notice a problem.
Pick a pot that has at least one large drainage hole, but more holes are better. Terracotta pots are a favorite among experienced growers because they breathe and dry out faster than plastic.
A pot that holds moisture too long will cause far more trouble than one that drains quickly.
Size matters too. A pot that is too large holds extra soil that stays wet longer than it should.
Start with a container that fits the root ball with a few inches to spare. As the plant grows, move up one size at a time.
Avoid decorative pots with no drainage or just a small hole at the bottom. Those look great on a shelf but are not practical for plumeria.
You can always place a nice-looking pot inside a plain one that drains well.
Elevating your pots slightly helps too. Pot feet or small risers keep the drainage hole from getting blocked by the surface below.
Water should flow freely every time you water. If it pools at the bottom or drains slowly, something needs to change before root problems develop.
2. Use A Fast-Draining Potting Mix

Standard potting soil straight from the bag is usually too dense for plumeria. It holds moisture longer than these plants prefer, and that leads to root rot.
Mix regular potting soil with coarse perlite or pumice at roughly a fifty-fifty ratio. That blend drains fast, dries out between waterings, and still holds enough nutrients to support growth.
Some growers add a small amount of coarse sand to improve drainage even further.
Avoid mixes labeled as moisture-retaining or moisture-control. Those are designed for plants that need consistently wet conditions.
Plumeria roots need air pockets and dry periods to stay healthy and strong.
Cactus and succulent mixes are actually a solid starting point. They are already formulated to drain well, and adding a bit of regular potting soil gives the mix more body without making it too heavy.
Refresh the mix every couple of years. Over time, the perlite breaks down and the soil compacts, which reduces drainage.
When you repot, always use fresh mix rather than reusing the old stuff. Old, compacted soil can harbor pathogens and drain poorly even if it looks fine.
Getting the soil right from the start saves a lot of frustration later. Plumeria roots are sensitive, and a well-draining mix is one of the most important factors in container success.
3. Place Containers In Full Sun

Plumeria is not a shade plant. Without enough direct sun, it will grow slowly, skip blooming entirely, and look weak no matter how well you water or feed it.
Aim for at least six hours of full sun daily, and eight hours is even better. South-facing spots near a wall or fence work well because they tend to stay warmer and brighter throughout the day.
Reflected heat from a light-colored wall can actually benefit plumeria during cooler stretches.
One advantage of container growing is mobility. If your current spot is not delivering enough sun, move the pot.
Try a few different locations before settling on one. Watch how the light shifts across your yard through the day before committing.
Patios, driveways, and deck areas often get more concentrated sun than garden beds because there is no shade from nearby shrubs or trees. Those hard surfaces also absorb and radiate heat, which tropical plants respond to very well.
During the hottest part of summer, afternoon shade for an hour or two will not hurt the plant. But consistent morning and midday sun is non-negotiable for strong growth and reliable blooming.
Growers in Georgia who move their pots to the sunniest corner of the yard consistently report more blooms and better overall plant health compared to those who leave pots in partially shaded spots.
4. Water Only After The Soil Dries

Overwatering is the most common mistake container plumeria growers make. Watering on a fixed schedule without checking the soil first almost always leads to trouble.
Push your finger two inches into the soil before watering. If it still feels damp, wait another day or two.
Only water when the top couple of inches are dry. During active growth in warm months, that might mean watering every five to seven days depending on heat and pot size.
Smaller pots dry out faster than large ones. Terracotta dries faster than plastic.
Keep those differences in mind rather than watering all your pots on the same schedule.
When you do water, soak the soil thoroughly until water runs freely from the drainage holes. Shallow watering encourages roots to stay near the surface, which makes the plant less stable and more vulnerable during dry spells.
Cut back watering significantly in late fall and winter when the plant goes dormant. During dormancy, plumeria needs very little water.
Too much moisture during that period creates ideal conditions for rot.
Watch the leaves for clues. Yellowing lower leaves sometimes signal overwatering.
Slightly wrinkled stems can indicate the plant is getting too dry. Learning to read those signs takes a season or two, but it makes watering decisions much more accurate over time.
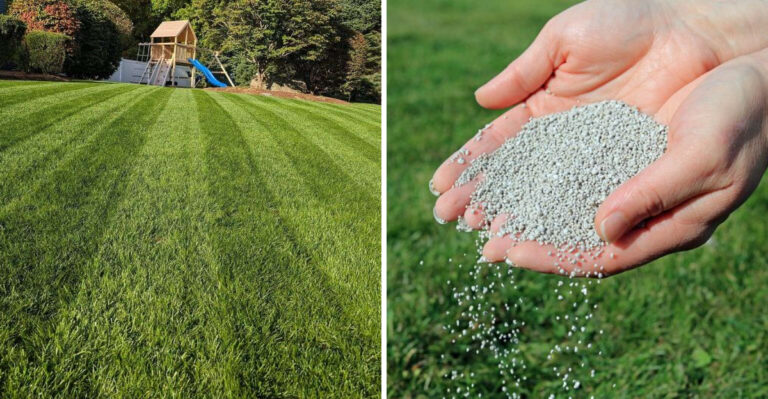
5. Feed Regularly During The Growing Season

Hungry plumeria will not bloom. Container plants run out of nutrients faster than in-ground plants because watering flushes nutrients out of the soil over time.
Start fertilizing in spring when new growth appears. Use a fertilizer with a high middle number, which represents phosphorus.
Phosphorus drives root development and flower production. A formula like 10-30-10 or similar is commonly recommended for plumeria specifically.
Feed every two to three weeks through the growing season. Monthly feeding is better than nothing, but more frequent applications in smaller doses tend to produce better results without overwhelming the plant.
Slow-release granular fertilizers are convenient because you apply them once and they work over several weeks. Water-soluble fertilizers give you more control and work faster, which is useful if a plant looks like it needs a quick boost.
Stop fertilizing in late summer, around August. Feeding too late in the season pushes new soft growth that will not have time to harden before cooler weather arrives.
That tender growth is vulnerable to temperature swings.
Avoid fertilizers that are high in nitrogen during bloom season. Nitrogen promotes leafy growth, which can actually reduce flower production.
Balance matters. Getting the fertilizer timing and formula right makes a noticeable difference in how many blooms you see each season.
6. Bring Pots Indoors Before Frost

Plumeria cannot handle frost. Even a brief dip below freezing can damage stems and set the plant back significantly heading into the next growing season.
Watch the forecast closely starting in October. When overnight lows are expected to drop below forty degrees consistently, it is time to bring pots inside.
Do not wait for frost to show up in the forecast. Move plants before that point.
A garage works well for overwintering plumeria in dormancy. It does not need to be warm, just protected from freezing temperatures.
Temperatures between forty-five and sixty degrees are fine during dormancy. The plant will drop its leaves and rest until warmer weather returns.
Bright indoor light is not required during full dormancy. A garage or basement with minimal light is acceptable as long as temperatures stay above freezing.
If you want to keep leaves on the plant through winter, place it near a bright south-facing window indoors.
Limit watering to once a month or less while the plant is dormant indoors. The soil should be barely moist, not wet.
Soggy soil in a cool, low-light environment is a fast path to root problems.
Gardeners across the South who start moving their pots indoors in early October consistently report healthier plants come spring compared to those who wait until the last minute before a frost hits.
7. Repot When Roots Fill The Container

Roots pushing out of drainage holes are a clear sign your plumeria has outgrown its container. At that point, growth slows and the plant can start to look stressed even with good care.
Repot in spring just before the growing season kicks in. That timing gives the plant a full season to settle into its new container and build a stronger root system before winter arrives again.
Move up only one pot size at a time. Jumping from a small pot to a very large one fills the extra space with soil that stays wet too long before roots can reach it.
That extra moisture creates unnecessary risk.
When you repot, shake off as much old soil as possible and inspect the roots. Trim any that are brown, mushy, or circling tightly around the root ball.
Healthy roots are firm and white or light tan in color.
Use fresh potting mix when repotting rather than refilling with the old soil. Old mix compacts over time and loses its drainage ability.
Starting fresh gives the roots a better environment to expand into.
After repotting, hold off on fertilizing for three to four weeks. Let the roots settle and recover first.
Watering lightly during that adjustment period helps without overwhelming newly disturbed roots. Once new growth appears, resume your normal feeding and watering routine.