Vegetables That Actually Thrive In Virginia’s Piedmont Clay Soil
Virginia’s Piedmont clay doesn’t forgive mistakes. It clumps when wet, cracks when dry, and turns a simple planting day into a wrestling match with a shovel. Roots struggle. Water pools instead of soaking in.
Plenty of gardeners have walked away from a bed after one brutal season, convinced the soil was working against them. Yet certain vegetables don’t just tolerate this dense, mineral-packed ground; they thrive in it.
The same heaviness that suffocates delicate roots gives sturdier crops exactly what they need to anchor deep and pull up nutrients most soils can’t offer.
The real skill isn’t fighting the clay. It’s matching the right plant to the ground you already have. Get that pairing right, and a stubborn Piedmont backyard can turn into one of the most productive spots on the property.
1. Tomatoes

Clay soil and tomatoes have a complicated relationship, but with the right approach, it becomes a love story. Dense Piedmont ground holds moisture and nutrients longer than sandy soil, giving tomato roots plenty to work with.
The trick is to loosen the clay before planting. Work in compost or aged manure at least eight inches deep to improve drainage and aeration around the root zone.
Choose compact varieties like Celebrity or Roma for best results in heavy soils. These plants do not need as much root spread, making clay conditions far more manageable.
Plant your tomatoes deep, burying two-thirds of the stem underground. Extra roots will form along that buried stem, anchoring the plant firmly into that mineral-packed Virginia’s Piedmont clay.
Mulch heavily around the base with straw or wood chips. This regulates soil temperature and prevents the surface from baking into a hard crust during hot July afternoons.
Water consistently but avoid overwatering, since clay already retains moisture well. Irregular watering in clay can contribute to blossom end rot, which affects fruit quality later in the season.
Stake or cage your plants early in the season. Clay soil can heave and shift slightly with heavy rains, so a solid support system keeps everything upright and productive.
Growing vegetables that actually thrive in clay starts with tomatoes, and once you crack the code, the rest of the season falls beautifully into place.
2. Broccoli

Broccoli is basically built for the Piedmont growing season, and clay soil is secretly one of its best friends. The heavy ground holds the steady moisture that broccoli craves during its cool-weather growing windows in spring and fall.
Clay soil can hold calcium and magnesium well once amended, two nutrients broccoli needs to form tight, dense heads. That steady nutrient supply keeps broccoli fed throughout its growing window.
Amend your planting area with compost before setting out transplants. A few inches of organic matter worked into the top layer of clay creates a welcoming zone for young roots to get established quickly.
Start seeds indoors about six weeks before your last frost date. Transplanting established seedlings into amended clay gives them a strong head start before the soil warms too much in late spring.
Space plants about eighteen inches apart to allow good airflow between them. Clay soil that stays wet can encourage fungal issues, so spacing and air circulation are your best defenses.
Side-dress plants with a balanced fertilizer about three weeks after transplanting. Clay holds nutrients well, but a small boost helps broccoli hit its peak production window right on schedule.
Harvest heads before they begin to flower, when they are still tight and deep green. Once yellow flowers appear, the flavor turns bitter and the texture gets loose and unpleasant fast.
Broccoli grown in well-amended Piedmont clay produces heads that make the extra prep work feel worthwhile.
3. Cabbage

Cabbage has a tough, no-nonsense personality that fits right in with Virginia’s Piedmont clay. Its wide root system stabilizes well in dense soil, which tends to hold minerals better than lighter, sandier ground.
The cool seasons of spring and fall are prime time for cabbage in this region. Clay soil stays cooler longer in spring, which is exactly what cabbage needs to form tight, heavy heads without bolting.
Work a generous layer of compost into your planting bed several weeks before setting out transplants. Giving the clay time to absorb and blend with organic material creates a looser, more hospitable growing zone.
Choose compact varieties like Stonehead or Early Jersey Wakefield for smaller garden spaces. These types reach maturity faster, getting you to harvest before summer heat turns your hard work into a wilted mess.
Firm the soil around each transplant after planting to eliminate air pockets. Clay can sometimes leave large gaps around roots if not properly settled, which stresses young plants during critical establishment weeks.
Consistent moisture is key to preventing cabbage heads from splitting. Clay retains water well, but during dry spells, a deep weekly watering keeps the heads growing evenly without cracking under pressure.
Watch for cabbage loopers and aphids, which love tender outer leaves. A simple row cover early in the season keeps most pests away without relying on chemicals.
When that first solid head of cabbage comes out of your clay garden, it feels like a genuine trophy worth showing off at the dinner table.
4. Squash

Squash behaves almost aggressively in good conditions, and Virginia’s Piedmont clay can deliver exactly that with a little help. Its moisture-retaining quality keeps squash plants hydrated through blazing Piedmont summers.
Both summer and winter squash varieties perform well here, giving you options from July straight through October. Zucchini, butternut, and acorn squash all adapt beautifully when the soil is properly amended before planting.
Mound your planting hills about six to eight inches above the surrounding soil level. Raised mounds improve drainage in clay and warm up faster in spring, giving squash roots an ideal environment from day one.
Mix compost and aged manure into each planting hill before placing seeds or transplants. Squash is a heavy feeder, and that rich amendment gives clay soil the organic boost needed to keep up with its appetite.
Plant two to three seeds per hill, then thin to the strongest single plant after germination. Giving each plant plenty of space lets those enormous leaves spread without competing for the moisture locked in surrounding clay.
Watch for squash vine borers after mid-June, as they are a serious threat in this region. Wrapping the base of the stem with row cover fabric early in the season creates a physical barrier against egg-laying adults.
Harvest summer squash frequently to encourage continuous production throughout the season. A squash left too long on the vine grows enormous and stops the plant from setting new fruit.
Clay soil vegetables like squash reward patience and preparation with a steady, generous harvest all season.
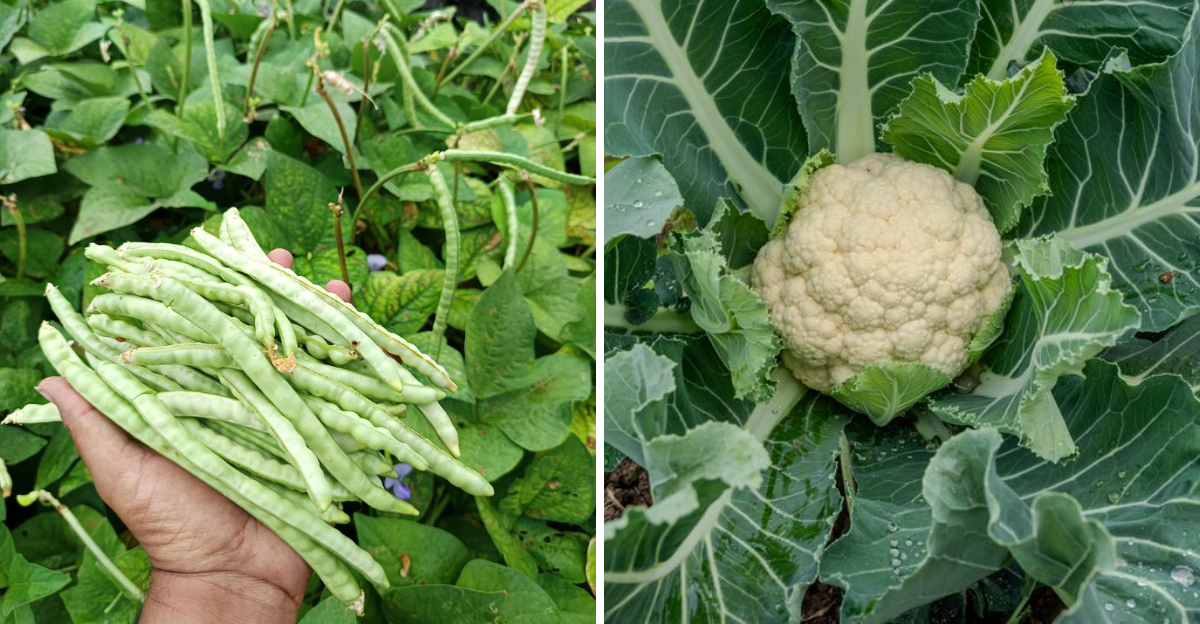
5. Green Beans

Green beans are forgiving crops, which makes them a natural fit for clay-heavy Piedmont soil. Bush varieties thrive especially well, since their compact root systems don’t need to push through deep, hard layers.
Plant seeds directly into the garden after your last frost date, typically mid-April in the Piedmont region. Direct seeding works better than transplanting for beans, since they dislike having their roots disturbed after they settle in.
Loosen the top six inches of clay before planting and mix in compost to improve seed-to-soil contact. Good contact helps seeds absorb moisture quickly and germinate within seven to ten days under warm spring conditions.
Space seeds about three inches apart in rows set eighteen inches from each other. This spacing allows enough airflow to reduce fungal pressure, which is always a concern when clay holds moisture near the soil surface.
Avoid working in your bean patch when the soil is wet and sticky. Clay compacts easily under foot traffic, and compacted pathways between rows can restrict water movement and make future planting much harder.
Side-dress with a low-nitrogen fertilizer once plants begin to flower. Too much nitrogen in clay-rich soil pushes leafy growth at the expense of pod production, which is the exact opposite of what you want.
Pick pods when they snap cleanly and feel firm in your hand. Overripe beans left on the plant signal the crop to slow production, cutting your season shorter than it needs to be.
Once you taste fresh green beans pulled from your own clay garden, store-bought bags feel like a downgrade.
6. Peppers

Peppers love heat, and Piedmont summers deliver it in full from June through September. Clay soil, properly managed, holds the warmth and steady moisture peppers need to set fruit all season.
Start pepper seeds indoors eight to ten weeks before your last frost date for a strong head start. Transplanting robust seedlings into warm, amended clay gives them the best possible launch into a long productive season.
Warm clay soil before transplanting by laying black plastic mulch over the bed for one to two weeks. Peppers sulk in cold ground, and even mid-April soil temperatures in the Piedmont can be too chilly for immediate planting.
Amend your clay bed deeply with compost and a handful of bone meal per plant. Bone meal provides phosphorus, which supports strong root development in dense soils where roots must work harder to spread.
Space plants eighteen to twenty-four inches apart to allow light and air to reach every branch. Good air circulation in a clay garden reduces the risk of bacterial leaf spot, which thrives in humid, stagnant conditions.
Water deeply but infrequently once plants are established, since clay retains moisture between sessions. Shallow, frequent watering in clay encourages roots to stay near the surface instead of pushing deeper for stability.
Stake each plant early in the season before the stems get heavy with fruit. A loaded pepper plant in loose amended clay can topple during summer thunderstorms if it has no support.
Peppers grown in Virginia’s Piedmont clay can produce right up until first frost, giving you months of colorful, flavorful rewards from a single planting.
7. Sweet Potatoes

Sweet potatoes seem like they’d dislike clay, but Piedmont growers know better. With the right prep, clay soil supports excellent production by holding the consistent moisture these tropical roots crave.
Plant sweet potato slips after the soil reaches at least sixty degrees, usually late May in the Piedmont. Cold, wet clay is the enemy of slips, so patience at planting time pays off in a much better stand.
Build raised rows about eight to ten inches tall before planting slips along the ridge. Elevated planting improves drainage and gives the developing tubers loose, workable soil to expand into without fighting dense clay resistance.
Mix coarse sand and compost into the raised row to lighten the growing zone for expanding roots. You are not trying to fix your entire garden, just creating a comfortable pocket where the tubers can size up properly.
Plant slips about twelve to fifteen inches apart along the row, burying the stem to the first leaf. Sweet potatoes root aggressively from buried stems, and more roots mean more tubers forming underground over the season.
Do not fertilize with high-nitrogen products once plants are established in the ground. Too much nitrogen in clay soil pushes enormous vines but produces small, disappointing tubers at harvest time in late September.
Harvest after the first light frost warning, when vines begin to yellow slightly at the tips. Clay soil insulates tubers well, but a hard freeze can damage the skin and shorten storage life significantly.
Sweet potatoes from a well-prepared clay garden are some of the richest, most satisfying vegetables you can grow at home.
8. Cauliflower

Cauliflower has a fussy reputation, but Virginia’s Piedmont clay can actually work in your favor. Its mineral richness and moisture retention create the steady conditions cauliflower needs to form dense, white heads.
Timing is everything with cauliflower in this region. A fall planting started in late July gives you heads ready to harvest in October, when cooler temperatures bring out the best flavor and firmness in each crown.
Start seeds indoors five to six weeks before your target transplant date for the fall crop. Strong transplants handle the transition into clay much better than weak, spindly seedlings that struggle to establish under summer heat.
Amend your planting bed with compost and a balanced granular fertilizer before setting out transplants. Cauliflower is a heavy feeder, and clay soil benefits from that organic boost to keep nutrient availability high throughout the growing period.
Water consistently and deeply, since even moisture is critical to forming tight, unblemished heads. Clay holds water well between rains, but during dry stretches in September, a deep weekly soak keeps development on track.
Blanch cauliflower heads by tying the outer leaves over the crown once it reaches about two inches across. This protects the white surface from sunlight, preventing yellowing at harvest.
Check plants daily once heads begin forming, since cauliflower can go from perfect to overripe surprisingly fast. A head left too long opens up, loses density, and develops an off-flavor that no amount of cooking can fix.
Vegetables that actually thrive in clay soil include cauliflower, and pulling a perfect white head from your Piedmont garden is one of the highlights of the fall garden.