The Herbs New York Gardeners Can Still Root From Cuttings This Fall
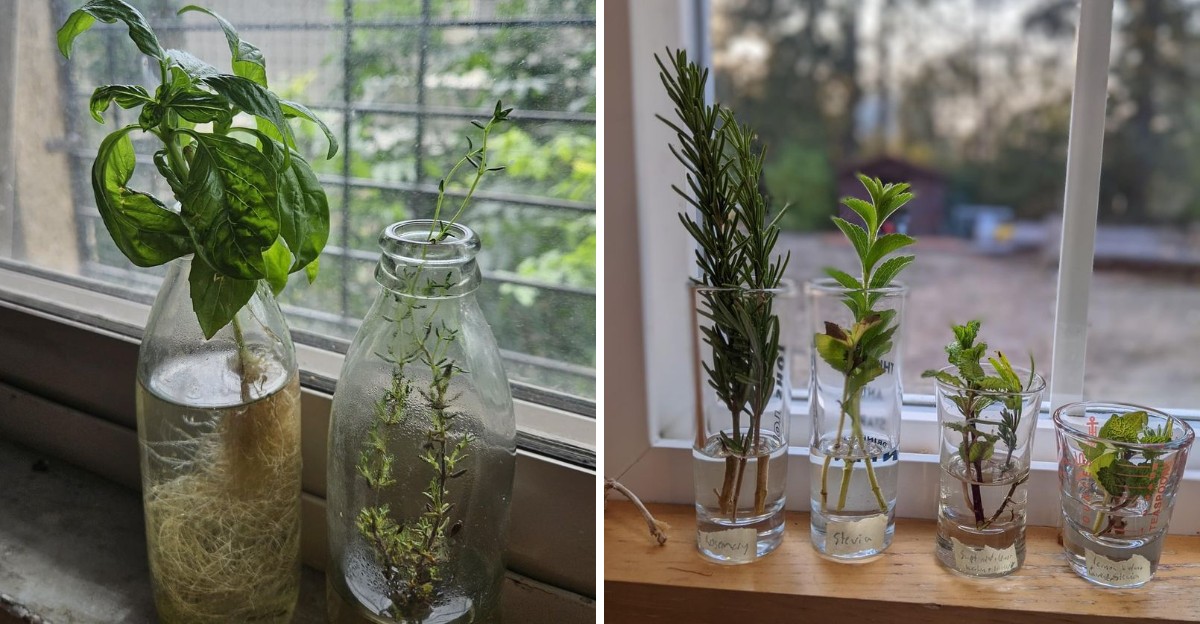
Your herb bed has one last gift to give before frost shuts the season down. Grab your scissors now, and those tired stems can keep feeding you all winter.
A few green clippings can grow into full plants on a sunny windowsill. Rooting them costs almost nothing, and each new plant is an exact copy of the one you love.
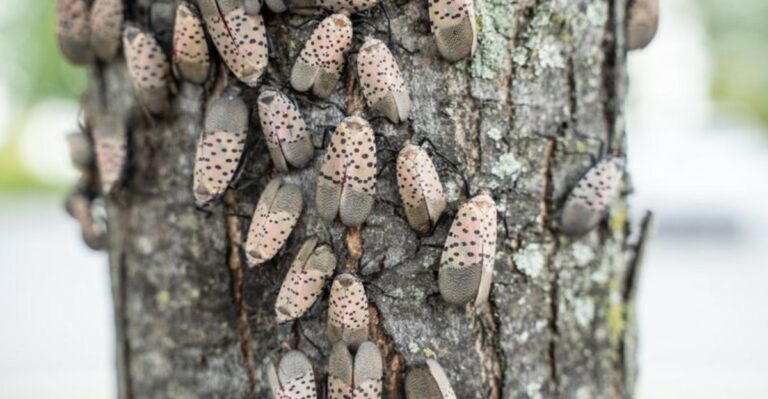
Cold nights across New York arrive quickly, so the best window is right now. Check every cutting for hitchhiking bugs before it comes indoors.
The herbs below are worth saving this season, from kitchen staples to fragrant favorites. The steps cover taking cuttings, rooting them, and keeping them strong until spring.
Basil Cuttings Can Keep Producing Indoors
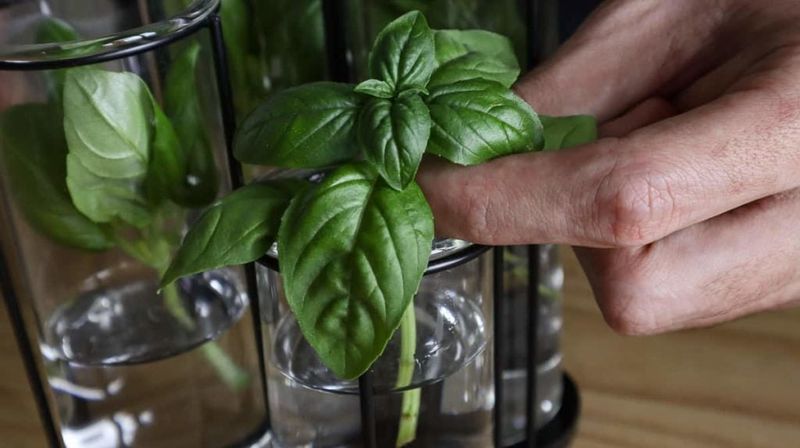
Few things beat the smell of basil in a chilly kitchen. Fall frost ends basil outdoors, so cuttings are your rescue plan.
Snip stems about 4 to 6 inches long from healthy plants. Make your cut just above a leaf node to keep the parent bushy.
Strip the leaves off the bottom two inches of each stem. Bare nodes are exactly where new roots push out.
Water rooting works wonderfully here. Stand the cuttings in a glass of room-temperature water near a bright window.
Skip harsh direct sun, which can cook tender stems. Indirect light in a kitchen window suits basil perfectly.
Refresh the water every other day so it stays clear. Cloudy water invites rot and slows everything down.
Tiny white roots usually show up in five to fourteen days. Let them reach one or two inches before potting.
Around day twelve to eighteen, each cutting is ready for its own container. Use a light, well-draining potting mix.
Keep the soil evenly moist, watering once the top inch feels dry. Soggy soil is the quickest way to lose a young plant.
Basil wants six hours of light daily, minimum. A cheap grow light easily covers short winter afternoons.
Pinch the top leaves every couple of weeks. Regular pinching creates a fuller plant with more harvestable leaves.
Fun fact: one healthy summer basil plant can yield a dozen cuttings. That means winter pesto without a grocery run.
Oregano Roots Easily From Healthy Stems
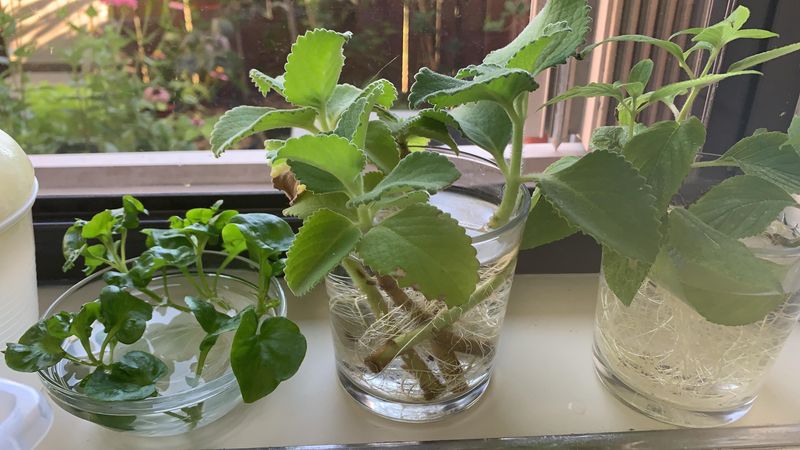
Oregano is the overachiever of the cutting world. Give it water, light, and patience, and it rarely disappoints.
Pick a sturdy stem measuring three to six inches. Vigorous growth roots faster than tired, floppy shoots.
Cut just below a leaf node with sharp scissors. Roots form most readily right at that swollen joint.
Pull off the lower leaves, keeping two or three pairs at the top. Leaves left underwater break down and foul the jar.
Both water and potting mix work as rooting homes. Water lets you watch progress, which is honestly half the fun.
Change the water regularly to stop cloudiness. Clean water keeps stems firm and pale green at the base.
Roots generally show within two to four weeks. Rooting hormone is optional, though it can speed things along.
Once roots look sturdy, move each cutting into its own pot. Choose a mix that drains fast and never stays soggy.
Your New York Garden Changes Every Week. Your Plan Should Too.
Gardening in New York changes quickly throughout the season. Every Friday you’ll receive a simple weekly plan showing exactly what to plant, prune, fertilize, harvest, and protect so you never miss the right timing.
Oregano loves sunshine, wanting six to eight hours daily. Short November days call for a grow light.
Water deeply, then let the top of the soil dry out. Constant dampness leads straight to root problems.
Here is a bonus: indoor oregano leaves often taste milder than summer growth. Toss them into soups, sauces, and roasted vegetables.
Old Greek gardeners called oregano joy of the mountain. Growing it in a small apartment feels like a fair tribute.
Rosemary Needs Flexible Green Growth
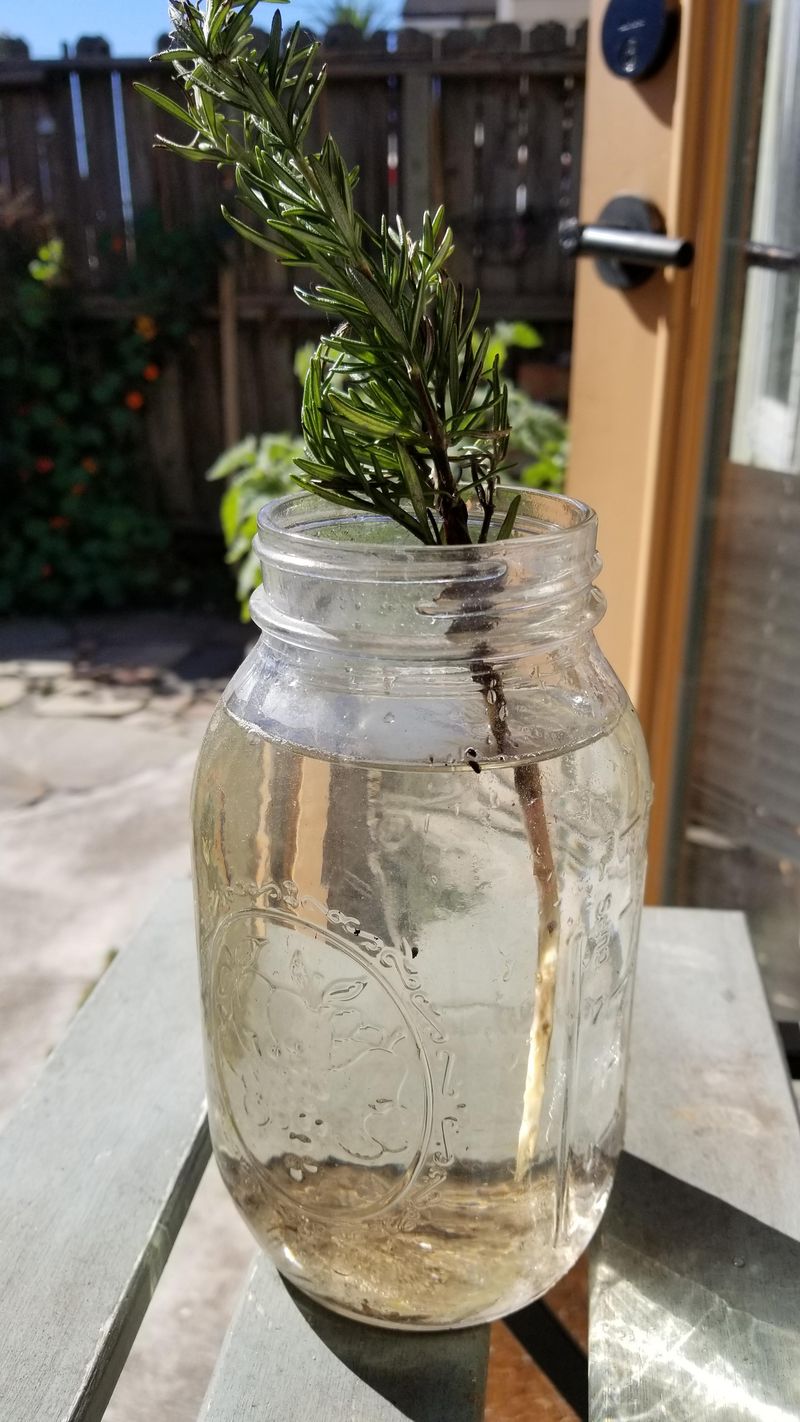
Rosemary rewards gardeners who pick the right stems. Woody brown pieces stubbornly refuse to root, no matter how much you coax them.
Target the soft, bendy green tips instead. Those young shoots carry the energy needed for new roots.
Take pieces four to six inches long. Anything shorter tends to dry out before roots appear.
Strip needles from the bottom half of each cutting. Exposed nodes are the launching pads for root growth.
You have two solid options: water or coarse sand. Sand takes longer but usually produces tougher roots.
Water rooting can show results in about two weeks. Sand propagation often needs four to six weeks of patience.
Swap the water every couple of days if you go that route. Stagnant water quickly turns stems mushy.
A dip in rooting hormone raises your odds. Rosemary can be moody, so any small advantage helps.
Pot up once roots reach roughly an inch. Use a gritty, fast-draining mix with extra perlite or sand.
Water only when the top inch of soil feels dry. Rosemary handles thirst better than wet feet.
Bright light matters enormously indoors. South-facing windows in New York apartments work well, and a grow light fills the gaps.
Brush the needles as you walk past. That piney scent is a small winter reward for your effort.
Thyme Cuttings Can Become New Plants
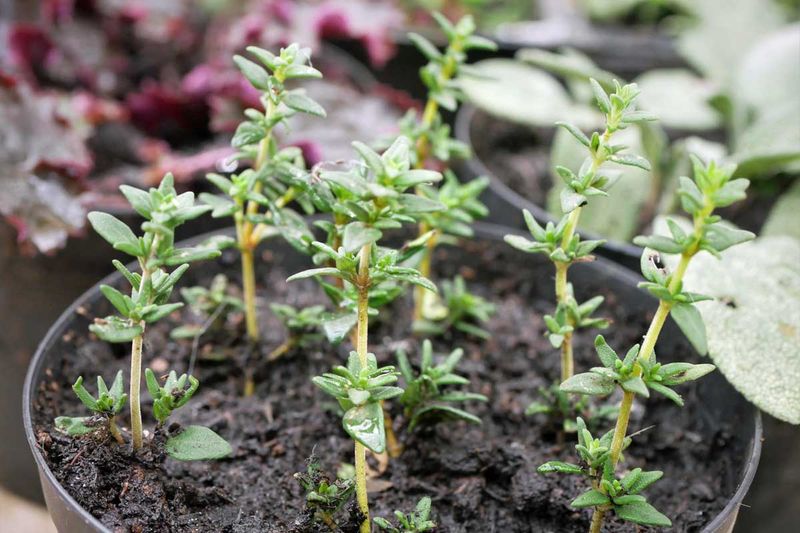
Thyme looks delicate, yet it propagates with surprising willingness. Small cuttings turn into tidy little plants in a matter of weeks.
Aim for soft, fresh growth rather than stiff woody stems. Green flexible tips root much more reliably.
Cut pieces two to three inches long. Slice below a leaf node at roughly a 45-degree angle.
Strip the leaves so about half the stem sits bare. That bare portion goes into water or medium.
Water rooting works on a sunny sill. Refresh the glass every few days to keep things fresh.
Expect roots in four to six weeks with water. Thyme takes its sweet time, so resist poking at it.
Soil rooting is another route worth trying. Use moist seed-starting mix, perlite, or vermiculite in a shallow tray.
Rooting hormone is not required, though it nudges success rates upward. Many gardeners skip it entirely with fine results.
Keep the medium damp but never soggy. Thyme comes from dry Mediterranean hillsides and hates wet roots.
New leaf growth signals that roots have taken hold. Transplant each cutting into a three-inch pot with good drainage.
Full sun keeps indoor thyme compact and flavorful. Low light produces stretched, weak stems with faint taste.
Little tip for New York cooks: one small pot supplies enough thyme for soups and roasts through February.
Sage Gives You Another Plant From One Stem
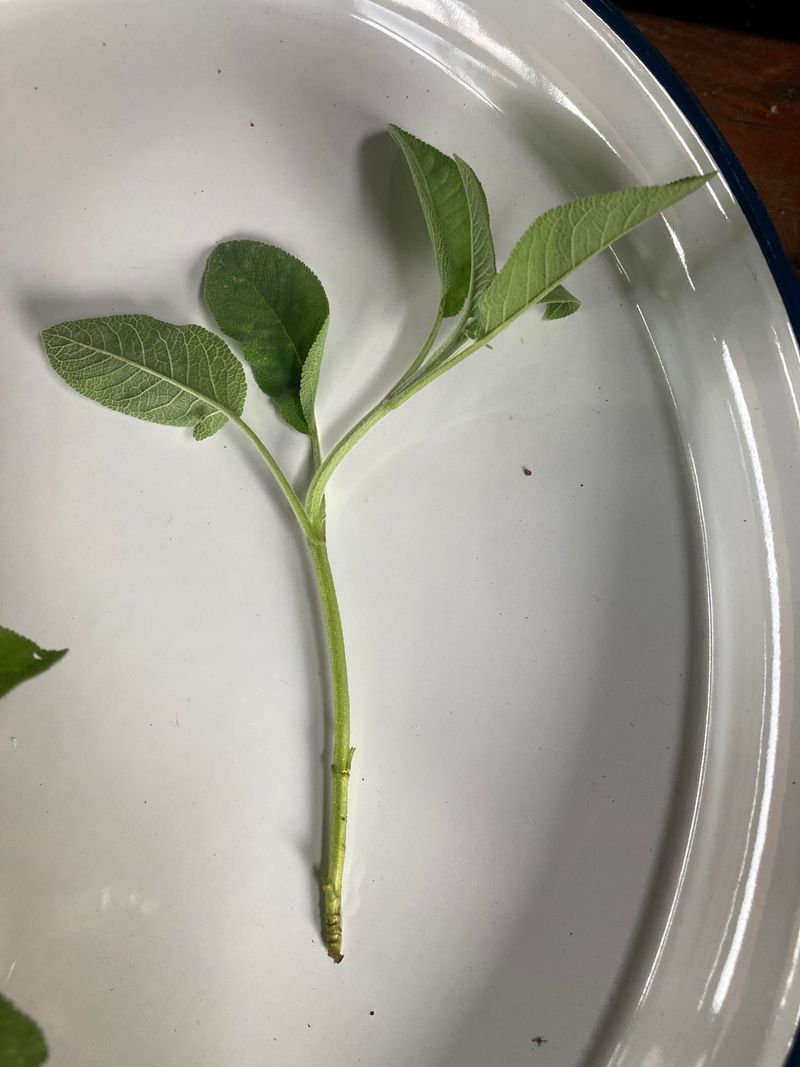
One sage stem holds real potential. With a clean cut and a little time, it becomes a whole new plant.
Choose healthy stems that are not flowering. Flower buds pull energy away from root production.
Four to six inches is the ideal length. Sharp, clean scissors make the cleanest cut just below a node.
Remove every lower leaf from the stem. Leftover leaves rot fast when buried or submerged.
Trim the remaining leaves in half if they look large. Smaller leaf surface means less moisture lost through evaporation.
Water rooting often produces roots within one to three weeks. Sage is noticeably quicker than rosemary in this department.
Soil propagation works too. Push cuttings into a moist, well-draining medium and set them somewhere warm and bright.
Indirect light suits fresh cuttings best. Harsh midday sun stresses stems that have no roots yet.
Rooting hormone is optional but can improve your numbers. Try half your batch with it and compare.
Move rooted sage into a four-inch pot, then size up as it grows. Mature sage develops a surprisingly large root system.
Water moderately, letting the top layer dry between drinks. Young sage is especially sensitive to constant moisture.
Set the pot near a south-facing window, or run a grow light. Many homes need that extra boost by December.
Lavender Cuttings Work Best After Flowering
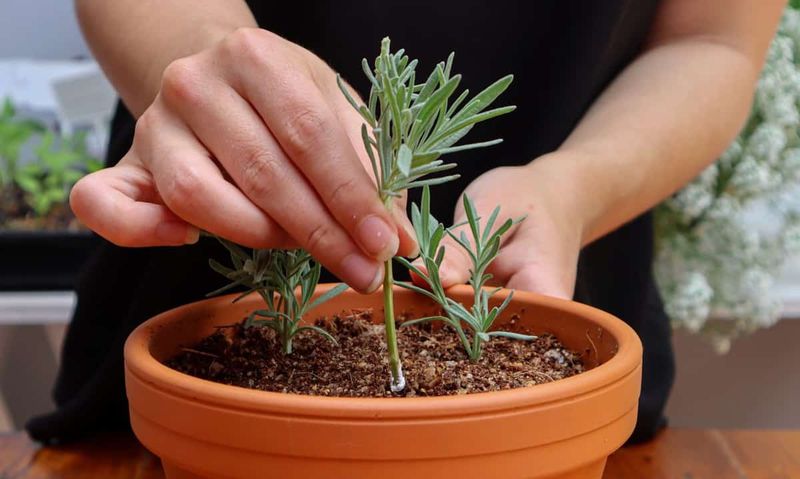
Lavender carries a scent that calms a whole room. Rooting it takes a bit of finesse, but the payoff smells fantastic.
Timing matters more than anything here. Cuttings taken shortly after flowering root far better than random snips.
Look for semi-hardwood stems that bend without snapping. Very soft new tips wilt, and old woody pieces stay stubborn.
Keep cuttings around 2.5 to 3.5 inches long. Short and sturdy beats long and floppy.
Clear the leaves from the bottom portion of the stem. That bare section is what gets buried or submerged.
Sandy, gritty soil is lavender’s favorite rooting medium. Push the bare stem about one inch deep into moist sand.
Water rooting is possible too. Keep the water level low and refresh it every few days.
Give water cuttings partial sun, not blazing light. Pot them once roots stretch one to two inches.
Roots typically take two to four weeks to form. Rooting hormone speeds things up for gardeners in a hurry.
Keep the medium moist yet never swampy. Drainage holes are non-negotiable for this plant.
Transplant into gritty potting soil once rooted. Add coarse sand or small gravel for extra airflow.
Gardeners can enjoy that fragrance all winter. A single pot on a desk perfumes an entire room.
Mint Is Easier To Divide Than To Root
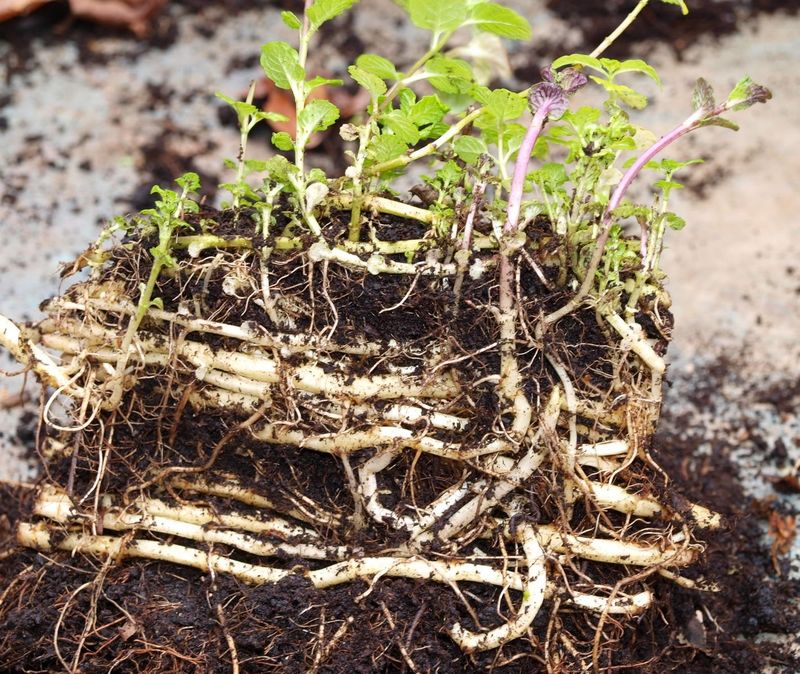
Mint spreads with such enthusiasm that gardeners sometimes fight it back. That same energy makes propagation almost effortless.
Division beats cuttings for speed. Splitting an established clump gives you instant plants with working roots.
Autumn is one of the two best windows for dividing. Spring is the other, so fall timing works perfectly right now.
Dig up an established plant from its pot or bed. Shake off loose soil to see the rootball clearly.
Pull the mass into smaller sections by hand. Each piece should carry both roots and green stems.
Tangled, woody clumps may need a trowel or knife. Cut decisively rather than tearing the roots apart.
Replant divisions into fresh potting mix right away. Water them in well and set them somewhere bright.
Water rooting still works if you prefer it. Softwood shoots often sprout roots within a single week.
Drop mint stems in a glass and wait. Pot them up once a small tangle of roots appears.
Indoor mint appreciates steady moisture and bright, indirect light. Twelve to sixteen hours daily keeps growth lush.
An LED grow light helps during gloomy winters. Natural light alone rarely stretches far enough in January.
Pinch the shoot tips regularly for a compact shape. Otherwise mint sprawls right off the windowsill.
Inspect Every Cutting Before Bringing It Inside
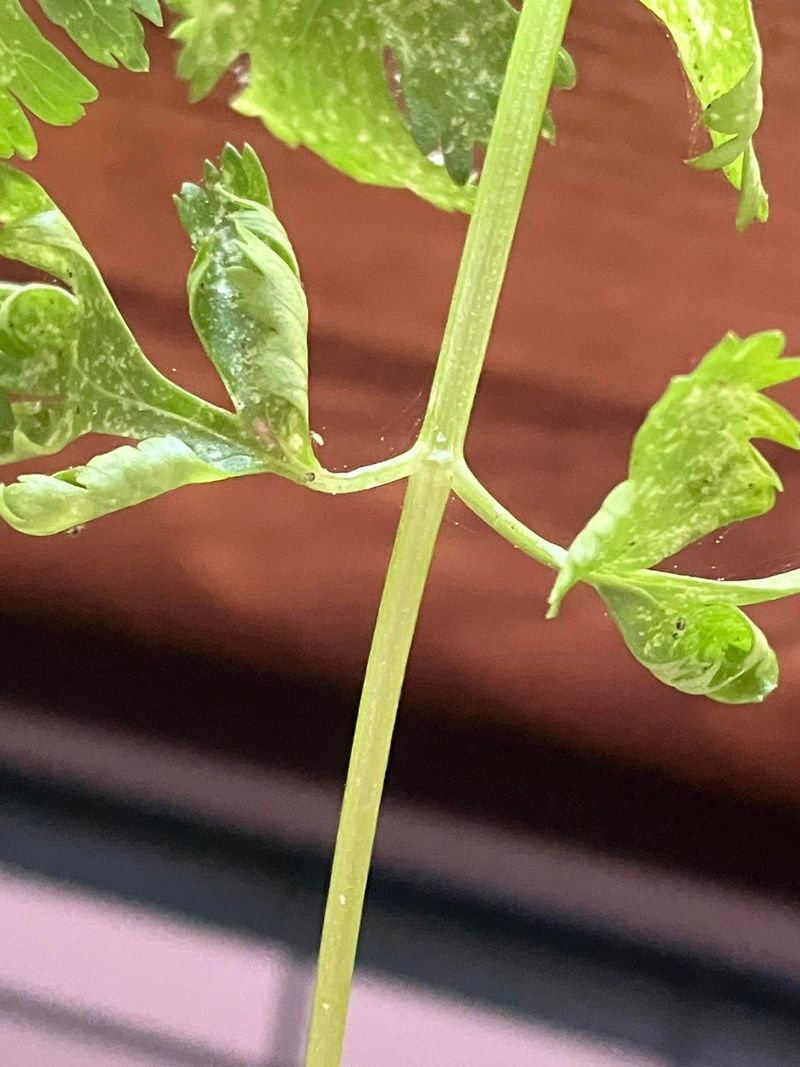
A single aphid can turn into an infestation by Thanksgiving. Five minutes of inspection saves weeks of frustration later.
Look at every cutting before it crosses your doorway. Outdoor pests happily move into warm houses.
Flip leaves over and check the undersides. Aphids, spider mites, and whiteflies hide exactly where you forget to look.
Watch for spots, streaks, or odd discoloration. Those marks often signal fungal or bacterial trouble.
Young cuttings are especially fragile. Damping-off disease can wipe out an entire tray of fresh stems.
Rinse each cutting under cool running water. A gentle stream knocks off tiny hitchhikers you missed.
Diluted insecticidal soap or neem oil adds another layer of protection. Apply lightly and let the stems air dry.
Quarantine new arrivals for a week or two. Keep them in a separate room away from your houseplants.
Check them every couple of days during that period. Hidden eggs often hatch within ten days.
Toss any cutting that shows webbing or sticky residue. Saving one questionable stem risks the whole collection.
Clean your scissors between plants with alcohol. Dirty blades spread problems faster than insects do.
New York gardeners moving plants indoors in October face this challenge every year. A careful routine keeps your winter windowsill healthy and productive.
Use Clean Pots And A Well Drained Mix
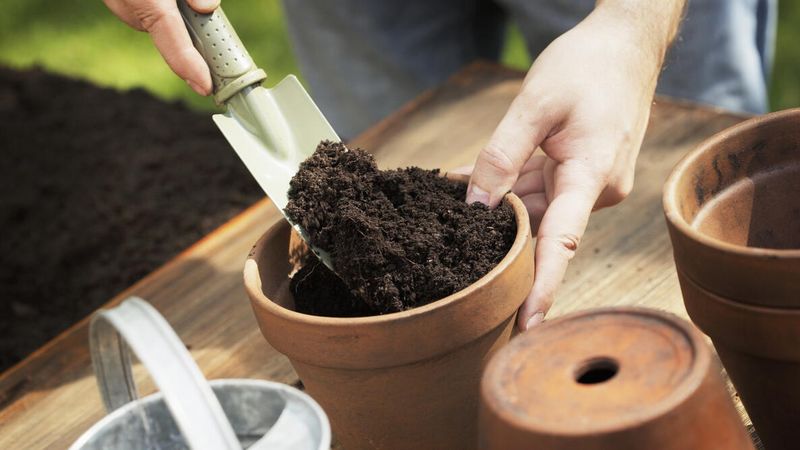
Reused pots often carry invisible trouble. Old soil crusted on the rim can hold fungal spores and disease.
Scrub away debris before anything else. A stiff brush and warm water handle most of the job.
Sanitizing comes next. Soak pots in one part bleach to nine parts water for ten to twenty minutes.
Rinse thoroughly afterward so no residue lingers. Bleach left behind can harm tender new roots.
Isopropyl alcohol at 70 percent is another solid choice. Wipe surfaces down and let them air dry.
Hydrogen peroxide offers a gentler option. It breaks down into plain water and oxygen, leaving nothing harsh behind.
Let every pot dry completely before filling it. Damp containers encourage mold before your cuttings even settle in.
Drainage deserves just as much attention. Cuttings rot fast in mixes that hold water like a sponge.
Seed-starting mix is a reliable pick. Blending potting soil with perlite, vermiculite, or coarse sand also works nicely.
Aim for a mix that feels light and crumbly. Air pockets around new roots matter more than rich nutrients.
Check that every pot has drainage holes. Decorative containers without them cause more losses than any pest.
With clean gear and the right mix, New York gardeners can keep harvesting fresh herbs straight through winter. Your kitchen will thank you in February.