9 Cold Frame Setups Smart New York Gardeners Are Building This Weekend
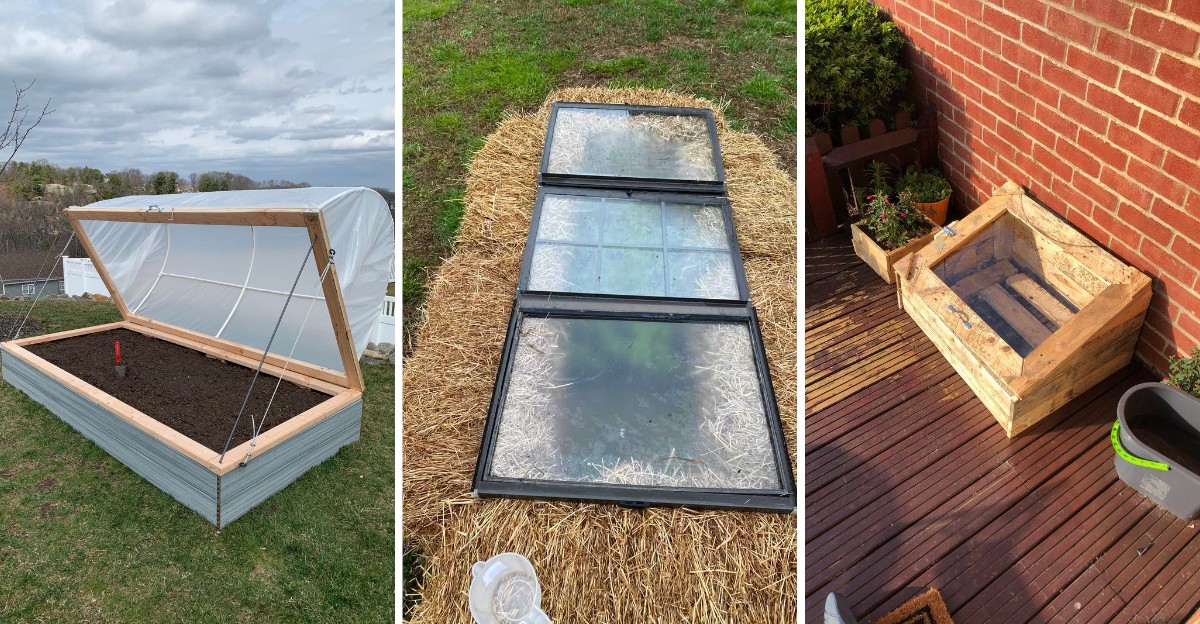
Frost on the pumpkins looks pretty, but frost on your lettuce is a different story. Across New York, gardeners are trading rakes for hammers before the real chill arrives.
A cold frame is simply a low box with a clear lid that traps sunshine. Think of it as a tiny greenhouse you can build in one weekend.
Inside, the soil stays warmer, the wind stays out, and your greens keep growing. Spinach and kale can keep producing long after the garden outside goes quiet.
Some setups cost almost nothing, while others need a trip to the lumberyard. A few even borrow heat from surprising sources.
Whether you have a tiny patio or a big backyard, one of these builds fits your space. Each one can stretch your harvest by weeks, and sometimes by months.
1. The Storm Window Frame That Costs Next To Nothing
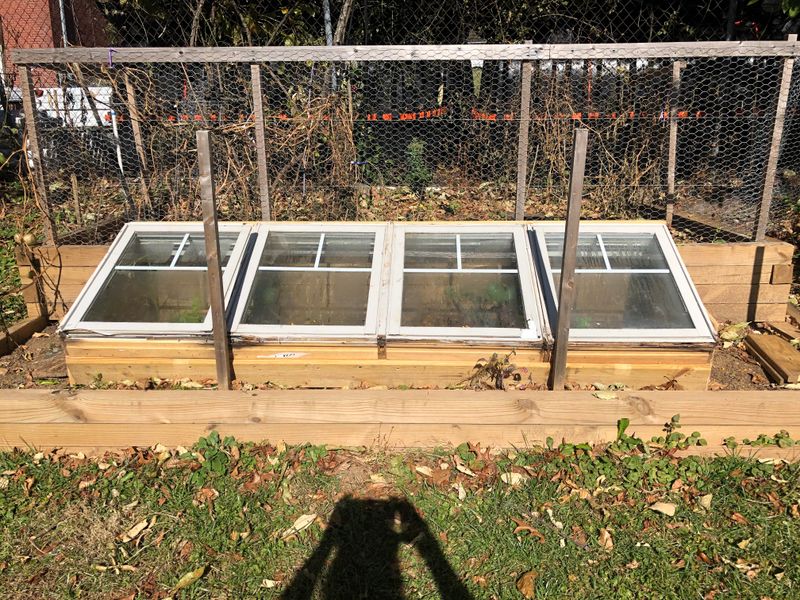
Somewhere in your garage, an old storm window sits gathering dust. Pull it out, wipe it down, and you already own the priciest part of a cold frame.
Glass lets in plenty of sunlight, and it holds up for years outdoors. Many gardeners also find free windows through curb alerts, neighbors, or local building reuse stores.
Let the window decide the size of your box. A common old sash measures about 3 feet by 6 feet, so build your frame to match.
Untreated wood like pine works fine for a first try. Skip old railroad ties, since the chemicals inside them do not belong near food crops.
Four boards screwed into a simple rectangle will do the job. Make the back about 6 inches taller than the front so rain slides off.
Before you start, check the window for peeling paint. Older sashes may contain lead, so test flaky paint first and skip any window that tests positive.
Attach the window with two sturdy hinges along the back edge. A short stick propped under the front lets you vent the frame on sunny days.
Double-check that the lid seals snugly against the box. Weatherstripping foam along the top edge blocks cold drafts and costs only a few dollars.
Once it is built, the payoff comes fast. Your lettuce, spinach, and scallions get shelter from frost, wind, and snow for several extra weeks each season.
Across upstate New York and Long Island alike, a free window can mean earlier salads in spring. You might even be picking greens after Thanksgiving.
2. Straw Bale Frames You Can Stack In An Afternoon
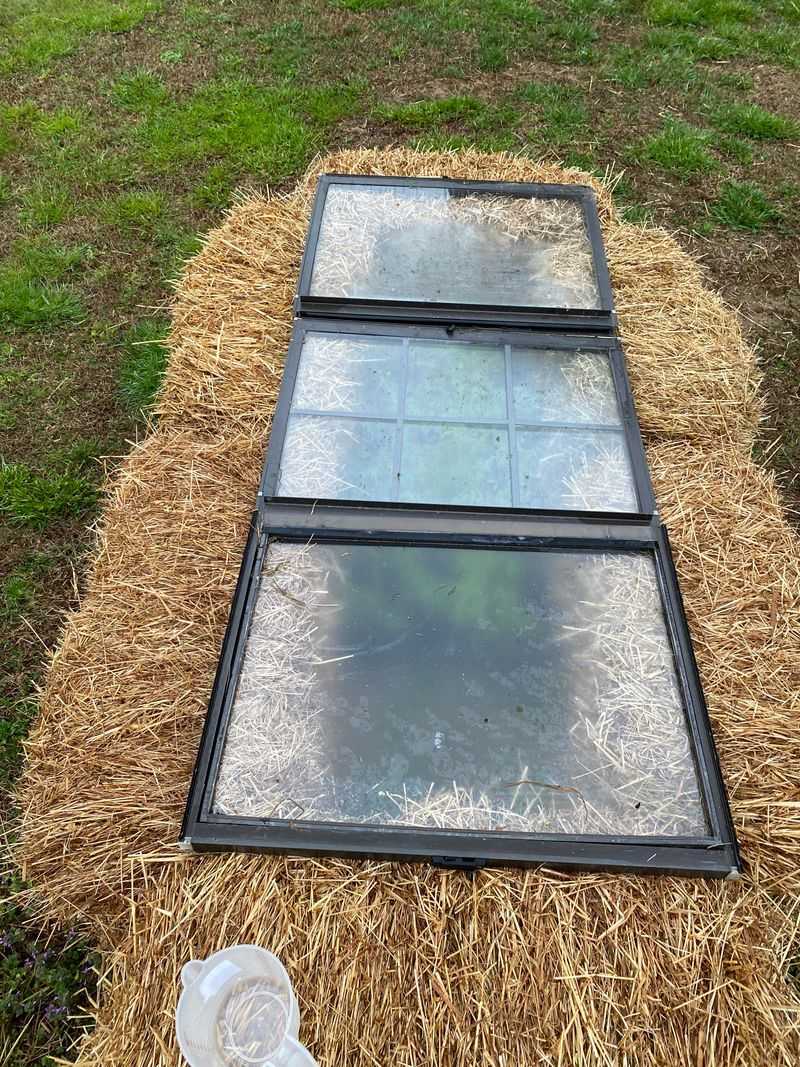
Picture a cozy fort made of straw, like something from a fall hayride. Now imagine lettuce growing happily inside it while frost coats the lawn outside.
Straw bale frames are about as easy as garden building gets. No saws, no screws, and no carpentry skills are needed at all.
First, make sure you buy straw and not hay. Hay is packed with seeds, and those seeds will sprout into weeds all over your bed.
Most farm stands and garden centers in New York sell bales each autumn. Grab four to six, depending on how big you want your frame.
Your New York Garden Changes Every Week. Your Plan Should Too.
Gardening in New York changes quickly throughout the season. Every Friday you’ll receive a simple weekly plan showing exactly what to plant, prune, fertilize, harvest, and protect so you never miss the right timing.
Arrange the bales in a U shape or a full square around your plants. A garage or shed wall can serve as the fourth side if you like.
Gaps between bales let chilly air sneak in. Stuff them tightly with loose straw until the walls feel solid when you press on them.
For the top, lay an old window or stretch clear plastic sheeting across the bales. Weigh the edges down with bricks so gusty winds cannot lift it.
Keep an eye on moisture inside the frame. Damp straw can invite mice, so check the bales every week and pull out any soggy clumps.
Those thick walls act like a warm winter coat for your crops. Kale, chard, and radishes stay snug through cold nights that would flatten them in open ground.
Here is a bonus that makes the whole project even sweeter. Come spring, the bales break down into rich mulch or compost for your garden.
3. Cinder Block Frames That Soak Up Daytime Heat
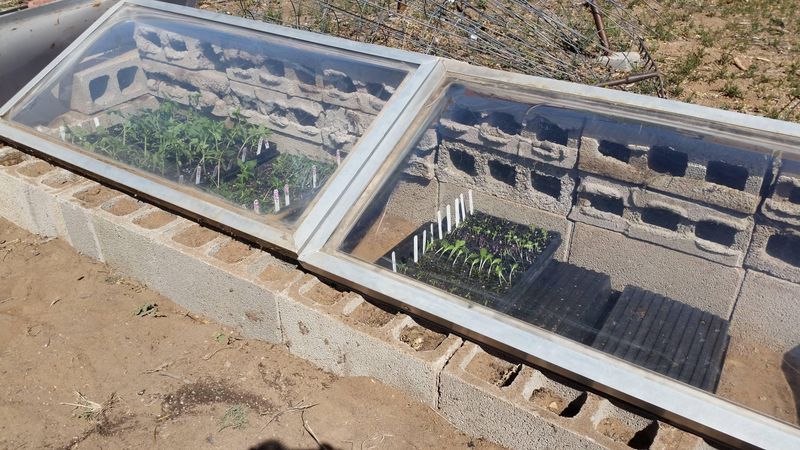
Ever sat on a stone wall after sunset and felt it still warm beneath you? Cinder block cold frames work on that very same trick.
Gardeners call it thermal mass, which is a fancy phrase for heavy stuff that stores heat. Dense blocks soak up sunshine all day, then slowly release it overnight.
Steady warmth matters a lot during spring. One afternoon might hit 60 degrees, and the next morning could bring a hard frost.
Building one feels a bit like playing with giant toy bricks. Level the ground first, then lay the blocks in a rectangle with no mortar needed.
Stack a second row along the back wall to create a slope. A tilted lid catches more low winter sun and sheds melting snow.
Dark blocks absorb even more heat than pale gray ones. Some gardeners paint the inside walls black to squeeze out a few extra degrees.
Those hollow cores are handy too. Fill them with soil and tuck in herbs like thyme or chives for a bonus mini garden.
Top the frame with an old window, a sheet of polycarbonate, or heavy plastic on a wood frame. Blocks are sturdy enough to hold almost any lid you choose.
Watch the thermometer on bright days, though. Blocks store heat so well that a closed frame can overheat by noon, so crack the lid open.
Best of all, the frame lasts for decades and can be moved later. Simply unstack the blocks and rebuild wherever the sun shines brightest.
4. Cedar Box Frames With A Polycarbonate Lid
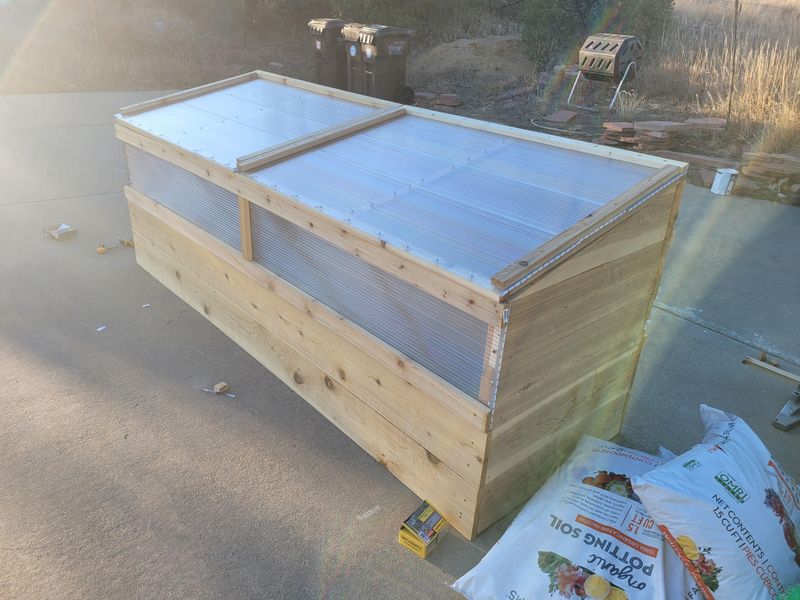
Some cold frames look like they belong in a fancy garden magazine. A cedar box with a polycarbonate lid is one of them, and it performs beautifully.
Cedar is famous for resisting rot without any chemical treatment. Its natural oils fend off moisture and insects, so the boards can last many seasons outdoors.
Wet autumns and snowy winters in New York can be rough on cheap wood. Cedar shrugs off that weather far better than plain pine.
Now for the lid, which is where polycarbonate really shines. It weighs much less than glass and will not shatter if a branch falls on it.
Look for twin-wall panels if you can find them. A thin layer of trapped air between the walls acts like insulation, holding warmth in after dark.
Polycarbonate also spreads sunlight gently instead of blasting it straight down. Seedlings are less likely to scorch, and light reaches the lower leaves more evenly.
Want a clever upgrade for busy weekdays? Automatic vent openers use a wax cylinder that expands in heat, lifting the lid without any electricity.
When temperatures drop again, the wax shrinks and the lid gently closes. Your plants stay comfortable even while you are stuck at work.
Cedar costs more than scrap lumber, so plan your cuts carefully. A 2-by-4-foot box is a friendly size for a first build and easy to reach across.
Kits are sold online too if you prefer skipping the saw. Many come pre-cut, so assembly takes about an hour with a simple screwdriver.
5. PVC Hoop Tunnels For Long Garden Rows
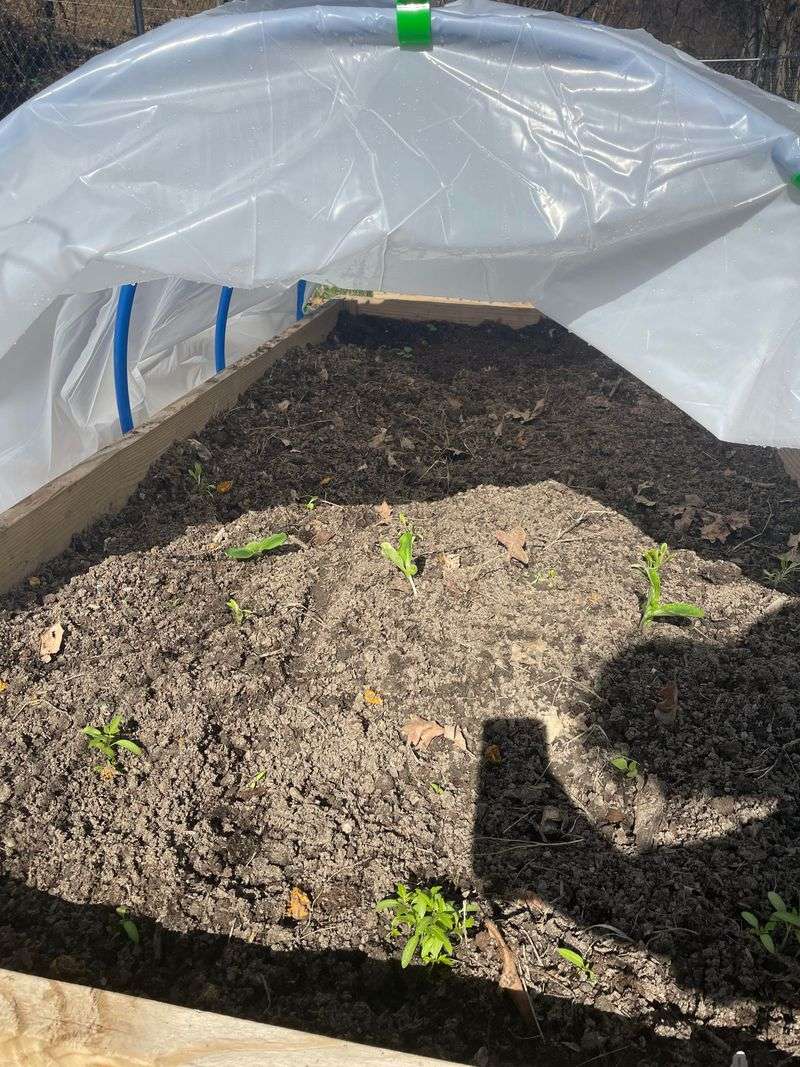
Got a long row of carrots or kale that no box could ever cover? A hoop tunnel stretches as far as your row does, like a cozy caterpillar.
Low tunnels are simple arches of bendy PVC pipe covered with plastic or row cover fabric. Farmers across New York use them to stretch harvests well into November.
Start by pounding short rebar stakes into the ground along both edges of the row. Leave about a foot sticking up to hold each pipe.
Space the stakes every 3 to 5 feet. Closer spacing makes the tunnel stronger, which helps a lot when heavy snow piles on top.
Slide a PVC pipe over one stake, bend it across, and slip it onto the other. Suddenly you have a neat row of arches.
A 10-foot length of half-inch pipe makes a hoop wide enough for a typical 4-foot bed. Each pipe costs just a few dollars at the hardware store.
Drape your cover over the hoops and hold it down with sandbags, bricks, or snap clamps. Loose edges flap in the wind and let cold air rush inside.
Clear plastic traps the most heat for deep winter. Lightweight row cover breathes better and works nicely for spring frosts or keeping hungry bugs away.
Harvesting is easy since you can roll up one side like a curtain. On warm afternoons, open the ends so air can flow through.
Summer brings another trick worth trying. Swap the plastic for shade cloth, and those same hoops protect lettuce from July heat.
6. Hotbeds Warmed By Fresh Manure Or A Heating Cable
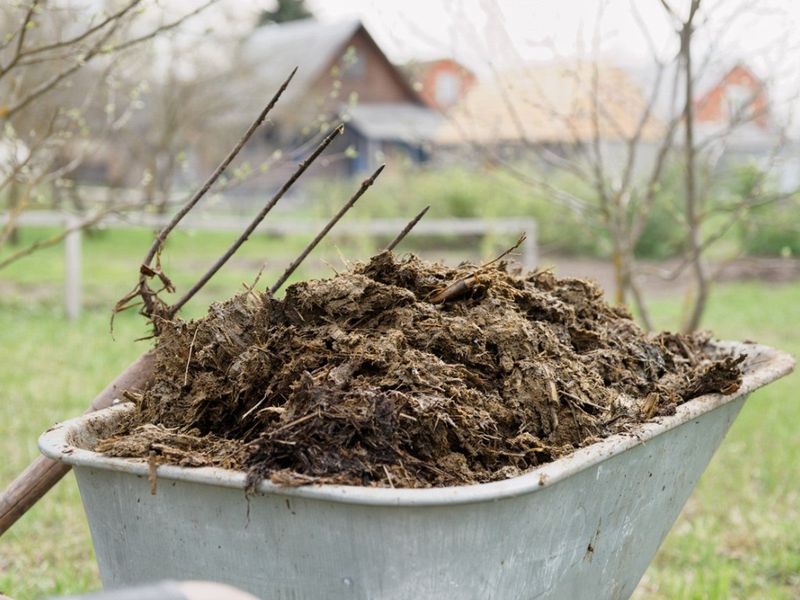
Long before electric heaters, gardeners had a smelly but brilliant way to warm their seedlings. They buried fresh horse manure under the soil and let nature do the rest.
French market gardeners in the 1800s grew lettuce in winter using this exact method. A hotbed is basically a cold frame with its own built-in furnace.
Going the old-fashioned route? Dig out your frame and pack in 18 inches to 2 feet of fresh manure mixed with straw.
Cover it with 6 to 12 inches of good soil. As the manure breaks down, it gives off steady heat that warms roots from below.
Wait about a week before planting, since the pile runs very hot at first. A soil thermometer helps you know when it settles near 75 degrees.
Local horse stables often give manure away for free. Bonus points come later, because the rotted manure enriches your soil for next season.
Prefer an option that smells a little less like a farm? Electric heating cables do the same job with no barnyard aroma drifting toward the neighbors.
Lay a gravel base for drainage, then add 2 inches of sand. Snake the cable across the sand in loops, keeping it from crossing over itself.
Cover everything with more sand and a layer of soil. A built-in thermostat keeps the temperature right where tomato and pepper seedlings love it.
Plug the cable into an outdoor GFCI outlet for safety. With either heat source, you can start seeds weeks before your neighbors even think about spring.
7. Raised Bed Toppers With A Hinged Lid
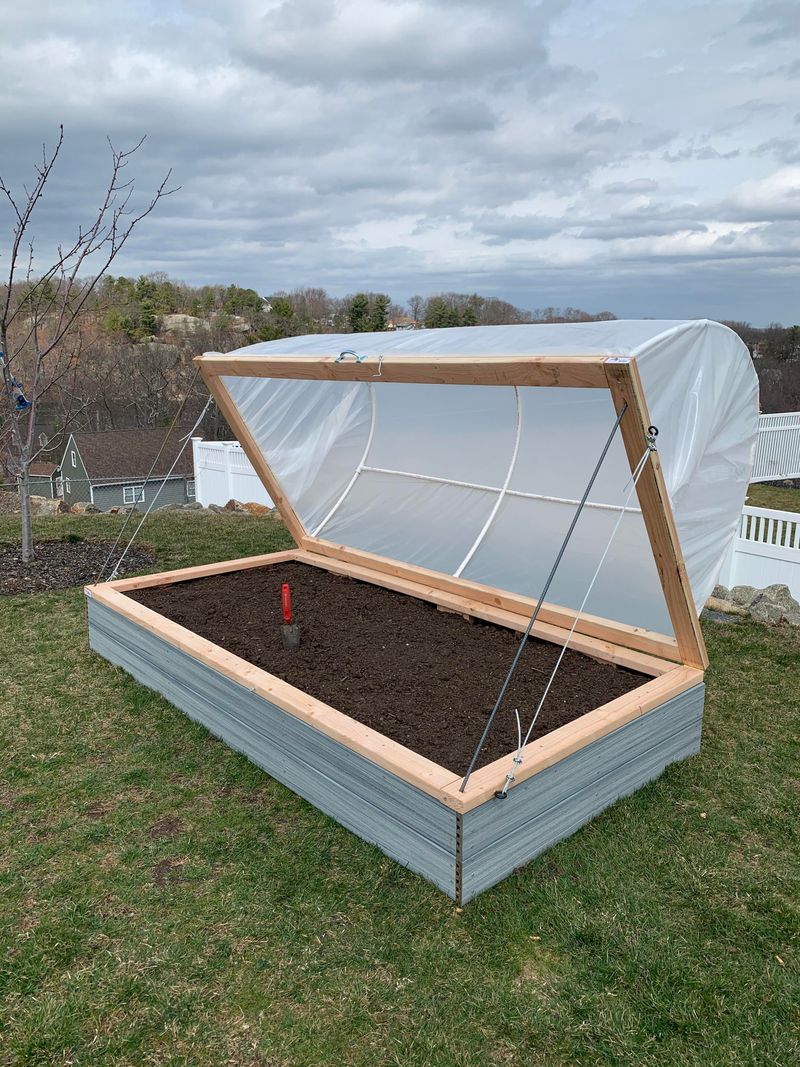
Already own a raised bed? Congratulations, because you are about halfway to having a cold frame without lifting a shovel.
A raised bed topper is a clear-lidded box that sits right on your existing bed. It turns ordinary soil into a sheltered growing space in minutes.
Measure the outside edges of your bed before building anything. Your topper should match those numbers so it rests snugly without gaps.
Taller toppers leave room for bigger plants like kale. Aim for a back wall around 18 inches high and a front near 10 inches.
Cedar boards make a sturdy base, and polycarbonate or glass works well for the lid. Angle the sides so the lid slopes toward the south.
The hinged lid is the real star of the show. Flip it open to water, pick a salad, or check for slugs hiding under the leaves.
Hinges also make hardening off a breeze. Leave the lid open a little longer each day, and young plants slowly adjust to outdoor life.
Spinach, arugula, and mache love life under a topper. Sow them in September, and you could be snipping leaves in the middle of January.
Add a simple hook-and-eye latch to the front edge. Strong gusts love to grab lightweight lids and slam them open when you least expect it.
A notched prop stick is another smart touch. Cut two or three notches so you can vent a crack, a few inches, or wide open.
Tidy gardeners will love one final perk. When warm weather arrives, lift the topper off and store it in the shed until fall.
8. Pallet Wood Frames Built From Free Scraps
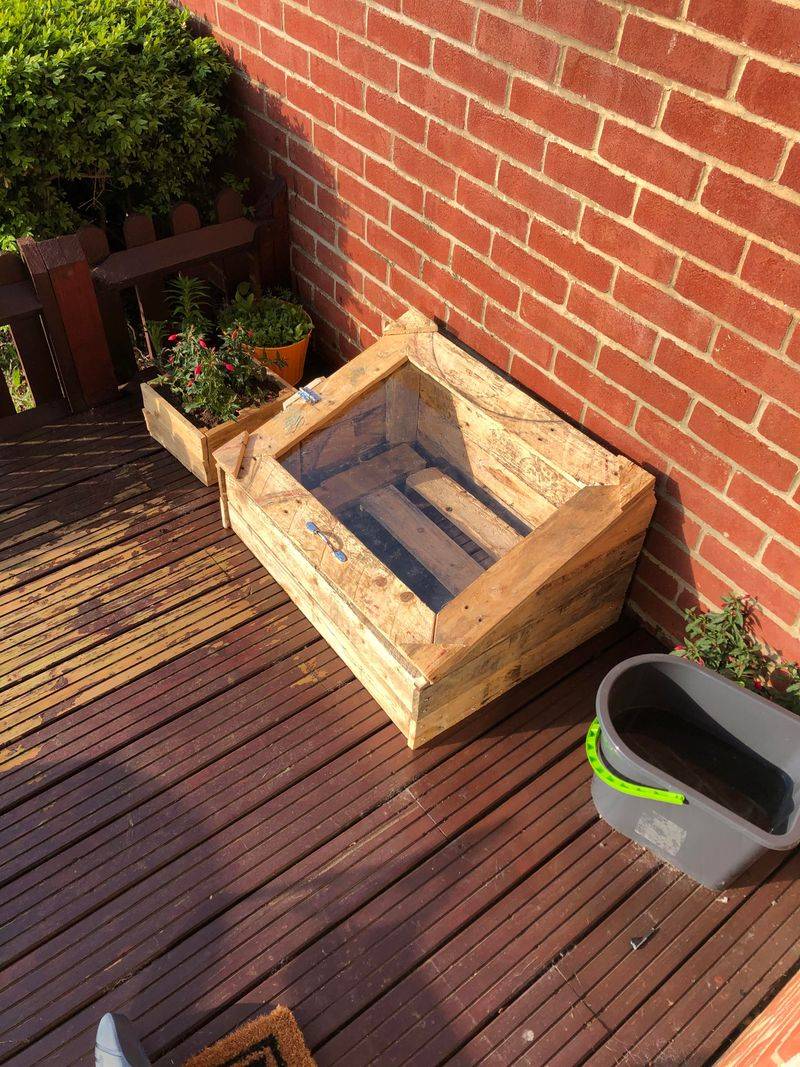
One gardener’s trash is another gardener’s treasure, and pallets prove it every single day. Stacks of them sit behind stores just waiting for someone creative.
Ask permission before hauling any pallets home from a business. Many shops are glad to see them go, since disposal costs them money.
Check each pallet for a small stamp before you take it. Look for HT, which means heat treated, and skip any marked MB for methyl bromide.
Taking pallets apart is the trickiest step. A pry bar and hammer work, but a reciprocating saw slices through nails much faster.
Old pallet boards are often dry and brittle. Drill small pilot holes before driving screws, or the wood may split right down the middle.
Sand down rough spots and pull every leftover nail. Splinters and sharp points are no fun when you reach in to harvest.
Build the back wall taller than the front to form a gentle slope. Sunlight hits the lid at a better angle, and rainwater runs off easily.
Pallet boards are thin, so gaps can let heat escape. Line the inside walls with scrap foam board or cardboard for extra insulation.
Clear plastic sheeting stapled over a light frame makes an easy, cheap lid. Polycarbonate lasts longer if your budget allows a small splurge.
Expect a pallet frame to last a few seasons rather than decades. When boards start to soften, just grab more free wood and rebuild.
Seedlings, rooted cuttings, and young perennials all thrive in these rustic little boxes. Plus, you get bragging rights for building something useful out of garbage.
9. Lean-To Frames Tucked Against A Sunny South Wall
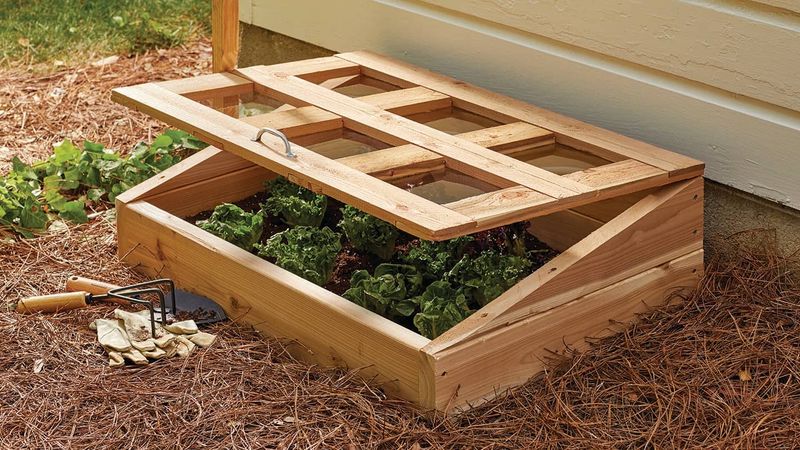
Your house has been quietly soaking up sunshine all day long. A lean-to cold frame lets your plants borrow some of that stored warmth.
Think of a slanted box snuggled right up against a south-facing wall. Bricks, stone, and siding release heat after dark, giving tender crops a gentle boost.
Winter winds in New York usually roar in from the northwest. Your house blocks those icy blasts, so the frame stays calmer and warmer.
Sizing is refreshingly simple. Build the back about 12 to 18 inches tall and the front around 6 to 8 inches.
Such a slope aims the lid straight at the low winter sun. Rain and melting snow slide right off instead of pooling on top.
Leave a small gap between the frame and your siding to protect the house. A strip of flashing keeps moisture from soaking into the wall.
Watch out for roof edges, too. Snow sliding off the eaves can crack a glass lid, so avoid the drip line.
Overwintering is where a lean-to really earns its keep. Potted rosemary, parsley, and young perennials can ride out winter safely inside.
Convenience is the sneaky bonus nobody talks about. Grabbing fresh chives for dinner takes ten seconds when the frame sits right outside the kitchen door.
Keep a cheap thermometer inside so you know when to vent. South walls can push temperatures past 80 degrees on a sunny March afternoon.
Build one this weekend, and you will wonder why you waited so long. Your garden, and your dinner plate, will thank you all winter.