The One Thing North Carolina Cabbage Needs In October To Keep Worms Off Your Harvest
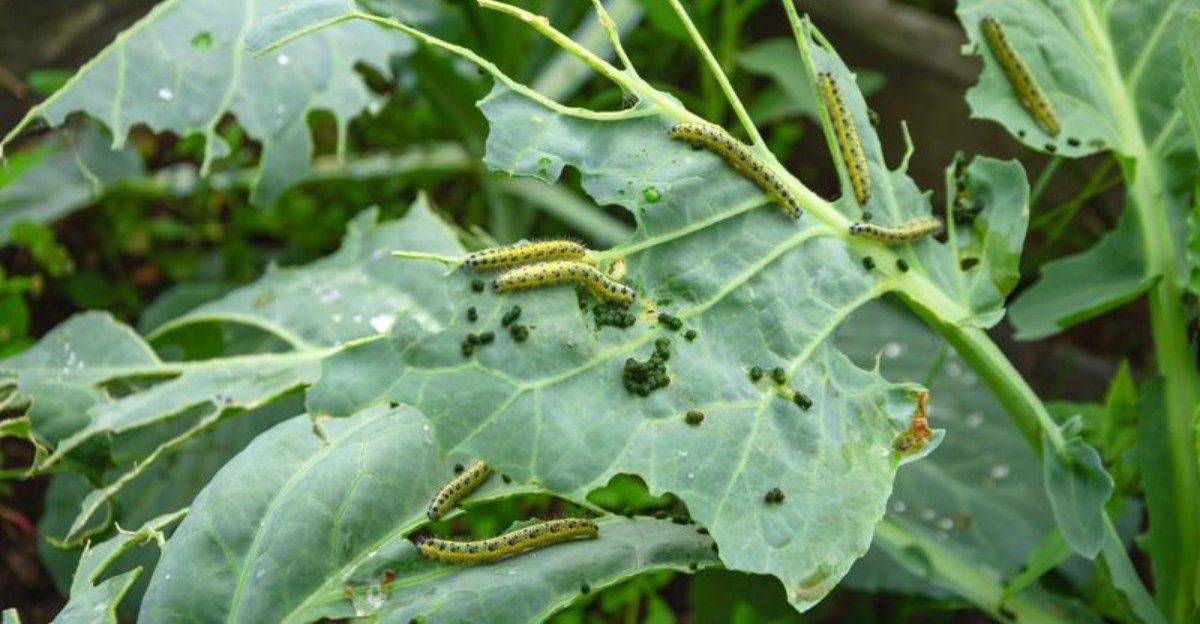
Cabbage worms remain a persistent threat to North Carolina gardens well into October, catching many gardeners off guard who assume cooler fall weather means pest pressure has already eased up.
These caterpillars continue feeding actively as long as temperatures stay mild, and cabbage heads maturing during this stretch face just as much risk as earlier plantings did back in late summer.
One specific preventive step taken now can significantly reduce the chances of finding chewed leaves or hidden caterpillars tucked between developing cabbage layers at harvest time.
Because cabbage worms can cause damage that isn’t always visible from the outside until a head is cut open, prevention proves far more effective than trying to salvage an already-infested crop.
Taking this one action in October protects weeks of growing effort right as cabbage heads are finally approaching harvest size.
1. A Row Cover Barrier Over The Plants
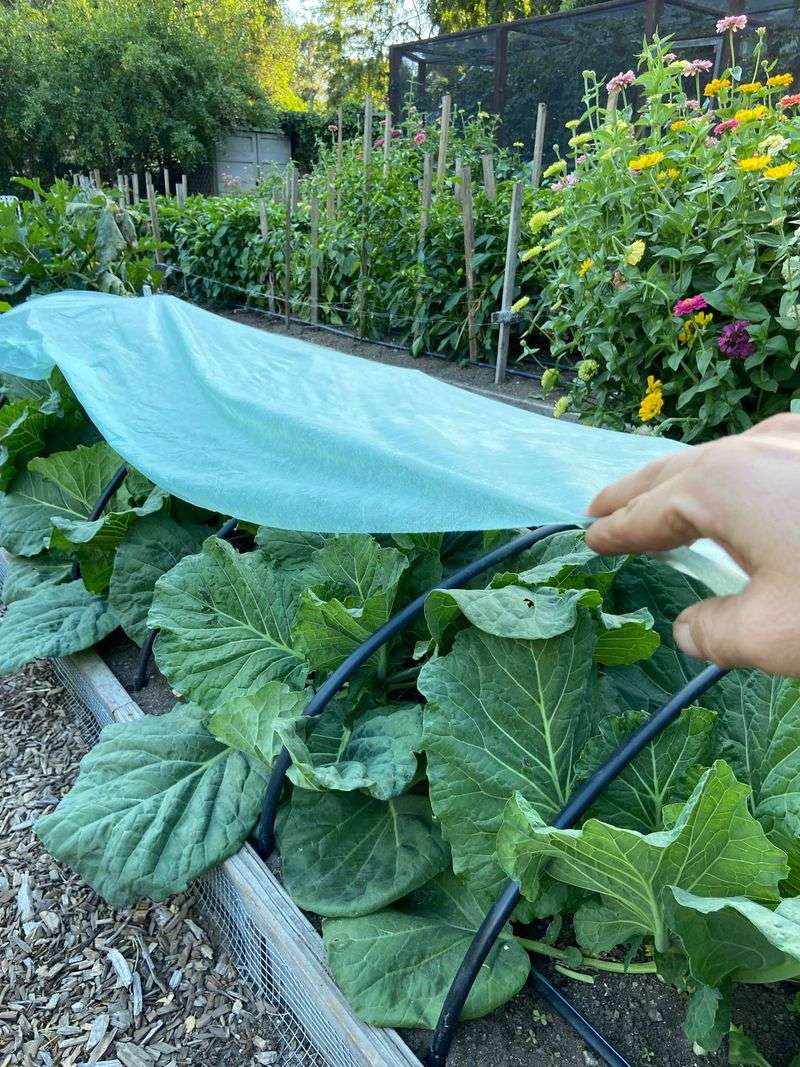
Every cabbage worm starts life as a tiny egg, and every egg gets placed on a leaf by a flying moth or butterfly. Stop the adults from landing, and the whole problem disappears. That is the simple idea behind a lightweight floating row cover.
Row cover is a thin, white fabric that lets sunlight, rain, and air pass through while blocking insects. Gardeners call it floating because it is so light that it rests on plants without crushing them.
Once the fabric goes on and the edges stay sealed, egg-laying insects cannot reach the leaves. No eggs means no caterpillars, and no caterpillars means no holes in your harvest.
Setting it up is easy. Drape the fabric over your cabbage bed, then bury or weigh down every edge so nothing can sneak in underneath. Leave it in place until cold weather shuts down insect activity or until you are ready to start picking heads.
Many gardeners like this method because it replaces a lot of spraying and worrying. You simply check on things now and then and let the fabric do the heavy lifting. It also gives plants a little extra warmth on chilly nights, which is a nice bonus.
North Carolina gardeners need this help more than most. Our fall weather stays mild well into October, so moths and white butterflies keep flying and laying eggs long after gardeners in colder states stop seeing them.
A good cover keeps your cabbage safe during that long, warm stretch.
2. Know Which Worms Are Feeding
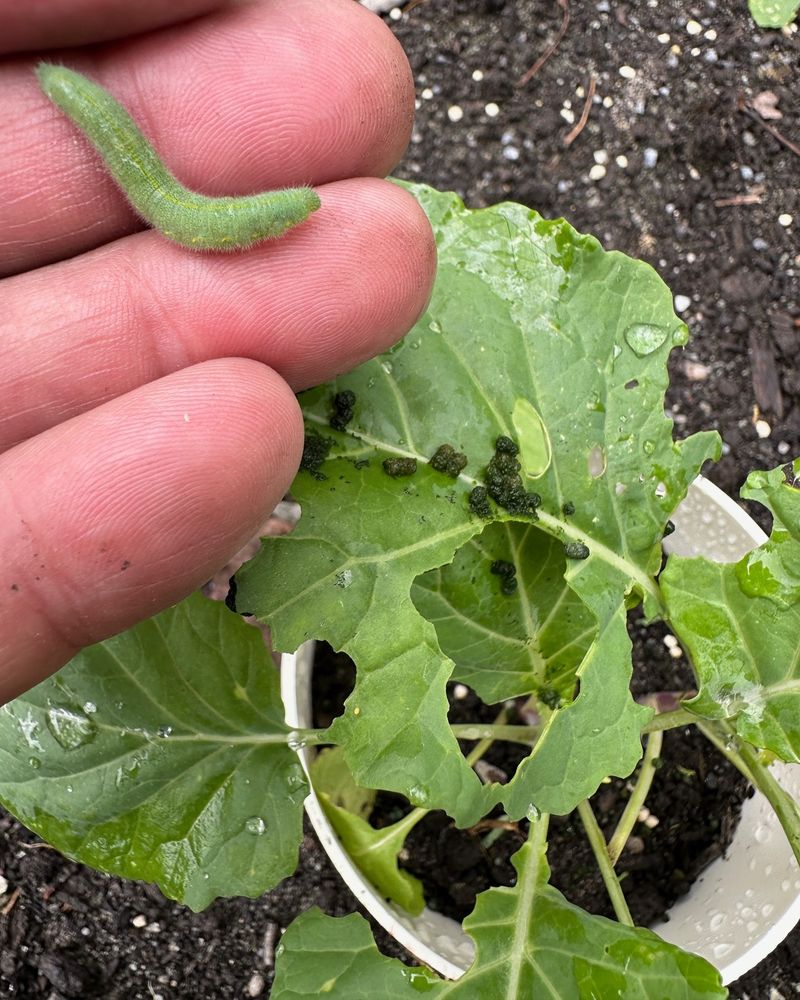
Ever notice that not all green worms act the same? Some crawl slowly, some arch like tiny bridges, and some wiggle wildly when touched. Getting to know them helps you spot trouble early.
The imported cabbageworm is the most familiar one. It is velvety green, moves slowly, and often has a faint yellow line down its back. Its parent is the small white butterfly you see fluttering around gardens on sunny afternoons.
Cabbage loopers are pale green and have no legs in the middle of their bodies. Because of that, they crawl by pulling their back end forward, making a loop shape. They can chew large, ragged holes in a short time.
Your North Carolina Garden Changes Every Week. Your Plan Should Too.
Gardening in North Carolina changes quickly throughout the season. Every Friday you’ll receive a simple weekly plan showing exactly what to plant, prune, fertilize, harvest, and protect so you never miss the right timing.
Diamondback moth larvae are much smaller, usually less than half an inch long. Poke one gently, and it will twist and wriggle quickly, sometimes dropping off the leaf on a silk thread. They often leave little windowpane spots where they scrape the leaf surface.
Cross-striped cabbageworms look quite different. Their bodies are bluish gray with thin black stripes across them, and they like to feed in groups. A cluster of them can shred young leaves and the center of a plant fast.
Here is the helpful part. Even though each worm feeds a bit differently, all of them come from eggs laid on leaves. That is why one fabric barrier works against every single type.
In North Carolina, all four can show up on fall cabbage, broccoli, and collards at once, so knowing them by sight gives you a real edge.
3. Seal Every Edge Completely
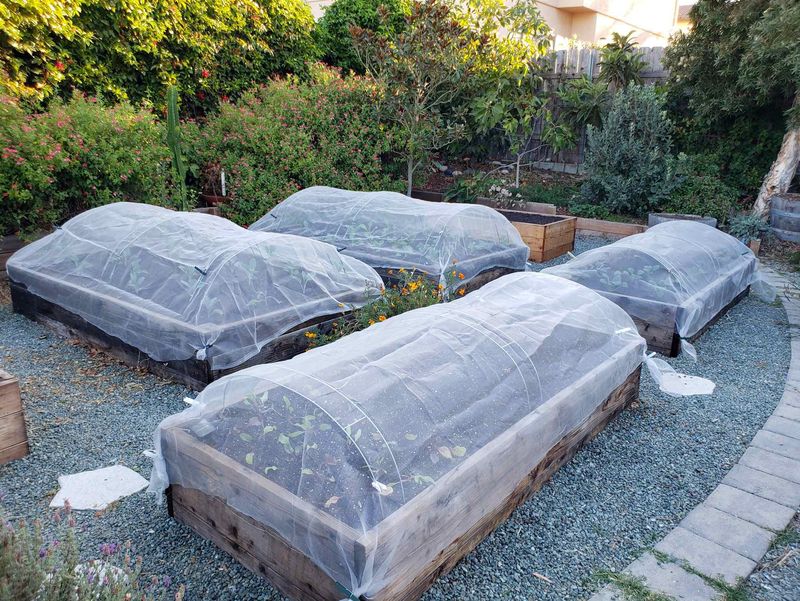
A row cover with a loose edge is a bit like a screen door left open a crack. It looks protective, but bugs slip right through. Moths and butterflies are surprisingly good at finding tiny gaps along the ground.
Once one gets inside, things can turn worse than having no cover at all. The insect lays eggs on your plants, and the caterpillars hatch in a cozy space where birds, wasps, and other helpful predators cannot reach them.
They feed in peace while you think your cabbage is safe. So how do you close things up tight?
The best option is to bury the fabric edges under a few inches of soil along the whole length of the bed. If digging is not practical, sandbags, boards, bricks, or landscape pins work well.
Just space them close together so the fabric stays flat against the ground with no openings.
Pay special attention to the ends of the row. Leave extra fabric at each end, gather it into a bunch, and tie it or weigh it down firmly. Gathered ends are one of the most common places for sneaky gaps.
Wind loves to lift covers, too. After any gusty day or storm, walk your beds and check every edge. It only takes a minute, and fixing a loose spot quickly can save a whole crop.
North Carolina falls bring their share of blustery fronts and leftover tropical storms. Those strong gusts can tug fabric loose overnight, so a quick morning check becomes a smart habit all season.
4. Check Under The Cover Before Sealing It
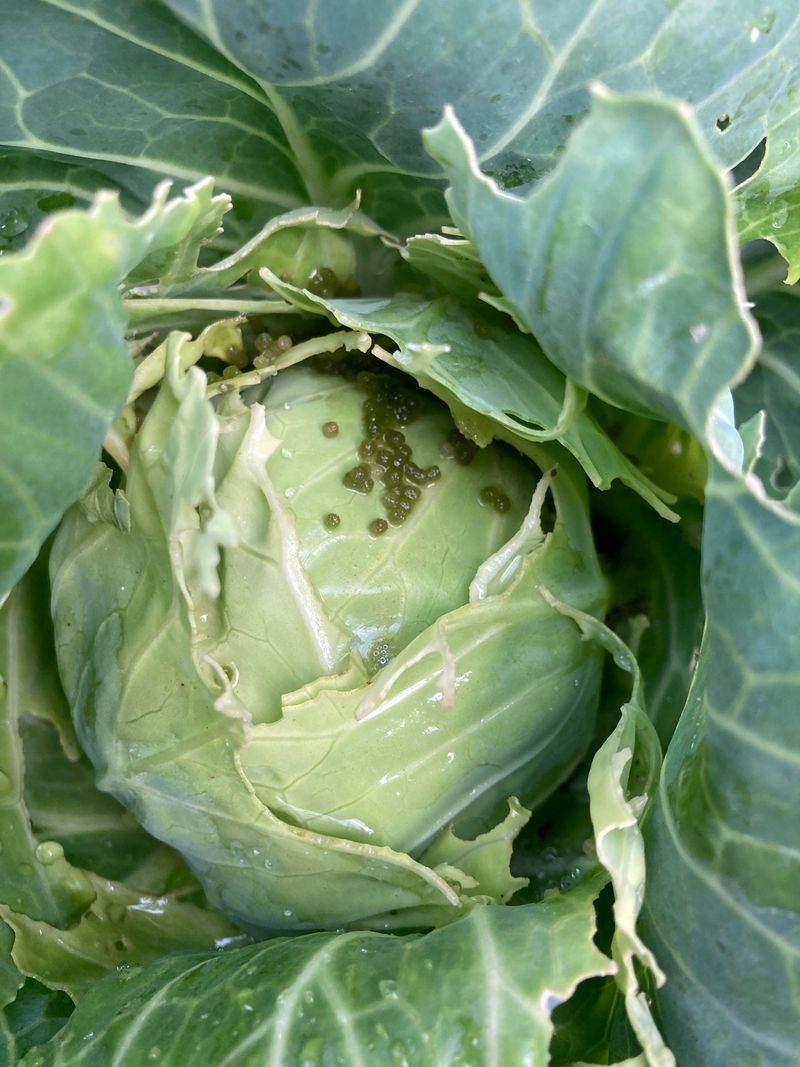
Timing is everything. A row cover can only block insects that are outside, so any eggs already on your plants will get sealed in with them. That mistake surprises many first-time gardeners.
Picture the problem this way. Tiny eggs hatch under the fabric, and the young caterpillars feed happily with no birds or helpful insects around to eat them. By the time you notice, leaves may be full of holes.
Before you spread the cover, take a slow walk down your cabbage row. Look over the tops of the leaves, and then flip each one to check the undersides.
You are searching for small caterpillars and tiny eggs that are yellowish or greenish, about the size of a pinhead.
Cabbage white butterfly eggs are often shaped like little bullets standing on end, while looper eggs are rounder and flatter.
Rub off any eggs with your finger and pick off caterpillars you find. Then go ahead and seal the cover. A few extra minutes here can save you weeks of frustration later.
Once the fabric is in place, keep checking. Lift one end about once a week and peek at the plants, then close it up tightly again. You will catch any surprises early while caterpillars are still small. For North Carolina gardeners, this step really matters.
Fall cabbage usually goes into the ground as transplants in late summer, right when butterflies and moths are busy laying eggs. Your young plants may already carry a few passengers before you even cover them.
5. Use Hoops To Give Plants Room To Grow
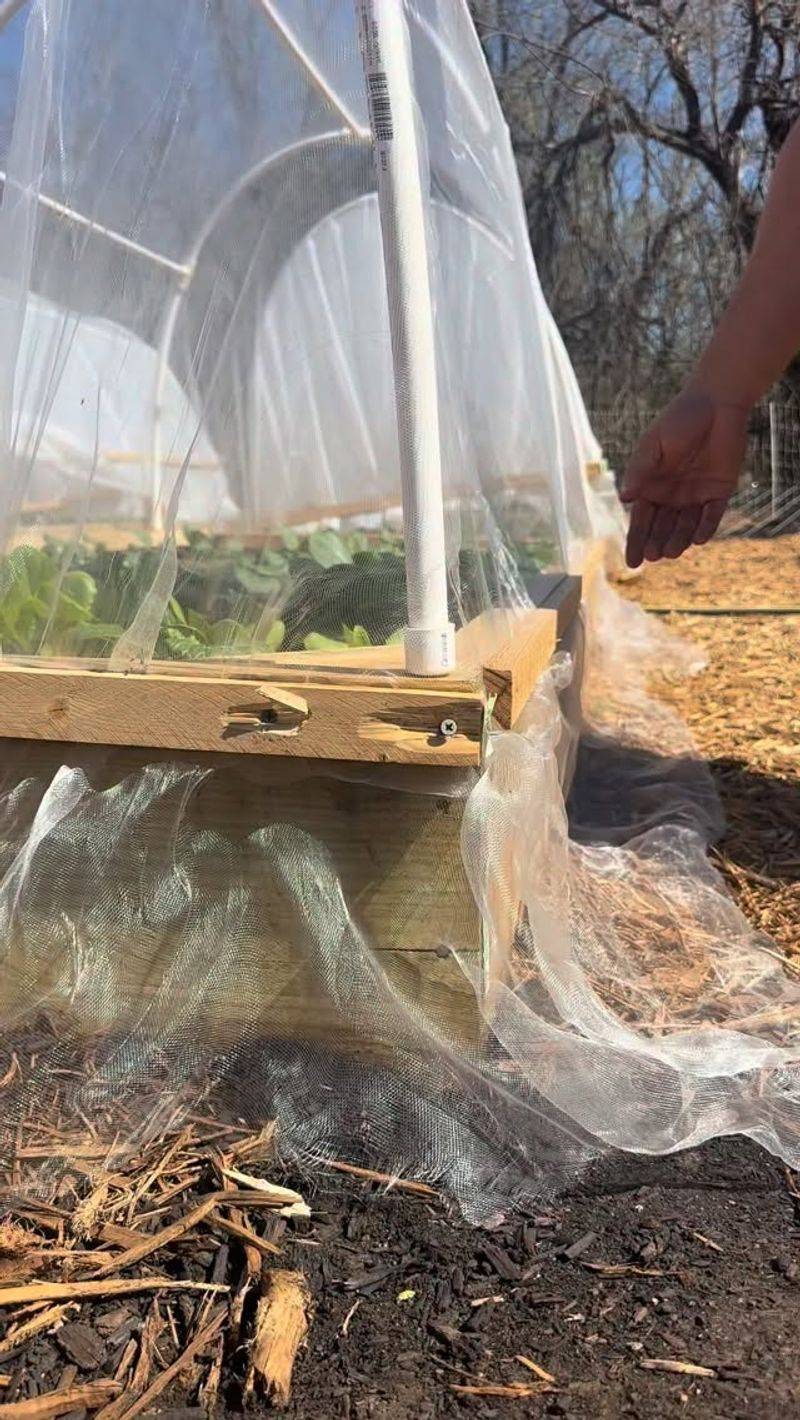
Cabbage starts small but grows into a real space hog. By harvest time, a single plant can spread its leaves two feet or more across. A cover laid right on top has trouble keeping up.
When fabric rests directly on big plants, it gets pulled tighter and tighter as they grow. That tension can drag the edges up off the ground and open gaps for insects. It can also rub against leaves in the wind, leaving scuffed or torn spots.
Hoops fix both problems. They hold the fabric above the plants like a little tunnel, giving cabbage plenty of room to stretch out. You can make them from 9-gauge wire, bendable PVC pipe, or electrical conduit shaped into arches.
Push each end firmly into the soil on opposite sides of the row. Space the hoops about 3 to 4 feet apart along the bed. Then drape your row cover over them, leaving lots of slack so the fabric does not pull tight. Secure the edges just as you normally would.
Many garden stores sell ready-made hoop kits, but homemade versions work just as well and cost very little. Wire hoops are light and easy to store over winter, too.
North Carolina has a long, gentle fall growing season. That extra time lets cabbage heads grow large and firm before harvest, which is wonderful for your kitchen.
Hoops make sure the cover stays sealed and roomy through all that growing, so your plants never outgrow their protection.
6. Keep Bt Ready As A Backup
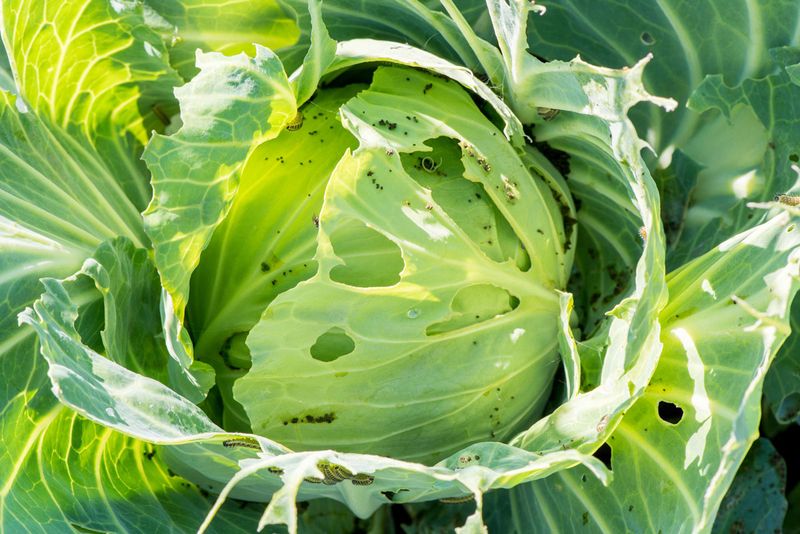
Even the best barrier has an off day. Maybe a storm lifted a corner, or an egg slipped past your inspection. That is when a trusted backup comes in handy.
Bacillus thuringiensis, usually sold as Bt, is a bacterium found naturally in soil. When a caterpillar eats leaves treated with it, the Bt upsets its gut, and the caterpillar stops feeding within hours. Best of all, it only affects caterpillars that eat it.
Bees, ladybugs, people, and pets are not harmed. Organic gardeners have relied on Bt for decades, and it is approved for use in organic farming. You can find it at most garden centers under several brand names, often labeled for caterpillars or worms.
Using it is simple. When you spot small caterpillars, mix or shake the product as the label says and spray both the tops and undersides of the leaves. Worms often hide underneath, so do not skip that side.
Sunlight breaks Bt down within a few days, and rain washes it off, so reapply after rain as the label directs.
Timing makes a huge difference. Young caterpillars are much easier to control than big ones, so treat as soon as you notice them. Waiting until they are fat and full grown means more damage and weaker results.
In North Carolina, a sunny, warm spell in October can trigger a late wave of moths and butterflies. Keeping a bottle of Bt on the shelf means you are ready the moment new caterpillars appear.
7. Hand-Pick Worms And Check Inside Heads
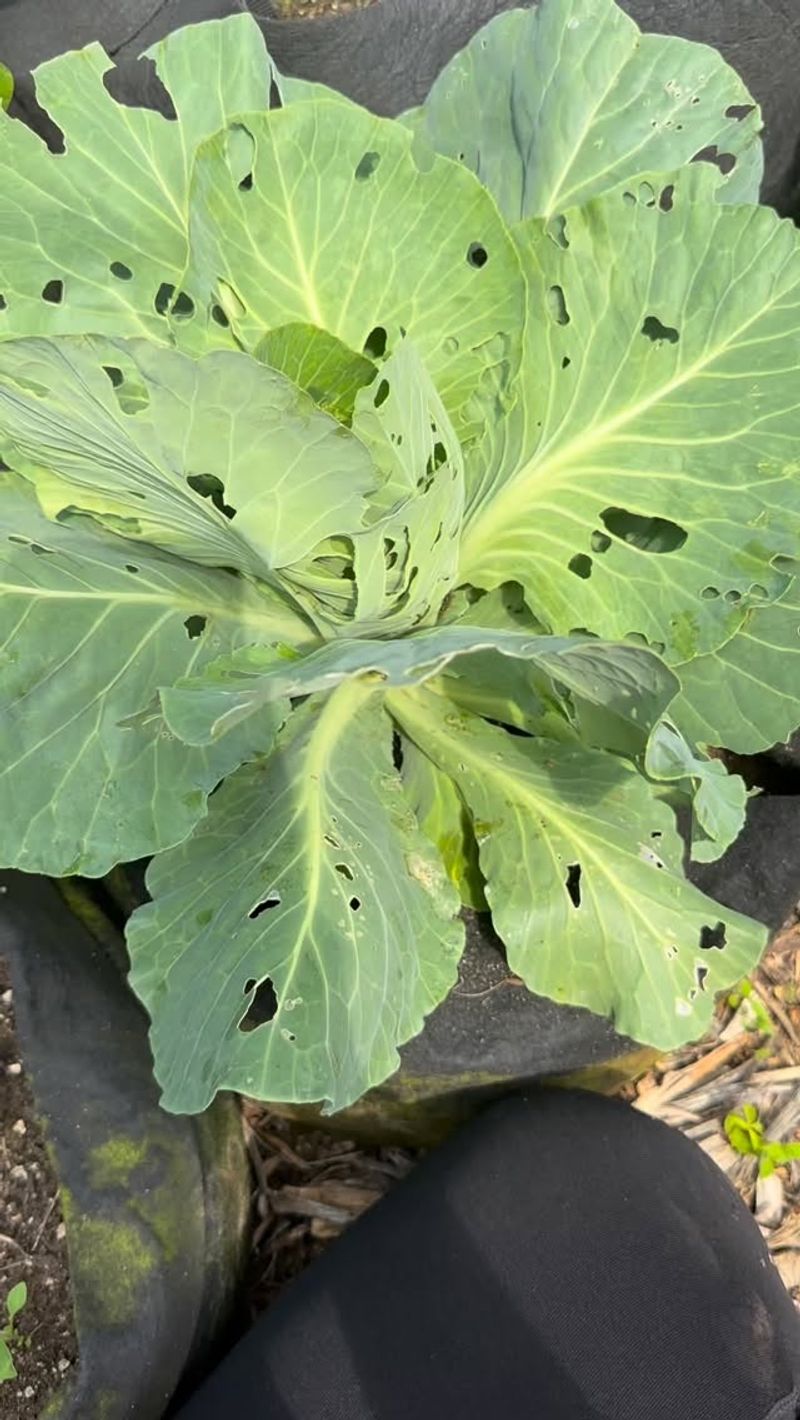
Old-fashioned hand-picking still works wonders. Grandparents across the South kept cabbage clean this way long before fancy garden products existed. All you need are sharp eyes and a jar of soapy water.
Caterpillars love to crawl toward the middle of the plant. There, the leaves are young and tender, and the forming head gives them a safe hiding spot.
They chew holes and leave dark green droppings behind, which makes the cabbage much less appealing at dinner time.
Every few days, stop by your plants and peek into the center of each one. Gently pull back the outer head leaves and look between them. Pick off any caterpillars you find and drop them into a container of soapy water.
Watch for their droppings, too, since those little specks often point right to a hidden worm. Kids usually enjoy this job, and it turns into a fun treasure hunt. It also teaches them to notice what is happening in the garden.
Once you harvest, one more trick helps. Fill a large bowl or sink with cool water and stir in a few tablespoons of salt. Soak each head for about 15 minutes.
Any caterpillars hiding deep inside will let go and float out, so you can rinse them away before cooking.
North Carolina gardeners often find a stray worm or two even in late fall cabbage. A quick salt soak means nobody gets a surprise in their coleslaw.
8. Clean Up And Rotate After Harvest
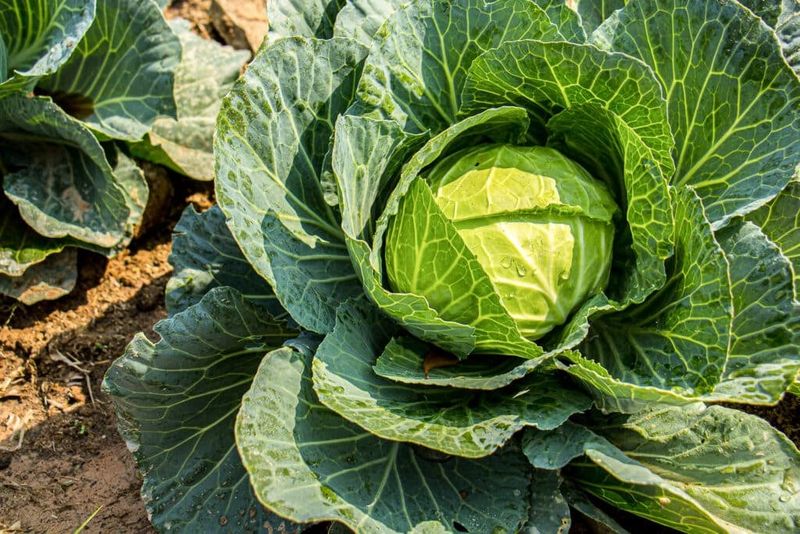
Your harvest basket is full, and the garden looks quiet. Still, the story is not over yet. What you do next can shape how many worms show up in spring.
Many of these pests spend part of their lives as pupae, which are resting stages tucked inside a small case.
They like to shelter on leftover stems, old leaves, and garden debris. Leave those scraps lying around, and you give next year’s moths a comfortable place to wait.
After harvest, pull up cabbage stumps, roots, and fallen leaves. Toss them in a hot compost pile or bag them for removal. A tidy bed offers far fewer hiding places.
Weeds matter, too. Wild radish and wild mustard belong to the same plant family as cabbage, and they feed these caterpillars just as well.
Keep them cleared from garden edges and nearby fence lines so pests have nothing to snack on between plantings.
Crop rotation adds another layer of protection. Next season, plant cabbage, broccoli, kale, and other brassicas in a different bed. Moving them around makes it harder for pests and soil diseases to build up in one spot.
Many gardeners try to wait at least two or three years before returning brassicas to the same bed.
In North Carolina, brassicas grow in both spring and fall, so pests can hop from one crop to the next with little break. A clean garden and a smart rotation plan help break that cycle and set you up for another clean harvest.