Brown Arborvitae In New York This Autumn? 9 Fall Tasks To Keep It Healthy
French explorers in 1536 reportedly survived scurvy by drinking tea brewed from a native evergreen’s needles and bark. That grateful crew nicknamed the shrub the tree of life, and the name still sticks around today.
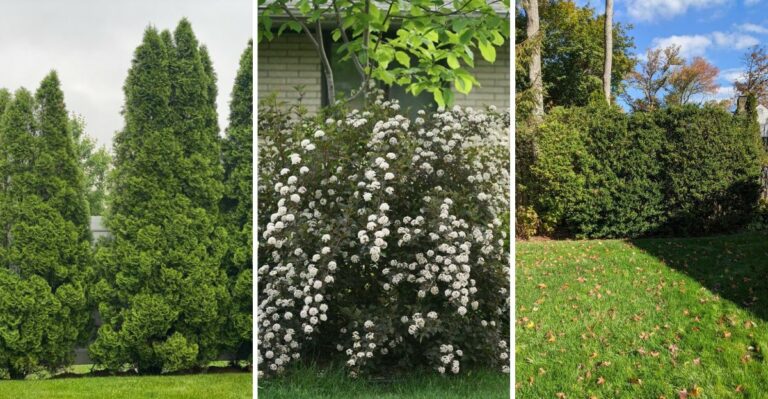
Across New York, that same tough evergreen lines countless driveways and backyards as a living privacy wall. Every autumn, though, plenty of owners spot rusty brown patches and start worrying about their green screens.
I have to admit my stomach dropped the first time I saw my hedge turn the color of cinnamon. You might notice the browning mostly hides deep inside the plant, which turns out to be a helpful clue.
Some fall browning is perfectly normal, while other spots signal real trouble heading into a long New York winter. So which kind of brown are you staring at, and what simple chores can keep your shrubs thriving?
1. Check Whether Brown Arborvitae Needles Are Inside Or At The Tips
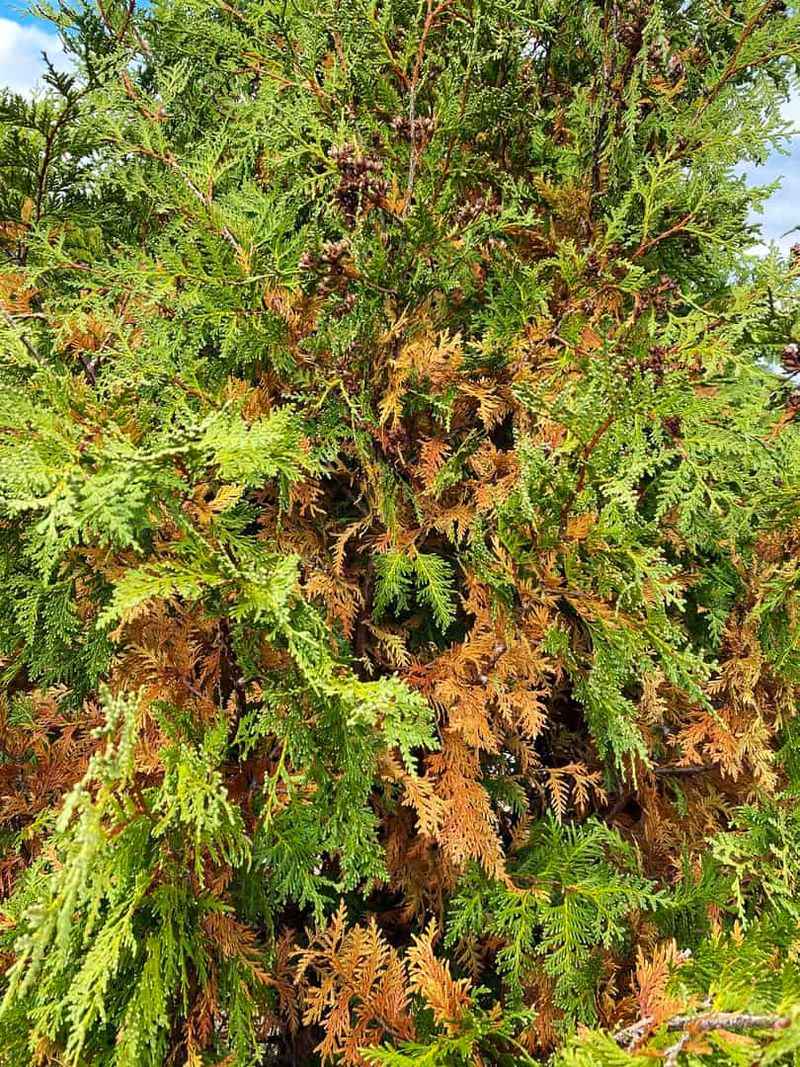
Arborvitae shed their oldest inner needles each autumn, and the browning starts deep inside near the trunk. I love how this seasonal cleanup looks scary but actually means the shrub is simply clearing out old foliage.
Those inner sprays turn yellow or rusty brown, then drop onto the mulch below during late September and October. Scientists call this normal needle drop, and it happens on pines and many other evergreens too.
Walk up to your shrub and gently part the outer branches with your hands to peek at the interior. Brown scales clustered close to the trunk, with bright green tips outside, usually mean everything is fine.
Browning on the outer tips or along one side tells a very different story worth checking more carefully. That pattern often points to drought stress, winter burn, pests, or a fungal problem like tip blight.
Personally, I snap a quick phone photo of each shrub every fall so I can compare changes next year. Those pictures help you see whether brown areas are spreading outward or staying tucked inside like they should.
Give the shrub a gentle shake, and the loose brown needles will often fall away on their own. Leave healthy green growth alone, and save your worry for brown patches that keep creeping toward the branch tips.
Old brown sprays also make a decent addition to your compost pile once you rake them out from underneath. Your shrub will look fresher afterward, and you will feel much calmer about that autumn color change.
2. Give Thirsty Arborvitae Roots A Deep Soak Before The Ground Freezes
Winter burn sneaks up on evergreens because their leaves keep losing water even when frozen soil locks moisture away. I think of a fall soaking as packing a big water bottle before a long, chilly hike.
Established arborvitae appreciate a deep watering about once a week whenever autumn rainfall runs short in your area. Young shrubs planted this year need more frequent attention, sometimes every day or two during warm, dry stretches.
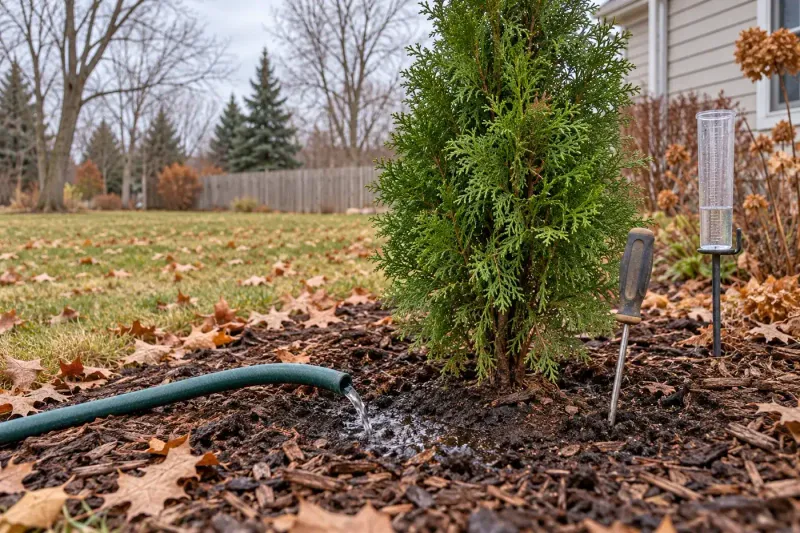
Lay a soaker hose around the drip line and let it run slowly until water reaches deep roots. A quick sprinkle from the hose mostly wets the surface and evaporates before the roots can use it.
You need to check moisture by pushing a finger or a screwdriver a few inches into the soil. Damp, cool soil means you can wait, while dry crumbly soil means it is time to water again.
Keep going until the ground freezes solid, which in parts of New York may not happen until January. Mild spells during early winter are a great chance to give thirsty shrubs one more helpful drink.
Water in the morning so the foliage dries quickly and fungal problems have less chance to settle in. Disconnect and drain your hose afterward, because a frozen hose bib makes for a very unhappy spring surprise.
Shrubs near south or west walls dry out faster, since reflected sunshine and heat pull moisture away quickly. Give those hardworking plants a little extra attention, and they usually reward you with richer green color next spring.
3. Spread A Ring Of Bark Mulch Around The Arborvitae Base
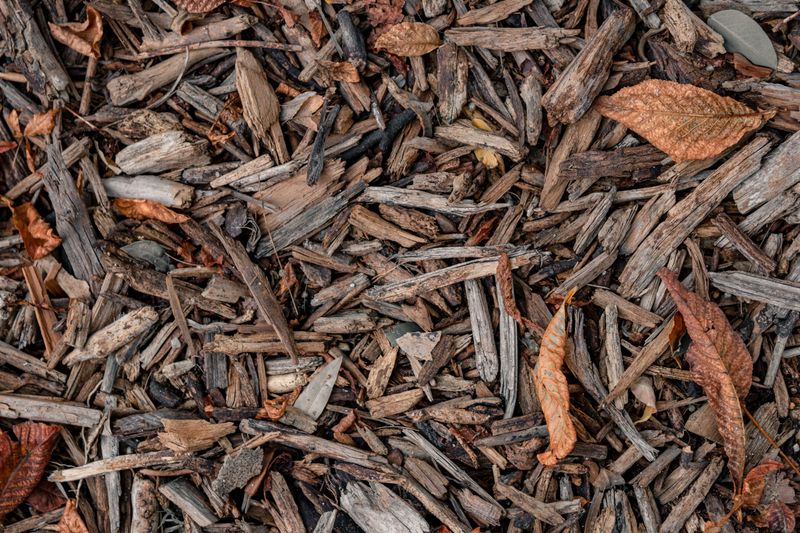
Mulch works like a cozy blanket for roots, keeping soil temperatures steadier when a cold snap suddenly rolls through. I like how a fresh layer also makes the whole planting bed look tidy and cared for.
Spread about three to four inches of shredded bark, wood chips, or compost in a wide circle around each shrub. Extending the ring toward the drip line protects more of the shallow roots that spread outward from the trunk.
Pull the mulch back four to six inches from the trunk so the bark stays dry and healthy. Piling mulch against the stem, often called a mulch volcano, invites crown rot and lets rodents hide nearby.
Voles love tunneling under thick mulch in winter, and they sometimes chew the bark at the base. Leaving that bare gap around the trunk gives those tiny nibblers fewer cozy hiding spots right next to dinner.
Refresh your mulch before the first hard freeze, since older layers break down over the summer and thin out. Rake the old material loose first, because matted mulch can block water and air from reaching the soil.
Organic mulch slowly feeds the soil as it breaks apart, which helps earthworms and other helpful soil creatures thrive. Personally, I enjoy watching a once bare bed turn into dark, crumbly earth after a few years of mulching.
Skip thick piles of fresh grass clippings here, since wet layers can mat down and start to smell sour. Shredded fall leaves from your own yard make a free option that your arborvitae roots will happily accept.
4. Shield Arborvitae With Burlap Screens Against Winter Wind
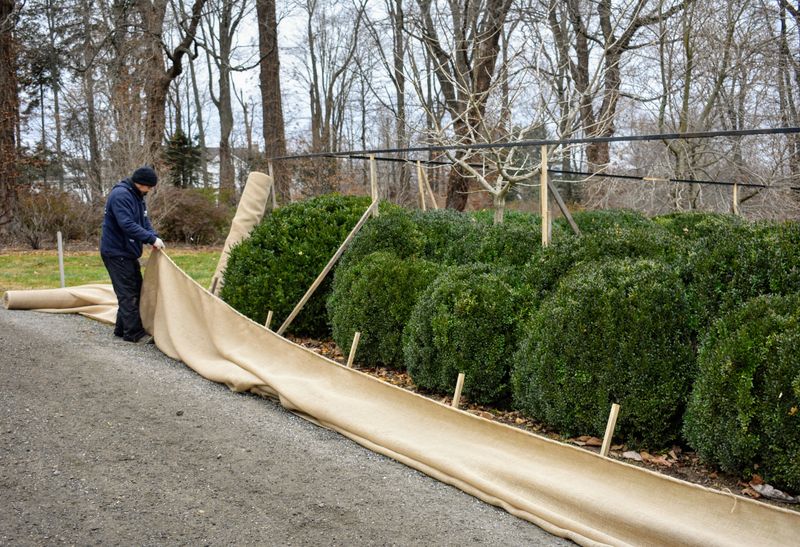
Burlap might look like an old potato sack, yet it shields evergreens from drying winter wind surprisingly well. I believe a simple screen on the windy side can spare your shrubs from those crispy brown patches.
Drive three or four wooden stakes into the ground around the plant before the soil freezes too hard. Wrap burlap around the stakes to form a loose fence, leaving space between the fabric and the foliage.
Wrapping burlap tightly against the branches can trap moisture and rub tender foliage, so keep a little breathing room. Leave the top open as well, letting light and air reach the shrub during sunny winter afternoons.
Focus on shrubs facing strong winds, road salt spray, or bright winter sun bouncing off snow and pavement. Plants in sheltered spots often get through winter fine without any wrapping, which saves you time and money.
Anti-transpirant sprays such as Wilt-Pruf form a thin waxy coating that slows water loss from the foliage. Apply them in late fall on a day when temperatures stay above freezing so the coating can dry properly.
Researchers have mixed opinions about how well these sprays work, so treat them as a backup instead of a cure. Proper watering before freeze-up still does more heavy lifting than any product you can buy at the garden center.
Remove the burlap in early spring once harsh winds calm down and temperatures begin to warm up steadily. Folded neatly and stored somewhere dry, the same burlap can protect your shrubs for several winters in a row.
5. Keep Hungry Deer Away From Your Arborvitae Hedge
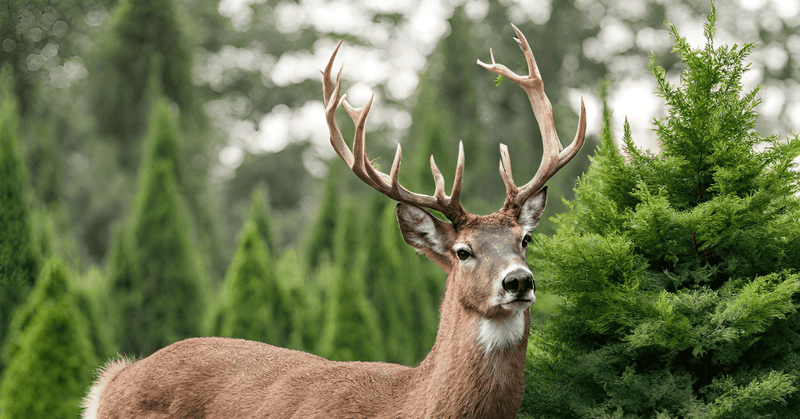
Deer treat arborvitae like a winter salad bar, and hungry herds can strip a hedge almost overnight. What surprises me most is how neatly they leave a bare line right at the height they can reach.
Damage usually peaks from late fall through early spring, when acorns and other favorite foods start running low. Across New York, deer browsing ranks among the most common reasons arborvitae look thin and brown at the bottom.
Sadly, arborvitae rarely regrow foliage on branches that deer have stripped bare, so prevention matters far more than repair. Those bald lower sections can stay that way for years, leaving an awkward gap in your privacy screen.
Fencing or sturdy deer netting works best, especially when you drape it over the shrub before browsing starts. Burlap screens do double duty here, blocking both cold wind and curious noses during the long winter months.
Repellent sprays made with egg solids or strong scents can discourage nibbling when physical barriers are not practical. Plan to reapply every four to eight weeks, plus after heavy rain or snow washes the coating away.
Switching between different repellent products helps keep deer from getting used to one smell over the winter season. You might notice tracks in fresh snow near your hedge, a handy sign that visitors are checking in.
Some homeowners replace badly browsed hedges with less tasty evergreens like spruce, which deer tend to nibble less often. Ask your local nursery which choices hold up best against deer pressure in your particular neighborhood and region.
6. Trim Only Broken Arborvitae Branches In Early Fall
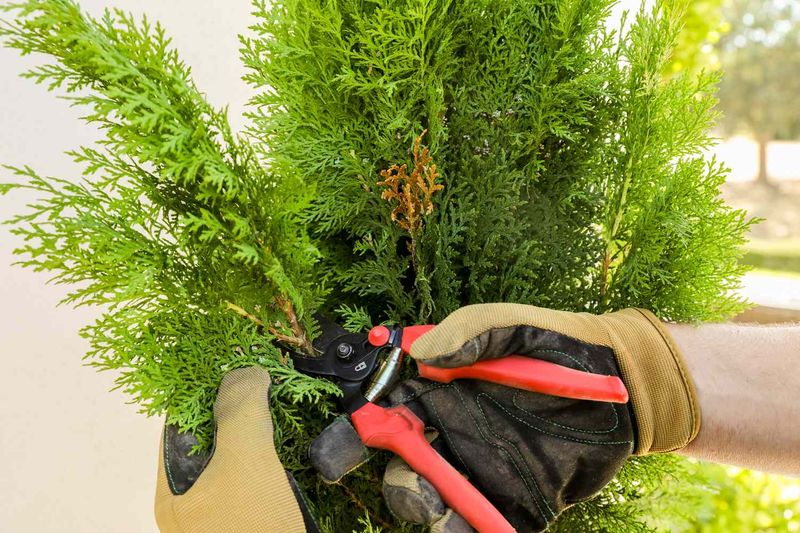
Pruners feel extra tempting in autumn, when a scraggly branch suddenly stands out against crisp blue skies. I have to admit my hands itch to tidy everything, yet arborvitae prefer a light touch this season.
Early to mid fall is fine for snipping out broken, damaged, or diseased branches that could cause bigger problems. Make clean cuts just outside the branch collar so the wound can seal properly before cold weather settles in.
Heavy shaping this late can trigger tender new growth that lacks time to harden before the first hard frosts. That soft growth often turns brown in winter, which creates exactly the kind of damage you hoped to avoid.
Save major shaping for late winter or early spring, while the shrub is still dormant and ready for new growth. Light trimming in early summer works well too, once the spring flush of fresh green growth has finished.
Arborvitae rarely sprout new foliage from old, bare wood deep inside the plant, so cutting too far leaves holes. Stay within the green, leafy portion of each branch, and your hedge will stay full and attractive for years.
Wipe your pruner blades with a household disinfectant between shrubs, especially when you are removing branches that look diseased. Sharp, clean tools make smoother cuts, and smoother cuts tend to heal faster than ragged, torn ones.
Gather the trimmings and toss them away from the planting bed, since fungal spores can linger on old branches. Your hedge may look a little patchy for now, but spring growth fills those small gaps surprisingly quickly.
7. Skip The Quick Fertilizer Boost For Fall Arborvitae
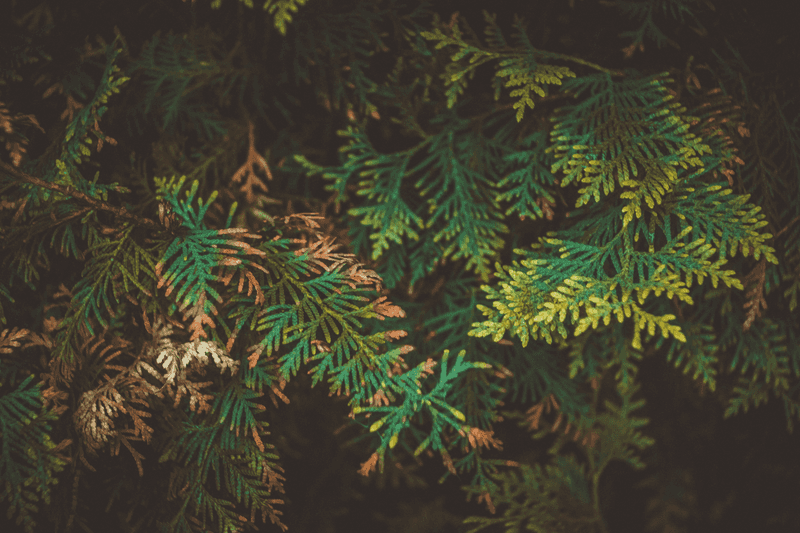
Feeding a shrub in fall sounds generous, yet the wrong fertilizer can actually set arborvitae up for winter trouble. Quick-release nitrogen pushes soft new growth that cannot toughen up before freezing temperatures arrive in the region.
Most experts suggest stopping fertilizer by late summer so shrubs can slow down and prepare for dormancy naturally. Personally, I put the fertilizer bag on a high shelf once August ends, which keeps me honest.
Some gardeners apply a balanced slow-release product in late fall after leaf drop, when top growth has stopped. Roots keep working in cool soil, so nutrients at that time mostly support root health instead of shoots.
Newly planted arborvitae may benefit from a mild root stimulator that encourages stronger roots without forcing leafy growth. Follow label directions carefully, because more product rarely means better results and can burn tender young roots.
A soil test through Cornell Cooperative Extension can show whether your yard actually needs extra nutrients at all. Many established hedges do fine without fertilizer, especially when mulch slowly breaks down and feeds the soil.
Brown foliage caused by drought or deer will not improve with fertilizer, so diagnose the real problem first. Spending a few minutes investigating saves money and keeps unnecessary nutrients from washing into nearby streams and lakes.
Early spring, just before new growth begins, is another sensible window for feeding shrubs that truly need help. Your arborvitae will put that boost to good use when warm weather and longer days return again.
8. Tie Up Arborvitae Stems Before Heavy Snow Arrives
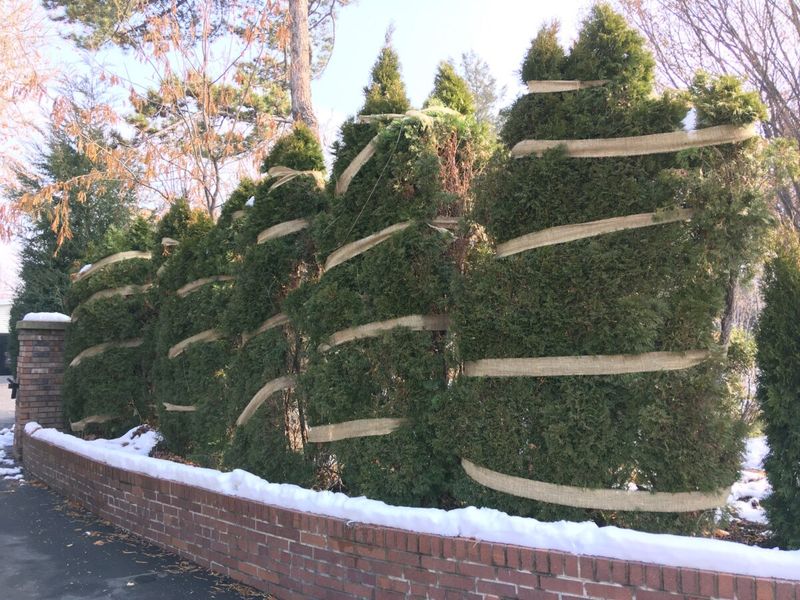
A single heavy snowstorm can split a tall arborvitae right down the middle, leaving it splayed open like a book. Columnar types like Emerald Green have narrow branch angles that catch and hold wet snow easily.
Tying the stems together in fall helps young or narrow shrubs keep their shape when wet snow piles up. Use soft twine or strips of old fabric, spiraling loosely from the bottom up toward the top.
Avoid wire or thin nylon cord, since they can cut into bark as branches move in the wind. Remember to remove the ties in spring, or they may girdle stems once growth picks up again.
After each storm, gently brush snow upward off branches with a broom so they spring back into place. Pushing downward or shaking frozen limbs can snap brittle wood, especially when a crust of ice coats everything.
Ice is trickier, and experts usually suggest letting it melt on its own instead of chipping away. You might feel helpless watching branches sag, but patience often causes far less damage than banging on them.
Pay attention to where snow slides off your roof or lands after plowing and shoveling along the driveway. Shrubs in those spots take a beating, so steer snow piles elsewhere whenever you clear paths this winter.
Heavy lake-effect snow near Buffalo and Syracuse makes this task especially valuable for gardeners in western and central New York. Even downstate yards see occasional wet nor’easters that bend branches, so a little preparation pays off nicely.
9. Inspect Arborvitae For Bagworms And Spider Mites
Bagworms disguise themselves in little cone-shaped bags made of silk and bits of foliage that hang from branches. Many people mistake them for tiny pine cones, which honestly makes them some of the sneakiest pests around.
Each bag left hanging through winter may hold hundreds of eggs from the female, ready to hatch next spring. Handpicking those bags in fall and dropping them in soapy water or the trash greatly reduces next year’s population.
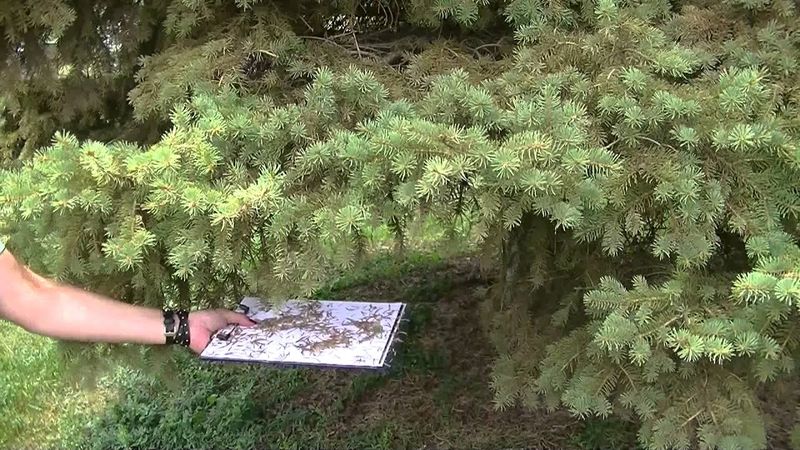
Spider mites cause a different look, leaving foliage speckled, dull, or bronze, often with fine webbing between sprays. Tap a branch over white paper, and tiny moving specks that smear reddish tell you mites are present.
Tip blight shows up as browning at branch ends, unlike the normal inner needle drop that happens each autumn. Watering at the soil instead of the foliage helps, since fungal diseases spread faster on leaves that stay wet.
Rake fallen needles and debris from beneath your shrubs, because spores can overwinter in that old plant material. I love how this small chore makes the bed look cleaner while cutting down on next year’s disease pressure.
Snap photos of anything unusual and share them with your county Cornell Cooperative Extension office for identification help. Getting the correct diagnosis first means you treat the actual problem instead of guessing and wasting effort on sprays.
A careful fall inspection takes maybe ten minutes per shrub, yet it can save a whole hedge from trouble later. Your arborvitae will greet spring looking healthier, and you will know exactly what to watch for next year.