Don’t Toss Faded Mums in Virginia: 8 Steps for a Bushier Plant Next Fall

Each autumn, plenty of potted fall bloomers land in the trash, even though many are hardy perennials in disguise. Those flowers actually open because nights grow longer, a clever timing trick that plant scientists call photoperiodism.
Growers often pinch these plants several times in summer to create the tidy domes you see at stores. Left alone, many varieties stretch taller and lankier, flopping open by October with fewer flowers to show off.
I used to drag my faded pots to the curb every November without a second thought. My garden taught me otherwise, because one forgotten plant returned the next fall twice as full.
Most of Virginia sits in hardiness zones 6 and 7, which suits these tough bloomers better than many folks realize. So why buy new plants each year when the ones on your steps might be ready for an encore?
1. Move Potted Mums Into Garden Soil Fast

Roots are the secret engine behind a mum that returns, and potted plants usually arrive with tight, crowded root balls. In my yard, the plants that went into the ground earliest consistently came back with the most enthusiasm.
Mums spend autumn energy on flowers rather than roots, since shorter days push them hard toward blooming. That means a plant set out in late October has little time to anchor itself before frost arrives.
Many extension experts suggest planting garden mums by early September for the best shot at winter survival. If your faded pots are still sitting on the porch, get them into the soil as soon as possible.
Dig a hole about twice as wide as the root ball, then gently loosen any circling roots with your fingers. Set the plant at the same depth it grew in the pot, and firm the soil around it.
Water deeply right after planting, since fresh roots need moist soil to reach outward into their new home. A slow soak with the hose works better than a quick splash from a watering can.
Spring planting offers even better odds, because mums get a full growing season to build sturdy roots. Still, giving autumn plants a chance costs nothing, and many surprise their owners with fresh green shoots.
If the ground has already frozen solid, skip planting and jump ahead to the container care tips below. Either way, your faded mum deserves a fair shot before it heads to the compost pile or curb.
2. Choose A Sunny Bed With Six Hours Of Light

Mums are serious sun lovers, and a shady corner turns them into stretched, sparse plants with few buds. I learned that lesson the hard way when one tucked beside my maple flopped over by September.
Aim for at least six hours of direct sunlight each day, with morning sun being especially helpful. Morning light dries dew from the leaves quickly, which helps reduce problems like powdery mildew and leaf spot.
Autumn can trick you, since bare branches let in plenty of light that disappears once trees leaf out. A spot that seems bright in November might sit in deep shade by June, right when growth matters most.
Think about where the summer sun travels across your yard before picking a final location for your plant. South-facing beds and open borders away from large trees usually give mums the steady light they crave.
Soil matters here too, because mums strongly dislike soggy ground, especially during the cold, wet winter months. Pick a well-drained bed, or mix in compost to loosen heavy clay that holds water around the roots.
Much of the Piedmont region in Virginia has red clay, so raised beds can be a smart choice. Even a slight mound of improved soil can lift the crown above puddles that form after heavy rain.
Good sun and good drainage work as a team, giving your mum the energy it needs for next fall. Pick the spot wisely now, and the plant will repay you with stronger stems and more buds.
3. Leave Brown Mum Stems Standing Through Winter

Those crispy brown stems might look messy, but they quietly work as a winter shelter for your mum. Funny thing is, the plants I ignored last winter came back stronger than the ones I neatly trimmed.
Old stems catch fallen leaves and drifting snow, which builds a natural blanket over the crown below. University of Minnesota research found that mums left unpruned over winter survived better than those cut back in fall.
Wait until a hard frost browns the foliage before you even consider trimming anything off the plant. Cutting too early can spark tender new growth that struggles once freezing nights return later in the season.
If the tangled look bothers you, snip only the faded flower heads and leave the stems in place. Some gardeners trim stems to four to six inches tall, which still offers a bit of protection.
Once spring arrives and fresh green shoots appear at the base, cut the old stems down to the ground. Clean, sharp pruners make this spring job quick and help prevent ragged cuts that can invite disease.
Toss the old stems in the trash if your plants had leaf spots or mildew during the summer. Healthy stems can head straight to the compost pile, where they break down into rich soil over time.
A little winter untidiness is a small price to pay for a mum that bounces back with vigor. Your neighbors might raise an eyebrow, but they will be asking your secret come next October.
4. Tuck Pine Straw Mulch Around The Mum Crown

Winter in much of the state swings between frosty mornings and mild afternoons, and that seesaw can harm shallow roots. Repeated freezing and thawing can push mum roots right out of the soil, a problem gardeners call heaving.
A loose layer of mulch acts like a cozy quilt, keeping soil temperatures steadier through the cold months. In my garden, pine straw has become my favorite choice because it stays airy and rarely mats down.
Spread about three to four inches of mulch over and around the crown after the ground gets cold. Waiting until the soil chills helps discourage voles and mice from moving into a warm, comfy winter hideout.
Shredded leaves and shredded hardwood also work nicely, as long as the layer stays fluffy instead of soggy. Whole wet leaves can form a heavy mat, which traps moisture and may lead to crown rot.
Many of us already rake plenty of leaves each fall, so running them over with a mower is handy. Chopped leaves settle into a light blanket that breaks down slowly and feeds the soil by spring.
Pull the mulch back gently in early spring once the worst cold has passed and new shoots peek up. Leaving it piled too long can keep the crown damp and slow down the fresh growth you want.
Keep the pulled mulch nearby, because a surprise late frost might call for a quick cover again. That small bit of planning has saved my early shoots more than once during chilly April nights.
5. Water Mums Deeply Before The Ground Freezes

Thirsty roots in winter sound strange, yet dry soil is one of the sneaky reasons mums fail to return. Mums have shallow, fibrous roots that can dry out quickly, even when the air feels cool and damp.
Keep watering your planted mums regularly through fall until the first hard frost settles in for good. A deep drink once or twice a week usually beats daily sprinkles that only wet the surface.
Push a finger into the soil about two inches deep to check moisture before you reach for the hose. If it feels dry at that depth, give the plant a slow soak right at the base.
Dry autumn spells do happen here, and I have seen my mum beds turn dusty during a rainless October. Those are the weeks when a little extra watering makes the biggest difference for winter survival.
Once plants go dormant, cut back on water, since soggy cold soil can cause roots to rot. During long dry stretches in winter, a light drink on a mild afternoon can still help a lot.
Water in the morning or early afternoon so moisture soaks in before nighttime temperatures drop below freezing. Aim the stream at the soil rather than the foliage to keep leaves dry and fungus away.
Moist soil actually holds heat better than dry soil, which gives roots a small but useful buffer. It is one of those quiet garden facts that makes a simple chore feel surprisingly clever.
6. Shelter Potted Mums In An Unheated Garage

A plastic nursery pot offers far less protection than garden soil, so container mums face colder roots in winter. Roots in a pot sit exposed on every side, while roots in the ground enjoy the earth’s insulation.
After frost browns the foliage, trim the stems back to a few inches above the soil line. Then move the pot into a cool, dark spot like an unheated garage or a chilly basement.
The goal is a dormant rest, with temperatures staying cold but mostly above freezing all winter long. Warm rooms inside the house confuse the plant and encourage weak, pale growth that struggles later.
Water sparingly, perhaps once a month, just enough to keep the soil from turning bone dry. An old sheet draped over the pot can add a bit of extra protection during the coldest weeks.
Without a garage, you can sink the whole pot into a garden bed up to its rim for winter. Surrounding soil and a layer of mulch then shield the roots much like an in-ground plant.
Bring stored pots back outside gradually in early spring, once the hardest freezes are behind you. A few days in shade before full sun helps the fresh shoots adjust without getting scorched.
Honestly, my first garage experiment felt silly, yet that humble pot sprouted green tips by late March. Seeing those tiny leaves felt like getting a thank you note from a plant I nearly threw away.
7. Pinch Spring Mum Shoots For Extra Branches
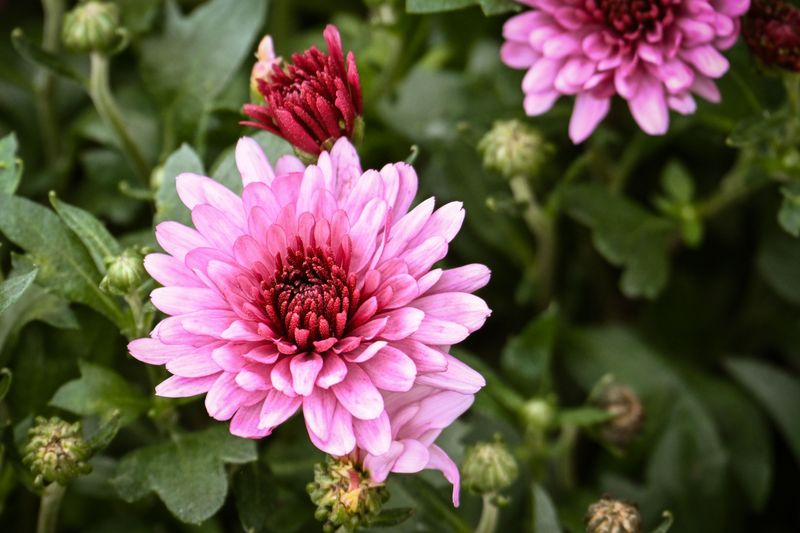
Your thumb and forefinger are the best tools for building a mum that looks like a store-bought dome. Pinching sounds fussy, but it takes only a few seconds and changes the overall shape of the plant.
Start when new spring shoots reach about five to six inches tall, usually sometime in May. Simply nip off the top inch or so of each stem, right above a set of leaves.
Removing that tip shifts a plant hormone called auxin, which normally keeps side buds from waking up. Once the tip is gone, two or more side shoots usually sprout below the spot you pinched.
More stems mean more flower buds later, which is how pinched mums end up covered in color. Unpinched plants often grow tall and floppy, with blooms clustered on top like a messy hat.
In my own beds, I carry a small bucket while pinching, because the soft tips pile up fast. Some of those cuttings can even root in moist potting mix, giving you bonus plants for free.
Clean fingers or small snips both work, though fingers let you feel exactly where the tender growth ends. Try to pinch every stem, including short ones at the sides, so the plant fills out evenly.
The first pinch can feel brave, since you are removing healthy growth on purpose from a happy plant. Trust the process, and you will notice a thicker, leafier plant within just a couple of weeks.
8. Snip Spent Mum Flowers To Tidy The Plant
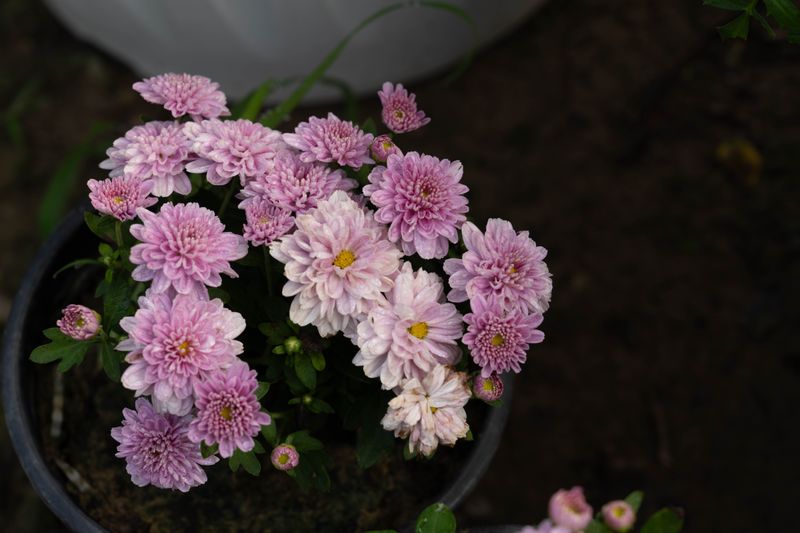
Spent mum blossoms turn brown and crispy fast, and a quick trim makes a plant look fresh again. What surprised me most is how much brighter a mum looks once the brown blooms are gone.
Most garden mums bloom once each fall, so snipping old flowers will not trigger a second big flush. It can, however, help late buds stand out and keep the whole display looking tidy for a little longer.
Removing soggy, faded petals also cuts down on places where gray mold and other fungi like to grow. Damp autumn weather in Virginia can make botrytis a real nuisance on tightly packed flower heads.
Use small, clean snips to cut each faded bloom back to the next healthy bud or leaf. Wiping the blades with a disinfecting wipe between plants helps keep any lurking disease from spreading around.
Once every flower has faded, you can stop snipping and let the stems stand for winter shelter. That lines up nicely with the earlier advice about leaving the plant upright until fresh spring growth appears.
I find this chore oddly relaxing on a crisp afternoon, especially with a warm mug of cocoa nearby. Every snip feels like a small promise that this plant has another season of color ahead.
So before you haul those faded pots to the curb, give them a trim and a second look. With a little care through the seasons, next fall’s mum could be the bushiest one on your street.