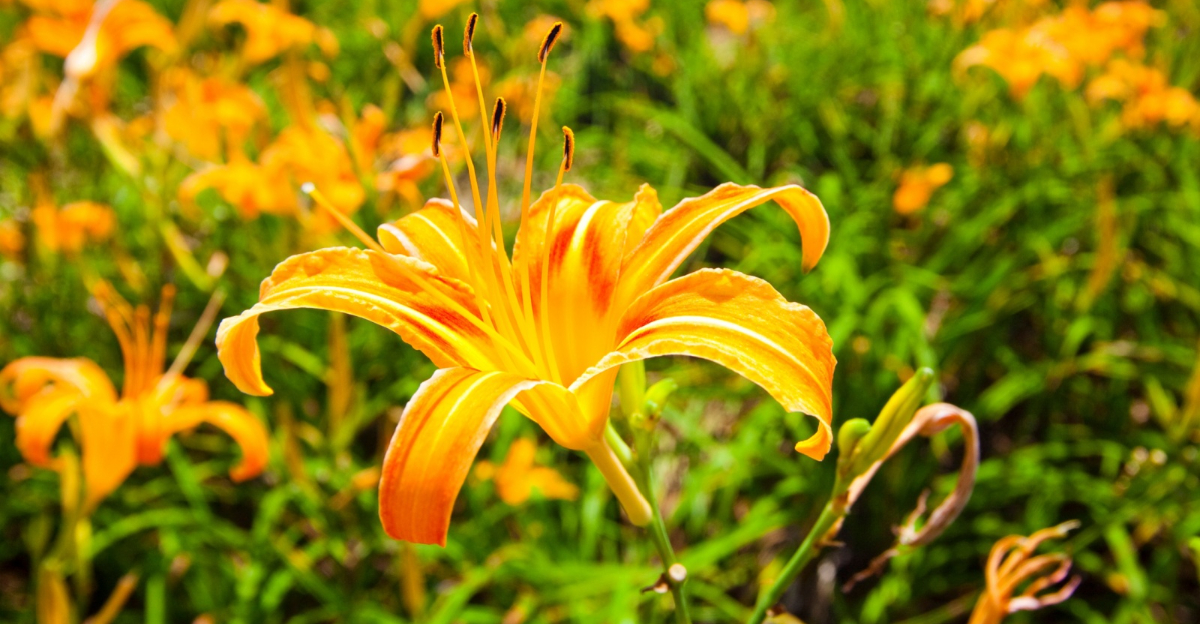
Get A Fuller Daylily Second Flush This Summer In Minnesota With These 10 Proven Steps
Spent stalks, stripped blooms, a garden gone completely quiet where color used to reign. That feeling after a daylily’s peak bloom stings a little.
Every Minnesota gardener feels it. One slow walk through the yard, eyes drifting across exhausted stems, and a single thought landed with surprising force: what if this is not actually over?
What if the garden is not finished at all, just quietly gathering itself for another show? That question rewired how I tend my beds here in Minnesota.
For reblooming daylily varieties, a second flush is not folklore or a lucky accident. It is a biological response that the right care routine can reliably trigger.
Minnesota summers still carry enough heat and light to fuel another wave of blooms, and a handful of proven steps can trigger exactly that.
Your daylilies are already holding their next performance. All they need is the right cue from you.
1. Snap Off Spent Flowers Daily

Removing sounds like a chore, but it is honestly one of the most satisfying things you can do in the garden. Pinching off a spent bloom takes about two seconds per flower.
When you leave old flowers on the plant, the daylily shifts its energy toward making seeds. That means less energy goes toward producing new buds for a second flush.
Walk through your garden every morning with a small basket or bag. Pull off any flower that looks shriveled, brown, or past its prime.
You do not need scissors for this step. A firm pinch right at the base of the spent bloom is enough to snap it clean.
This is also a great task to share with younger helpers in the garden, since it requires no tools and delivers instant results. Make it a morning ritual and your daylilies will respond quickly.
Within a week of consistent removing, you may notice new buds forming on scapes that looked finished. That fresh pop of color is your reward for showing up daily.
2. Remove Seed Pods Immediately

A seed pod is sneaky. It forms quietly right where the flower was, and if you blink, the plant is already putting all its fuel into growing that pod.
Daylilies are biologically wired to prioritize seed production over blooming. Without intervention, that instinct wins every time.
Check each scape carefully after a bloom drops. Look for a small, swollen green bump forming at the tip of the stem.
Pinch or snip that bump off right away. Do not wait until tomorrow because the pod grows fast in summer heat.
Removing seed pods is not just about looks. It is a direct signal to the plant that its job is not done yet.
Without a seed pod to nurture, the daylily redirects its energy back into root strength and bud production. That redirect is exactly what powers a strong second flush of blooms.
Stay consistent with this habit for two weeks and the difference in bud production can be noticeable, especially in established reblooming varieties.
Your Minnesota Garden Changes Every Week. Your Plan Should Too.
Gardening in Minnesota changes quickly throughout the season. Every Friday you’ll receive a simple weekly plan showing exactly what to plant, prune, fertilize, harvest, and protect so you never miss the right timing.
3. Cut Finished Scapes To The Ground

Once every single bud on a scape has bloomed and finished, that scape is done for the season. Leaving it standing is like keeping a burned-out candle on the table.
Cut the whole scape down to the ground using clean, sharp pruners. A clean cut heals faster and reduces the chance of disease sneaking in.
This step does two things at once. First, it tidies up the garden so it looks fresh and intentional.
Second, it pushes the plant to focus on any remaining scapes that still have buds. Some gardeners skip this step because they think the scape might rebloom. It will not. Each scape only blooms once per season.
Removing finished scapes also improves air circulation around the plant. Better airflow means healthier foliage and a lower risk of fungal problems.
Do this every few days as scapes finish up. By keeping the plant tidy, you are creating the best possible conditions for a daylily second flush to emerge strong and full.
4. Fertilize After The First Bloom Flush

After the first big wave of blooms fades, your daylilies are tired. They just put on a huge show and now they need a little fuel to go again.
A balanced fertilizer with equal parts nitrogen, phosphorus, and potassium works well here. Look for something labeled 10-10-10 at your local garden center.
Apply the fertilizer around the base of the plant, not directly on the leaves or crown. Water it in right away so the nutrients reach the roots quickly.
Timing matters a lot with this step. Feed your plants within a week of the first bloom flush ending for the best results.
Too much nitrogen can push leafy green growth instead of flowers. Stick to a balanced formula and follow the label directions so you do not overdo it.
Liquid fertilizers work faster than granular ones if you want quicker results. Either option will give your plants the energy boost they need to power a second flush of beautiful blooms this summer.
5. Water 1 Inch Per Week

Daylilies are tough plants, but even tough plants get thirsty. Consistent moisture is one of the most overlooked keys to a strong rebloom season.
Aim for about one inch of water per week, whether that comes from rain or your garden hose. Stick a rain gauge in your garden bed to track what nature provides.
Water deeply at the base of the plant rather than sprinkling from above. Wet foliage can invite fungal problems, and the roots are where moisture does the most good.
Morning watering is ideal. The soil absorbs the moisture before the afternoon heat can evaporate it away.
During a heat wave, your daylilies may need a little extra. If the soil feels dry two inches down, go ahead and water even if it has not been a full week.
Drought stress causes buds to abort before they even open. Keeping moisture steady through summer is one of the simplest ways to protect your daylily second flush and get every last bud to open beautifully.
6. Trim Yellowing Leaves Promptly

Yellow leaves on a daylily are worth a closer look. Lower leaves naturally yellow with age, but widespread or sudden yellowing can point to overwatering, poor drainage, or a nutrient gap worth addressing.
Grab a pair of clean scissors and snip the yellow leaves off close to the base. Do not pull them because that can disturb the roots.
Removing yellow foliage improves airflow around the plant. Good airflow is a natural defense against fungal diseases that love warm, humid summers.
After trimming, take a look at your watering habits. Too much moisture in heavy clay soil is a common reason leaves turn yellow in mid-summer.
A fresh, tidy plant also puts its energy where you want it: into roots and new buds. Keeping the foliage clean and healthy gives your daylilies the best shot at producing a lush second flush before the season winds down.
7. Refresh Mulch Around The Base

Mulch is like a cozy blanket for your plant roots. It holds in moisture, keeps the soil cool, and slows down weeds that compete for nutrients.
After the first bloom flush, pull back any old mulch and check the soil beneath it. Old mulch can get compacted and stop water from reaching the roots properly.
Add a fresh two to three inch layer of wood chips, shredded bark, or straw around the base of each clump. Keep the mulch a few inches away from the crown to prevent rot.
Fresh mulch also gives your garden a neat, finished look that makes the whole yard feel more intentional. A clean, well-mulched bed also makes it easier to spot pest activity or disease early.
In the heat of July and August, soil temperatures can soar. Mulch acts as insulation, keeping roots cool enough to keep working hard on new bud development.
Refreshing your mulch mid-season is a small effort with a big payoff. It supports steady moisture, healthy roots, and the strong energy reserves your daylilies need for a full second flush of color.
8. Check Regularly For Daylily Rust

Daylily rust is a fungal disease that spreads fast in warm, humid weather. If you have never seen it before, look for orange or yellow streaks and powdery spots on the leaves.
The disease travels on wind and water, so it can jump from plant to plant quickly. Catching it early makes a huge difference in how well your garden recovers.
Check the undersides of leaves too, not just the tops. Rust often starts on the bottom of the leaf before it becomes visible from above.
Remove any infected leaves immediately and bag them up for the trash. Do not toss them in your compost pile or the spores can spread.
A copper-based fungicide or neem oil spray can help slow the spread if you catch it in time. Follow the label instructions carefully and reapply after rain.
Healthy, well-watered plants with good airflow are more resistant to rust. Staying on top of inspections is one of the best ways to protect your daylily second flush and keep your garden looking its best all summer long
9. Divide Clumps Every 3 To 5 Years

Crowded daylilies are unhappy daylilies. When a clump gets too big, the plants compete with each other for water, nutrients, and light.
That competition leads to fewer blooms and smaller flowers over time. Dividing your clumps every three to five years resets the clock and restores their blooming power.
Late summer, early fall, and early spring are all reliable windows for division. In warmer climates, early spring tends to give new divisions more time to establish before summer heat arrives.
Use a sharp garden fork to lift the whole clump out of the ground. Shake off the loose soil and look for natural separation points between fans of leaves.
Pull or cut the clump into sections, each with at least three to five fans. Replant the divisions at the same depth they were growing before.
Water the new sections well and keep them moist for the first few weeks. Freshly divided plants come back with renewed energy, producing more scapes and a far more impressive daylily second flush than an overcrowded clump ever could.
10. Stop Fertilizing By Mid-August

Fertilizing feels like a good idea all season long, but there is a point where it works against you. Pushing new growth too late in summer can hurt your plants come fall.
Tender new growth stimulated by late fertilizing is vulnerable to frost damage. The plant needs time to slow down and harden off before cooler nights arrive.
As a general guideline, aim to stop fertilizing around mid-August in most climates. Gardeners in warmer southern zones may have a slightly longer window, but stopping at least six weeks before the first expected frost is a reliable rule of thumb.
After that date, let the plant start its natural wind-down process. The energy it stores in its roots now will fuel next year’s first big bloom flush.
Stopping fertilizer does not mean stopping care. Keep removing, watering, and checking for pests right through the end of the season.
Think of mid-August as the finish line for feeding and the starting line for resting. Respect that boundary, and your daylilies will come back next year stronger and ready to bloom again.