How North Carolina Gardeners Grow Mint Easily In Plastic Bottles At Home
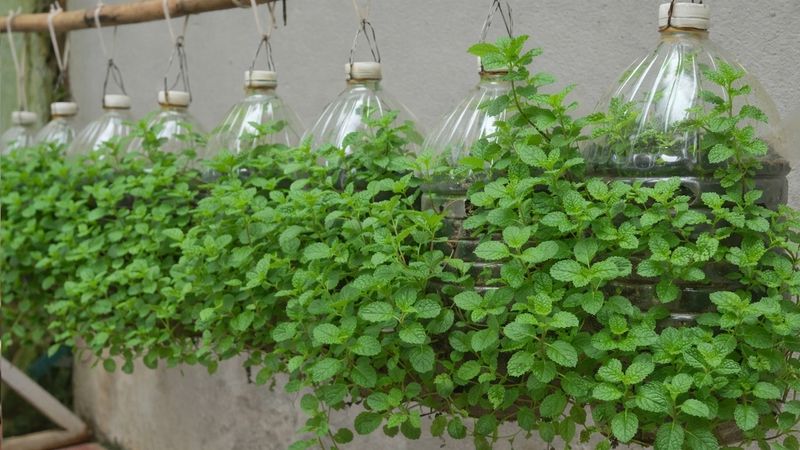
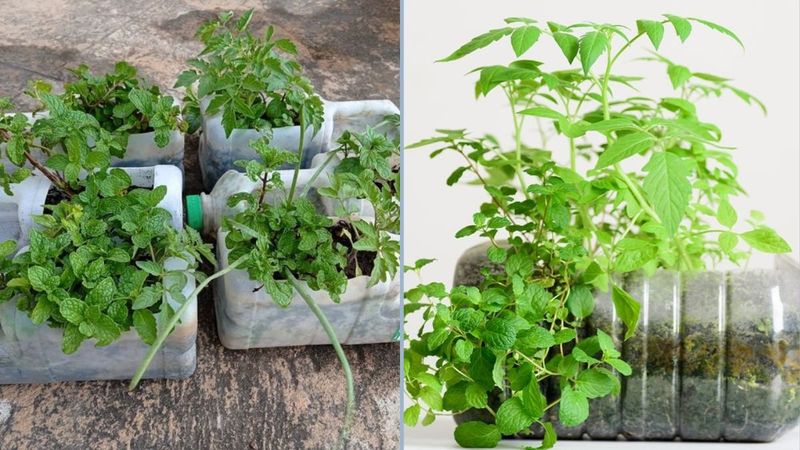
Growing mint in plastic bottles is one of the easiest and most space-saving ways to enjoy this fragrant herb at home, especially in North Carolina’s climate.
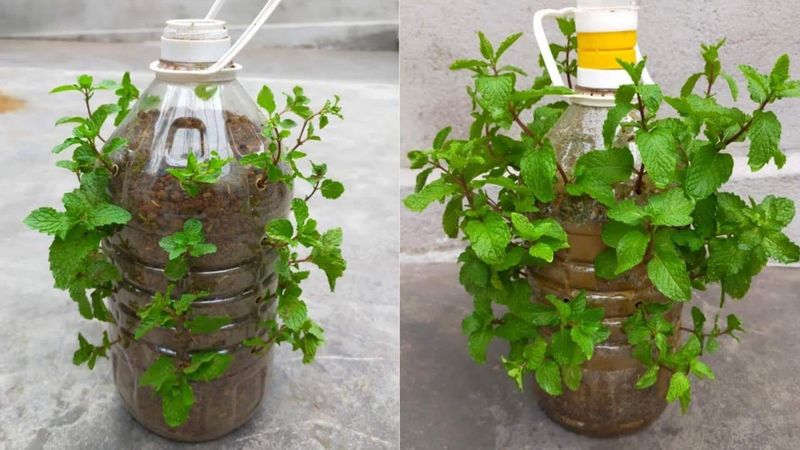
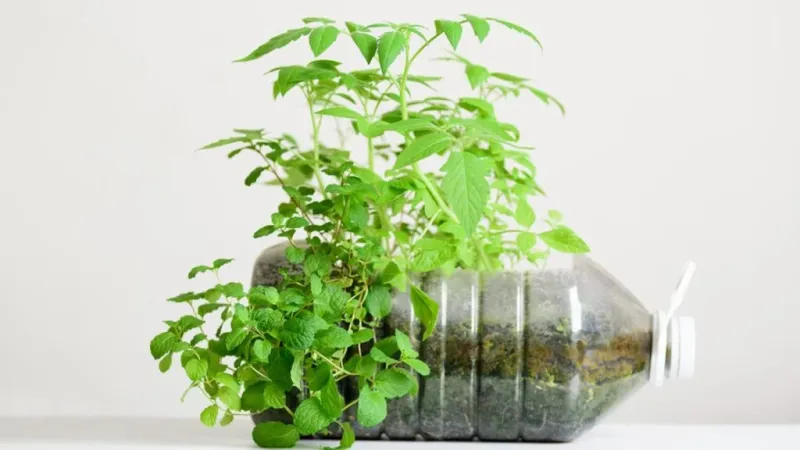
Mint can spread fast and take over a garden if not kept in check, but growing it in a plastic bottle container helps control its growth while still allowing it to thrive.
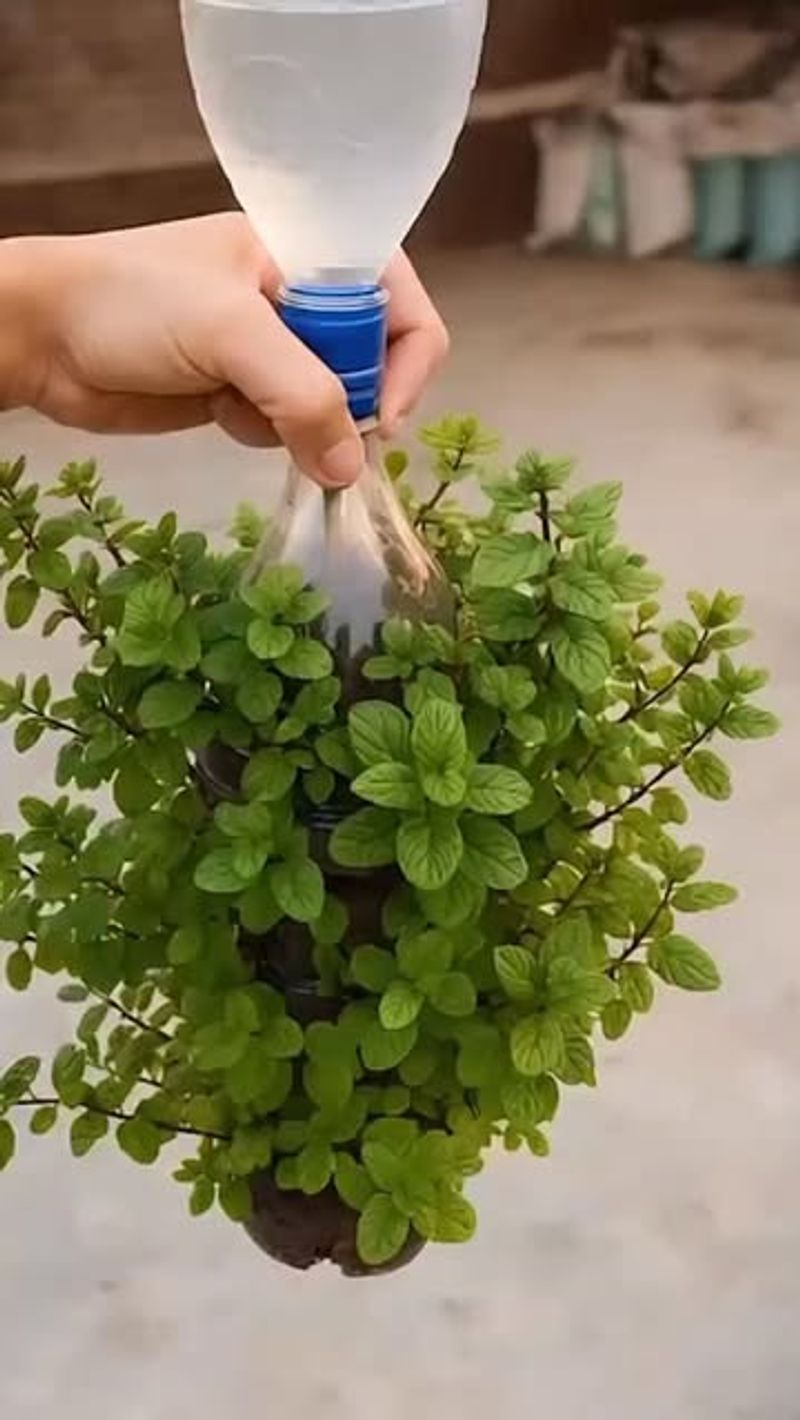
To get started, simply cut the top off a plastic bottle, leaving enough space to create drainage holes at the bottom. Fill the bottle with well-draining soil and plant your mint cutting or young plant inside.
Make sure the container is in a spot with partial sunlight—mint prefers some shade during the hotter parts of the day. Water regularly, but avoid overwatering, as mint prefers moist soil without getting too soggy.
This simple method keeps mint under control, allows it to grow well, and makes it easy to harvest right from your own backyard or porch!
1. Choose A Healthy Mint Cutting Or Small Plant
Mint is one of those herbs that practically wants to grow for you. Choosing the right starting point makes the whole process much easier and more enjoyable.
North Carolina gardeners are lucky because the warm climate here encourages mint to root and spread faster than in cooler regions.
You can start with a small nursery plant from your local garden center, or snip a fresh cutting from a neighbor’s established mint. A healthy cutting should be about four to six inches long, with several bright green leaves at the top.
Remove the lower leaves so only the leafless stem will sit in water or soil.
Mint varieties like spearmint and peppermint both root easily and thrive in North Carolina’s climate. Place your cutting in a glass of clean water near a sunny window and watch roots appear within seven to fourteen days.
Once those roots are about an inch long, your cutting is ready to move into a bottle planter. Starting with a strong, healthy cutting gives your mint plant the best foundation. Avoid stems that look wilted, yellowed, or damaged, since those will struggle to root properly.
A vigorous, green stem full of life is your best bet for growing a lush, productive mint plant right at home.
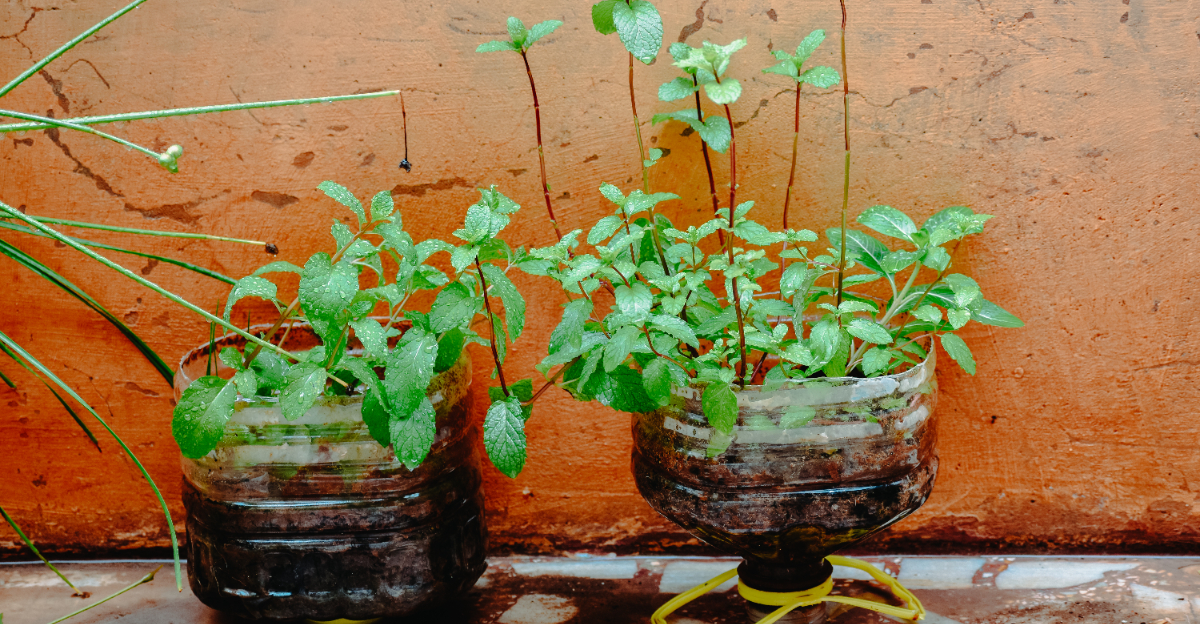
2. Prepare A Clean Plastic Bottle Planter
Recycling a plastic bottle into a planter is both smart and satisfying. Before anything else, rinse the bottle thoroughly with warm water to remove any leftover residue.
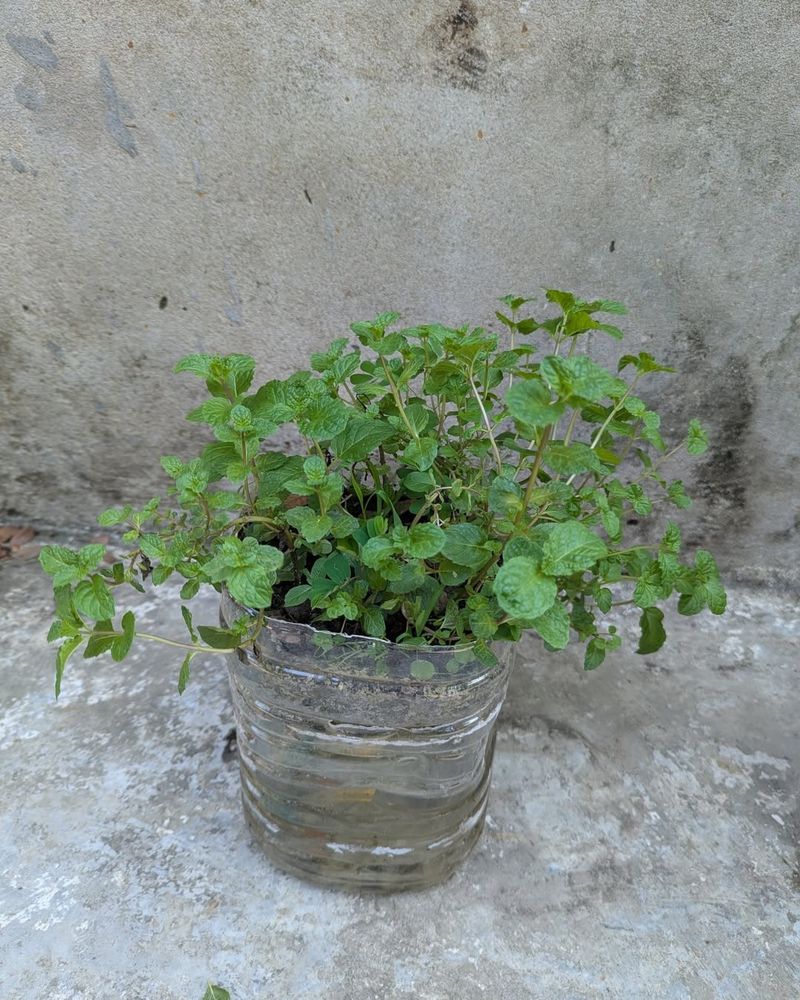
A one-liter or two-liter bottle works perfectly for growing a single mint plant at home.
Grab a pair of scissors or a sharp craft knife and cut a wide rectangular opening along the side of the bottle. This opening becomes the top of your mini planter where you will add soil and plant your mint.
Leave the bottom and the opposite side of the bottle fully intact so it holds everything securely in place.
Drainage is one of the most important parts of this whole setup. Use a pen, nail, or skewer to poke four to six small holes across the very bottom of the bottle. These holes let extra water drain out freely, which keeps the roots from sitting in soggy soil.
Your North Carolina Garden Changes Every Week. Your Plan Should Too.
Gardening in North Carolina changes quickly throughout the season. Every Friday you’ll receive a simple weekly plan showing exactly what to plant, prune, fertilize, harvest, and protect so you never miss the right timing.
North Carolina summers can bring heavy watering needs, and without proper drainage, mint roots can suffer quickly. You can also poke a couple of small holes along the lower sides for extra airflow.
Once your bottle is clean, shaped, and ready with drainage holes, you have a fully functional planter that cost you absolutely nothing. Simple, eco-friendly, and surprisingly effective for growing fresh mint at home.
3. Add A Well Draining Potting Mix
Soil quality matters more than most beginners expect, especially when growing mint inside a small container. Mint roots need room to breathe, and heavy or compacted soil slows growth significantly.
A light, well-draining potting mix gives the roots the oxygen and moisture balance they need to thrive.
Pick up a standard all-purpose potting mix from any North Carolina garden center. Avoid using plain garden soil from your yard because it tends to compact tightly inside small containers, blocking drainage and airflow.
Some gardeners like to mix in a small handful of perlite or coarse sand to make the potting mix even lighter and better draining.
Fill the bottle planter about two thirds full with your potting mix before planting. Leave enough space at the top so you can easily water without soil spilling out. Press the soil down gently just once to remove large air pockets, but do not pack it tightly.
A loose, airy potting mix also warms up quickly in North Carolina’s spring sunshine, which encourages faster root growth and new leaf development.
Good soil is the foundation of a healthy mint plant, and investing a few minutes getting this step right pays off with weeks of lush, fragrant growth.
Fresh, quality potting mix makes a noticeable difference from the very first week of growing.
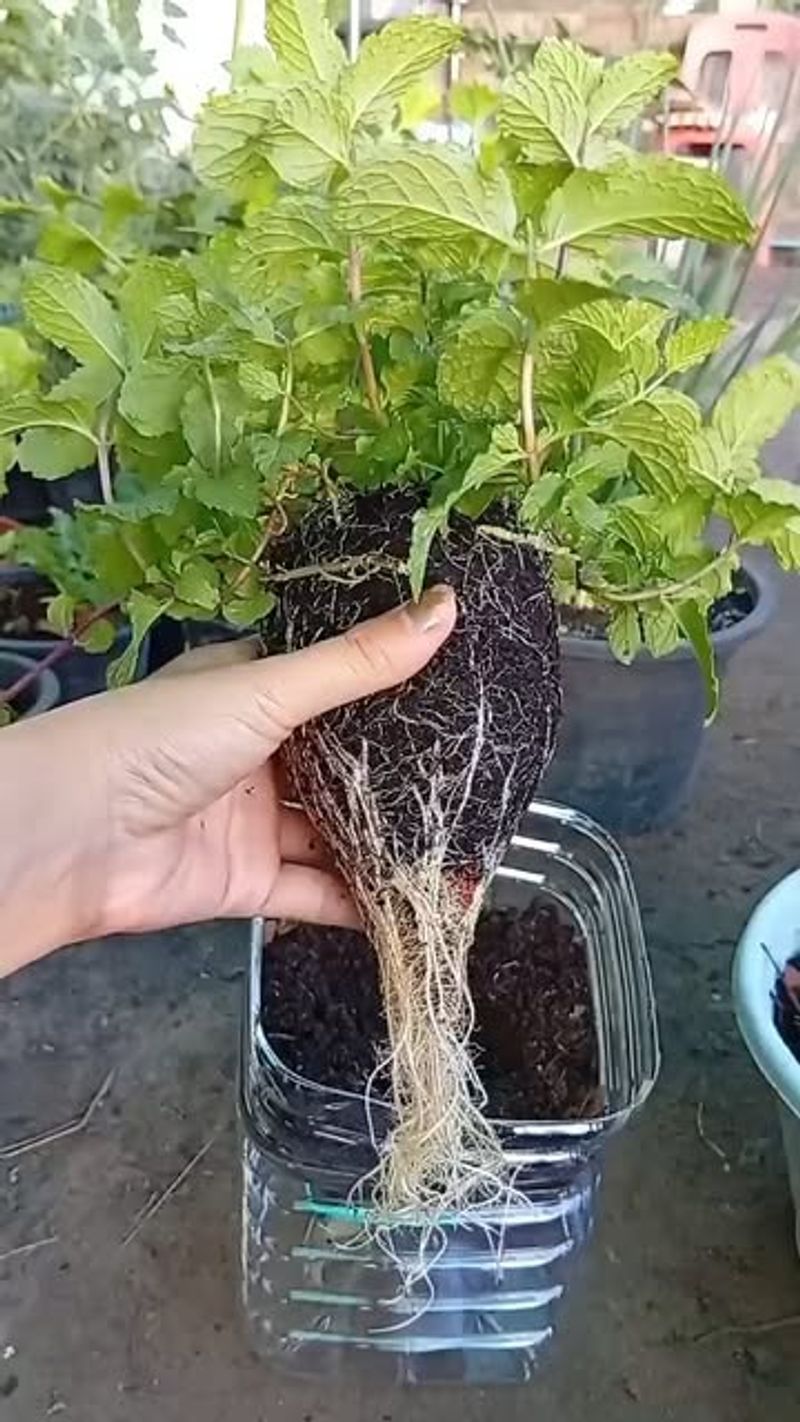
4. Plant The Mint Gently In The Bottle
Planting day is genuinely exciting because this is where everything comes together. Once your cutting has developed strong roots or your nursery plant is ready, it is time to settle it into its new bottle home.
Handle the roots carefully because young mint roots are tender and break easily under rough handling.
Use your finger or a pencil to make a small hole in the center of the potting mix, deep enough to fit the roots comfortably without bending them. Lower the mint gently into the hole, spreading the roots slightly downward and outward if possible.
This helps the plant anchor itself and access moisture from all directions.
Once the roots are in place, scoop soil back around the base of the plant and press it down lightly with your fingertips. The goal is to eliminate air gaps around the roots while keeping the soil loose enough for good drainage.
The base of the stem should sit just at or slightly below the soil surface.
Give the bottle a gentle shake to help the soil settle naturally around the roots. North Carolina gardeners often plant mint in spring when temperatures are mild, making it easier for the plant to adjust to its new container.
Water lightly right after planting to help the soil make good contact with the roots and give your mint the best possible start in its new home.
5. Place The Bottle In Bright Indirect Sunlight

Mint loves light, but it has a limit. Too much harsh afternoon sun can scorch the leaves and stress the plant, especially during North Carolina’s hot summer months.
Finding the right light spot is one of the easiest ways to keep your bottle-grown mint looking full and vibrant all season long.
A spot that receives four to six hours of bright, indirect sunlight each day is ideal. East-facing or north-facing windows inside your home work beautifully for mint.
On a covered patio or balcony, a spot that gets morning sun and afternoon shade is practically perfect for keeping the plant happy and productive.
North Carolina gardeners growing mint on kitchen windowsills often find that the plant thrives with just the natural light coming through glass. If the leaves start to look pale or stretched out, move the bottle a little closer to the light source.
If the edges look scorched or dried out, shift it back slightly to reduce direct sun exposure.
Mint grown in good light produces more aromatic oils, which means the leaves smell and taste stronger when you use them in teas or recipes.
Checking the light conditions regularly and adjusting the bottle’s position as the seasons change keeps your mint growing at its very best.
A little attention to light placement goes a long way toward a healthy, thriving plant.
6. Water When The Soil Begins To Dry
Watering mint correctly is simpler than most people think, but getting it wrong is one of the most common reasons container plants struggle. Mint likes consistent moisture, but it absolutely does not want to sit in soggy, waterlogged soil for long periods.
Finding that balance is the secret to keeping a bottle-grown mint plant thriving.
Check the soil by pressing your fingertip about an inch into the potting mix. If it feels dry at that depth, it is time to water.
If it still feels slightly damp, wait another day and check again. This simple finger test takes only a few seconds and tells you exactly what your plant needs right now.
During North Carolina’s warm spring and summer months, you may find yourself watering every one to two days, especially if the bottle sits in a warm, sunny spot. In cooler fall weather, the soil dries out more slowly, so you can water less frequently.
Always water slowly and evenly until a little moisture drips from the drainage holes at the bottom.
Avoid splashing water directly onto the leaves when possible, since wet foliage in humid North Carolina conditions can sometimes encourage mold or mildew. Watering at the base of the plant keeps the roots hydrated while keeping the leaves dry and healthy.
Consistent, thoughtful watering keeps your mint growing strong and productive through every season.
7. Trim The Plant Regularly To Encourage Growth
Here is a gardening fact that surprises a lot of beginners: the more you trim mint, the better it grows. Cutting the plant regularly signals it to send out new side shoots, which makes the whole plant grow thicker, bushier, and far more productive over time.
Skipping this step leads to tall, leggy stems with fewer leaves.
Use a clean pair of scissors or small garden snips to trim the top two to three inches of each stem about once a week or whenever the plant looks like it is getting tall. Always cut just above a leaf node, which is the point where a leaf meets the stem.
New growth will sprout from that exact spot, doubling the number of stems over time.
Pinching off any flower buds that start to form is especially important during North Carolina’s warm summer months.
Once mint flowers, the plant puts most of its energy into seed production rather than leaf growth, and the leaves can lose some of their fresh, strong flavor.
Removing buds early keeps the plant focused on producing the lush, aromatic leaves you actually want.
Regular trimming also keeps your bottle planter looking tidy and manageable. A well-trimmed mint plant stays compact enough to fit comfortably in a plastic bottle planter on any windowsill, patio, or balcony.
A few snips every week truly transforms how productive and attractive your mint plant becomes throughout the entire growing season.
8. Harvest Leaves Throughout The Growing Season
One of the greatest rewards of growing mint in a bottle planter is that the harvest season in North Carolina stretches from early spring all the way through late fall. That means months of fresh, fragrant leaves ready whenever you need them, right at home.
Once your plant reaches about six inches tall, it is ready for its first real harvest.
Snip leaves or whole stems from the top of the plant using clean scissors, always cutting just above a leaf node to encourage regrowth. Never remove more than one third of the plant at one time, since taking too much at once stresses the plant and slows new growth.
Light, frequent harvesting actually keeps the plant producing more leaves over a longer period of time.
Fresh mint leaves are incredible stirred into iced tea, blended into smoothies, added to salads, or used as a garnish for desserts and cocktails. North Carolina summers practically call for fresh mint lemonade and minty iced drinks on a warm afternoon.
The flavor of freshly harvested mint is noticeably brighter and more aromatic than anything you can buy at a grocery store.
If you harvest more mint than you can use right away, bundle the stems loosely and store them in a glass of water in the refrigerator for up to a week.
Growing mint in a simple plastic bottle at home gives you a steady, generous supply of one of the most versatile herbs in any kitchen, season after season.