8 Tips For Growing Pumpkins On Trellis + Pros And Cons
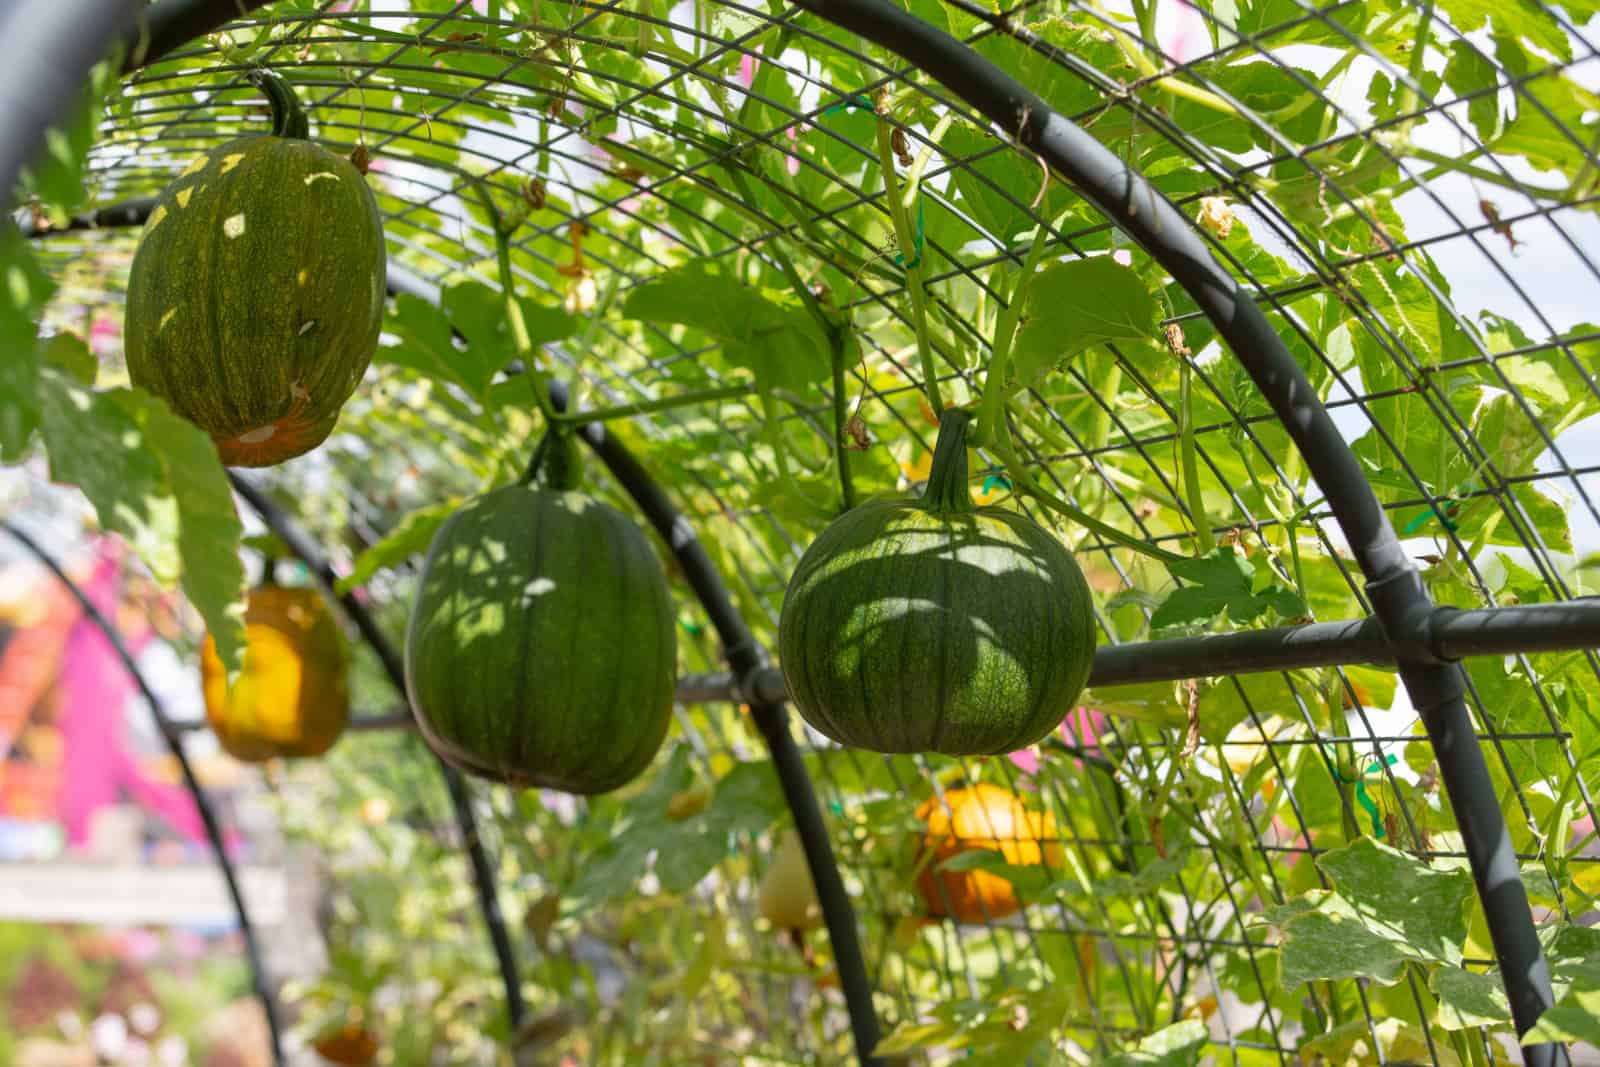
Pumpkins are vining plants, so it’s not surprising that you can grow them on a trellis.
However, seeing jack-o-lanterns hanging in the air isn’t an everyday thing, so it poses the question of how to do it.
It’s simple! Choose your pumpkin, preferably one with smaller fruit, add the trellis to the planting site, plant the pumpkins, and watch them as they grow.
There are some other things you need to pay attention to, of course, but I’ll go through all the ins and outs of this process to make it easy for you.
And if you opt for growing pumpkins on trellis, you’ll soon realize that there aren’t as many infestations and diseases to worry about. That’s because the fruit is away from the ground, and moisture and pests can’t get to it easily.
Let’s get started!
Choose A Suitable Pumpkin Variety

One of the main factors that influences which variety to plant is how many pumpkins a plant yields.
Smaller gourds usually bear more fruit, and that’s exactly what we’re looking for here! That’s because tiny pumpkins weigh less and you’ll be able to stake them more easily.
Some of the best pumpkins for trellises include “Autumn Frost,” “Small Sugar,” “Baby Boo,” “Hooligan,” and my personal favorite, “Jack be Little.”
But this doesn’t mean that you can’t grow heavy pumpkins on trellis. You’ll just have to support the stake to help your vertical garden thrive.
Select A Trellis
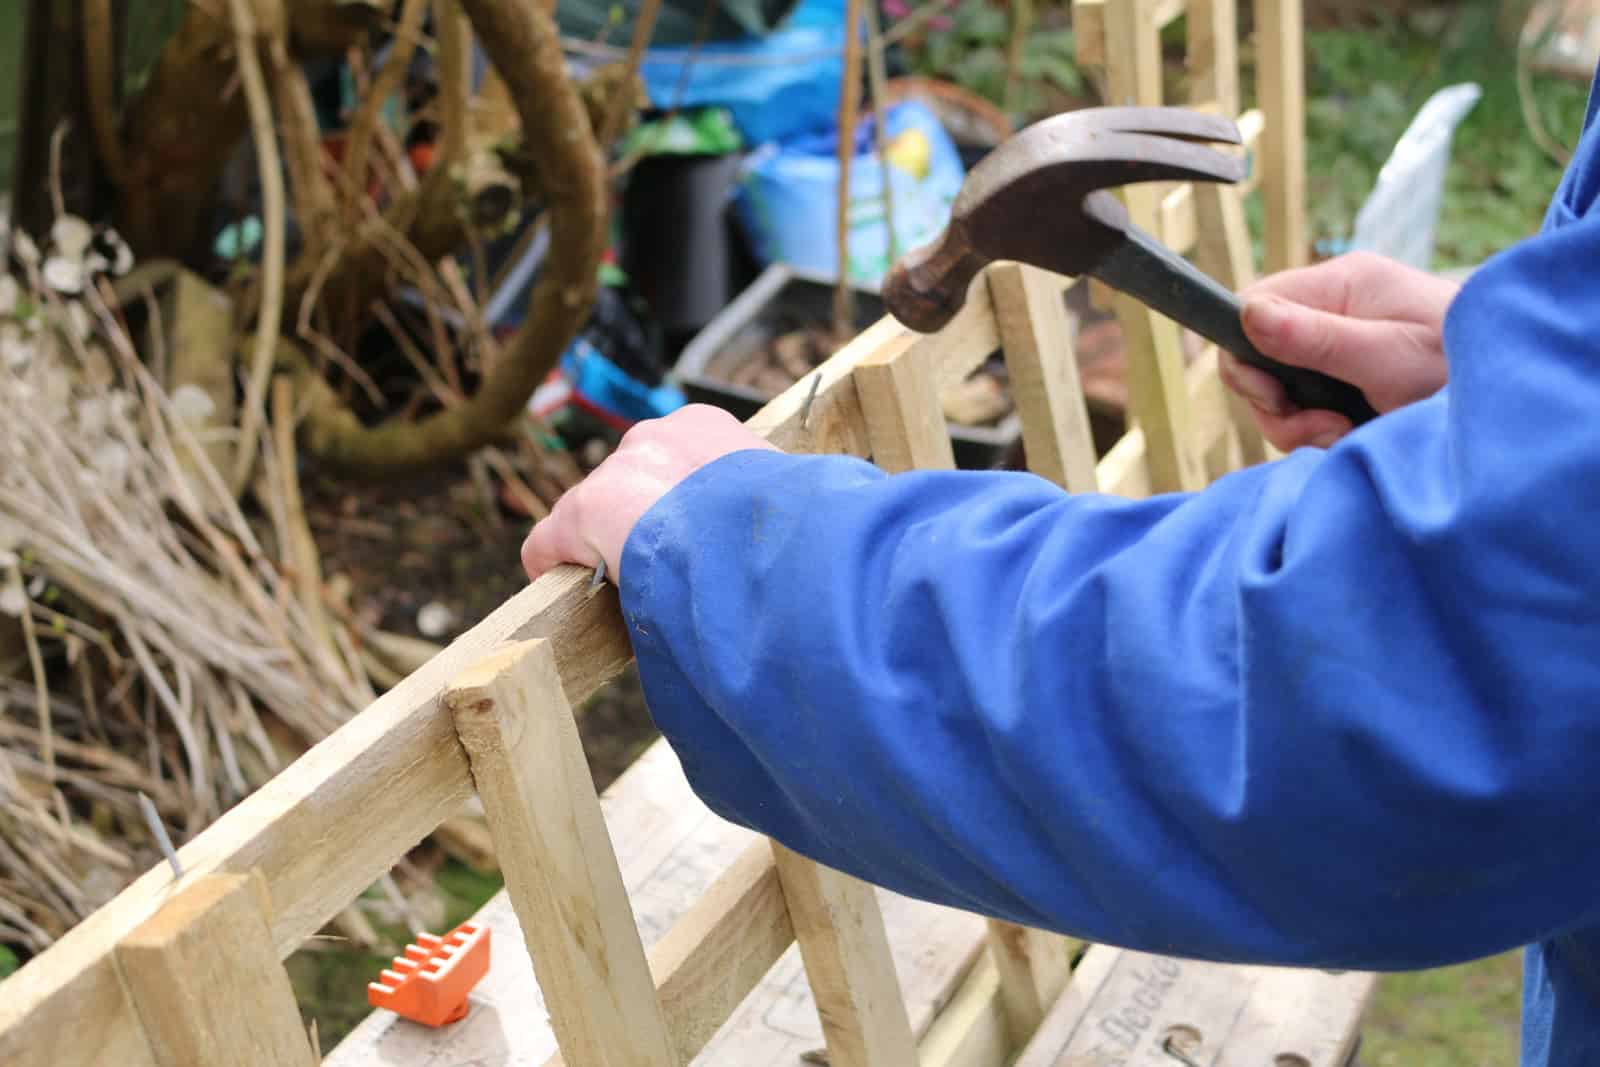
When it comes to choosing a perfect stake for your pumpkins, you can’t go wrong with classics such as a tomato cage, pea fence, or trellised arbor.
You can also make your own stake if you’re handy with wood and a hammer (it makes for a great DIY project if that’s your thing).
However, plan your choice ahead of time because the average pumpkin weight will play a role in it. If you go for a heavier species, you’ll have to use a sturdier trellis such as a wooden trellised arbor.
DIY Stake
To make a simple pumpkin trellis, you can use thin wooden stakes and zip ties.
Place the stakes vertically into the ground or the container where you grow your pumpkins. Then start adding horizontal stakes and tying them to the vertical ones with zip ties.
When I do this, I first tie the ends and then go to the middle; it makes the job a lot easier.
You can find more tips for making this type of trellis and training your pumpkins on it in this video:
Choose The Location
The next step is to find the best site for your pumpkins. These veggies thrive in full sun conditions, so choose a location that gets plenty of direct sunlight during the day.
For a higher yield, choose an area that gets at least eight hours of direct light each day.
Note: Pumpkins will still grow in partial shade, but fruiting will take longer and the plant’s growth rate will slow down due to a lack of sunlight.
Prepare The Soil
Pumpkins can thrive in almost any medium, but they prefer well-draining substrates rich in organic matter.
Therefore, you should amend your garden soil with plenty of compost, especially if it’s heavy clay because this will improve drainage.
Another way to overcome soil-texture issues is by building a raised bed. This way, the soil will drain faster and your pumpkins won’t be at risk of overwatering.
And if your native substrate is sandy and drains extremely fast, you can also amend it with compost. In this case, the organic material will increase moisture-retention and keep your pumpkins moisturized.
After applying compost, you should check the soil pH and ensure it is between 6.0-6.8. If it isn’t in the preferred range, plants have a hard time absorbing nutrients and moisture from the substrate. (1)
Finally, fertilize the soil with triple 10 fertilizer by using around 3 lbs per 100 sq ft. This will help the pumpkins get all the nutrients they need and boost their growth. (2)
Plant The Pumpkins
Now it’s the time to plant this vegetable. I start the seeds indoors a month or so before transplanting them outside, but you can plant the seeds straight into the ground once all danger of frost has passed.
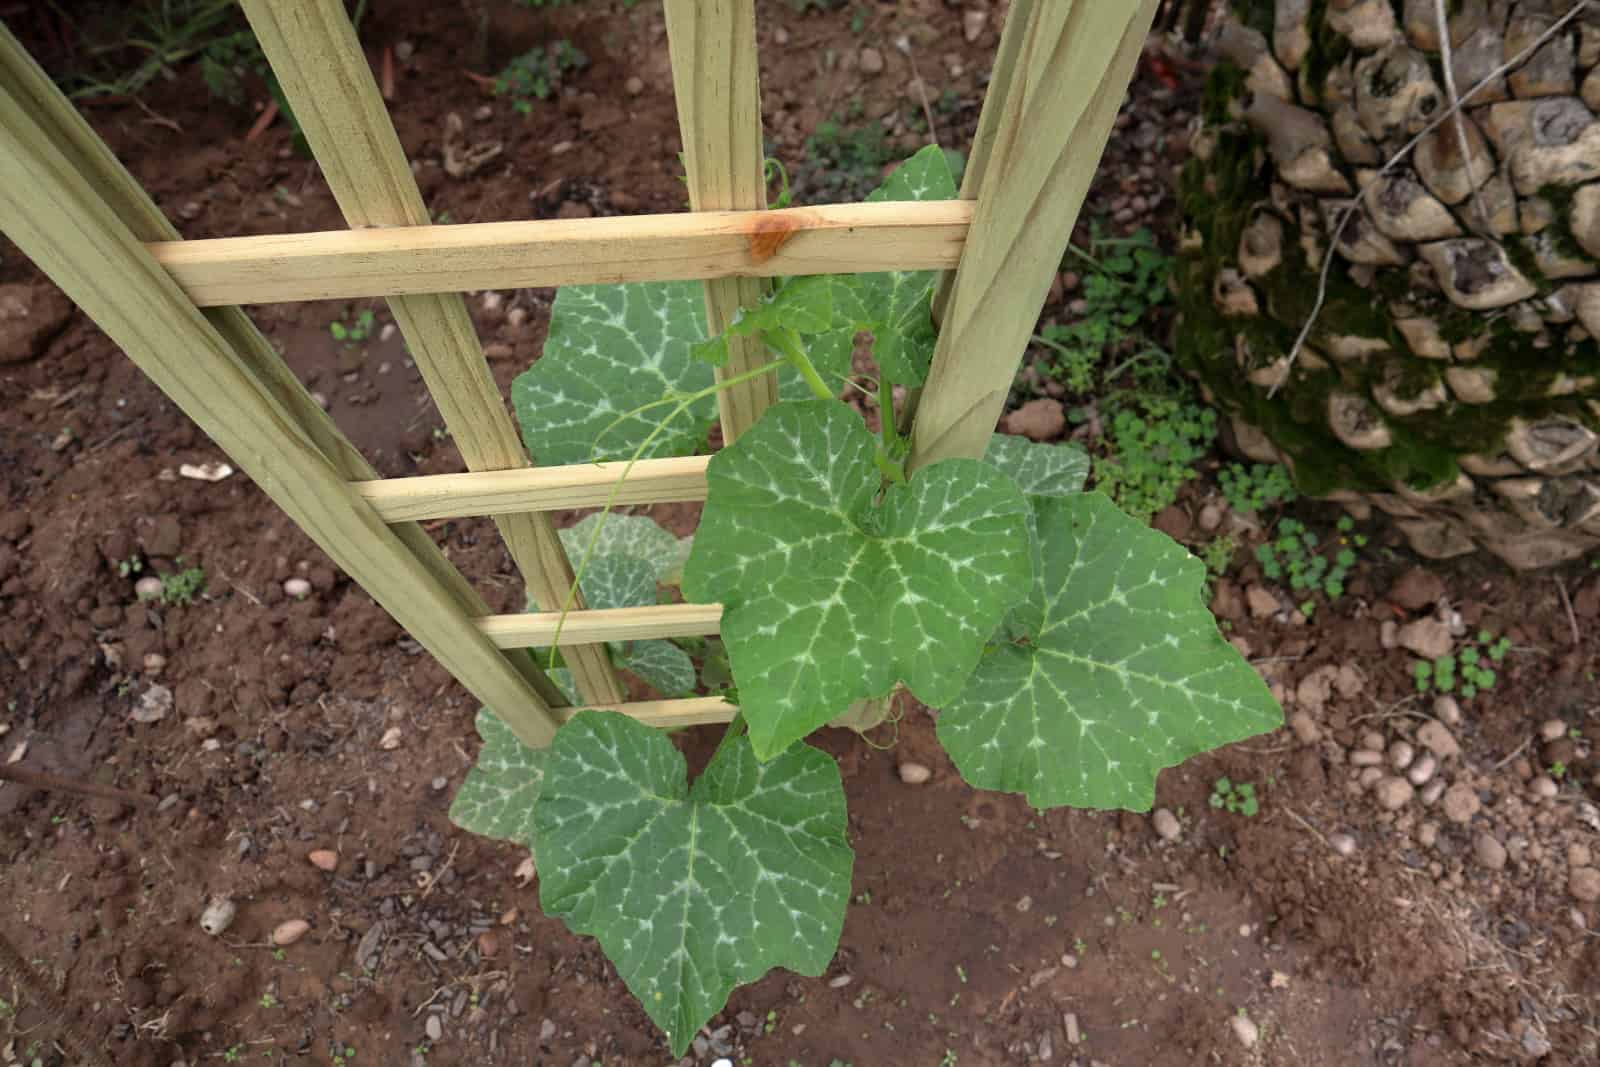
I like to plant pumpkins by installing the trellis first and then placing the seedlings (or sometimes seeds) right next to it.
Create a mound and plant the veggie in it to provide excellent drainage. However, if you have a raised bed or a container with drainage holes, you don’t have to do this since drainage is already taken care of.
Growing pumpkins vertically will save you space and allow you to sow more seeds in a smaller area, but you’ll still have to pay attention to spacing. I leave about a foot between each plant to make sure they have enough room before I tie them to the trellis.
Tie The New Growth To The Stake
Understanding the pumpkin growing stages can help you prepare for training these veggies on a trellis. Or rather, you’ll know when to expect speedy vegetative growth and vining.
But even if you don’t, simply monitor your plant, and once you notice that vines are a couple of inches long, you can start tying them to the trellis.
Use the zip ties to connect the main stem to the stake. You’ll also notice thin and curly young vines, and you can use them as well. Since they’re lithe, you’ll be able to easily curl them around the trellis or arbor, and they’ll keep growing that way.
And if you’re a visual person like me, you can use this video to help you out:
Adjust Watering
Pumpkins generally require an inch of water per week, but this changes once you start growing them vertically.
Their vines serve as ground cover, which slows down water evaporation during hot summers. If you train them on trellises, they lose this ability.
Therefore, you’ll have to water your pumpkins more frequently if you grow them in a vertical garden.
Irrigate them deeply every 2-3 days, and they’ll be more than happy. If you notice yellowing of the foliage and wilting vines, you’ll need to water your pumpkins more.
You can also mulch the soil around them, which will slow down the evaporation rate and keep them moisturized for longer.
Feed The Pumpkins
These veggies need plenty of nutrients, so it’s important to feed them properly. The following table shows exactly how many minerals they require:
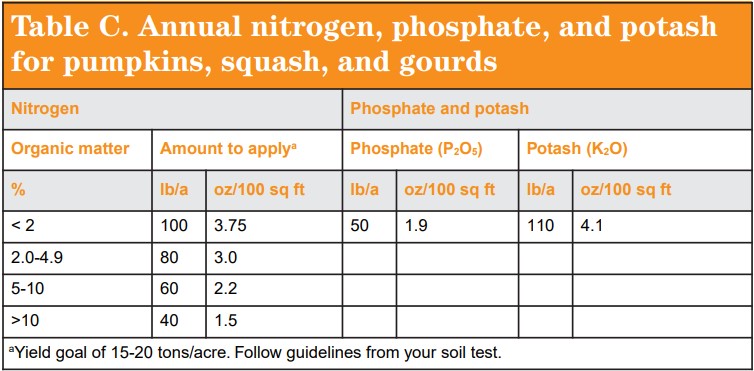
Note: The data was taken from A Plain Language Guide: Growing Fresh Market Pumpkins, Squash, and Gourds (p. 11), by UW Extension, 2011. Copyright 2011 by the Board of Regents of the University of Wisconsin System. (3)
Test your soil before adding any fertilizers, or use organic variants such as compost and worm castings.
I apply compost and triple 10 fertilizer before planting to create the best soil for my pumpkins. Once the plants start flowering, I include some bone meal if I notice there aren’t many buds.
During the fruiting stage, I increase potassium and use 5-10-10 to produce large and tasty fruit.
Finally, if you want a more eco-friendly solution, try growing this veggie with other plants. Beans are on the list of pumpkin companion plants and can fix nitrogen, which lowers their need for this nutrient.
Pros And Cons Of Growing Pumpkins On Trellis
[table id=714 /]
Final Thoughts
Growing pumpkins on trellis can yield much healthier fruit since the veggies aren’t on the moist ground at the mercy of pests and diseases.
These types of gardens also save space, look interesting, and aren’t that difficult to set up once you get your head around them.
However, you do need to invest your time and materials to create the best conditions for your pumpkins. You’ll also have to water your plants more often.
Hopefully this article has convinced you to try out this method and enjoy this interesting type of vegetable garden.
Until next time!
Research:
1. McCauley, A., Jones, C., & Jacobsen, J. (2009). Soil pH and Organic Matter. Nutrient Management Module no. 8, Montana State University Extension.
2. Pumpkins and Squash – Growing Tips (n.d.). UMass Amherst, Center for Agriculture, Food, and the Environment.3. Newenhouse, A. C. (2011). A Plain Language Guide: Growing Fresh Market Pumpkins, Squash, and Gourds. UW Extension.


