7 Steps To Revive Heat-Damaged Hydrangea Plants In Florida
Hydrangeas in Florida are already working against the odds. They want cooler temperatures, consistent moisture, and protection from the kind of afternoon sun that Florida delivers without apology.
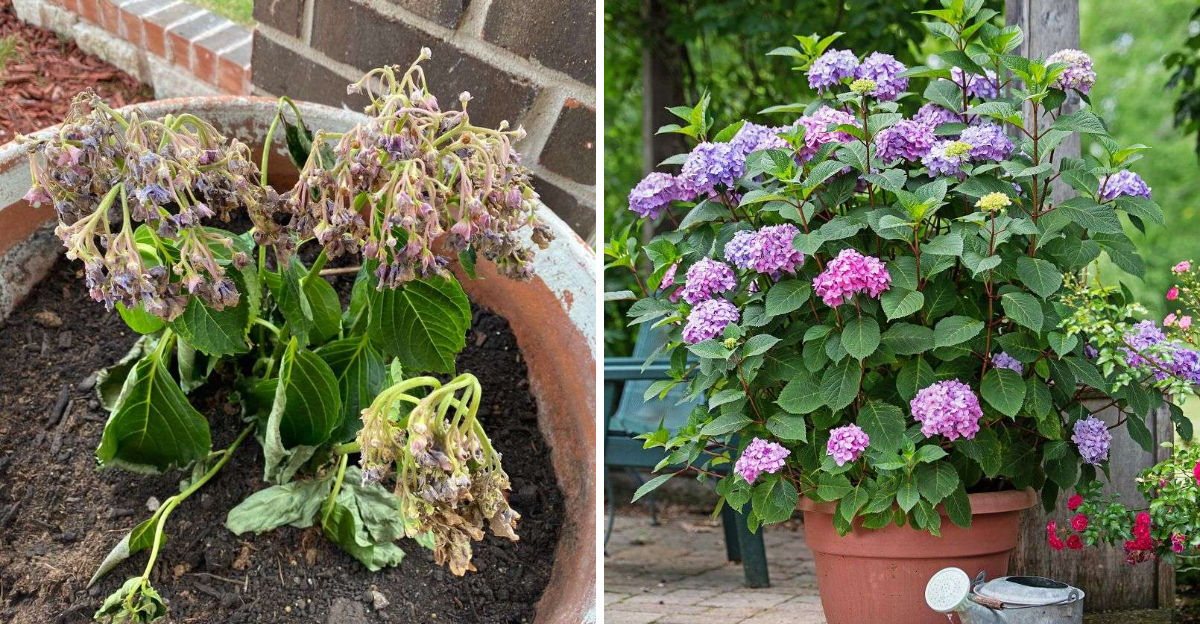
Push through a brutal stretch of summer heat and a hydrangea that was hanging on starts showing exactly how much stress it has been carrying. Scorched leaves, wilting that does not recover overnight, blooms that brown before they open.
The plant is not finished, but it is asking for help in the only language it has. Heat damage on hydrangeas follows a pattern, and recovery does too.
The gardeners who bring them back are not doing anything complicated. They are working through the right steps in the right order and giving the plant time to respond.
Seven steps make that process clear. Done correctly, a heat-damaged Florida hydrangea has a real path back before the season closes out.
1. Check Whether The Stems Are Still Flexible

A scorched hydrangea on a hot afternoon can look completely lost. Drooping leaves, brown edges, and shriveled flower heads are alarming, but they do not always tell the full story.
Before reaching for pruners or pulling the plant out of the ground, take a few minutes to actually check the stems.
Gently bend a stem between your fingers. A stem that still has some bend and spring to it is a good sign.
One that snaps cleanly or crumbles is likely past recovery. Work from the outer tips inward, because the ends tend to show damage first while the base of the plant may still be healthy.
Try a small scratch test on a few stems. Use your fingernail or the edge of a pruner to scrape just the surface.
If you see green tissue underneath, that stem still has life in it. Brown, dry tissue all the way through means that section is gone.
Check for any firm buds along the stems or near the base of the plant. Even tiny, tight buds are a hopeful sign.
Bigleaf hydrangeas often hold dormant buds low on the stem or near the crown, so look carefully before writing off the whole plant.
One mistake to avoid is making a final call during the hottest part of the day. Hydrangeas wilt dramatically in midday heat, even healthy ones.
Check the plant in the early morning or evening when temperatures have dropped. A plant that looks collapsed at noon may look noticeably better by the next morning, which tells you the roots are still pulling water.
2. Move Potted Hydrangeas Out Of Afternoon Sun

A hydrangea sitting in a dark pot on a west-facing patio during a Florida summer is fighting an uphill battle every single day. Container walls absorb heat rapidly.
By mid-afternoon, the soil inside a pot can reach temperatures that stress or damage roots even when the air temperature alone would not cause harm. Patios, pool decks, driveways, balconies, and walls with western or southwestern exposure all reflect and trap heat.
A plant placed near light-colored concrete or a pale stucco wall gets hit from both above and below. Moving a potted hydrangea away from these spots is often the single most effective thing you can do to stop the damage from continuing.
Your Florida Garden Changes Every Week. Your Plan Should Too.
Gardening in Florida changes quickly throughout the season. Every Friday you’ll receive a simple weekly plan showing exactly what to plant, prune, fertilize, harvest, and protect so you never miss the right timing.
Aim for a location with morning sun and filtered or bright shade in the afternoon. A spot under a large tree canopy, on a covered porch that still gets indirect light, or beside a north-facing fence can all work well.
Morning light supports healthy growth and future blooms without the punishing intensity of afternoon rays.
Deep shade is not the answer. Too little light will slow recovery and reduce flowering once the plant stabilizes.
The goal is to cut harsh afternoon exposure while still giving the plant enough light to support new growth.
Use pot feet or risers to lift containers off hot surfaces so air can circulate beneath the pot. Lighter-colored containers absorb less heat than dark ones.
If you cannot move the pot, try wrapping it with burlap or placing it inside a slightly larger container to create an insulating air gap. Small changes in placement can make a meaningful difference during recovery.
3. Water Deeply Without Leaving Roots Soggy

Shallow sprinkling on a stressed hydrangea is a little like offering someone a single sip of water after they have been out in the sun all day. It barely reaches the root zone and evaporates quickly in the heat.
Roots need moisture at depth to actually support recovery, and sandy soil common across much of this state drains fast, which makes thorough watering even more critical.
Water slowly and deeply at the base of the plant. Let the water soak in rather than running off the surface.
For in-ground hydrangeas, aim to wet the soil at least six to eight inches down. A slow trickle from a hose held near the base for several minutes works better than a quick blast from overhead.
For containers, water until you see drainage coming from the holes at the bottom. Empty saucers after about thirty minutes so roots are not sitting in standing water.
Our summer rainy season can bring heavy downpours that seem like plenty of water, but they sometimes run off compacted or dry soil without soaking in deeply.
Check soil moisture below the surface before watering again. Push a finger or a wooden dowel two to three inches into the soil.
If it comes out moist, hold off. If it comes out dry, water thoroughly.
Overwatering a heat-stressed plant can cause root problems that look very similar to drought stress, so checking before watering is always worth the extra minute.
Bigleaf hydrangeas are especially sensitive to uneven moisture. Consistent, deep watering during recovery gives them the best chance to stabilize and push new growth.
4. Refresh Mulch Before The Soil Heats Again

Bare soil under a hydrangea during a Florida summer heats up fast and loses moisture even faster. A fresh layer of mulch around the root zone acts like a light blanket, slowing moisture loss and buffering the soil from extreme temperature swings.
For shallow-rooted plants like bigleaf hydrangeas, that kind of root-zone stability really matters during recovery.
Apply two to three inches of organic mulch such as pine bark, shredded leaves, or pine straw around the base of the plant. Keep it spread out to the drip line if possible, which is roughly where the outermost branches reach.
That is where many of the feeder roots are actively working.
Pull the mulch back a few inches from the main stem. Piling mulch directly against the stem traps moisture and can encourage rot or pest problems.
A small gap between the mulch and the stem is all it takes to avoid that issue.
Avoid thick, dense piles that pack down and stay soggy after rain. Heavy, wet mulch can reduce oxygen in the root zone and create conditions that hurt rather than help.
A moderate, loose layer that allows some airflow is more effective than a deep, compacted pile.
Mulch supports recovery, but it is not a fix for a hydrangea planted in brutal afternoon exposure or one with serious root damage. If the placement is wrong, mulch buys some time but does not solve the core problem.
Refreshing mulch works best as part of a broader recovery plan that also addresses sun exposure, watering, and soil conditions. Reapply as needed if the layer thins out through the season.
5. Remove Crispy Leaves Without Hard Pruning

Reaching for the pruners the moment a hydrangea looks rough is a common nervous reaction, but it can actually set recovery back. Leaves that are still partly green, even if they look rough around the edges, may still be shading the stem and supporting some photosynthesis.
Stripping everything away at once removes whatever protection and energy production the plant still has going.
Focus cleanup on leaves that are fully crispy, completely brown, and papery dry. Those leaves are no longer doing anything useful.
Removing them tidies the plant and reduces the chance of fungal issues that can develop when deceased material sits against stems in humid conditions.
Use clean, sharp pruners or scissors. Wipe the blades with rubbing alcohol between plants to avoid spreading any pathogens.
Make clean cuts rather than tearing, which can leave ragged tissue that takes longer to seal.
Resist the urge to do a hard prune during peak summer heat. For bigleaf hydrangeas especially, this is a serious concern.
Bigleaf hydrangeas bloom on old wood, which means the buds for next season’s flowers are already set on this year’s stems. Cutting those stems back hard in summer removes those buds entirely and means no blooms next spring.
Oakleaf hydrangeas bloom on new wood and are a bit more forgiving with pruning timing, but hard pruning a stressed plant in summer heat still adds unnecessary stress. Light cleanup is the right move now.
Wait until the plant shows clear new growth and conditions have improved before considering any major shaping or structural pruning. Patience here protects both the plant and next year’s blooms.
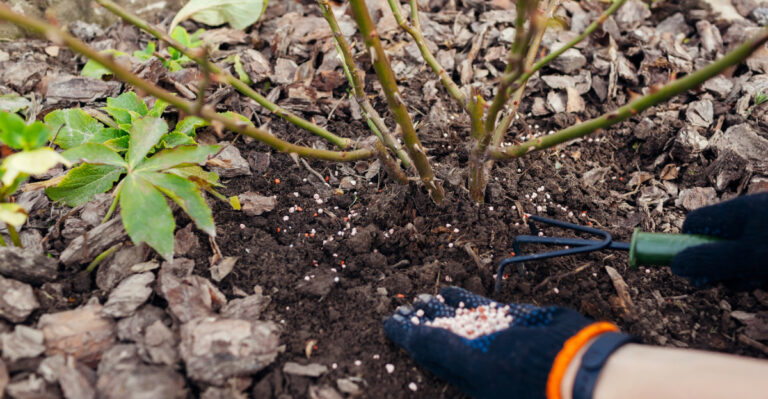
6. Pause Fertilizer Until New Growth Appears

It is tempting to reach for fertilizer when a plant looks stressed, as if feeding it will somehow speed up recovery. With a heat-damaged hydrangea, that approach can backfire.
Fertilizer encourages new, tender growth, and tender growth on a plant that is already struggling in the heat can make stress worse rather than better.
Concentrated fertilizer salts can also draw moisture away from roots that are already working hard to stay hydrated. In sandy soil, where nutrients leach quickly, over-fertilizing is a real risk.
A scorched leaf is not a sign of nutrient deficiency. It is a sign of heat and water stress, and more fertilizer will not fix either of those problems.
Hold off on all fertilizer, including slow-release granules, liquid feeds, and foliar sprays, until the plant shows clear signs of active new growth. New leaves unfurling and fresh stems pushing out from the base are encouraging signals.
Tighter buds beginning to swell also show that the plant is stabilizing and ready to use nutrients productively.
Once conditions improve and new growth is underway, a balanced, slow-release fertilizer appropriate for flowering shrubs can support continued recovery.
UF/IFAS guidance for landscape shrubs in this state generally recommends fertilizing in spring and early summer, not during peak heat stress or drought periods.
Skipping fertilizer during recovery is not neglect. It is the right call.
The plant needs steady moisture, reduced heat exposure, and time to rebuild its root function before it can benefit from feeding. Giving the roots a chance to stabilize first makes any future fertilizer application far more effective and far less risky.
7. Give The Plant Shade And Time To Recover

A shaded recovery spot and a few weeks of patience are sometimes the most powerful tools available. After working through the steps above, the hardest part for many gardeners is simply waiting.
Hydrangeas under heat stress do not bounce back overnight, and pushing them with more intervention can do more harm than good.
Temporary shade cloth rated at thirty to forty percent can make a real difference for in-ground plants that cannot be moved. Drape it over a simple frame or stake it above the plant to cut afternoon sun intensity without blocking all light.
Remove it once temperatures drop and the plant shows signs of stabilizing.
For containers, moving to a shaded recovery spot with morning light is usually enough. Check root moisture regularly, keep mulch fresh, and avoid disturbing the root zone unnecessarily.
Repeated stress events, such as letting the soil dry out completely and then flooding it, slow recovery significantly.
Watch carefully over the coming weeks for signs of progress. New buds swelling, small leaves unfurling, or fresh stems emerging from the crown or base of the plant are all encouraging signals.
Even a single new leaf on a stem that looked completely gone is a reason to keep waiting before making any major decisions.
Be honest about what you are seeing, though. If stems have dried completely from the base up and no new growth appears after several weeks of good care, the plant may not recover.
Replacement with a more heat-tolerant variety or a better-sited planting may be the practical next step. Oakleaf hydrangeas, for example, tend to handle this state’s heat and humidity with more resilience than bigleaf types in tough exposures.