8 Steps Wisconsin Gardeners Take The Moment Daylilies Start Blooming
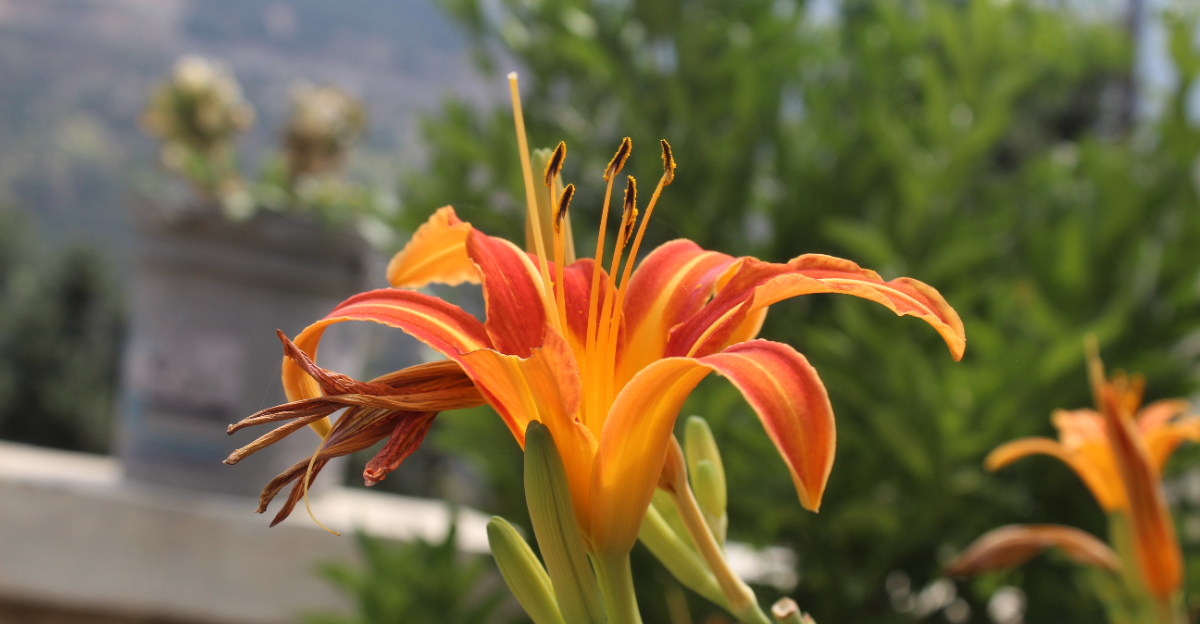
Wisconsin daylilies do not ease into bloom season. One morning the scapes are bare, and the next your yard looks like someone turned up the color.
That quick shift from quiet to spectacular is one of the best moments in the gardening calendar, but it is also easy to miss what comes next. The first open bloom is not just a reward. It is a signal.
What you do in the days right after that first flower opens will shape how the rest of the season plays out. Neglect it and you get a week of color.
Pay attention and you get weeks of healthy, continuous blooms that hold up through Wisconsin’s humid summers. None of this requires a greenhouse or a horticulture degree. It requires showing up with the right knowledge at the right time.
1. Remove Spent Blooms As Soon As They Fade

Yesterday’s blooms are today’s clutter. Each daylily flower lasts only one day, and once it fades, it starts to look sad and mushy fast.
Removing spent blooms is one of the most satisfying things you can do in the garden. You just pinch or twist off the wilted flower at its base, right where it connects to the stem.
Leaving old blooms on the plant is not just ugly. It can actually signal the plant to put energy into making seeds instead of pushing out new flowers.
Taking a few minutes each morning to clear them out pays off quickly. Your plant stays tidy, your garden looks intentional, and the remaining buds get a better shot at opening strong.
The best part is that you do not need any special tools to do this well. Your fingers work just fine, and the whole process takes less time than you might think.
Some gardeners make it a quick morning ritual, walking the beds and clearing away spent flowers before the day gets started.
In Wisconsin, where the bloom window can feel short, you want every bud to count. Staying on top of spent flowers means you are not wasting a single day of the season.
A clean stem with fresh buds is a hopeful thing. Keep the faded ones gone, and your daylilies will reward you with a more vibrant, longer-lasting display all the way through summer.
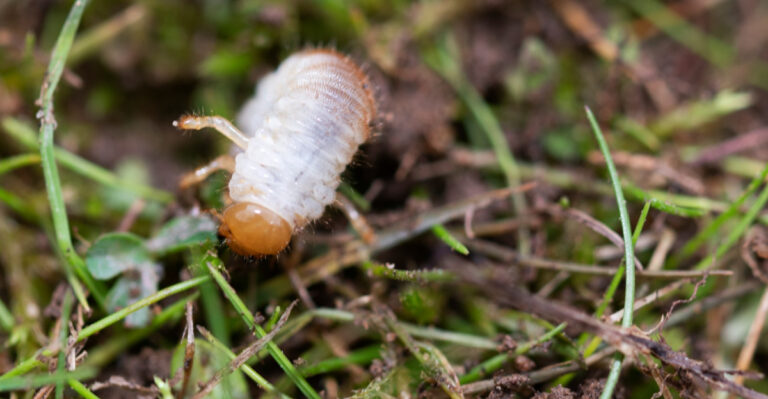
2. Check For Aphids And Thrips

Tiny bugs can ruin big blooms before they ever open. The moment your daylilies start flowering, pests like aphids and thrips move in fast, targeting the soft, tender buds.
Aphids are small, pear-shaped insects that cluster on stems and buds, sucking out plant juices. Thrips are even tinier, almost invisible, but they leave behind telltale silver streaks and distorted petals.
Checking your plants every few days is the best early warning system you have. Flip the buds gently and look closely at the stems where they meet the leaves.
Catching an infestation early makes control so much easier. A strong spray of water from a garden hose can knock aphids off without any chemicals at all.
Your Wisconsin Garden Changes Every Week. Your Plan Should Too.
Gardening in Wisconsin changes quickly throughout the season. Every Friday you’ll receive a simple weekly plan showing exactly what to plant, prune, fertilize, harvest, and protect so you never miss the right timing.
For thrips, things get a bit trickier since they hide deep inside the bud. Insecticidal soap spray works well for thrips, though it should be applied in the early morning or evening to reduce the chance of contact with pollinators.
Wisconsin summers can bring waves of pest pressure, especially after a wet spring. Staying alert during the first weeks of bloom is when your attention matters most.
Healthy plants can handle a few bugs without skipping a beat. But a heavy infestation left unchecked will stunt growth, deform flowers, and spread to neighboring plants before you even notice the damage is done.
3. Water At The Base, Not Overhead

How you water matters just as much as how often you do it. Splashing water all over the leaves and blooms might feel thorough, but it actually causes more harm than good.
Wet foliage during warm weather is an open invitation for fungal problems. Overhead watering also knocks petals around, shortening the lifespan of already fleeting one-day blooms.
Watering at the base of the plant sends moisture directly to the roots, where the daylily actually needs it. A soaker hose or drip irrigation system makes this effortless and efficient.
If you are hand-watering, aim the nozzle low and let the water soak in slowly. Daylilies prefer a deep, thorough soaking a few times a week over a light daily sprinkle.
In Wisconsin, summer rain can sometimes do the job for you. But during dry stretches, especially in July and August, consistent base watering keeps plants from stressing out and skipping blooms.
Sandy soils common in parts of the state drain fast, so those gardens may need more frequent watering. Clay-heavy soils hold moisture longer, so watch for soggy conditions that can cause root rot.
Good watering habits are one of the simplest ways to extend your bloom season. Get the water where it belongs, and your daylilies will stay strong, healthy, and flowering longer than you expected.
4. Add Mulch If You Haven’t Already

Mulch is one of those garden investments that keeps paying off all season long. If you skipped it in spring, the moment your daylilies bloom is a great time to catch up.
A two to three inch layer of organic mulch around the base of your plants does several important jobs at once. It holds moisture in the soil, keeps roots cool during summer heat, and slows down weed growth.
Wood chips, shredded bark, or straw all work well for daylily beds. Just keep the mulch a few inches away from the actual crown of the plant so air can still circulate at the base.
Wisconsin summers can swing between rainy weeks and dry spells with little warning. Mulch acts as a buffer, smoothing out those moisture extremes and keeping your soil conditions more stable.
Weeds are a real competitor for nutrients and water, especially during peak bloom season. A solid mulch layer cuts down on the time you spend pulling them, freeing you up to enjoy the garden instead.
As organic mulch breaks down over the season, it adds nutrients back into the soil. That slow release of goodness is a bonus that benefits your daylilies and everything else growing nearby.
Adding mulch now is not playing catch-up. It is making a smart move that your plants will thank you for with stronger stems and more vibrant blooms through the rest of the season.
5. Give Them A Midsummer Fertilizer Boost

Blooming takes a lot out of a plant. Once your daylilies hit their stride in summer, they are burning through nutrients fast, and the soil may not keep up on its own.
A midsummer fertilizer boost gives them the fuel to keep pushing out buds. Look for a balanced fertilizer with roughly equal parts nitrogen, phosphorus, and potassium, something like a 10-10-10 formula.
Too much nitrogen at this stage can push leafy green growth instead of flowers. You want to feed the blooms, not just the foliage, so balance is the key word here.
Granular fertilizers are easy to scatter around the base of the plant and water in. Liquid fertilizers work faster and are great if your plants are showing signs of stress or pale coloring.
In Wisconsin, the growing season is precious and short. A well-timed feeding in late June or early July can push a plant through another strong wave of blooms before the season winds down.
Always read the label and follow the recommended amounts. Over-fertilizing can burn roots and do more damage than skipping the feeding altogether would have done.
Think of this step as giving your garden a mid-race energy boost. Your daylilies are running hard, and a little extra support right now can carry them across the finish line with color to spare.
6. Watch For Signs Of Daylily Rust

Daylily rust sounds alarming, and honestly, it should get your attention. Daylily rust is more common in warmer, southern states, but it can still appear in Wisconsin during humid summers, so it is worth knowing what to look for.
The first sign is usually orange or yellow streaking on the leaves, followed by powdery orange pustules that rub off on your fingers. If you touch a leaf and your hand turns orange, you have found it.
Rust spreads through spores carried by wind and water, which is exactly why overhead watering makes things worse. Warm, humid conditions during bloom season create the perfect environment for it to travel fast.
Catching it early is everything. Remove and bag affected leaves immediately, and do not compost them since the spores can survive and spread from a compost pile.
Fungicide sprays containing tebuconazole or azoxystrobin are the most effective options once infection is spotted. Chlorothalonil and mancozeb work better as preventive treatments than as a cure.
Some daylily varieties show more resistance than others, which is worth noting when you shop for new plants. Asking your local nursery about rust-resistant cultivars is a smart move for future seasons.
A little rust does not have to end your bloom season. Stay observant, act quickly, and keep the affected material contained, and your garden can bounce back stronger than you might expect.
7. Clip Scapes Once All Buds Have Bloomed

Once the last bud on a stem has opened and faded, that stem has done its job. Leaving it standing in the garden serves no purpose and actually pulls focus away from the fresh blooms still opening nearby.
The tall flowering stem on a daylily is called a scape. Clipping it down to the base once all its buds are spent keeps the bed looking clean and intentional.
Use sharp pruning shears or scissors for a clean cut close to the soil. A clean cut heals faster and reduces the chance of disease sneaking in through a ragged edge.
Do not cut scapes that still have unopened buds, even if some flowers on that same stem have already faded. Each scape can carry multiple buds at different stages of opening.
Patience here is a small virtue with a big reward. Wait until you are absolutely sure the last bud has opened and faded before you reach for the shears.
Removing finished scapes also prevents the plant from putting energy into seed production. That saved energy gets redirected toward root development and, in reblooming varieties, toward producing new scapes.
A garden full of trimmed, tidy scapes and fresh open blooms is a satisfying sight. This one small act of maintenance keeps your daylily bed looking sharp all the way through late summer.
8. Note Which Varieties Are Reblooming

Not all daylilies bloom just once and call it a season. Some varieties, called reblooming daylilies, push out a second or even third wave of flowers after the first flush fades.
Right now, while your garden is blooming, is the perfect time to notice which plants are already sending up new scapes after their first round. Mark those plants so you remember them come fall planning time.
A simple garden journal or even a phone photo with a label works great for tracking this. Write down the variety name if you know it, the color, and whether it pushed a second bloom.
Rebloomers are especially valuable in Wisconsin, where the growing season feels like it ends before you are ready. Getting two or three rounds of color from a single plant stretches your investment beautifully.
Popular reblooming varieties include Stella de Oro, Happy Returns, and Rosy Returns, all of which tend to perform well in northern climates. Ask your local extension office about varieties proven to rebloom reliably in your specific zone.
Knowing your rebloomers also helps with fertilizing decisions. These plants need a bit more feeding to fuel multiple bloom cycles, so they benefit from that midsummer boost more than single-season types do.
Paying attention now sets you up for smarter planting decisions later. The daylilies that keep giving all season long are the ones worth multiplying across your entire garden next spring.