The Most Common Tomato Mistakes Costing Indiana Gardeners Their Best Harvests
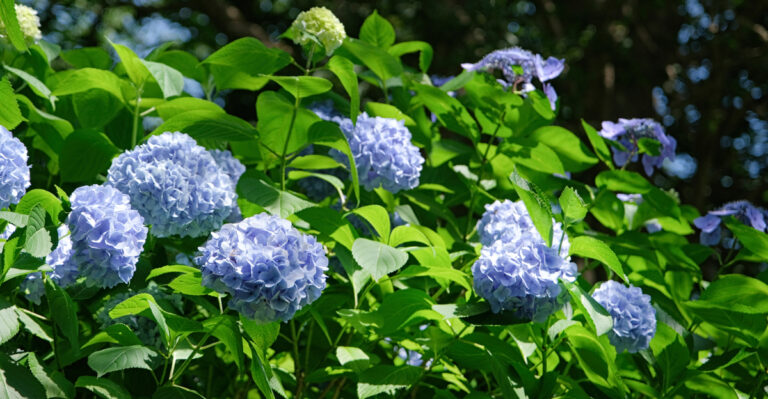
Twelve Roma seedlings. Perfect rows. A season full of promise. By August, cracked fruit and stunted plants are all that stare back at you.
You timed your watering. You babied those transplants. You still walked away with a harvest that barely filled a salad bowl. Here is the uncomfortable truth: the problem started before you ever touched a trowel.
Indiana’s late cold snaps and suffocating summer humidity punish every small mistake you make in spring.
Did you know that most tomato failures trace back to decisions made in the first two weeks of planting?
The answer sits in a handful of habits you repeat without questioning. Cold soil at planting, ignored pH levels, and watering patterns that stress roots more than they nourish them.
No guesswork borrowed from gardening advice written for California backyards.
Pure Indiana-tested solutions built for your soil, your season, your garden. The tomatoes you keep chasing are closer than you think.
1. Planting Too Early In Cold Soil

Cold soil is a problem most gardeners never see coming. Store shelves fill up with seedlings in late April and suddenly you are hauling plants outside before Indiana soil has warmed up.
Tomato roots slow dramatically in cold ground, making nutrient and water uptake far less efficient. That early start you were so proud of turns into weeks of stalled, stressed plants.
Soil temperature below 60 degrees Fahrenheit stops tomato roots from absorbing nutrients and water efficiently.
Even if the air feels warm on a sunny April afternoon, dig down two inches and you might find soil still sitting in the low 50s.
That temperature gap causes transplant shock, yellowing leaves, and slow growth that haunts your plants for weeks after planting.
Smart Indiana growers wait until nighttime temperatures consistently stay above 50 degrees and soil temps hit at least 60.
A cheap soil thermometer from any garden center takes all the guesswork out of timing. weeks, sometimes surpassing them entirely. Planting in mid-May feels like losing time.
Plants in warm soil often catch up and surpass early starters within weeks. Black plastic mulch is a practical tool for warming soil faster if you are impatient. Lay it down a week or two before planting and let the sun do the work.
Giving your tomatoes warm feet from day one sets the entire season up for success, and that small delay pays off in a big way come harvest time.
2. Watering Inconsistently Leading To Blossom-End Rot

Blossom-end rot stops you cold. One morning you flip a fat, green tomato over and find a dark, leathery patch eating away at the bottom.
The culprit is rarely a disease. In most cases it traces back to inconsistent watering or low soil calcium availability.
Inconsistent watering blocks calcium uptake in tomato plants, even when plenty of calcium is present in the soil.
When soil swings from bone dry to soaking wet and back again, roots struggle to pull in the nutrients they need consistently.
Your Indiana Garden Changes Every Week. Your Plan Should Too.
Gardening in Indiana changes quickly throughout the season. Every Friday you’ll receive a simple weekly plan showing exactly what to plant, prune, fertilize, harvest, and protect so you never miss the right timing.
Calcium is what keeps cell walls firm and healthy, so when uptake gets disrupted, the tissue at the blossom end breaks down and collapses.
Indiana summers are notorious for stretches of dry heat followed by heavy rain, which makes this problem especially tricky for outdoor growers.
The fix is building a steady watering routine rather than reacting to the weather. Deep watering two to three times per week works far better than a daily sprinkle that barely reaches the root zone.
Mulching around your plants with straw or shredded leaves helps lock in soil moisture between watering sessions.
A two to three inch layer keeps the ground from drying out too fast during heat waves. Consistent watering paired with good mulch coverage is your most reliable defense against blossom-end rot.
3. Allowing Blossom Drop In Extreme Heat

Tomato blossoms are more fragile than they look. Above 90 degrees daytime or 70 degrees at night, plants drop their flowers as a stress response.
You end up with a lush, leafy plant that produces absolutely nothing, which is one of the most frustrating outcomes in the garden.
Indiana summers have been trending hotter, with July heat waves that regularly push past 95 degrees for days at a stretch.
During those stretches, pollen becomes sterile and flowers fall off before they ever get a chance to set fruit.
Many growers assume something is wrong with their soil or care routine, never realizing the problem is simply temperature stress.
Shade cloth rated at 30 to 40 percent can protect plants during the hottest afternoon hours without starving them of light.
Draping it over a simple frame during heat waves gives blossoms a fighting chance. Heat-tolerant varieties like Heatmaster or Solar Fire hold their blooms better when temperatures spike.
Keeping plants well-watered during heat events reduces stress and helps them hang onto their flowers longer.
A thick layer of mulch around the base keeps root zone temperatures from spiking. Once temperatures drop, most healthy plants push out a new flush of blossoms. Patience and preparation are your best tools.
4. Neglecting Crop Rotation

Growing tomatoes in the same spot year after year builds up soil-borne pathogens, nematodes, and disease spores. They are waiting for your next crop.
Many growers never connect their struggling plants to where they planted two summers ago. Diseases like early blight, fusarium wilt, and verticillium wilt all overwinter in soil and plant debris.
Each season you plant tomatoes in the same location, the pathogen population grows stronger and larger.
By year three or four of continuous planting, even healthy, well-fertilized plants can start collapsing mid-season with no obvious explanation.
The standard recommendation is to wait at least three years before returning tomatoes to the same garden bed. That rotation schedule breaks the disease cycle and gives the soil a chance to reset.
During the off years, planting unrelated crops like beans, corn, or squash in that space keeps the bed productive without feeding the same pathogens.
Keeping a simple garden map each season makes rotation much easier to track than relying on memory. Jot down what grew where and plan your moves before spring planting begins.
Small gardens can still rotate by shifting plants just a few feet, which provides meaningful protection even in tight spaces.
A little planning in February saves a lot of heartache come August when your tomatoes are still standing tall and full of fruit.
5. Ignoring Soil Drainage, Especially In Clay Soils

Indiana clay soil holds water like a bathtub. Tomatoes cannot tolerate that for more than a day or two.
Roots in waterlogged soil suffocate, rot begins, and plants start showing stress signals that look confusingly like drought damage.
Clay soil compacts easily and drains poorly, creating conditions where water sits in the root zone long after rain has stopped.
In a wet Indiana spring, this can mean your tomato plants are essentially struggling while you wait for better weather.
Yellowing leaves, wilting despite wet soil, and a faint sour smell near the roots are all signs that drainage has become a serious problem.
Raised beds are the most reliable solution for clay-heavy yards because they let you control soil composition completely.
Filling beds with a mix of topsoil, compost, and perlite creates the loose, well-draining environment tomatoes thrive in.
Even a six-inch raised bed can make a dramatic difference in how roots develop through a wet season.
If raised beds are not an option, work generous amounts of compost into your existing soil each fall and spring.
Organic matter breaks up clay structure over time and dramatically improves drainage. Adding coarse sand in combination with compost also helps open up the soil.
Getting drainage right is foundational, and no amount of fertilizer or care can compensate for roots sitting in water.
6. Skipping Disease-Resistant Varieties

The wrong tomato variety costs you the entire season. Most growers grab whatever looks prettiest at the nursery without a second thought.
They never check whether it has any resistance to diseases common in their region. Indiana’s humid summers create the perfect conditions for fungal and bacterial problems to spread fast.
Disease-resistant varieties carry letter codes on their labels that tell you exactly what they can handle.
V stands for verticillium wilt resistance, F for fusarium wilt, N for nematode resistance, and T for tobacco mosaic virus.
A variety labeled VFNT is essentially armored against some of the most damaging tomato problems you will face in the Midwest.
Popular resistant varieties like Celebrity, Mountain Merit, and Defiant perform consistently well in Indiana gardens because they were bred with real-world growing conditions in mind.
They may not have the romantic backstory of a family heirloom, but they deliver fruit reliably even when summer throws its worst at them.
Heirloom lovers can still grow their favorites alongside one or two resistant varieties as insurance. Resistance does not mean a plant is invincible, but it does mean the odds shift meaningfully in your favor.
Combining resistant varieties with good spacing for airflow and consistent watering gives you a strong foundation.
Think of choosing disease-resistant varieties as the single easiest upgrade you can make to your tomato garden without spending extra time or effort. The payoff shows up clearly when your neighbors are spraying and you are harvesting.
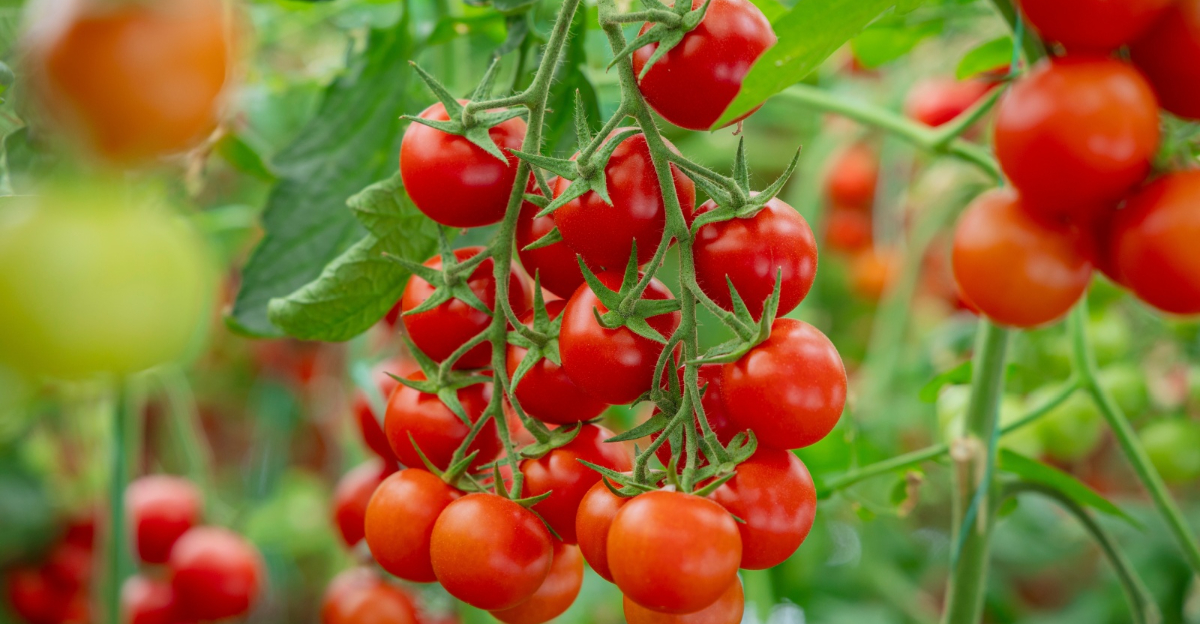
7. Causing Fruit Cracking From Uneven Watering

Few things sting quite like picking a tomato that split wide open just before it was perfect. after a dry spell.
Fruit cracking in Indiana almost always traces back to one thing: a sudden flood of water after a dry spell.
The fruit swells faster than the skin can stretch, and the result is cracks that range from hairline splits to gaping wounds.
Radial cracks run from the stem down the sides of the fruit, while concentric cracks circle around the top like rings. Both types happen when water availability spikes sharply after a period of stress.
A heavy rainstorm following two weeks of dry weather is the classic trigger, and Indiana summers deliver that exact scenario with frustrating regularity.
Keeping soil moisture steady is the most effective prevention strategy available to home growers.
Drip irrigation or soaker hoses deliver water slowly to the root zone, preventing the sudden saturation that causes cracking.
Combining a consistent watering schedule with a thick mulch layer gives you two layers of protection against moisture swings.
Picking tomatoes slightly before full ripeness also reduces cracking risk because the skin is still a bit more flexible at that stage.
They will finish ripening perfectly on your counter within a day or two. Varieties like Juliet and Sungold cherry tomatoes are naturally more crack-resistant than large slicers.
They are a smart addition to any Indiana garden where summer rain patterns are unpredictable. Steady habits lead to smooth, beautiful fruit every time.
8. Poor Soil Health And Wrong PH

Soil pH is the invisible dial that controls everything your tomato plants can and cannot access. When that dial is set wrong, nutrients lock up and roots cannot access them, no matter how much fertilizer you apply.
Tomatoes need a pH between 6.0 and 6.8 to thrive, and Indiana soils often sit outside that range without gardeners ever realizing it.
Acidic soil below 6.0 makes phosphorus, calcium, and magnesium harder for roots to absorb.
Alkaline soil above 7.0 locks up iron and manganese, causing yellowing between leaf veins. It looks like a nutrient deficiency but it is a chemistry problem.
Adding fertilizer without fixing pH first means much of it goes to waste, because nutrients sit in the soil unavailable to roots.
Getting a soil test done through Purdue University Extension costs very little and gives you a detailed breakdown of your soil’s pH and nutrient levels.
The results come with specific recommendations for amendments tailored to your situation. Garden lime raises pH in acidic soil, sulfur lowers it in alkaline ground.
Apply both several months before planting. Beyond pH, overall soil health matters enormously for tomato production.
Two to three inches of finished compost each season feeds soil biology, improves structure, and gives tomatoes exactly what they need.
Tomato problems often start right here in the soil before a single plant goes in the ground. Get the foundation right, and your garden rewards you for it.