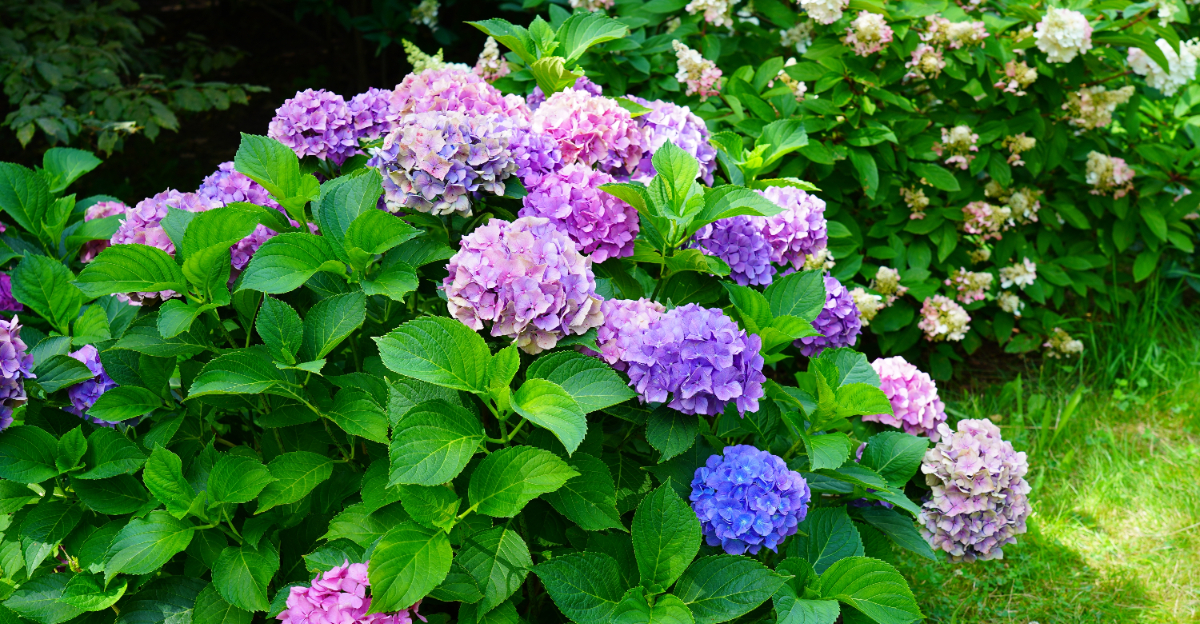
What Georgia Gardeners Should Do With Hydrangeas Before June Ends
One of the most frustrating things about yard work is how quickly a season can get away from you. It feels like spring just started, and then suddenly the calendar says June is almost over.
The plants that looked perfect a few weeks ago are growing fast, changing fast, and demanding attention at exactly the same time.
That is why experienced gardeners often pay close attention to timing rather than waiting until something looks wrong.
A healthy plant can still benefit from the right care at the right moment, and missing that window is usually easier than most people realize.
For hydrangea lovers in Georgia, the final stretch of June happens to be one of those periods worth noticing.
Before summer settles in completely, there are a few things that can help these popular shrubs stay on the right track for the weeks ahead.
1. Refresh Mulch Before Summer Heat Arrives

Bare soil around hydrangeas in late June is asking for trouble. Without a solid layer of mulch, the ground heats up fast and moisture disappears before roots ever get a chance to use it.
Fresh mulch acts like a buffer between your plants and the brutal summer sun beating down on the soil. Aim for a layer around two to three inches thick, keeping it pulled a few inches back from the main stem.
Piling mulch right against the base traps moisture against the wood and invites rot.
Pine straw works well in the Southeast and breaks down slowly. Shredded hardwood bark is another solid choice that holds moisture without compacting too quickly.
Both options are easy to find at local garden centers.
Refreshing mulch now also suppresses weeds that would otherwise compete with your hydrangeas for water during dry stretches. Weeds under a hydrangea canopy are sneaky.
They rob nutrients quietly and steadily.
If you already have mulch down from spring, check the depth. It compacts and breaks down over time.
Top it off if it has thinned to less than an inch. A quick refresh takes maybe fifteen minutes per plant and pays off all summer.
2. Remove Weeds Competing For Water And Nutrients

Weeds do not ask permission. They move in fast, especially once warm weather locks in and soil stays consistently moist from summer rains.
Around hydrangeas, weeds are more than just an eyesore. They pull water and nutrients straight from the root zone, competing directly with your shrubs at the exact time those plants need reliable resources most.
Spotted spurge, crabgrass, and nutsedge are especially aggressive in warm Southern gardens.
Hand-pulling works best when weeds are still small. Grab them low and pull slowly to get the root, not just the top.
Leaving roots behind means they bounce back within days.
Avoid using a hoe too close to hydrangea stems. Shallow roots spread wide and can be nicked easily.
Work carefully near the base and use your hands for anything within six inches of the plant.
After weeding, lay down fresh mulch to slow regrowth. Weeds struggle to push through a solid two-inch layer.
Your Georgia Garden Changes Every Week. Your Plan Should Too.
Gardening in Georgia changes quickly throughout the season. Every Friday you’ll receive a simple weekly plan showing exactly what to plant, prune, fertilize, harvest, and protect so you never miss the right timing.
That combination of hand removal and mulching is the most practical approach for most home gardeners.
Check around your plants every week or two during June. Weed pressure increases quickly once temperatures stay consistently above eighty degrees.
Staying ahead of it early takes far less effort than dealing with an overgrown bed later in the season.
3. Water Deeply Before Extended Dry Weather Sets In

Hydrangeas are surprisingly dramatic about water. Miss a few days during a dry stretch and those big leaves will droop hard, sometimes before noon on a hot day.
Deep watering is the key phrase here. A quick sprinkle on the surface does almost nothing useful.
Water needs to reach down six to eight inches where the feeder roots actually live. A slow, steady soak at the base of each plant works far better than a fast spray across the foliage.
Early morning is the best time to water. Moisture soaks in before the heat peaks, and foliage dries off quickly once the sun rises.
Wet leaves sitting through the night create conditions where fungal problems take hold more easily.
During June, established hydrangeas typically need about one inch of water per week. Rainfall counts toward that total, but it is worth checking soil moisture rather than assuming rain was enough.
Push a finger two inches into the soil near the base. If it feels dry, water.
Drip irrigation or a soaker hose delivers moisture efficiently and keeps water off the leaves entirely. That matters in humid summers where leaf diseases spread quickly.
If you rely on hand watering, water slowly and let it pool slightly before moving on.
4. Check Leaves For Early Signs Of Leaf Spot

Brown circles on hydrangea leaves are not random. They are usually the first visible sign of a fungal problem called Cercospora leaf spot, and catching it early makes a real difference.
Leaf spot spreads fast in warm, humid conditions. Spores move through water splash, which means rain and overhead irrigation both help the disease travel from leaf to leaf.
Once a plant is heavily infected, managing it becomes much harder.
Look at the lower leaves first. Spots typically start small, with purple or brown edges and sometimes a lighter center.
Leaves with heavy spotting will eventually yellow and drop. Repeated defoliation weakens the plant over time.
Remove affected leaves as soon as you spot them. Do not compost them.
Bag them and put them in the trash to prevent spores from spreading back into the garden bed.
Improving airflow around the plant also helps slow the spread. Crowded shrubs with dense canopies stay wet longer after rain, giving fungal spores exactly the conditions they need to thrive.
Copper-based fungicides and neem oil are both commonly used treatments. Follow label directions carefully and apply in the early morning so the product dries before temperatures peak.
Repeat applications are usually needed every seven to ten days during wet stretches.
5. Clear Away Fallen Blooms And Plant Debris

Old blooms and fallen leaves sitting on the ground around your hydrangeas are not harmless. They become a shelter for fungal spores, pests, and moisture-related problems.
As spring blooms fade and petals drop, they accumulate in the mulch and soil below. Damp, decomposing plant material is exactly what fungal diseases need to establish and spread.
Keeping the ground beneath your plants clean is a simple but genuinely effective form of disease prevention.
Grab a pair of gloves and walk through your beds every week or two. Pick up fallen petals, spent blooms, and any yellowed or spotted leaves that have dropped.
It takes only a few minutes per plant.
Bag this material rather than composting it, especially if any of the debris shows signs of spotting, discoloration, or powdery coating. Composting diseased plant material risks spreading pathogens back into the garden later.
Clearing debris also reduces hiding spots for insects like aphids and spider mites, which tend to cluster in sheltered spots near the base of plants. Less clutter means fewer places for problems to hide and grow undetected.
After clearing, fluff up the mulch layer to improve drainage and airflow near the soil surface. Compacted, wet mulch stays damp too long and creates conditions similar to standing water.
6. Avoid Pruning Stems That May Carry Future Flower Buds

Pruning at the wrong time is one of the most common hydrangea mistakes, and June is exactly when that mistake gets made most often.
Several popular hydrangea varieties, including Bigleaf and Oakleaf types, set their flower buds for next year on old wood. That means the stems currently on the plant are already carrying next season’s blooms.
Cut those stems now and you lose those flowers entirely.
Smooth hydrangeas like Annabelle and panicle types such as Limelight are different. They bloom on new wood and can tolerate pruning earlier in the season.
Knowing which variety you have matters a lot before you pick up the pruners.
Right now, the safest approach for most gardeners is to hold off on any major cutting.
If you need to remove a damaged or obviously nonproductive stem, prune carefully and only take off what is necessary. Green, flexible stems with visible buds should be left completely alone.
Deadheading spent blooms is fine and will not harm next year’s flower production. Just remove the old flower head and leave the stem intact below it.
If you are unsure what variety you have, err on the side of caution and skip pruning entirely until late summer or early fall when timing becomes clearer.
7. Give Crowded Shrubs More Space For Airflow

Packed-in plants struggle more in summer heat than most gardeners realize. When hydrangeas are crowded, air barely moves through the canopy, and that trapped humidity becomes a breeding ground for fungal issues.
Thinning out surrounding plants and cutting back anything pressing against your hydrangeas can make a noticeable difference. You do not need to do a full redesign.
Just create some breathing room around each shrub so air can circulate freely between the leaves.
Start by removing any dead branches from neighboring shrubs. Next, trim back any overgrowth that is leaning directly into the hydrangea canopy.
Even pulling back a few inches of crowding plant material helps airflow dramatically.
Hydrangeas also benefit from some selective thinning within their own canopy. Removing a few crossing or inward-facing branches allows light and air to reach the interior of the plant.
Fewer damp, shaded spots means less opportunity for leaf spot and powdery mildew to develop.
Be careful not to overdo it. Removing too much foliage at once stresses the plant, especially during hot weather.
Focus on the most congested areas and work gradually.
Good airflow also helps plants recover faster after heavy rain. Leaves dry more quickly, reducing the window of time when fungal spores can germinate and spread.