What Those Small White Ovals Under Your Kentucky Planter Actually Are
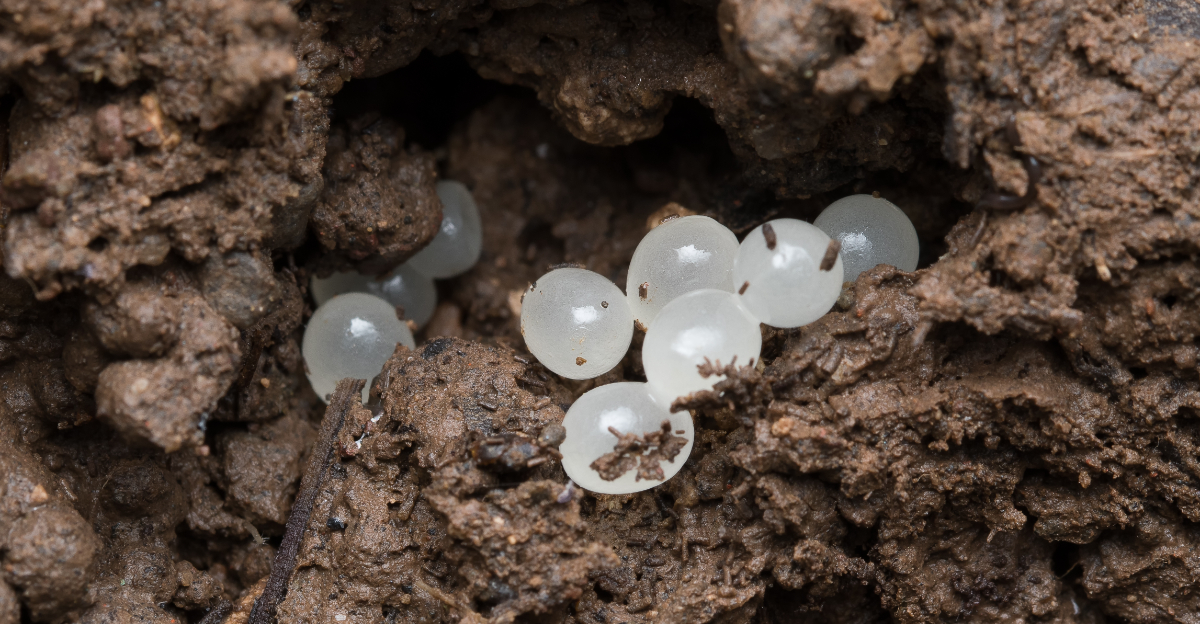
You lift the planter to move it, and there they are: tiny white ovals clustered together in the damp soil underneath. Your first reaction might land somewhere between confusion and mild alarm.
In Kentucky, those small white ovals under a planter are one of the most common finds hiding in damp, shaded soil. Moisture-loving pests favor pots, stones, and thick mulch as cover for laying their clutches undisturbed.
Spotting the eggs now, before they hatch, puts you ahead of the problem instead of chasing it later. One overlooked cluster can turn into dozens of slugs working through your seedlings within days.
Slug Or Snail Eggs Are The Likely Culprit
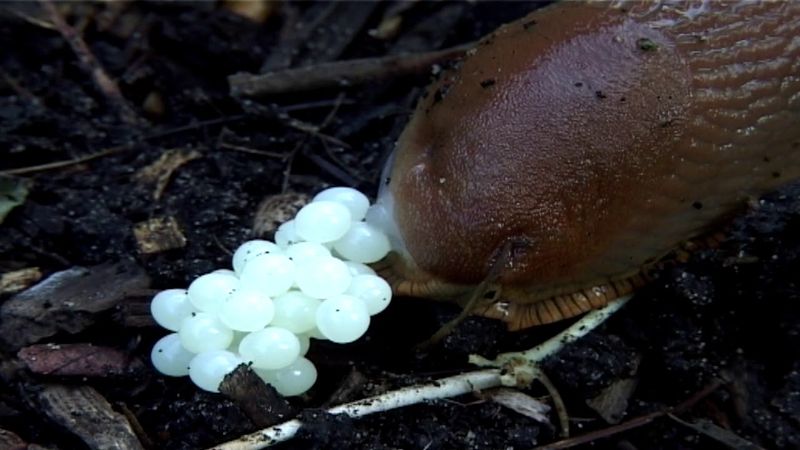
Lift any planter that has been sitting in a shady spot for a week, and you might get a surprise. Those pearly white ovals staring back at you are almost certainly slug or snail eggs.
Slugs lay eggs in batches, typically 20 to 40 at a time, in soft moist soil. The eggs are round to oval shaped, measuring roughly 3 to 4 millimeters across.
Fresh eggs look translucent white or pale cream, almost like tiny pearls. Older eggs may turn slightly yellowish as the embryos develop inside.
Snail eggs look nearly identical to slug eggs, so telling the two apart without a magnifying glass is tough. Both pests favor the same hiding spots under planters.
The underside of a planter is prime real estate for egg-laying because it stays dark, cool, and consistently moist. Slugs seek out exactly those conditions when choosing a place to deposit eggs.
Kentucky gardens are especially welcoming to slugs from spring through fall. Warm humid summers create a nearly perfect nursery environment beneath every planter in your yard.
If you see eggs, do not assume it is just one slug passing through. A single adult can lay multiple egg batches across a single season.
Those small white ovals under your Kentucky planter are a sign of an active slug population nearby. Acting quickly gives you the upper hand before the eggs hatch and hungry juveniles scatter across your garden beds.
Clustered Eggs Signal An Active Infestation
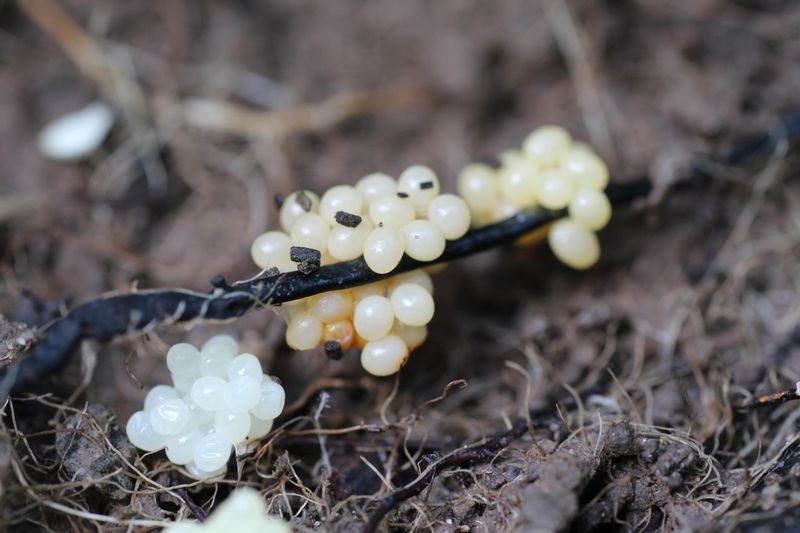
Finding one or two stray eggs is one thing, but a dense cluster is a completely different story. A tight grouping of 20 or more eggs tells you a slug has been living comfortably under that planter for a while.
Slugs do not wander far from their feeding grounds when it is time to lay eggs. Discovering a cluster means the parent slug is likely still feeding on nearby plants at night.
Look for chewed leaf edges or silvery slime trails on surrounding plants as confirmation. Those signs paired with egg clusters confirm an active infestation, not just a passing visitor.
Multiple clusters in the same area suggest more than one adult slug is using your planter as a nursery. Each new batch multiplies the problem exponentially once the eggs hatch.
Slug eggs hatch in about 10 days during warm weather, so time is genuinely short. Waiting even a few days after spotting a cluster can mean dozens of new juveniles emerge.
Your Kentucky Garden Changes Every Week. Your Plan Should Too.
Gardening in Kentucky changes quickly throughout the season. Every Friday you’ll receive a simple weekly plan showing exactly what to plant, prune, fertilize, harvest, and protect so you never miss the right timing.
Juvenile slugs begin feeding almost immediately after hatching, targeting tender seedlings and young leaves first. A single hatched cluster can noticeably damage a small plant within days.
Checking under every planter in your yard after a rain event is a smart habit to build. Wet soil speeds up egg development and encourages adults to lay new batches sooner.
Spotting clustered eggs early puts you in control of the situation before real plant damage begins. Your garden will thank you for paying attention to what hides underneath.
Distinguishing Eggs From Fertilizer Pellets

Not everything small and white in your garden soil is a slug egg, and making the right call matters. Slow-release fertilizer pellets are a very common look-alike that confuses plenty of gardeners.
Fertilizer pellets are usually perfectly round, uniform in size, and have a slightly chalky or hard texture. Slug eggs, by contrast, are softer, slightly translucent, and more oval than spherical.
Try pressing one gently with a fingernail or a stick. A fertilizer pellet will feel firm and resist pressure, while a slug egg will compress slightly or burst with a little force.
Perlite is another white material that sometimes confuses gardeners checking their soil. Perlite pieces are irregular and jagged looking, nothing like the smooth uniform surface of a slug egg.
Slow-release fertilizer pellets also tend to be scattered randomly throughout the soil mix. Slug eggs cluster tightly together in a defined group, almost like a hidden pile of tiny pearls.
Color can help too, but only up to a point. Fertilizer pellets often have a brighter, more opaque white, while fresh slug eggs carry a soft translucent quality in natural light.
Location is another clue worth checking. Fertilizer pellets appear throughout the pot, but slug eggs almost always sit right at the soil surface or just beneath it near the planter edge.
Knowing the difference saves you from panicking over harmless garden materials. Once you have seen real slug eggs up close, the distinction becomes obvious and surprisingly easy to remember.
The Real Reason Planters Attract Egg-Laying Slugs
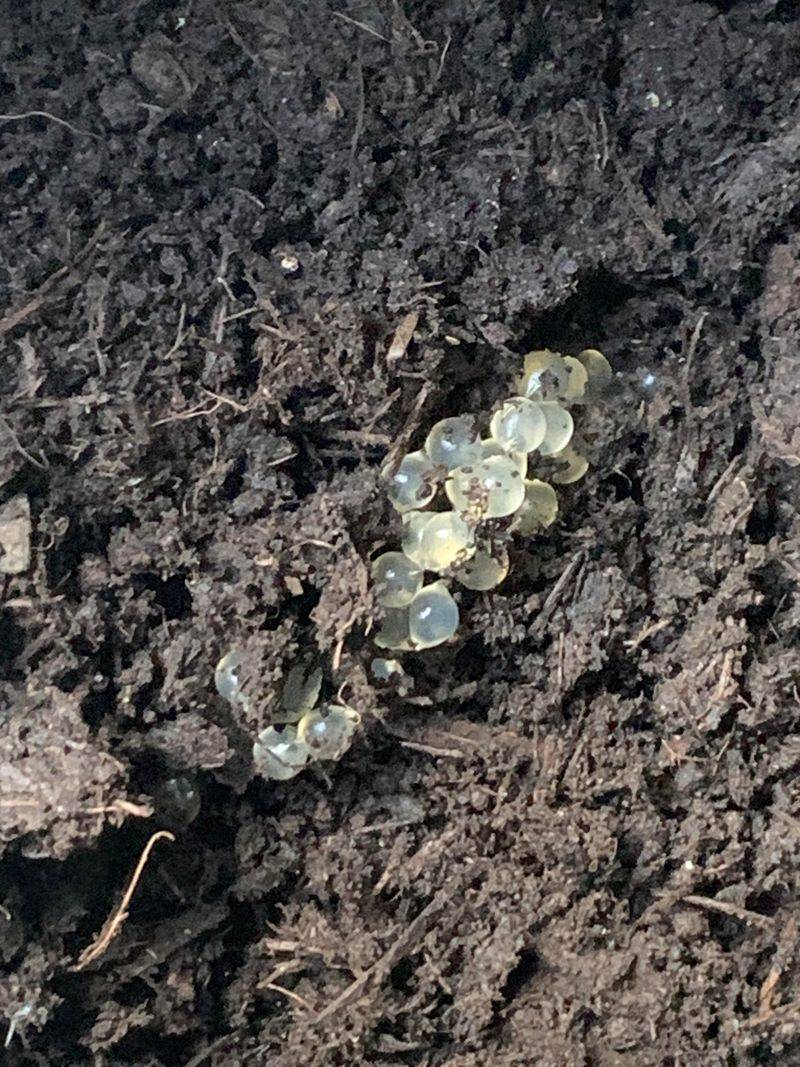
Slugs are not randomly choosing your planter as a hiding spot, they are making a calculated decision. The underside of a planter offers everything a slug needs to survive and reproduce successfully.
Moisture is the single biggest draw. Planters sitting on soil or mulch trap humidity underneath, creating a persistently damp microclimate that slugs absolutely seek out.
Darkness is the second major factor. Slugs are highly sensitive to light and prefer to rest and lay eggs in shaded, protected spaces away from drying sun and wind.
The soil directly beneath a planter stays loose and workable because it rarely dries out fully. Loose soil is far easier for a slug to burrow into when depositing a batch of eggs.
Planters also hold heat at night, which speeds up egg development during cooler spring months. A planter sitting on a warm patio provides a more stable temperature than open ground nearby.
Food proximity matters too. Slugs feeding on your plants do not travel far before resting. Laying eggs just beneath the nearest planter cuts down the distance between nursery and food source.
Kentucky gardens with heavy mulch, frequent rain, and shaded planting areas create near-perfect slug habitat. Planters in those environments are especially likely to become egg-laying sites.
Understanding why slugs choose your planters helps you make smarter decisions about placement and maintenance. Moving planters to sunnier, drier spots removes the exact conditions that make them so attractive to egg-laying slugs.
Removing Eggs Before They Hatch
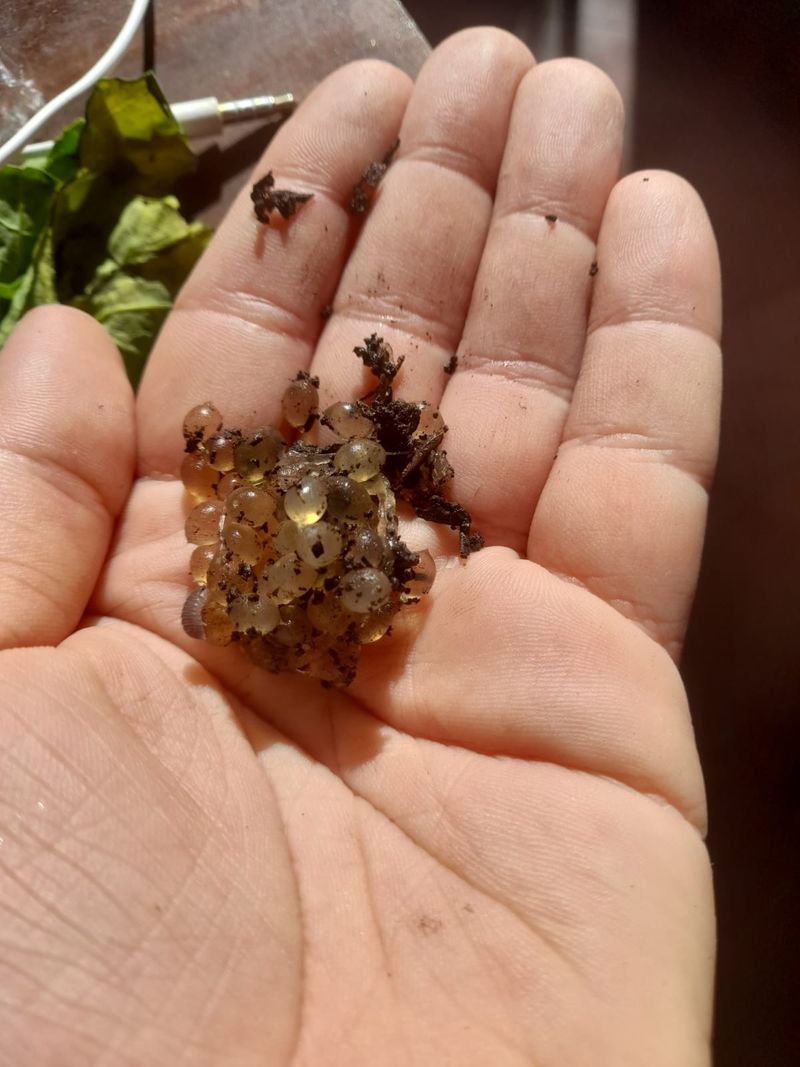
Speed matters the moment you spot those white ovals in the soil. Slug eggs can hatch in as few as 10 days during warm weather, so prompt removal makes a measurable difference.
Put on a pair of disposable gloves before you start, because slug eggs are coated in a slippery mucus. Bare hands work too, but gloves make the job much less unpleasant.
Scoop the eggs out of the soil using a small trowel or an old spoon. Try to gather the entire cluster at once rather than scattering the eggs deeper into the soil.
Drop the collected eggs into a sealed bag or a small container of soapy water. Soapy water breaks down the protective coating on the eggs and stops development fast.
Do not simply toss the eggs onto open ground nearby. Eggs left on the surface can still hatch if conditions stay moist enough, which defeats the whole purpose of removal.
After clearing the eggs, inspect the surrounding soil carefully for any strays. A few overlooked eggs can still produce enough juveniles to restart the infestation within two weeks.
Check back under the same planter every three to four days for at least two weeks. Adult slugs often return to the same site to lay new batches after the first removal.
Removing eggs before they hatch is one of the most effective steps you can take to protect your plants. Those small white ovals under your Kentucky planter are manageable once you know exactly what to do.
Preventing Future Slug Activity Around Planters
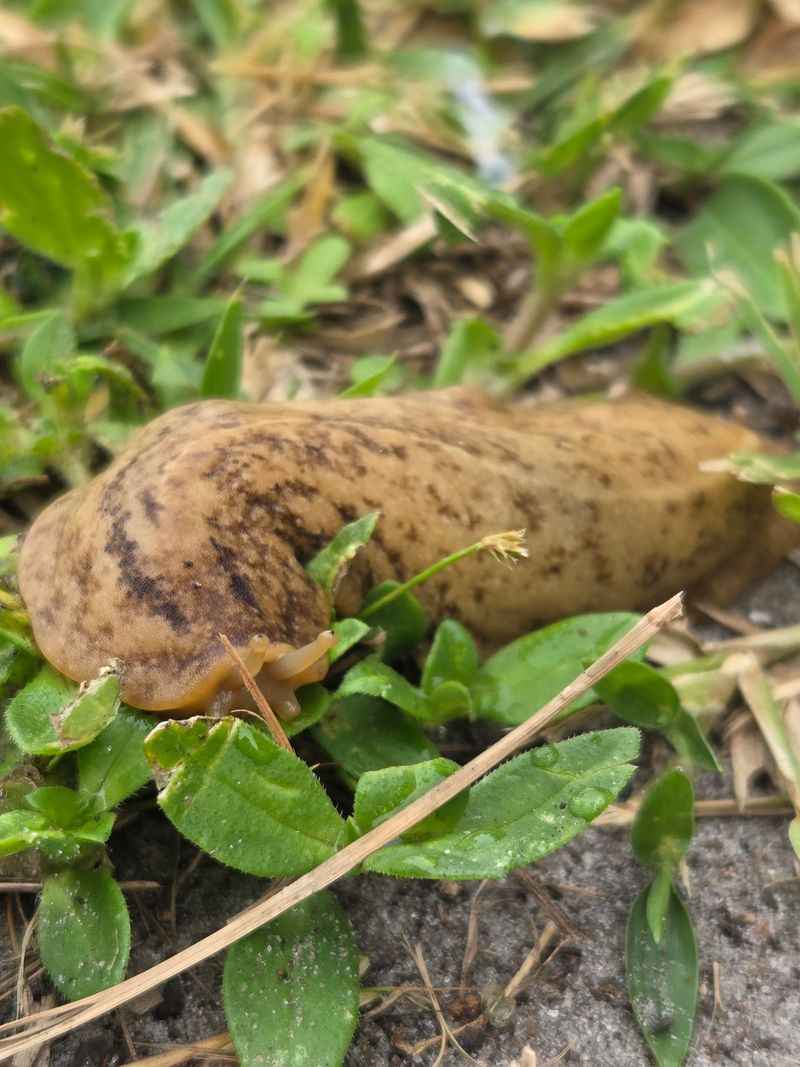
Removing eggs is a great start, but prevention is what keeps your garden protected season after season. A few simple changes to how you position and maintain your planters make a big difference.
Elevate planters off the ground using pot feet, risers, or small wooden blocks. Air circulation underneath breaks up the dark moist microclimate that slugs find so appealing for egg-laying.
Move planters to sunnier spots whenever possible. Slugs strongly avoid areas that dry out quickly during the day, and a sun-exposed planter base is far less inviting to them.
Copper tape applied around the base of a planter creates a barrier slugs dislike crossing. The copper reacts with slug mucus in a way that deters forward movement without harming other garden creatures.
Diatomaceous earth sprinkled around the perimeter of planters works as a physical deterrent. The sharp microscopic particles irritate slug bodies, discouraging them from settling in that area.
Reduce excess moisture near planters by watering in the morning rather than at night. Evening watering leaves soil wet through the hours when slugs are most active and most likely to lay eggs.
Clear away leaf litter, mulch, and debris from directly around each planter base. Removing those materials eliminates the extra hiding spots that help slugs feel safe enough to stick around.
Consistent prevention habits mean you are far less likely to find those small white ovals under your Kentucky planter next season. A little effort now protects your plants for months to come.