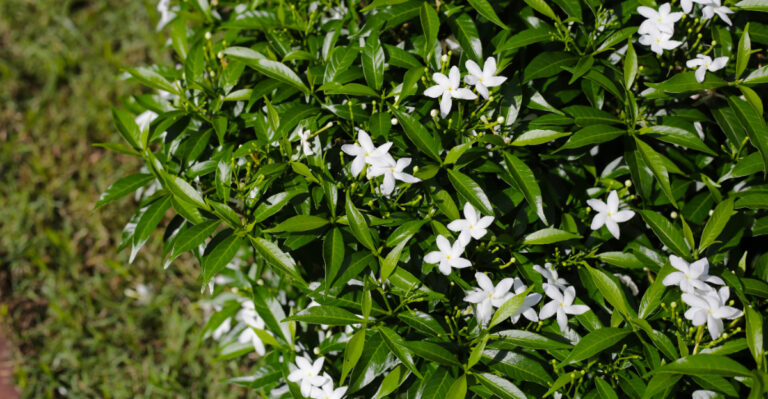
Common Mistakes North Carolina Gardeners Make When Pruning Crape Myrtles After The First Bloom
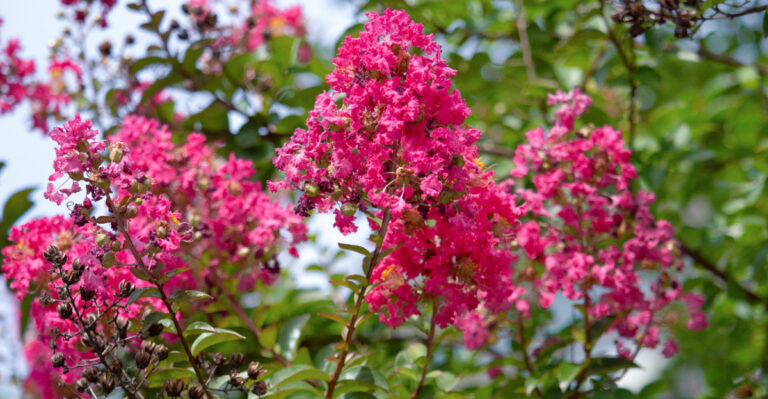
Crape myrtles are one of the most forgiving shrubs in the North Carolina landscape, but that forgiveness gets tested every summer when well-meaning gardeners reach for the pruning shears at the wrong time and in the wrong way.
The period right after the first bloom is actually one of the most important moments in the entire growing season for these plants, and how you handle it determines whether you get a second strong flush of color or a tired, weakened shrub limping toward fall.
Several very common pruning habits that seem logical on the surface end up setting the plant back significantly.
Knowing which cuts to make and which ones to absolutely avoid makes a real difference in how your crape myrtles perform year after year.
1. Pruning Too Late In The Season

Timing really is everything when it comes to coaxing a second flush of blooms from your crape myrtle.
Most North Carolina gardeners do not realize that waiting until mid-July or later to prune after the first bloom can seriously cut into the tree’s ability to produce new flower buds.
The warm growing season gives crape myrtles a natural window, and missing it means missing out.
The sweet spot for post-first-bloom pruning in North Carolina falls between late June and early July.
During this window, the tree still has enough warm weeks ahead to push out fresh growth and set new flower buds before the season winds down. Pruning even a week or two late can reduce that second flush significantly.
Think of it like planting tomatoes. Plant them at the right time and you get a full harvest. Wait too long and the season just runs out on you. Crape myrtles work the same way, responding strongly to timely care.
A simple habit that helps is keeping a note on your phone or a calendar reminder set for late June. Walk your yard, check for fading blooms, and snip them off promptly.
Staying ahead of the schedule keeps your crape myrtles blooming strong and full all the way through late summer.
2. Cutting Back Too Aggressively

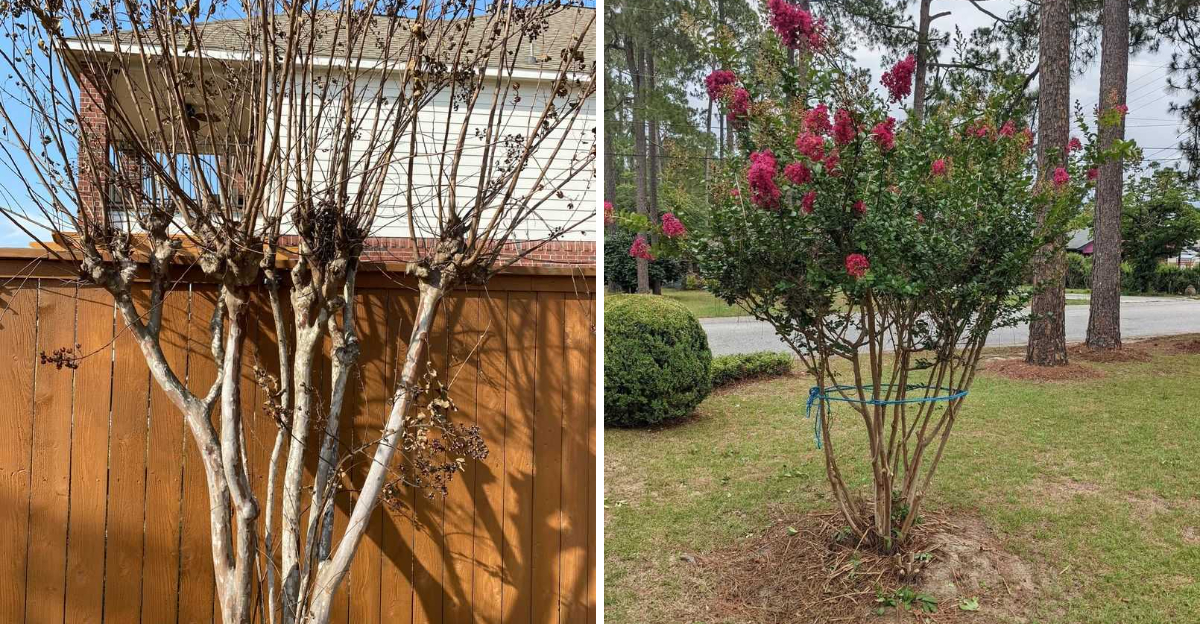
Few things frustrate experienced gardeners more than seeing a crape myrtle hacked down to ugly, thick stubs every year. This harsh practice is shockingly common across North Carolina neighborhoods.
Heavy topping weakens the tree, encourages weak water sprouts, and actually reduces the number of blooms you get each season.
Crape myrtles bloom on new growth, so the goal after the first flush is to encourage fresh, vigorous shoots, not to strip the tree bare. Selective trimming means removing only the spent flower heads and lightly thinning a few crowded branches.
That approach keeps the tree healthy, balanced, and ready to push out another round of color.
Over-pruning also leaves large wounds that take a long time to close, making the tree more vulnerable to pests and fungal issues during North Carolina’s humid summers. Smaller, precise cuts heal much faster and put far less stress on the plant overall.
A good rule of thumb is to never remove more than one-third of the tree’s canopy at any one time. Step back often while pruning and look at the overall shape.
Less really is more when it comes to crape myrtles, and a lighter hand almost always produces better results than going all out with the pruning saw.
3. Ignoring Withered Or Damaged Wood

Spotting and removing weak or damaged branches is one of the most overlooked steps in post-bloom crape myrtle care.
Many gardeners focus only on the spent flowers and completely skip checking the interior of the canopy for branches that have snapped, split, or simply stopped producing healthy growth. Leaving that wood in place creates real problems over time.
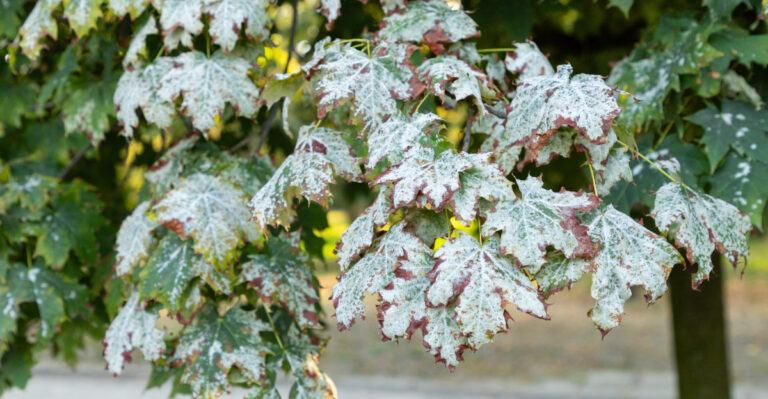
Damaged branches block airflow inside the canopy, which is a big deal in North Carolina’s warm, humid climate. Poor airflow creates the perfect conditions for powdery mildew and other fungal diseases that love crape myrtles.
Removing those problem branches is one of the simplest ways to keep your tree healthier through the rest of the growing season.
Identifying weak wood is easier than it sounds. Look for stems that feel brittle, have discolored or cracked bark, or show no signs of fresh green growth.
Those are the ones worth cutting out, and removing them actually encourages the surrounding healthy branches to fill in stronger.
The key is restraint. You are not trying to reshape the whole tree, just clean it up.
Take out what is clearly compromised, make clean cuts just above a healthy bud or branch junction, and leave the rest alone.
A little targeted cleanup goes a long way toward keeping your crape myrtle vigorous and full of blooms through late summer.
4. Using Dull Or Dirty Tools

Grabbing whatever pruning shears are hanging in the garage without checking their condition is a habit that can quietly hurt your crape myrtles. Dull blades do not cut cleanly.
Instead, they crush and tear plant tissue, leaving ragged wounds that take much longer to heal and are far more inviting to fungal pathogens and insects looking for an easy entry point.
Dirty tools are an equally serious issue. If you pruned a diseased plant earlier in the season and then moved on to your crape myrtle without cleaning the blades, you may have just transferred that problem directly onto a healthy tree.
A quick wipe-down with isopropyl alcohol between cuts, especially when moving from plant to plant, costs almost no time and protects your investment significantly.
Sharpening your pruning shears does not require special skills or expensive equipment. A basic sharpening stone or a pull-through blade sharpener handles the job in just a few minutes.
Sharp tools also make the work much easier on your hands and wrists, which is a bonus during longer pruning sessions in the summer heat.
Before heading out to prune, make it a routine to check your tools. Clean the blades, sharpen if needed, and have a small spray bottle of diluted bleach or alcohol ready to use between cuts.
That small preparation step keeps your crape myrtles protected and your pruning results looking clean and professional.
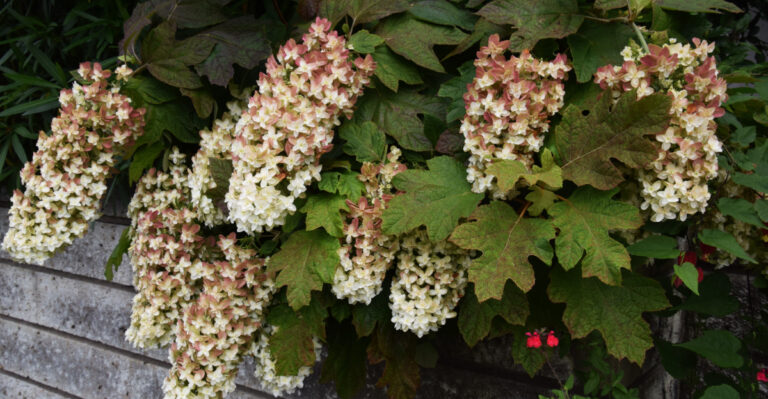
5. Not Thinning Interior Branches

A crape myrtle with a packed, overly dense canopy might look full and lush from the outside, but the interior tells a different story.
When branches are too crowded, air cannot move through freely, sunlight cannot reach the inner growth, and the tree ends up putting energy into weak, shaded stems instead of productive flowering shoots.
Thinning fixes all of that at once. After the first bloom, take a good look inside the canopy. If you see crossing branches, stems rubbing against each other, or sections so thick that light barely filters through, those are your targets.
Removing a selection of those interior branches opens up the structure without changing the tree’s overall size or natural appearance.
Better airflow reduces the risk of powdery mildew, which is one of the most common complaints from crape myrtle growers in North Carolina’s humid climate.
More sunlight reaching lateral shoots encourages those branches to produce stronger growth and more flower buds for the second bloom cycle. It is a straightforward trade-off that pays off visibly.
Thinning does not mean stripping the interior bare. Remove about ten to fifteen percent of the crowded inner growth, focusing on the weakest and most tangled stems.
Stand back regularly to assess your progress and avoid over-thinning. A well-opened canopy looks balanced, allows light to dance through the leaves, and sets the tree up for a spectacular late-summer flowering display.
6. Pruning New Wood Instead Of Spent Flowers

Here is a mistake that catches even well-meaning gardeners off guard. After the first bloom fades, it is easy to confuse the new green growth pushing out near spent flower clusters with excess material that needs to go.
Cutting that fresh new wood is one of the most counterproductive things you can do at this stage of the season. That vigorous new growth is exactly where your next round of blooms will come from.
Crape myrtles produce flowers at the tips of new shoots, so every piece of fresh green stem you accidentally remove is a potential flower cluster you have taken off the table for later in the summer.
Protecting that new wood is the whole point of post-bloom pruning. The correct move is to snip only the faded, brown, or dried flower heads, cutting just above the point where new green growth is already emerging.
This encourages the tree to redirect its energy into those fresh shoots and push them toward blooming rather than wasting resources on seed production in the spent clusters.
Taking a slow, careful approach makes all the difference here. Rushing through the pruning process increases the chances of accidentally clipping the wrong stems.
Spend a moment identifying the spent clusters versus the new shoots before every cut. Your patience will be rewarded with a second flush of blooms that can be just as impressive as the first one that started the whole season off so beautifully.
7. Failing To Shape Properly

Random pruning cuts made without any thought for the tree’s overall form can leave a crape myrtle looking awkward and uneven for the entire rest of the season. Shaping is not just about looks, though aesthetics certainly matter.
An unbalanced canopy can also affect how well the tree flowers, since unevenly distributed branches compete for light and resources in ways that reduce overall bloom production.
Crape myrtles naturally grow in a graceful, multi-stemmed vase shape, and working with that form rather than against it produces the best results. When shaping after the first bloom, step back frequently and look at the tree from multiple angles.
Identify which branches are pulling the silhouette out of balance and make targeted cuts to restore symmetry without removing too much material.
One practical technique is to prune in layers. Start at the top by removing spent blooms, then assess the mid-canopy for any awkward crossing or outward-reaching branches that disrupt the natural flow of the tree’s shape.
Finishing with a look at the lower structure helps ensure everything feels cohesive from top to bottom.
Avoid the temptation to make the tree look perfectly round or flat-topped. Those shapes are unnatural for crape myrtles and require constant, heavy pruning to maintain.
Embracing the tree’s natural upward-arching form and simply refining it after each bloom cycle keeps maintenance manageable and results in a stunning, well-proportioned tree that your neighbors will absolutely notice.
8. Removing Too Many Lower Branches

Stripping away the lower branches of a crape myrtle might seem like a tidy, organized thing to do, but it often creates more problems than it solves.
Over-lifting the canopy, which is what landscapers call the practice of removing too many lower limbs, leaves the tree looking top-heavy and unnatural.
It also reduces the total number of flowering branches available to put on a show each season. Lower branches play a surprisingly important structural role.
They help distribute the weight of the upper canopy, contribute to the tree’s overall stability during storms, and provide accessible blooms that pollinators like bees and butterflies can easily reach.
North Carolina gardens benefit enormously from pollinator activity, and crape myrtles are one of the best summer sources of nectar in the region.
When lower branches are removed too aggressively, the tree also loses some of its visual presence at eye level.
A crape myrtle with blooms cascading from ground level up through the canopy has a dramatically more beautiful and full appearance than one that has been lifted into a lollipop shape with a bare trunk and a blob of foliage on top.
A smarter approach is to remove only lower branches that are crossing, rubbing, or growing inward toward the trunk. Keeping the naturally outward-reaching lower limbs intact preserves both the structure and the beauty of the tree.
Your crape myrtle will look more graceful, support more wildlife, and reward you with blooms at every level throughout the summer season.
9. Forgetting To Dispose Of Clippings

Once the pruning is finished, it is tempting to leave the clippings on the ground and call it a day. After all, the hard work is done, right?
Unfortunately, leaving trimmed material piled around the base of your crape myrtle is a habit that can quietly undermine everything you just worked to achieve with careful pruning.
Fallen clippings, especially spent flower clusters, can harbor fungal spores that thrive in North Carolina’s warm, moist summer conditions.
Powdery mildew and Cercospora leaf spot are two common fungal issues for crape myrtles, and leaving infected plant material on the ground gives those spores a perfect place to overwinter or spread during wet weather.
Cleaning up promptly breaks that cycle. Pests are another concern. Certain insects lay eggs or shelter in piled plant debris, and a heap of fresh clippings sitting right at the base of your tree is basically an open invitation.
Removing that material promptly reduces the chances of pest populations building up right where they can do the most harm to your tree.
Disposal is straightforward. Bag the clippings in yard waste bags for curbside pickup, take them to a municipal composting facility, or hot-compost them at home if you maintain a compost pile that reaches high enough temperatures to neutralize pathogens.
Avoid leaving them in a cold pile near the garden. A clean base around your crape myrtle is one of the easiest and most effective ways to support its long-term health and ongoing beauty throughout the growing season.