The June Rose Mistake Most Tennessee Gardeners Make Without Knowing
Your Tennessee garden blazes pink after three years of careful work, then life gets busy and two weeks slip by before you make it back outside.
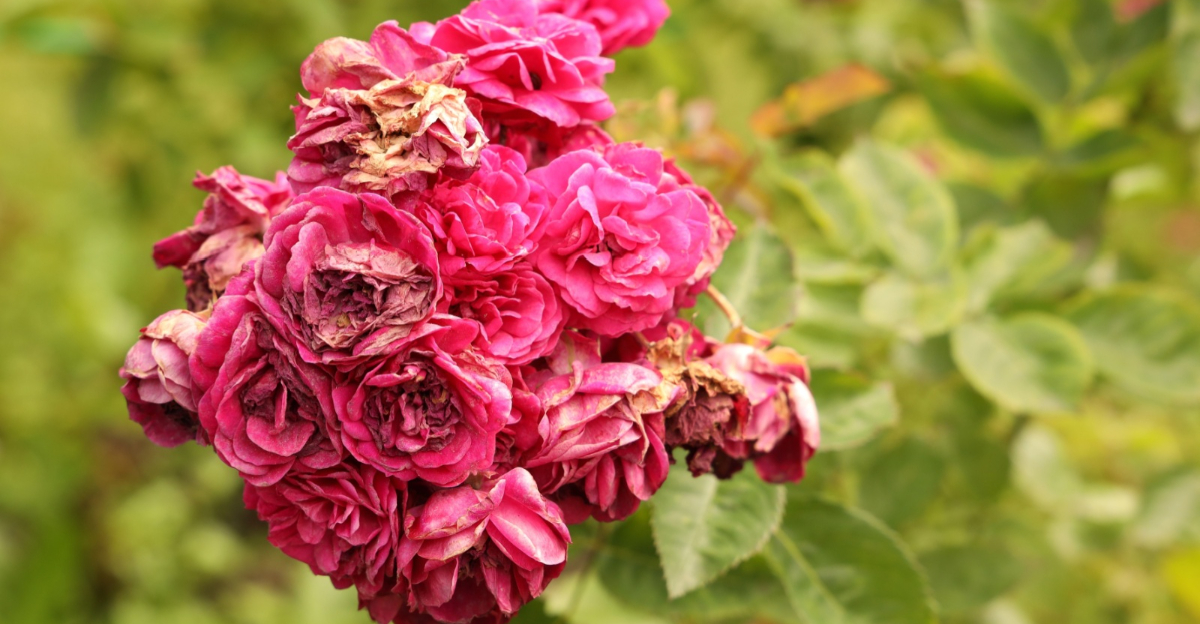
What greets you is a tangle of shriveled brown husks without a single new bud in sight, and just like that, your roses have quietly stopped performing.
A spent flower left on the cane sends one clear signal: job done, stop growing. Your plant obeys, shifting its focus into seed production while new blooms stall out entirely, draining energy all season long.
Ever wonder why some gardens in Tennessee keep flowering two full months longer than yours? The fix takes just a few minutes per bush once you know what to look for.
Where and how you cut matters more than most growers ever realize, because the wrong spot or angle sets your plant back instead of pushing it forward.
Master a handful of key habits once, and your roses will keep going until the first frost comes knocking.
The June Turning Point Most Rose Growers Miss

June heat hits fast, and your roses feel every degree of it. This is the month when the first big bloom cycle wraps up across most of the South.
When spent flowers stay on the stem, the plant shifts its energy toward making seeds. That means fewer new blooms and a slower second flush.
Removing those faded flowers in June sends a direct signal to the plant. It tells the rose to keep producing rather than winding down for seed development.
The June rose mistake most Tennessee gardeners make without knowing is waiting too long after petals drop. By then, the plant has already started redirecting its resources.
Acting within a day or two of petal drop makes a measurable difference in rebloom speed. Early removal keeps the plant in active flowering mode instead of rest mode.
June also brings humidity, which speeds up petal decay and raises the risk of fungal issues on aging blooms. Removing spent flowers reduces moisture buildup around the stem and bud union.
Think of June removing as a reset button for your rose bush. Hit it early and often, and the plant responds with fresh growth in as little as two weeks under good conditions.
Time It Right And Remove After Every Bloom Cycle

Timing is everything when it comes to rose care, and most gardeners wait a week too long. Petals that look tired but have not yet fully dropped are already costing you energy.
The ideal moment to remove is when petals start to loosen and the color fades noticeably. You should not wait until petals fall on their own.
Each bloom cycle on a repeat-flowering rose lasts roughly six to eight weeks from bud to fade. Removing spent heads right at the end of each cycle keeps the next one coming quickly.
Missing even one cycle in June can push your next flush back by several weeks, depending on your variety and conditions. That gap feels especially long when summer heat is already stressing the plant.
Set a simple weekly schedule and walk your rose beds every Sunday morning. A consistent routine catches spent blooms before the plant wastes energy on them.
After a full bloom cycle, the whole bush may need attention at once. Work methodically from the outside of the plant toward the center to avoid missing hidden stems.
Consistent timing across every bloom cycle is what separates a good rose season from a great one. Roses reward the gardener who shows up regularly, not just occasionally.
Find The Five-Leaflet Rule Cut Point Every Time

Not all leaves on a rose stem are created equal, and cutting at the wrong one is a mistake that slows regrowth. The five-leaflet leaf is your target every single time.
Rose stems carry leaves with three leaflets and leaves with five leaflets. The five-leaflet leaves grow from the stronger, more productive nodes on the plant.
Cutting just above a five-leaflet leaf ensures the new shoot emerges from a vigorous point. Cuts above three-leaflet leaves often produce weak, thin stems that struggle to carry a bloom.
To find your cut point, trace the stem downward from the spent flower. Count the leaves until you reach the first one with five leaflets, then cut just above it.
Leave about a quarter inch of stem above the leaf junction when you make the cut. Angle the cut at 45 degrees sloping away from the bud, so water runs off the exposed stem surface rather than pooling on it and inviting fungal growth.
Cutting flush against the leaf can damage the node and reduce your chances of a strong new shoot.
On younger or smaller bushes, you may only find one or two five-leaflet leaves per stem. In that case, cut above the highest one to preserve as much stem length as possible.
This single technique transforms average removing into a precision skill. Once you train your eye to spot the five-leaflet leaf, the whole process becomes faster and more satisfying.
Always Cut At An Outward-Facing Node For Stronger Growth

Where you cut matters just as much as when you cut. Choosing an outward-facing node shapes the whole future structure of your rose bush.
An outward-facing node is a bud that points away from the center of the plant. New growth from that node will extend outward, opening up the bush and improving airflow.
Cutting above an inward-facing node sends new stems toward the middle of the plant. That creates crowding, reduces light penetration, and raises the risk of disease in humid June weather.
To identify an outward-facing node, look at the small bump or eye on the stem just above your chosen five-leaflet leaf. The bump should face away from the main canes at the center.
On climbing roses, outward-facing nodes help guide new canes along a trellis or fence naturally. This reduces the need for aggressive tying and keeps the plant looking intentional rather than wild.
Some stems grow in awkward angles, making it hard to find a perfectly positioned node. In those cases, choose the node that points most away from the dense interior of the bush.
Getting this detail right means your rose grows into a beautiful open shape over time. Good structure now means easier care and better blooms for every season ahead.
Use Clean Sharp Pruners Every Single Time You Cut

Dull blades crush stem tissue instead of cutting it cleanly, and crushed tissue creates conditions where disease can take hold. Sharp pruners are not optional, they are essential.
A clean cut seals faster and heals with less stress on the plant. Ragged cuts from dull blades leave torn edges that take longer to close and attract fungal spores.
Bypass pruners are the best choice for rose removing because they make a scissor-like cut. Anvil-style pruners press down on the stem and often cause the crushing damage you want to avoid.
Wipe your blades with rubbing alcohol between plants to stop the spread of any hidden pathogens. This step takes under ten seconds and protects every bush in your garden.
Sharpen your pruners at the start of each season and again at midsummer if you use them heavily. A simple whetstone or pull-through sharpener keeps the edge in good working condition.
Store your pruners in a dry place and oil the pivot point occasionally to keep them moving smoothly. Rust and stiffness make precise cuts much harder to control.
Your pruners are one of the most valuable tools in your June rose routine. Treat them well, and they will make every cut cleaner, faster, and safer for your plants.
Check The Node For Dark Spots Before Making Your Cut

Most gardeners pick their cut point and snip without a second glance. Taking five extra seconds to inspect the node can save the entire stem from disease damage.
Dark spots or discoloration on a node often signal a fungal infection or early canker. Cutting into or just above an infected node introduces the problem deeper into the plant.
Healthy nodes are firm, green, and slightly glossy with no visible markings. A compromised node may look sunken, dark brown, or have a soft texture when pressed gently.
If you spot a suspicious node, move your cut point lower on the stem to a healthy one. Sometimes that means going down two or three leaf junctions to find clean tissue.
After cutting near any discolored area, wipe your blades immediately with alcohol. This prevents carrying any pathogen from one stem to the next as you work through the bush.
The June rose mistake most Tennessee gardeners make without knowing includes skipping this visual check entirely. A two-second look at the node before each cut costs nothing and protects everything.
Healthy nodes produce the strongest new shoots and the fullest blooms in the next cycle. Protecting them is one of the simplest ways to keep your roses thriving all summer long.
Clear Away Cut Stems And Petals From The Base Of Every Bush

Most gardeners make the cut and walk away, leaving fallen petals and trimmed stems scattered across the soil below the bush. What sits on the ground around your roses matters just as much as what you remove from the canes above.
Decaying plant material holds moisture and creates the exact conditions that fungal spores need to establish. In Tennessee’s humid June air, that decomposing debris can become a source of blackspot, botrytis, and other common rose diseases within days.
After each removing session, gather every petal, snipped stem, and dropped leaf from the soil surface around your bushes. A quick sweep with a gloved hand or a small rake takes under two minutes and removes the problem before it takes hold.
Do not add this debris to your compost pile if any of the material looks discolored or spotted. Diseased cuttings can survive the composting process and reintroduce pathogens back into your garden the following season.
Fresh mulch applied after clearing the base helps lock in soil moisture, regulate root temperature, and discourage fungal spores from splashing up onto the lower canes during watering or rainfall.
Think of ground cleanup as the final step of every removing session rather than an occasional chore. The cut you make on the cane starts the process, but what you do at the base is what keeps the whole plant protected.
Roses that grow in a clean environment consistently outperform those surrounded by neglected debris, and the difference becomes most visible in the second and third bloom cycles of summer.