Don’t Toss The Christmas Cactus Pieces That Break Off In Michigan, Root Them Instead
A segment snaps off while you water the plant, and most people drop it in the trash without a second thought. That little piece is a free plant waiting to happen.
Christmas cactus roots easily, which is why a single healthy plant often turns into a dozen gifts in one family.
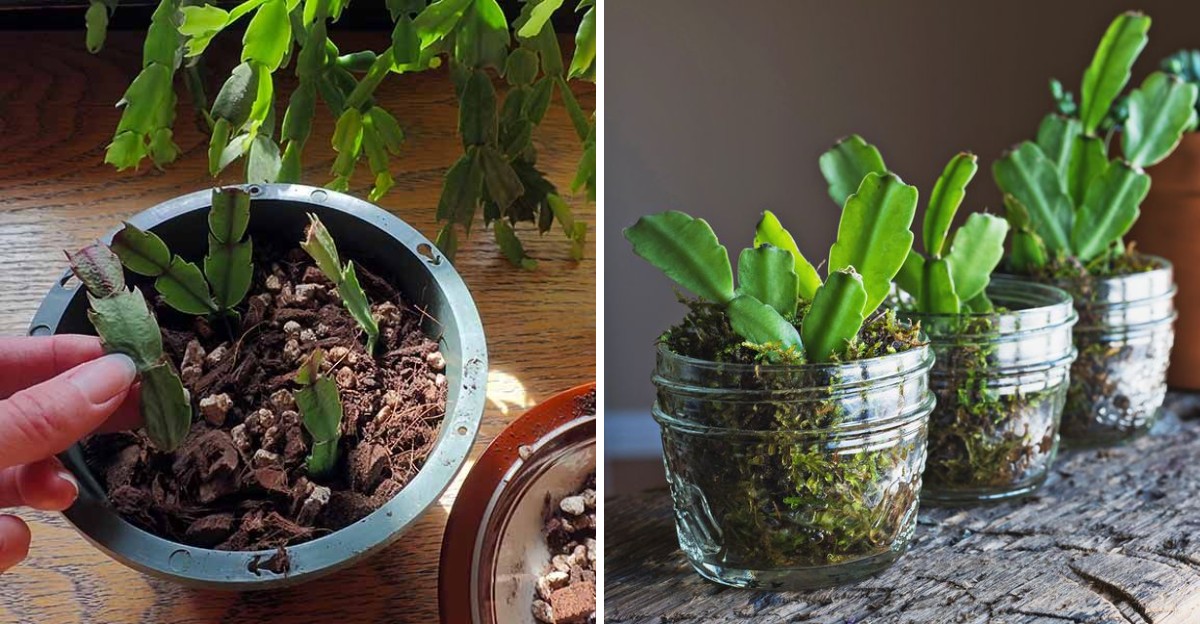
Let the broken end dry for a day or two so it can seal over. Then push it into a small pot of light, well-drained soil, and keep it barely damp. Too much water is the usual way this goes wrong.
A bright window without harsh sun is plenty. Michigan homes are drier in winter, so a spot away from the furnace vent helps. In a few weeks, tiny roots form, and one stray piece becomes a brand-new plant.
1. Broken Pieces Can Grow Into New Plants
That little green piece lying on your kitchen floor is not trash. It is a baby plant waiting for a chance. Christmas cactus, known to botanists as Schlumbergera, is one of the easiest houseplants to grow from broken stems.
The secret lies in its flat, leaf-like segments. Each one stores water and food, and the joints between segments are ready to sprout roots when given the right conditions.
A piece that snapped off while you were watering, dusting, or moving the pot still holds everything it needs to start over in a fresh pot.
Of course, not every piece is a winner. The best candidates are firm, healthy stems with at least one or two segments attached. Pieces that feel soft, mushy, or wrinkled like an old raisin are better off in the compost bin.
Those weak bits rarely root, and they can carry rot that spreads to other cuttings. Michigan gardeners see more broken pieces than most people.
Many folks set their Christmas cactus outside on a porch or patio during the warm months, then rush it indoors before the first frost arrives in September or October.
Squeezing a big plant through a doorway or fitting it into a car for a trip to grandma’s house almost always knocks off a few segments.
Instead of feeling bad about the damage, think of it as a free gift. Gather up those pieces right away, before they dry out too much or get stepped on. A small bowl or paper plate works well for collecting them.
With a little patience, the plant you accidentally broke can give you two, three, or even ten new ones. That is a pretty good trade for a clumsy moment.
2. Choose Firm, Healthy Segments
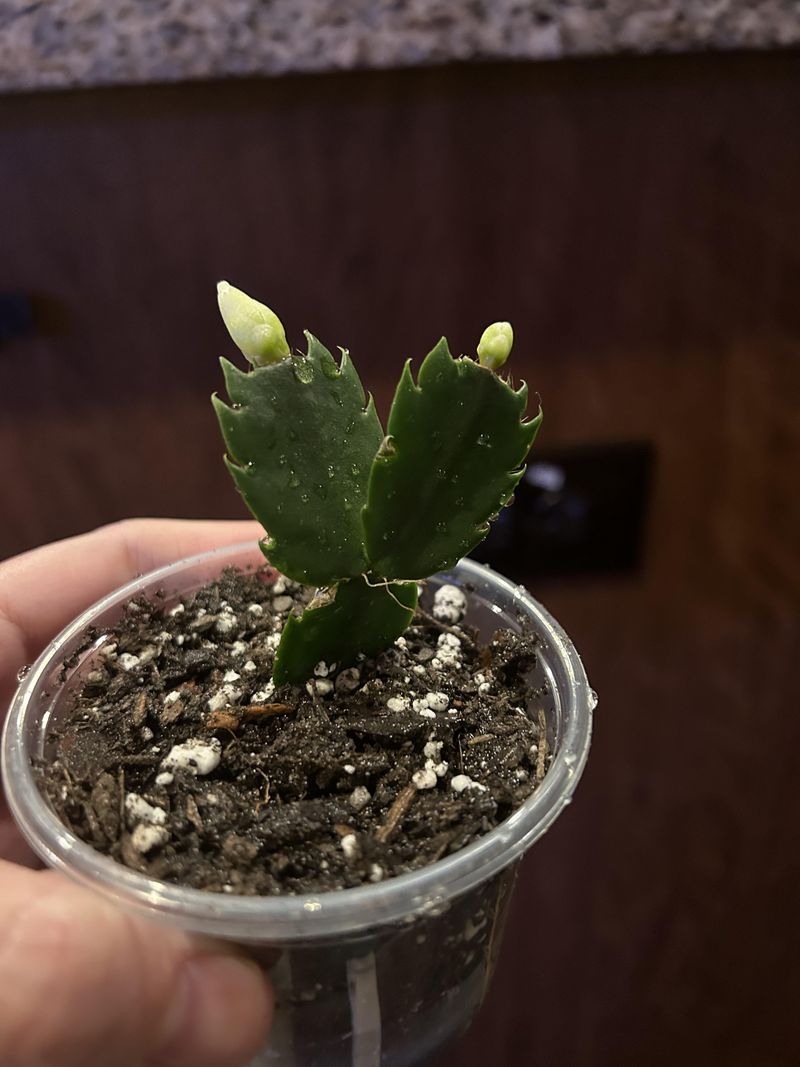
Think of sorting cuttings like picking apples at a Michigan orchard. You want the crisp, bright ones, not the bruised fruit at the bottom of the bin. Starting with strong pieces makes the whole rooting process faster and much more reliable.
Firm, green segments root best because they still hold plenty of water and energy. Damaged or rotting pieces usually fail, and worse, they can pass rot along to the healthy cuttings sitting next to them. A little sorting now saves a lot of frustration later.
Your Michigan Garden Changes Every Week. Your Plan Should Too.
Gardening in Michigan changes quickly throughout the season. Every Friday you’ll receive a simple weekly plan showing exactly what to plant, prune, fertilize, harvest, and protect so you never miss the right timing.
Begin by spreading all your broken pieces on a clean paper towel. Look for stems with two or three connected segments if you can find them, since longer pieces tend to root and grow more quickly. Give each one a gentle squeeze.
A good cutting feels plump and solid, a bit like a fresh green bean. Next, check the broken ends. Many pieces snap off with ragged, torn, or bruised tips.
Grab a pair of clean scissors, wiping the blades with rubbing alcohol first, and trim the cutting at the nearest joint where two segments meet. A clean break at a joint gives roots the best place to form.
Finally, set aside anything that looks limp, yellow, brown, or slimy. Pieces with reddish or purple tints can be fine, since cool temperatures or bright light often cause that color change, but they should still feel firm.
For Michigan gardeners, this step matters a lot. Rooting happens slowly during our chilly, dim winter months, so every advantage counts.
Healthy cuttings bounce back faster and push out roots sooner, which means you will see new growth before spring finally melts the snow.
3. Remove Flower Buds From Cuttings
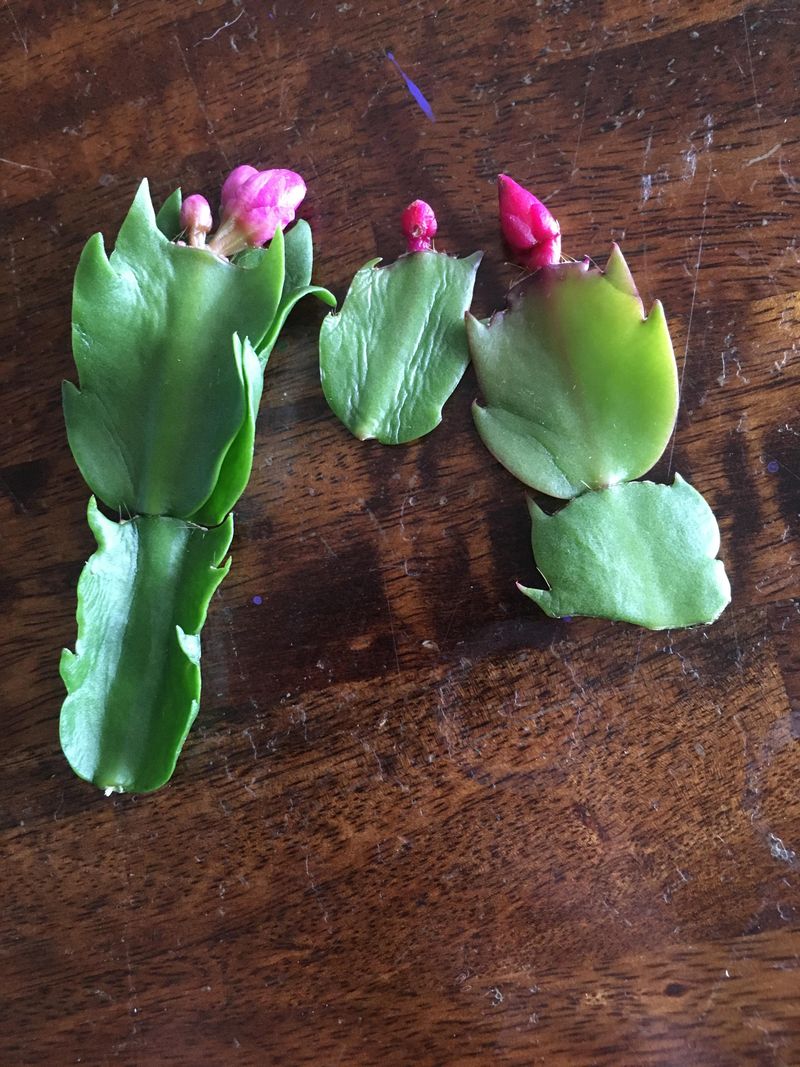
Pinching off a pretty pink bud might feel wrong at first. Trust the process, though, because your cutting will thank you for it. Buds look lovely, but they are a heavy load for a stem that has no roots yet.
Here is why. Flowers take a lot of energy to open and stay healthy. A rooted plant pulls that energy from the soil and its root system, but a cutting has nothing to draw from except what is stored in its own segments.
If you leave the buds on, the cutting spends its limited supply trying to bloom instead of building roots.
Even more frustrating, those buds usually drop anyway. Christmas cactus is famous for losing buds when it gets stressed, moved, or bumped. A broken piece is about as stressed as a plant can be, so the flowers rarely make it.
Removing them is simple. Hold the cutting in one hand and use your thumb and finger to gently pinch or twist off any buds or open flowers at the tip. The bud should pop off easily without tearing the segment.
Do this before you set the cutting out to dry or place it in soil or water. You do not have to miss out on the blooms. Your main plant still holds plenty of buds, and those will open into a colorful show for the season.
Michigan gardeners run into this situation often. Pieces tend to break off in late fall and early winter, right when plants are loaded with buds for the holidays.
Knowing to pinch them off helps your cuttings focus on what really matters, which is growing strong roots for a bright future.
4. Let The Ends Dry Before Planting
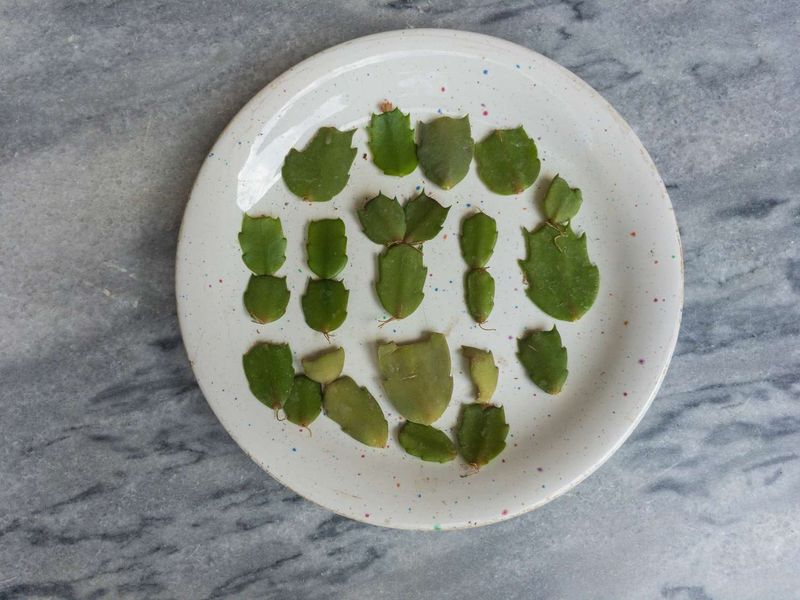
Patience is a gardener’s best tool, and this step proves it. Before your cuttings touch any soil, they need a short rest. Skipping it is one of the most common mistakes beginners make.
When a segment breaks, the open end is wet and tender. Placing that fresh wound straight into damp potting mix invites rot, which can turn a promising cutting into a soggy mess within days.
Letting the end dry forms a callus, a thin, tough layer that seals the wound much like a scab on a scraped knee.
The method could not be easier. Lay your trimmed pieces on a paper towel or clean plate in a dry spot. A kitchen counter, bookshelf, or table works well, as long as it stays out of direct sunlight.
Strong sun can dry out the whole cutting rather than just the end. Wait one to two days. Check the broken ends now and then. When they look dry, slightly shriveled, and sealed over, your cuttings are ready to plant.
Some gardeners wait a little longer, up to three or four days, and that works fine too. Christmas cactus segments hold enough moisture to handle a short break.
Rot is the top reason cuttings fail, so this simple pause pays off in a big way. It costs nothing and takes almost no effort. Michigan homes in winter can be a mixed bag.
Furnaces dry the air, which helps callusing, but cool rooms and damp basements can keep cuttings from sealing properly. Pick a warm, dry spot in the main part of your home, and your cuttings will be ready for planting before you know it.
5. Plant In A Light, Fast-Draining Mix
Soil might seem like a boring topic, but for Christmas cactus it makes all the difference. Unlike desert cacti, this plant comes from the rainforests of Brazil, where it grows on tree branches. Its roots love moisture, yet they also need plenty of air.
Heavy, dense soil holds too much water and squeezes out the air pockets roots need. A light, fast-draining mix keeps the right balance, so new roots can form without sitting in soggy dirt.
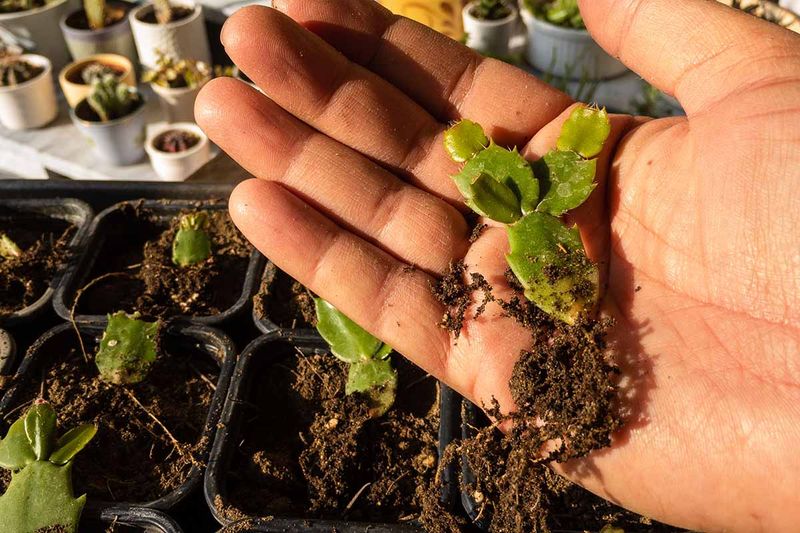
Start with a small pot that has drainage holes. A three or four inch pot is perfect for a few cuttings. For the mix, blend regular potting soil with perlite, about two parts soil to one part perlite.
Another good choice is a cactus mix with some orchid bark added for extra airflow. Next, take each callused cutting and gently push the bottom segment about half an inch to an inch into the mix.
The cutting should stand upright on its own. Press the soil lightly around the base to hold it steady, then give it a small drink of water. You want the mix damp, not dripping.
Skip the big pots for now. Too much soil around a tiny cutting stays wet for days, which raises the chance of rot. Small containers dry out at a healthier pace. Here in Michigan, this advice matters even more.
Indoor rooms often run cool during winter, especially near windows, and cool soil dries slowly. A gritty, airy mix helps protect your cuttings while they settle in, giving those young roots the best possible start in their new home.
6. Or Root Them In Water And Watch The Roots Grow
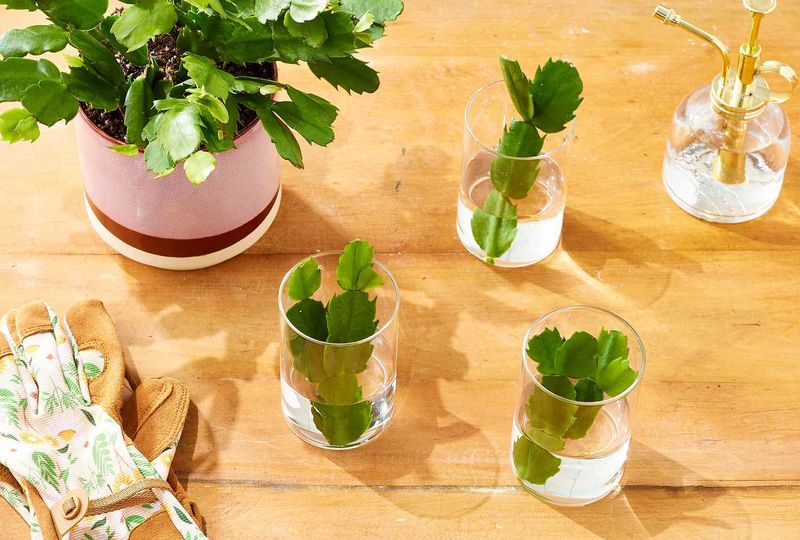
Kids love a good science experiment, and this one grows right before their eyes. Rooting Christmas cactus cuttings in water turns your windowsill into a tiny living lab. You get to watch every root appear, from the first white bump to a healthy tangle.
Water rooting works surprisingly well for this plant. Many cuttings sprout roots within a few weeks, and seeing that progress makes the wait feel shorter. It also takes the guesswork out of knowing when a cutting is ready for soil.
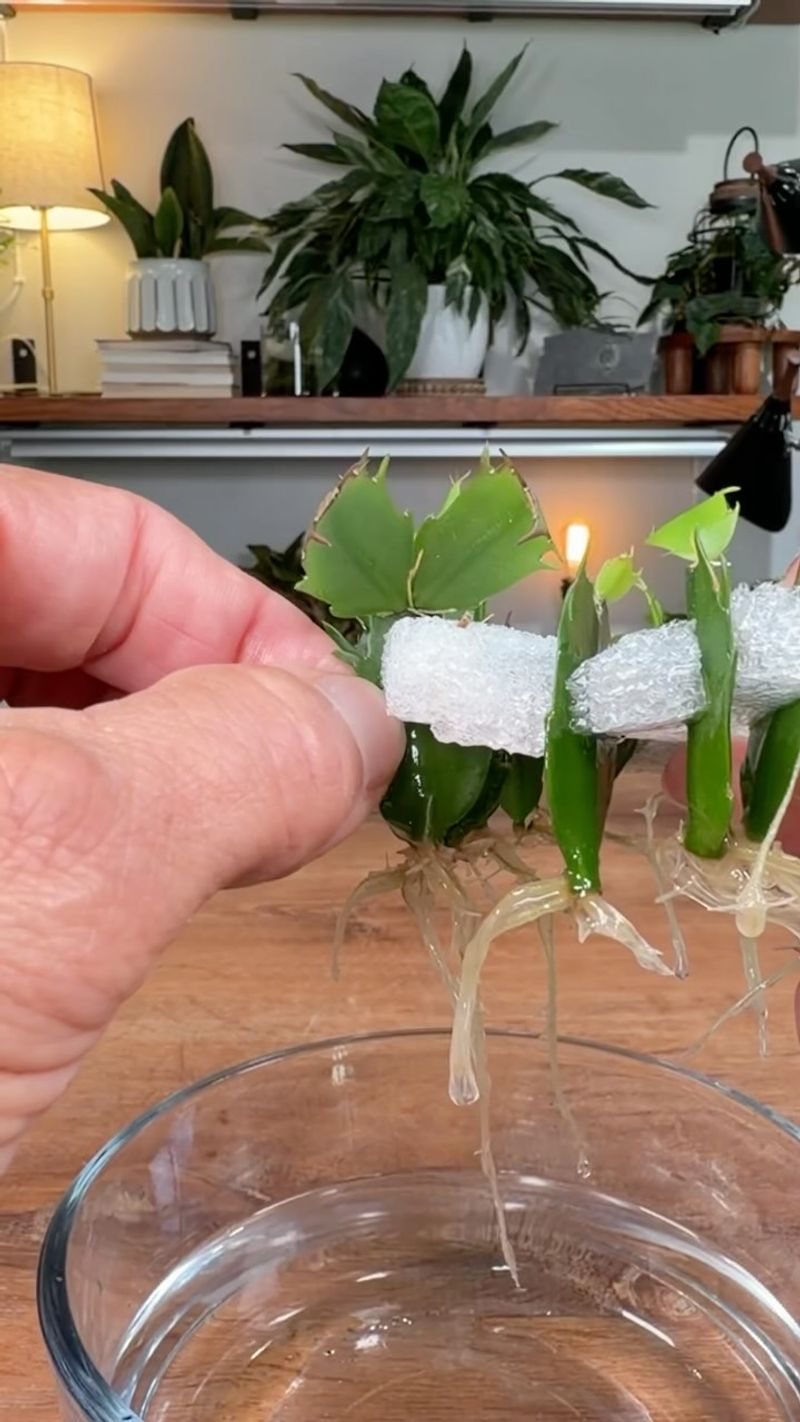
Grab a small glass, jar, or even a clean shot glass. Fill it with room temperature water. Place the callused end of each cutting into the water so only the bottom part of the first segment sits below the surface.
Keeping most of the cutting dry helps prevent rot. If pieces tip over, a little plastic wrap with holes poked in it can hold them upright.
Set the glass in bright, indirect light, such as near an east window or a few feet from a sunny one. Change the water every few days to keep it fresh and clear. Cloudy water is a sign it needs swapping.
Once the roots reach about an inch long, move the cuttings into a small pot of light, well-drained mix. Water the soil lightly after planting to help them adjust.
For Michigan families, this is a wonderful winter project. When the snow piles up and outdoor play is limited, checking on the jars each morning gives kids something exciting to look forward to. It also plants a love of gardening that may last a lifetime.
7. Give Cuttings Warmth And Bright Light
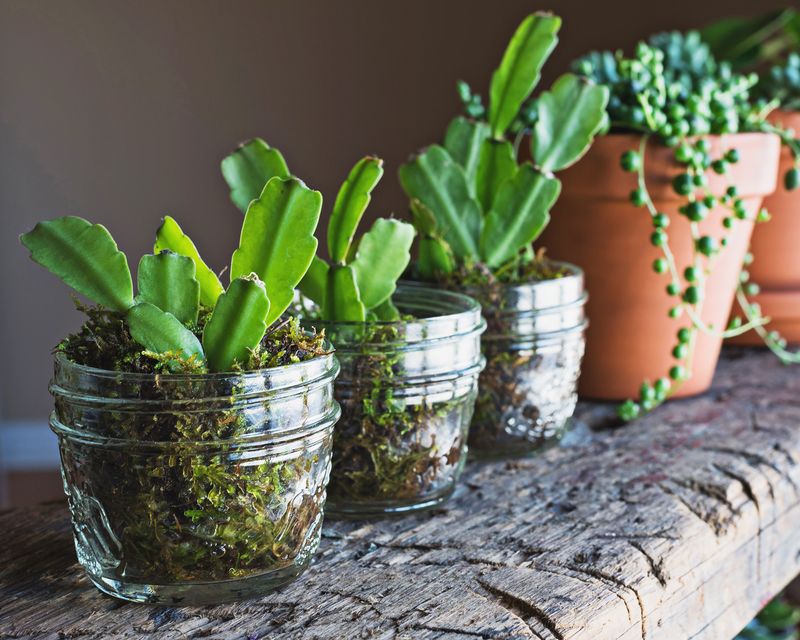
Winter in Michigan can feel like one long cloudy afternoon. Your cuttings feel it too. Cool temperatures and dim days slow rooting way down, but a few smart choices can speed things back up.
Warmth comes first. Keep your cuttings in a room that stays between 65 and 75 degrees Fahrenheit. Avoid cold windowsills, drafty doorways, and spots near heating vents that blast hot, dry air.
A living room shelf or kitchen counter away from the oven is often just right. Light comes next. Christmas cactus cuttings want bright, indirect light, the kind that fills a room without shining harshly on the leaves.
Direct sun through glass can scorch tender segments, leaving them pale or reddish. An east-facing window is a great choice, or set them a few feet back from a south window.
Short days are the real challenge in our state. In December, Michigan gets only about nine hours of daylight, and much of it is gray. A simple LED grow light makes a big difference.
Hang it several inches above the cuttings and run it for around 12 hours a day with an inexpensive timer.
Watering matters, too. Keep the soil lightly moist but never soggy. Poke a finger into the mix, and if the top half inch feels dry, add a small splash of water.
Expect roots in about three to six weeks. Winter rooting takes longer than spring rooting, so do not worry if progress seems slow. A gentle tug that meets resistance means roots have formed, and your little plants are on their way.
8. Plant Several Together For A Fuller Plant
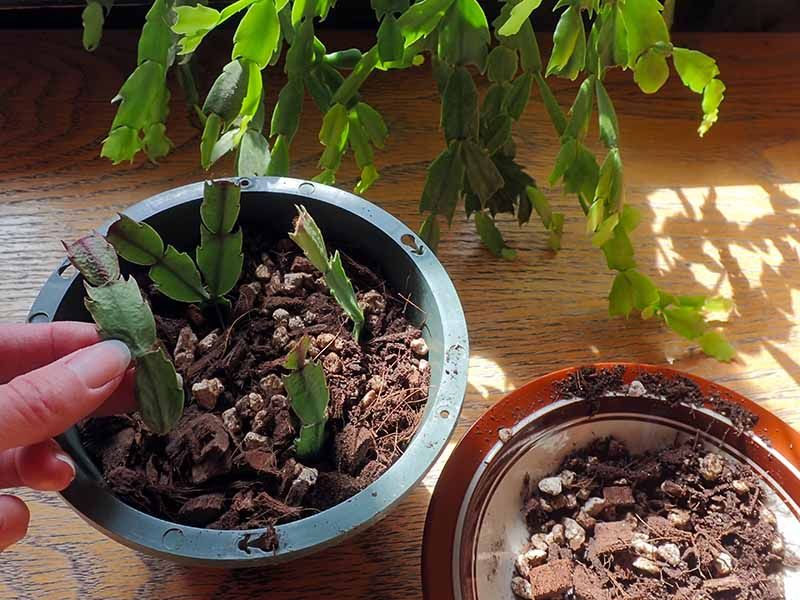
Some Christmas cactus plants in Michigan homes have been passed down for fifty years or more. Grandma’s plant on the windowsill might have started as a single cutting from her own mother. Now your rooted pieces can carry that story forward.
A lone cutting grows slowly, adding just a few segments each year. Plant several rooted cuttings together, though, and you get a full, bushy look in a fraction of the time. The result looks like a mature plant instead of a lonely stick in a pot.
Wait until your cuttings resist a gentle tug. That tells you the roots have grabbed hold. Then plant three to five of them together in a small pot, around four to six inches wide, using the same light, fast-draining mix.
Space them evenly so the plant grows in a nice round shape. Care is simple from here. Water when the top inch of soil feels dry, then let the extra drain away.
Once spring arrives and you spot fresh green segments, start feeding with a balanced houseplant fertilizer mixed at half strength about once a month. Stop feeding in late summer so the plant can prepare for blooming.
Patience brings the best reward. Most young plants bloom within a year or two, and each season the display grows bigger.
These potted bunches also make heartfelt gifts. Imagine handing a cousin, neighbor, or new homeowner a plant grown from a family treasure.
In Michigan, sharing cuttings from long-lived plants is a beloved holiday tradition, and your once broken pieces can become part of someone else’s story for years to come.