Don’t Toss Your Mums In Georgia: 11 Steps That Bring Them Back Bushier Next Fall

Those cheerful pots on every fall porch actually bloom on cue when the nights grow long enough. Growers time their color so carefully that many plants open right as pumpkins hit the grocery stores.
Most folks enjoy the show for a few weeks and then drag the faded pots straight to the curb. I have to admit, I did the same thing for years before a stubborn plant proved me wrong.
Many of those garden varieties are tough perennials that handle winters across Georgia with surprisingly little fuss. You only need a sunny bed and a few well-timed snips to coax them back next season.
What surprises me most is how much fuller a second-year plant looks compared with the original nursery pot.
Those faded fall flowers might have a much better second season ahead of them than you’d ever expect.
1. Pick Hardy Garden Mums Over Florist Mums

Not every mum on the store shelf was bred to come back, and that surprised me early on.
Florist mums are grown mostly for gift pots, with shallow roots and little interest in surviving cold weather.
Garden mums, sold as hardy mums, belong to Chrysanthemum x morifolium and handle zones 5 through 9 nicely. Georgia sits mostly in zones 7 and 8, so these tough plants feel right at home here.
Look at the tag before buying, since growers often label pots as garden mums or hardy mums. Florist types usually come wrapped in foil, which is a quick clue they were meant for indoor display.
I like choosing plants with plenty of tight buds rather than a pot already covered in open flowers. Fresh buds mean the plant has more energy left for rooting, and you get a longer show too.
Peek at the bottom of the pot and check for white, healthy roots instead of brown, mushy ones. Wilting leaves on a rootbound plant can recover, but soggy roots are often a sign of trouble ahead.
Some gardeners also love Korean and heirloom types, which spread happily and bloom later in the season.
These older varieties tend to look looser, yet they often return with impressive vigor year after year.
2. Plant Potted Mums In The Ground Early

Roots are the real secret behind a returning mum, even though we mostly admire the flowers on top. A plant left sitting in a plastic pot all winter has far less chance of seeing next spring.
Spring planting gives mums the longest runway, since roots have months to spread before cold weather arrives.
Many nurseries sell small starter plants then, and they often outperform the big blooming pots from fall.
Fall-bought mums can still succeed if you plant them by late September or early October here. Earlier is better, because roots need several weeks in warm soil before the first hard freeze shows up.
Dig a hole about twice as wide as the pot and set the plant at its original depth. Gently tease apart any circling roots with your fingers so they can reach into the surrounding soil.
Space plants about eighteen to twenty-four inches apart, giving each one room to fill out next summer. Crowded mums compete for water and air, which can invite leaf spot and other fungal problems later.
Personally, I water new transplants deeply right away and then check them every few days for a while.
Fresh plantings dry out much faster than established ones, especially during those warm and breezy autumn afternoons.
3. Give Mums Six Hours Of Full Sun

Mums are sun lovers, and a shady corner turns them into floppy, stretched plants with sparse blooms. I learned that lesson after tucking one beside a tall hedge and watching it lean toward the light.
Aim for at least six hours of direct sunlight each day, and more is usually even better.
Morning sun works especially well, since it dries the leaves early and helps reduce disease problems.
In the hottest parts of the state, a little afternoon shade during midsummer can ease heat stress. Just make sure the plant still gets plenty of bright light overall, or flowering will suffer.
Keep mums away from streetlights and security lamps that shine across the garden all night long. Mums bloom when nights grow long, so extra artificial light can delay or even prevent flower buds.
That detail fascinates me, because it shows how closely these plants track the slowly changing seasons around them. Growers use this same trick in greenhouses, covering plants with dark cloth to force blooms on schedule.
Before planting, watch your yard for a full day and note where the sunlight lingers longest.
Open beds along a south-facing fence or walkway often make wonderful homes for a mum collection.
4. Loosen Heavy Red Clay With Rich Compost

Red clay can feel like brick in August, and mum roots really dislike sitting in soggy, airless ground.
Wet winter soil is a common reason hardy mums fail, even more than cold temperatures themselves.
Before planting, work two to three inches of compost into the top eight to ten inches of soil. Compost loosens tight clay particles and lets extra water drain away instead of pooling around the crown.
Mums prefer slightly acidic soil, with a pH around 6.0 to 6.5 being a happy range. A soil test through your county Extension office can tell you exactly what your bed needs.
I love how inexpensive those tests are, and the results save plenty of guesswork with fertilizer later. Many gardeners add lime without testing, which can push the pH too high for good nutrient uptake.
Raised beds are another smart option if your yard stays wet after heavy rains or summer thunderstorms.
Even a mound just a few inches tall can keep roots from sitting in standing water.
Avoid adding sand alone to clay, because the mix can actually turn harder and more concrete-like. Organic matter is the better partner, and it feeds helpful soil organisms that keep roots healthy.
5. Leave Old Mum Stems Standing Through Winter
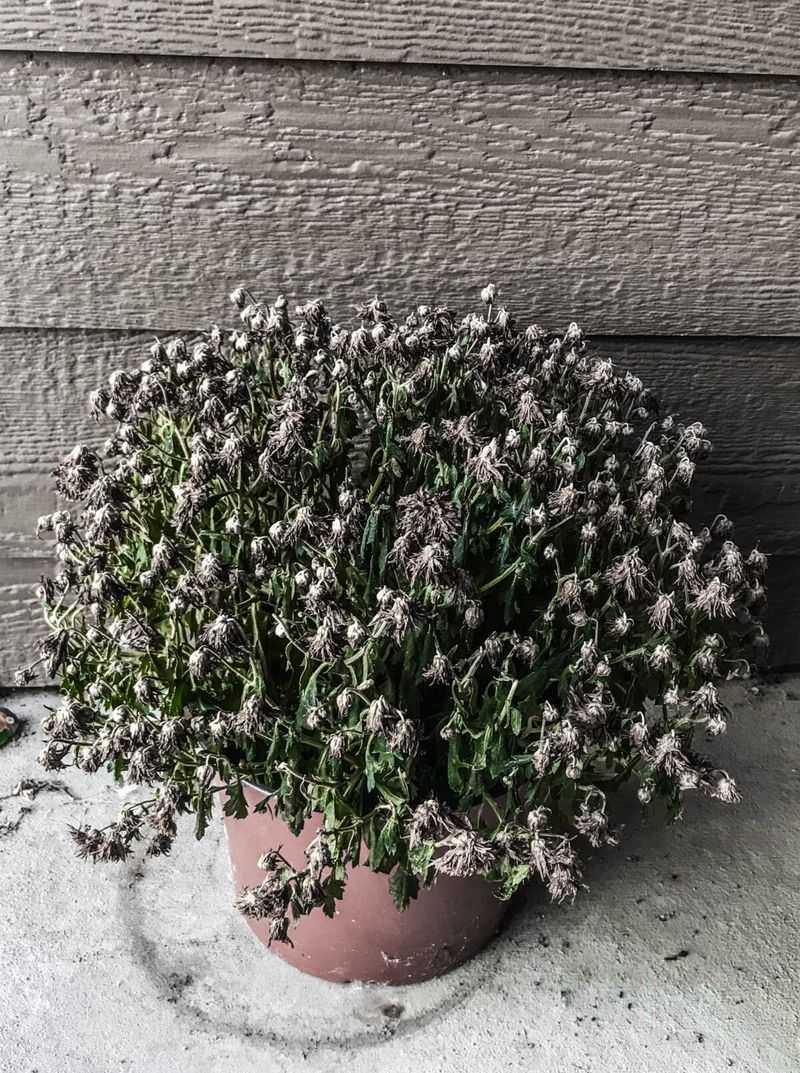
Those brown, crispy stems after blooming may look messy, yet they can quietly shelter the crown below.
Research from several universities found that mums with stems left standing survived winter better than trimmed ones.
The old stalks catch fallen leaves and help insulate the base of the plant during cold snaps. They also mark the spot, so you will not accidentally dig into the clump during winter chores.
Once flowers fade, you can snip off the spent blooms to tidy things up a little bit. Leave the stems themselves alone until late winter, when new green shoots start peeking from the soil.
In much of the state, that fresh growth appears sometime between February and early March each year. At that point, cut old stems back to just a few inches above the ground with clean pruners.
I have to admit, the scruffy look bugged me at first, but the payoff convinced me quickly. Now I tuck a few pansies nearby, and the bed looks cheerful while the mums rest quietly.
Some gardeners prefer cutting back right after frost for neatness, and plants can still return just fine.
If you choose that route, pair the trim with a thicker blanket of mulch for added protection.
6. Tuck Pine Straw Mulch Around Mum Crowns

Southern winters love to swing from balmy afternoons to icy nights, and that seesaw troubles shallow roots. Repeated freezing and thawing can push mum crowns right out of the soil, a process called frost heaving.
A loose blanket of mulch keeps soil temperatures steadier, so roots stay snug and firmly anchored.
Spread about two to four inches around each plant after the ground has cooled in late fall.
Pine straw is my favorite here, partly because it is easy to find and stays light and airy. Shredded leaves and fine bark work well too, as long as they do not pack into a soggy mat.
Keep the mulch pulled back an inch or two from the stems themselves to prevent rot. Moisture trapped right against the crown can cause more harm than a single chilly night would.
Gardeners in the mountains up north may want a slightly thicker layer than folks near the coast.
Coastal winters stay milder, so a lighter layer usually provides plenty of protection in those warmer areas.
When spring growth appears, pull some mulch away so the soil can warm up more quickly. You can leave a thinner layer in place to hold moisture and discourage weeds through summer.
7. Divide Crowded Mum Clumps In Early Spring
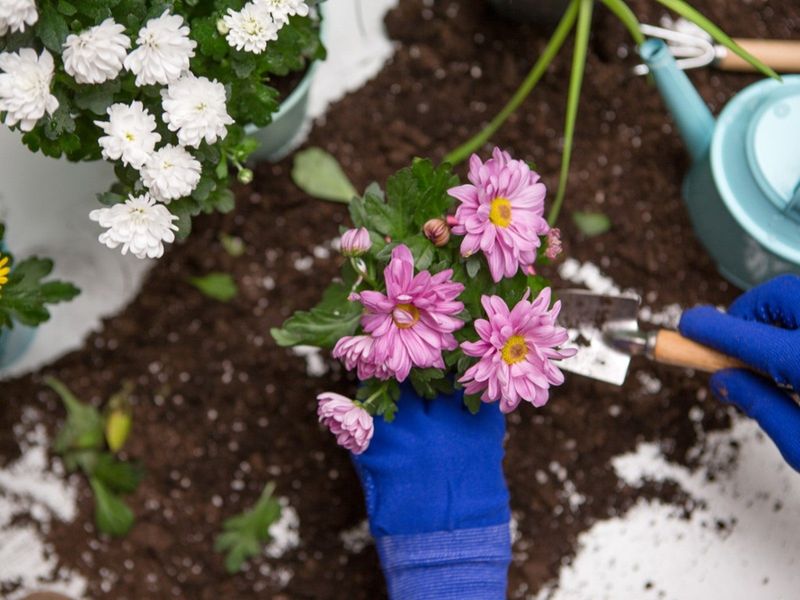
Older mums have a funny habit of growing hollow in the middle, like a green doughnut. The center gets woody and weak, while the youngest, most vigorous shoots crowd around the outer edge.
Dividing every two or three years refreshes the plant and gives you free extras to share.
Spring is the best time, once new shoots stand a few inches tall and frost danger has passed.
Water the clump the day before, then dig around it carefully and lift the whole root ball. Shake off loose soil so you can clearly see where the healthy shoots and roots connect underneath.
Use a sharp spade or your hands to pull off outer sections with several shoots and roots. Toss the tired, woody center into the compost pile, since it rarely regrows with much enthusiasm.
Replant divisions at the same depth they grew before, spacing them about eighteen inches apart in prepared soil. Water them in well, and keep the soil evenly moist for the next couple of weeks.
Personally, I love this chore because one plant can easily become five or six by lunchtime. Neighbors tend to appreciate the gifts, and you suddenly have a matching row along the walkway.
8. Pinch Mum Tips When Shoots Reach Six Inches

Snapping off perfectly healthy growth feels wrong, but it is the trick behind those big rounded mounds. Each pinch removes a growing tip and nudges the stem to branch into two or more new shoots.
Start when new spring shoots reach about six inches tall, usually sometime in April for most gardens.
Remove the top inch or so of soft growth, cutting just above a set of healthy leaves.
Your thumb and finger work perfectly, though small snips help when you have a big bed to manage. Repeat the process every few weeks whenever new stems stretch another five or six inches long.
What surprises me most is how fast the plant responds, sending out fresh side shoots within days. After a few rounds, a lanky little start transforms into a dense, leafy cushion of green.
Skipping this step usually leads to tall, floppy plants that split open and show bare centers.
Those stems carry fewer flowers too, since every branch you create becomes a future spot for buds.
Some modern garden mums are bred to branch on their own and need less pinching overall. Older varieties and divided plants, though, respond beautifully to regular trimming through the early summer months.
9. Put Away The Pruners By Mid July
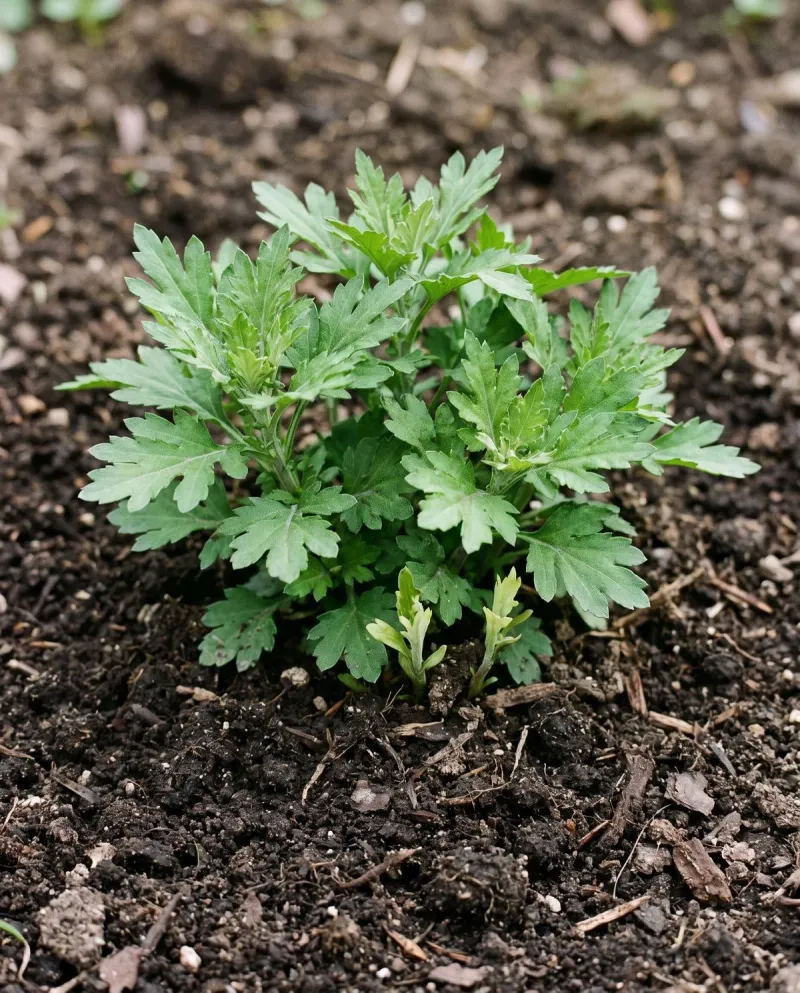
Mums keep a careful calendar, and pinching too late can quietly erase the very flowers you want. Plants begin forming buds in late summer as nights lengthen, so they need finished stems by then.
Most Extension guides recommend wrapping up pinching around the Fourth of July in warmer southern areas.
In cooler northern parts of Georgia, many gardeners stop a week or two later, near mid-July.
I mark the date on my kitchen calendar so summer vacations do not push me past the ideal time. It sounds silly, yet missing that window by a few weeks can cost you most of the fall show.
After your final pinch, let the plant grow freely and fill out its shape through late summer. You may notice the mound getting taller, which is perfectly normal as stems prepare to set buds.
If a stray branch sticks out awkwardly in August, a gentle trim is fine on that one stem. Avoid shearing the whole plant then, since tiny buds may already be forming near the stem tips.
Hot summers can stress mums, so steady watering during this stretch helps them hold onto developing buds.
Drought in late summer sometimes leads to smaller flowers or uneven blooming once fall arrives later on.
10. Feed Mums Lightly Through The Summer

Hungry mums show it fast, with pale lower leaves and skinny stems that struggle to hold flowers upright. A steady and modest diet keeps them leafy and strong without pushing weak, floppy growth all over.
Start feeding in spring once new shoots appear, using a balanced granular fertilizer such as 10-10-10 or similar.
Follow your soil test results when you have them, since every garden bed holds different nutrient levels.
Many gardeners sprinkle a light dose every four to six weeks, watering it in thoroughly afterward. Slow-release pellets are another easy choice, feeding plants gradually for a couple of months at a time.
Stop fertilizing by late July or early August, when plants shift their energy toward forming buds. Late feeding encourages tender new leaves that can struggle once the first cold nights roll through.
I believe less is more here, because heavy fertilizer can burn roots during hot summer stretches. Too much nitrogen also creates soft, lush foliage that attracts aphids and other pests rather quickly.
Compost spread around the base in spring adds gentle nutrients and improves soil structure at once.
Pairing compost with light fertilizer often gives the best balance for strong roots and steady growth.
11. Water Mums Deeply At The Base In The Morning

Mums are thirsty plants with shallow roots, and they wilt dramatically when summer soil turns dry and dusty.
Thankfully, most perk right back up after a good drink, though repeated wilting weakens them over time.
Aim for about one inch of water each week, counting rainfall, during the active growing season. A simple rain gauge in the garden takes the guesswork out of tracking how much has fallen.
Before watering, push a finger two inches into the soil and check whether it still feels damp. If it feels dry, soak the area slowly so water reaches deep into the root zone below.
Morning is the best time, since leaves dry quickly in the sun and fungal diseases struggle to spread.
Evening watering leaves foliage damp overnight, which can invite powdery mildew and leaf spot in humid weather.
I prefer soaker hoses or a watering can aimed at the base rather than overhead sprinklers. Keeping water off the leaves matters a lot during muggy Georgia summers, when humidity hangs around for weeks.
Mulch helps hold moisture between waterings and keeps soil temperatures cooler during those scorching July afternoons. Container mums dry out even faster, so check them daily when temperatures climb into the nineties.