How To Overwinter Garden Mums In New York So They Return Fuller Next Year

The University of Minnesota spent decades breeding a fall flower that shrugs off brutal Midwest winters. Yet most of the potted pompoms sold each autumn in New York end up tossed on the curb by November.
I skipped the curb trick one year and tucked my leftover pots into the garden soil instead. Half of them pushed up silver-green shoots in April, and the following fall they doubled in size.
You might notice that a few plants return like loyal friends while their neighbors quietly vanish by spring. Luck plays a tiny role, but timing and drainage explain most of the difference in a New York garden.
A little evidence gave me real confidence, and a few simple habits turned my curb rescues into reliable perennials. What really separates a one-season splash from a plant that blooms bigger every single year?
1. Give Mums Full Sun And Fast Draining Soil

Mums are sun worshippers, and mine sulk like teenagers whenever a maple starts shading their corner of the yard. Aim for at least six hours of direct sunlight to build strong stems and plenty of flower buds.
Shady spots often produce floppy, stretched plants that lean toward the light and bloom with far less enthusiasm. Morning sun is especially helpful because it dries dew from the leaves and lowers the risk of disease.
Drainage matters even more than sunshine once winter arrives, because soggy roots tend to rot in cold soil. Extension experts point to wet winter ground as a major reason hardy mums fail to return each spring.
Heavy clay is common across much of New York, so I mix in several inches of compost before planting. Raised beds or gentle slopes also help water move away from the crown after heavy autumn rains.
Mums prefer slightly acidic to neutral soil, with a pH somewhere between 6.0 and 7.0 working nicely. A simple soil test through your county Cornell Cooperative Extension office can tell you exactly where you stand.
Keep plants away from big trees and hungry shrubs, which steal water and nutrients from shallow mum roots. A little elbow room between plants also improves airflow and keeps powdery mildew from settling in.
2. Plant Hardy Mums In Spring For Deeper Roots

Spring-planted mums get a whole growing season to send roots deep before the first frost arrives. I learned this the hard way after a pretty October planting vanished without a trace by April.
Late fall mums pour almost all their energy into flowers, leaving little left for building a sturdy root system. Without those anchoring roots, freezing and thawing soil can push plants upward and expose their crowns to cold.
Many garden centers now sell small hardy mums in May, after the danger of frost has passed. Those modest starter plants may look plain at first, but they often become the biggest bloomers by autumn.
Fall planting can still work if you give the roots at least six weeks before the ground freezes. Upstate gardeners usually need to finish by early September, while Long Island has a little more breathing room.
Choose plants with lots of tight buds rather than full flowers, since budded mums still have energy to spare. Loosen the circling roots gently with your fingers so they reach outward into the surrounding soil.
Set each plant at the same depth it grew in the pot, then water deeply to settle everything. Space hardy varieties about eighteen to twenty-four inches apart because they spread quite a bit over time.
3. Pick Hardy Garden Mums Over Grocery Store Florist Mums

Those tight balls of color at the grocery store were often bred for one dazzling season on a porch. Florist mums put their energy into flowers, so their shallow roots rarely handle a hard freeze well.
Hardy garden mums, a type of Chrysanthemum x morifolium, spread by underground stems that help them return each spring. Labels that say perennial or hardy, plus a listed USDA zone, are the clues worth hunting for.
Most of New York falls between USDA Zones 4 and 7, with a few chilly pockets even colder. I look for plants rated to Zone 4 or 5, which gives me a comfortable cushion during cold snaps.
Some heirloom types have earned a strong reputation in northern gardens over many decades of fall color. ‘Sheffield Pink’ and ‘Clara Curtis’ both belong to a tough group often listed as Chrysanthemum x rubellum.
Fun fact for history fans, the University of Minnesota has bred cold-tough mums for nearly a century. The Mammoth series of hardy mums can spread several feet wide and handles harsh winters better than many supermarket picks.
If you still have a florist mum you adore, enjoy it on the steps and compost it later. Your future fall display, though, starts with buying the tough garden kind from a local nursery.
4. Water Mums At The Base Instead Of The Leaves

A thirsty mum droops so dramatically that you would swear it was auditioning for a soap opera. Shallow, fibrous roots dry out quickly, so steady moisture matters more for mums than many other perennials.
Most garden mums do well with about an inch of water each week from rain or the hose. I poke a finger into the soil, and if the top inch feels dry, I grab the hose.
Aim the hose or watering can at the soil around the stems instead of sprinkling the leaves from overhead. Wet foliage invites powdery mildew and leaf spot, which weaken plants heading into the long cold months.
Soaker hoses are my favorite shortcut, because they deliver water slowly and keep the leaves nice and dry. Morning watering also helps, since any splashes have the whole day to evaporate in the sunshine.
Keep an eye on moisture through autumn, because dry fall soil can stress roots before winter settles in. A good soaking before the ground freezes gives the plants a reserve to carry them through dormancy.
Overwatering causes its own trouble, especially in heavy clay, where puddles linger around the crown for days. Once the ground freezes solid, put the hose away and let winter snow handle the rest of the job.
5. Feed Mums In Spring And Stop By Midsummer
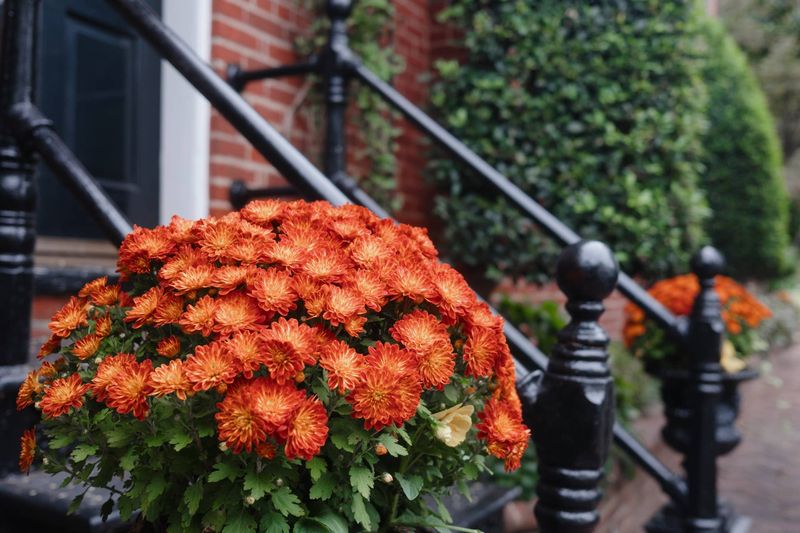
Fertilizer feels like kindness, yet a late-season snack can leave mums soft and tender right before the cold. Timing your feeding well is the sneaky secret behind tough plants and heavier flower displays every autumn.
Start when fresh green shoots appear in spring, using a balanced fertilizer such as a 10-10-10 blend. Mums are fairly heavy feeders, so a light dose every few weeks keeps growth steady and nicely green.
Slow-release granules make life easier because they feed plants gradually and reduce the chance of burned roots. I scratch them lightly into the soil around each plant, then water well to get the nutrients working.
Stop feeding by about mid-July in most of New York, since flower buds begin forming in late summer. Extra nitrogen after that point pushes leafy growth that may not harden off before hard frosts arrive in fall.
Compost is a gentler partner, and working an inch or two into the bed each spring helps soil structure. Better structure means better drainage, which loops right back to winter survival for these shallow-rooted plants.
Pale yellow leaves in early summer can hint at hunger, while lush leaves with few buds suggest overfeeding. Watching those small clues has taught me more about feeding than any fertilizer bag label ever did.
6. Pinch Back Mum Stems Until Early July
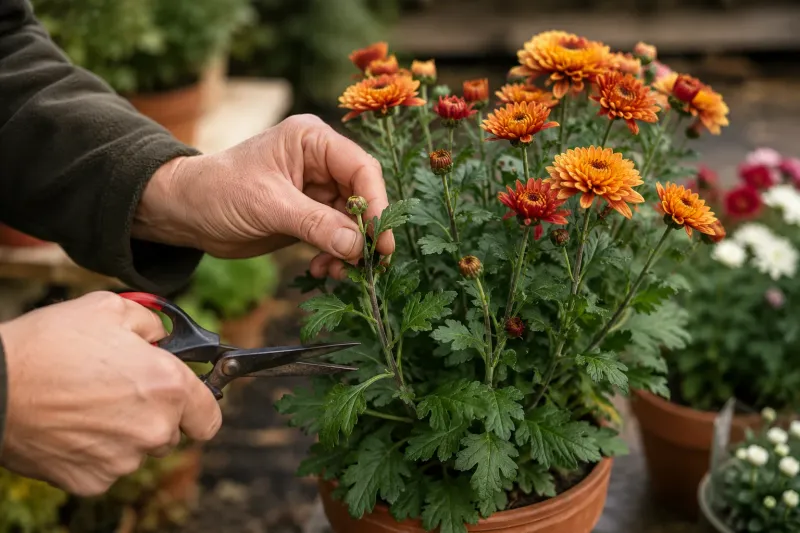
Pinching mums feels a little rude at first, like giving a toddler a haircut they did not request. Each pinch, though, makes a stem split into two or more branches, and every branch can carry flowers.
Start when new shoots reach about six inches tall, usually in late spring or early summer each year. Snip or pinch off the top inch or two, just above a set of healthy leaves on each stem.
Repeat every two or three weeks as the plant fills out, and you will see it thicken quickly. My thumbnail usually does the job, though clean scissors work better on the tougher, woody stems.
Northern gardeners often follow an old rule of thumb and finish pinching right around the Fourth of July. Mums set flower buds as nights lengthen in late summer, so later pinches can remove future blooms.
Cutting too late may also delay flowering until after hard frost, which hurts in colder upstate valleys. Gardeners in the Adirondacks sometimes stop in late June to give buds extra time before the first freeze.
Once flowers open, snipping off faded blooms keeps the display tidy and may encourage a few extra buds. That bushy, mounded shape you admire at garden centers usually comes from careful pinching, not magic.
7. Leave Old Mum Stems Standing Through Winter

Brown, tattered mum stems look scruffy in December, but they quietly do important work in the cold. Minnesota researchers found mums left uncut over winter tended to return more reliably than plants trimmed short.
Standing stems catch falling snow, and that snow acts like a fluffy white blanket over the crown. They also hold mulch in place, so wind cannot scatter it across the yard in a February gale.
I resisted my tidy instincts one year, and those messy plants came back noticeably fuller the next spring. The neatly trimmed clumps nearby struggled, and two of them failed to reappear at all that year.
Remove spent flowers after a hard frost if you like, since old blooms can harbor mildew and pests. Leave the stems and leaves alone, though, because the plant draws energy from them until frost browns them.
Diseased foliage is the main exception, so cut away anything covered with white mildew or dark leaf spots. Bag those pieces instead of composting them, since many home piles stay too cool to stop fungal spores.
Your neighbors may raise an eyebrow at the shaggy look, but your mums will thank you come April. Wait until new shoots appear at the base before trimming the old stems down to the ground.
8. Mulch Mums With Straw After The Ground Freezes

Winter cold rarely bothers a hardy mum as much as the wild swings between freezing nights and mild afternoons. That repeated freeze and thaw can heave shallow roots right out of the soil, leaving them exposed.
Mulch keeps the ground steadily frozen, which sounds odd but protects the roots far better than fluctuating temperatures. Wait until the top inch of soil freezes, often in late November or December across much of New York.
Then pile four to six inches of loose straw or shredded leaves around each plant and between stems. Evergreen boughs from a leftover holiday tree make a handy top layer that keeps the mulch from blowing.
Skip whole maple leaves, since they mat down into a soggy layer that can smother the crown. Running them over with the mower first turns them into light, airy insulation that breathes much better.
Potted mums need extra care because their roots sit above ground, where cold air surrounds them on every side. Move them to an unheated garage near 32 to 50 degrees, or sink pots into a garden bed.
Check stored pots about once a month and add a splash of water if the soil feels bone dry. Buried pots get the same mulch treatment as in-ground plants, with the rim sitting level with the soil.
9. Divide Overgrown Mum Clumps In Early Spring

Few garden moments beat spotting tiny green rosettes poking up beneath last year’s brown mum stems in April. That first glimpse tells you the winter plan worked, and now the real growing season can begin.
Pull mulch back gradually as temperatures warm, especially once hard frosts are mostly behind you for the season. Leaving it too long can trap moisture and smother those eager shoots trying to reach the sunlight.
Trim last year’s old stems down to the ground now, since the new growth no longer needs their shelter. Keep a light layer of mulch handy in case a surprise cold night shows up in the forecast.
Mums spread outward over time, and the center of an older clump often becomes woody and sparse. Dividing every two or three years in spring brings back vigor and those big, bold fall flowers.
Dig up the clump once shoots are a few inches tall, then pull apart the healthy outer sections. Toss the tired center into the compost and replant the young pieces in soil enriched with fresh organic matter.
Each division can grow into a full-size plant by autumn, which feels like getting free mums every year. Share a few extras with friends, and watch your bigger, brighter fall show spread across the whole neighborhood.