9 Edible Plants You Can Still Grow In New York Before The First Freeze
The tomatoes are done, and your garden looks a little lonely. Before you hang up the trowel, though, New York gardeners still have plenty of planting left to do.
Many tasty crops actually love the chill that sends summer plants packing. Some tuck themselves into cold soil and wake up ready to grow in spring.
Others keep handing you crisp, sweet leaves while frost sparkles on the lawn. A few even return year after year with almost no fuss.
The crops below range from fiery roots to buttery winter greens, and a few might surprise you. Plant them now, and your future self will thank you next spring.
1. Hardneck Garlic For Big, Bold Bulbs
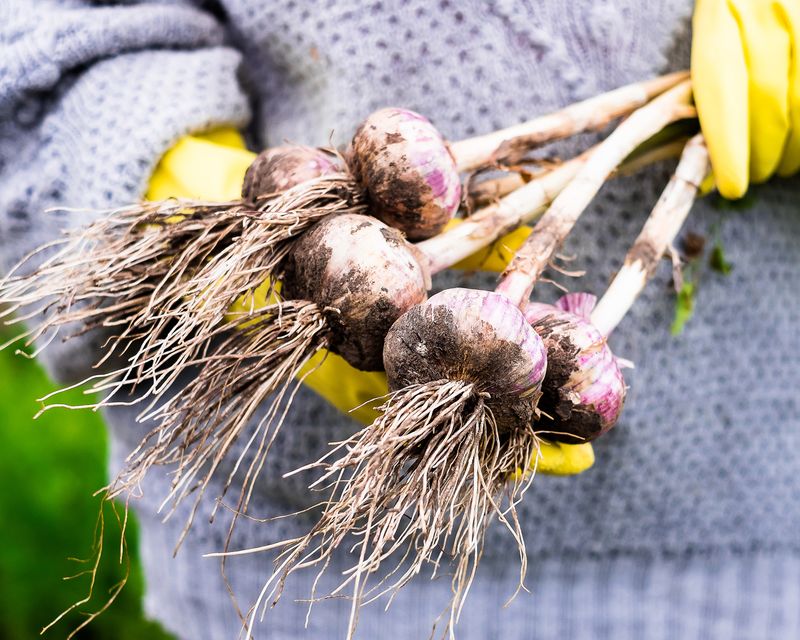
Picture pulling a fat, purple-streaked bulb from the ground next July. Every one of those summer bulbs starts as a single clove you tuck in this fall.
Hardneck garlic needs a long cold spell to form big heads. New York winters handle that job beautifully, so the weather works in your favor.
Timing depends on where you live in the state. Adirondack gardeners usually plant in early to mid-October, while Long Island folks can wait until mid-November.
Soil between 50 and 65 degrees is the sweet spot. Push each clove pointy side up, about 2 to 4 inches deep and 5 to 8 inches apart.
Pick a sunny bed with rich, well-drained soil. Mixing in compost before planting gives roots a strong start before the ground turns hard.
Once the cloves are in, pile on 4 to 6 inches of straw. Pull it back slowly in spring as the days warm up.
Here is a sneaky trick for local growers. Allium leafminer pests live in the region, and planting after the first hard frost helps you dodge them.
Curly flower stalks called scapes pop up in late spring. Snip them off so the plant sends energy back to the bulb, then toss them into a stir-fry.
Harvest arrives in mid to late summer. Watch for lower leaves turning brown while the top leaves stay green, then dig gently and let the bulbs cure somewhere airy.
2. Shallots For Gourmet Flavor
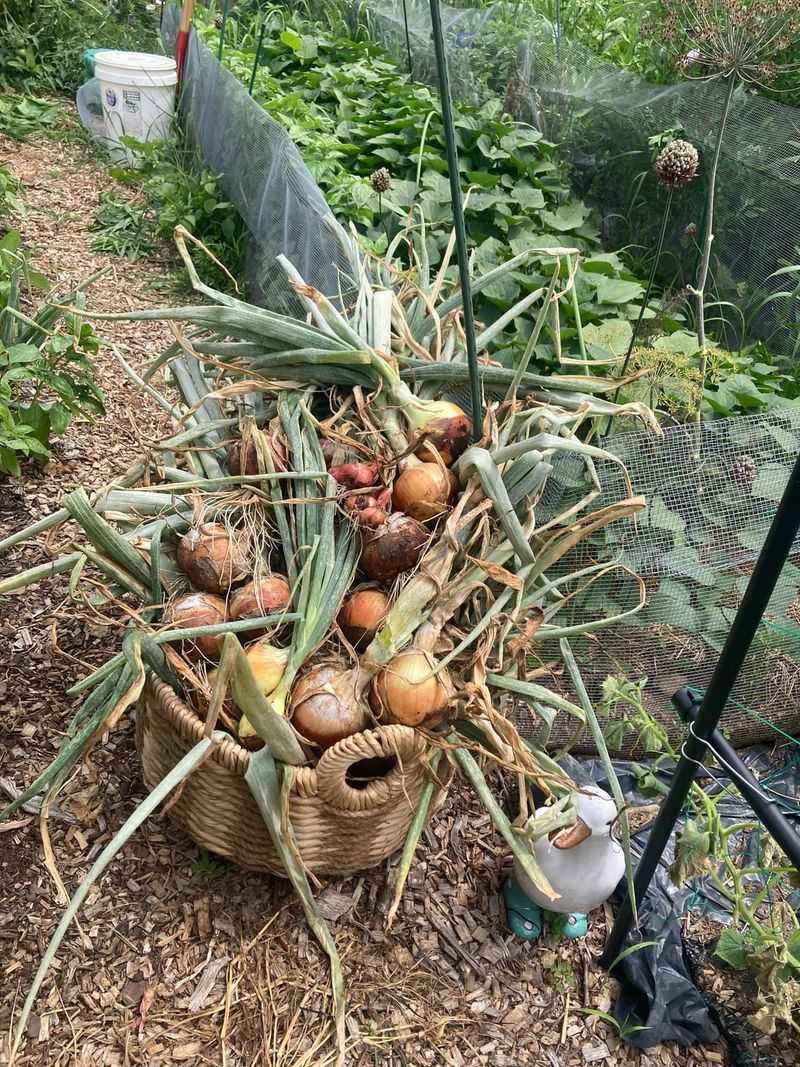
Fancy restaurant chefs love shallots for a reason. Their flavor sits somewhere between onion and garlic, only softer and a little sweet.
Store prices can sting, though. Growing your own costs far less, and fall is a smart window to get them started.
Shallots follow nearly the same schedule as garlic. If you are already planting garlic this autumn, just save a corner of the bed for these copper-skinned gems.
Start by breaking each bulb into separate cloves. Each little piece will grow into a whole cluster by next summer, which feels a bit like garden magic.
Set the cloves root side down in loose, fertile soil. Cover them with about 3 to 4 inches of earth so they stay snug through winter.
Spacing matters more than you might think. Leave at least 6 inches between cloves and about 12 inches between rows for good airflow.
Shallots handle cold without much drama. A light layer of straw mulch adds comfort during wild temperature swings, especially in upstate valleys.
Your New York Garden Changes Every Week. Your Plan Should Too.
Gardening in New York changes quickly throughout the season. Every Friday you’ll receive a simple weekly plan showing exactly what to plant, prune, fertilize, harvest, and protect so you never miss the right timing.
Keep the bed weeded in spring, since shallots dislike competition. Their slim leaves cannot shade out weeds the way bigger plants can.
Fun bit of history here. Shallots are thought to trace back to Central Asia, and French cooks made them famous in sauces like béarnaise.
Once harvested and dried, shallots store for months. Hang them in a mesh bag somewhere cool for winter cooking.
3. Elephant Garlic For Giant, Mild Cloves
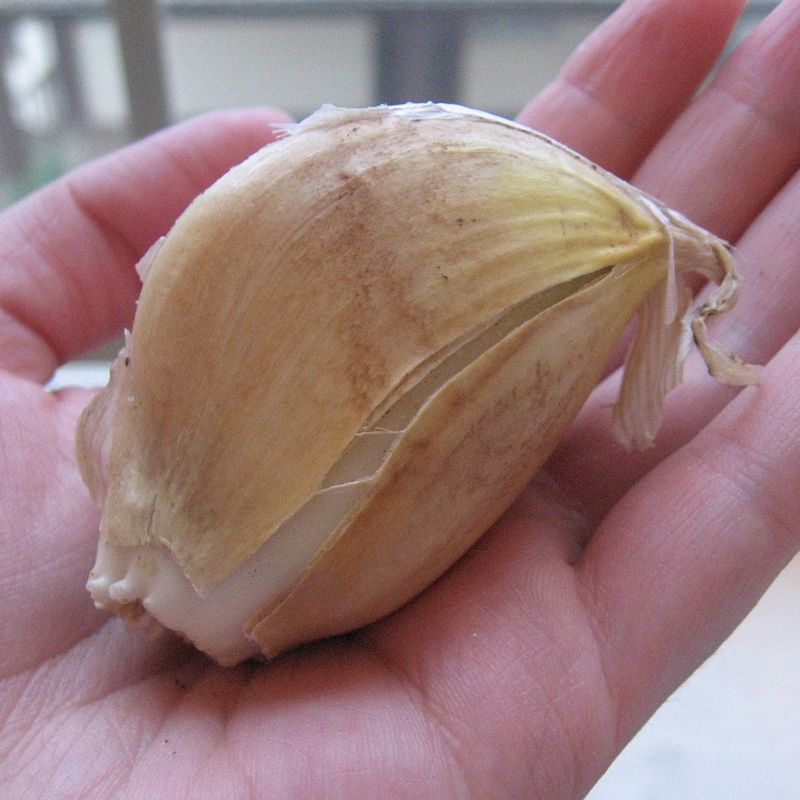
Hold one elephant garlic clove in your palm and you will laugh. It can be as big as a whole bulb of regular garlic.
Despite the name, it is not true garlic at all. Botanists place it closer to leeks, which explains its gentle, mellow taste.
People who find regular garlic too harsh often fall for this one. Roasted whole, the cloves turn soft and spreadable, almost like buttery onion jam.
Fall planting gives the best results. Wait until after the first hard frost, then get those giant cloves into the ground.
Separate the bulb carefully and plant each clove root side down. Aim for 3 to 4 inches of soil covering the top.
Those big cloves need elbow room. Space them at least 6 inches apart in rows roughly 12 inches apart.
Roots form quietly during the cool weeks before winter. Come spring, the leaves shoot up fast and look surprisingly like leeks.
A sunny bed with loose, well-drained soil works best. Heavy clay can stunt growth, so mix in compost if your yard tends to stay soggy.
Here is a quirky tip for curious gardeners. Small, hard bulblets called corms sometimes cling to the outside of the bulb at harvest.
Plant those corms too. They may take a couple seasons, but they eventually grow into full-size bulbs for free.
4. Egyptian Walking Onions For A Perennial Patch
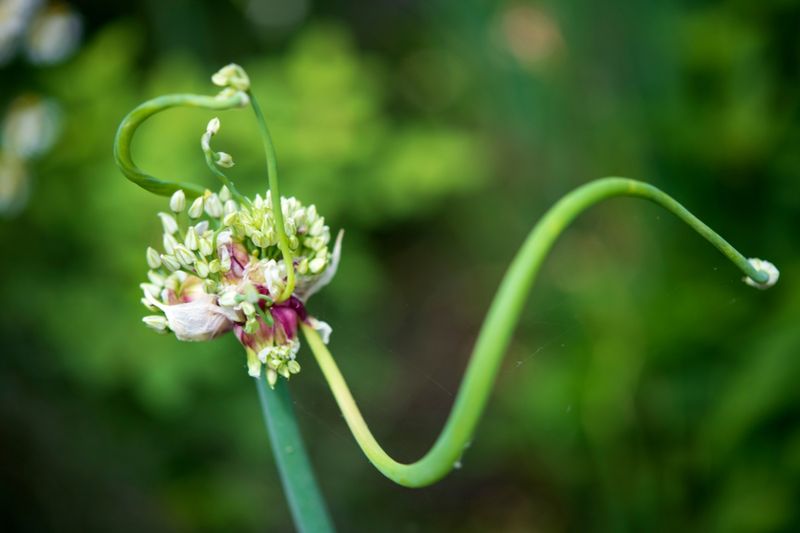
Some vegetables stay put, but these onions literally wander. Tiny bulbs form on top of their stalks, which bend over and plant themselves nearby.
Over a few seasons, the patch slowly strolls across the bed. Kids especially get a kick out of watching it happen.
September and October are ideal for planting in New York. Even so, you can tuck them in any time the ground is not frozen.
Start with the small top bulbs, called topsets, or with mature bulbs. Plant them about 1 to 2 inches deep.
Give each one 6 to 8 inches of space in the row. Leave around 12 inches between rows so harvesting stays easy.
Full sun is great, but partial shade works fine too. Moist soil that drains well keeps the roots happy and healthy.
Fall plantings start rewarding you the following spring. Snip the hollow green leaves like chives or pull young stalks for fresh scallions.
Want more scallions and fewer big bulbs? Plant the topsets closer together and harvest them while they are slim.
Once established, the patch takes care of itself. It multiplies each year with very little effort from you.
Many gardeners share extra topsets with neighbors. Ask around your local garden club, and you might score a starter batch for free.
5. Spinach Sown To Overwinter
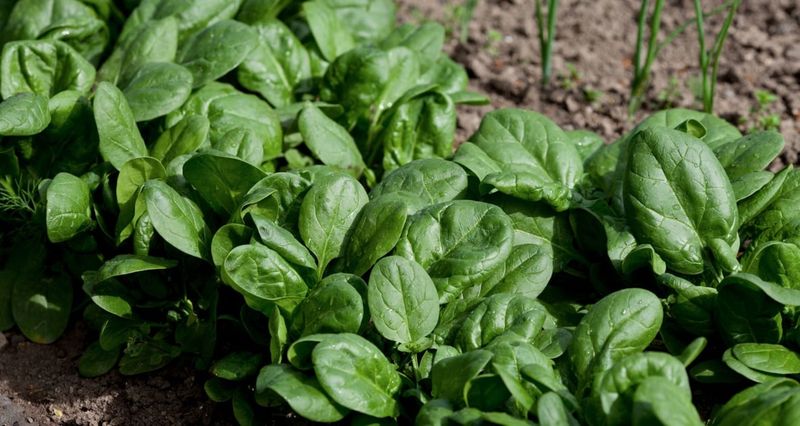
Spinach that survives winter tastes noticeably sweeter. Cold weather pushes the plant to store sugars, almost like a natural antifreeze.
Getting that sweet spring crop starts now. Sow seeds 6 to 8 weeks before your first expected frost.
For many New York gardens, early September hits the mark. Some growers also sow just before the ground freezes for a spring surprise.
Seeds sprout best in soil between 40 and 55 degrees. Keep the bed evenly moist until little green leaves appear.
Size matters before the deep cold arrives. Plants should reach at least 2 inches tall to handle winter well.
Young spinach is tougher than it looks. It can shrug off temperatures as low as 15 degrees once settled in.
Extra protection helps in colder zones. A cold frame, hoop house, or thick straw mulch keeps leaves cozy on bitter nights.
You can start picking a few leaves in late fall. Growth slows in deep winter, then bounces back quickly once spring sunlight returns.
Harvest the outer leaves first. Leave at least eight inner leaves on each plant so it keeps producing.
Enjoy the bounty while it lasts. Spinach usually bolts in mid to late spring when days get long and warm.
6. Mache For Hardy Winter Salads
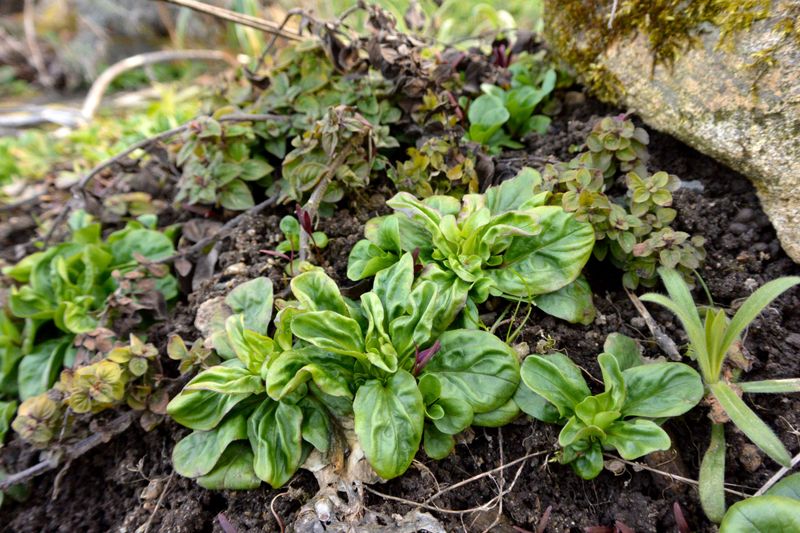
Small but mighty, mache grows in neat little rosettes that look like green flowers. Its leaves taste nutty, buttery, and wonderfully tender.
You may know it as corn salad or lamb’s lettuce. European farmers once picked it wild from grain fields, which explains the name.
Toughness is its real superpower. Mache can handle 15 degrees with no cover and about 5 degrees under mulch.
Sow seeds once the soil cools below the mid-60s. Warm soil above 70 degrees sends seeds into a sleepy state.
Patience pays off with this green. Germination takes 10 to 14 days, even in ideal soil around 50 to 60 degrees.
Plant seeds about a quarter-inch deep and an inch apart. Rows work fine, or you can scatter them across a bed.
For a steady supply, sow a new batch every 2 to 3 weeks. Keep going as long as the ground stays workable.
Low tunnels and unheated greenhouses give mache a real boost. A light blanket of straw or shredded leaves protects roots during harsh snaps.
Baby leaves are ready in about 30 days. Mature rosettes take closer to 70 days, so plan accordingly.
Cut what you need and let the plant regrow. A January salad from your own yard feels like a small victory.
7. Horseradish Roots For A Spicy Spring Harvest
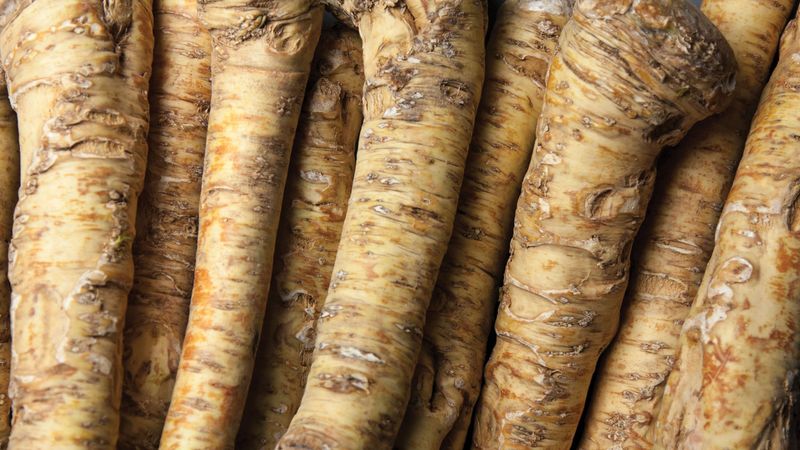
One whiff of freshly grated horseradish can clear your head faster than any cold medicine. Homegrown roots pack serious heat.
Grocery store jars cannot compete with the fresh stuff. Luckily, this tough perennial settles in nicely when planted in late fall.
Choose your spot carefully, because horseradish spreads and sticks around. A forgotten corner or a deep container keeps it from taking over.
Deep, rich, moist soil makes the best home. Loosen the ground at least 10 inches down and mix in plenty of compost.
Full sun gives the biggest roots. Partial shade works too, though your harvest may come out a bit smaller.
Plant root cuttings, called sets, at a 45-degree angle. Cover the tops with 2 to 3 inches of soil.
Space each plant 1 to 2 feet apart. Water well if the soil is dry, then add mulch to hold moisture.
Over winter, the roots quietly anchor themselves. By spring, fresh leaves push up, and you can sample a few roots or tender shoots.
Wait for autumn for the boldest flavor. Cool weather after the leaves fade back gives roots their strongest bite.
Grate it in a ventilated area, and keep your face back. Those fumes pack a punch strong enough to make eyes water.
8. Rhubarb Crowns While The Soil Stays Workable
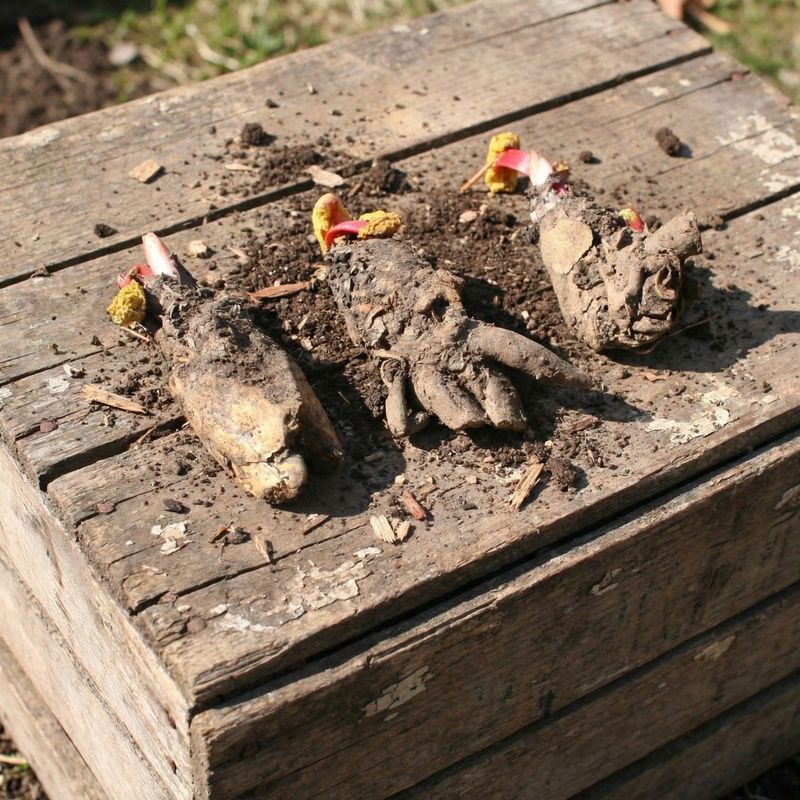
Grandma’s rhubarb pie probably started with a plant that lived for decades. One healthy crown can produce for 10 years or more.
Fall is a great time to get one started. Plant dormant crowns from mid-September to mid-October while the soil still crumbles in your hand.
Cold winters are no problem here. Rhubarb actually needs a chilly rest period to wake up strong in spring.
New York weather delivers that chill with ease. Upstate gardeners often grow some of the thickest, rosiest stalks around.
Pick a sunny spot with rich, well-drained soil. Work in plenty of compost, since rhubarb is a hungry feeder.
Keep the planting shallow. The top of the crown should sit just 1 to 2 inches below the surface.
Give each plant room to spread out. Aim for 2 to 3 feet apart, or up to 4 feet for larger beds.
Now comes the hard part, which is waiting. Skip harvesting entirely during the first year so the roots grow strong.
In year two, pull just 2 or 3 stalks per plant. By year three, you can harvest freely through spring.
Safety first in the kitchen. Rhubarb leaves contain toxic oxalates, so eat only the stalks and compost the leafy tops.
9. Lettuce Seeded Under A Cold Frame
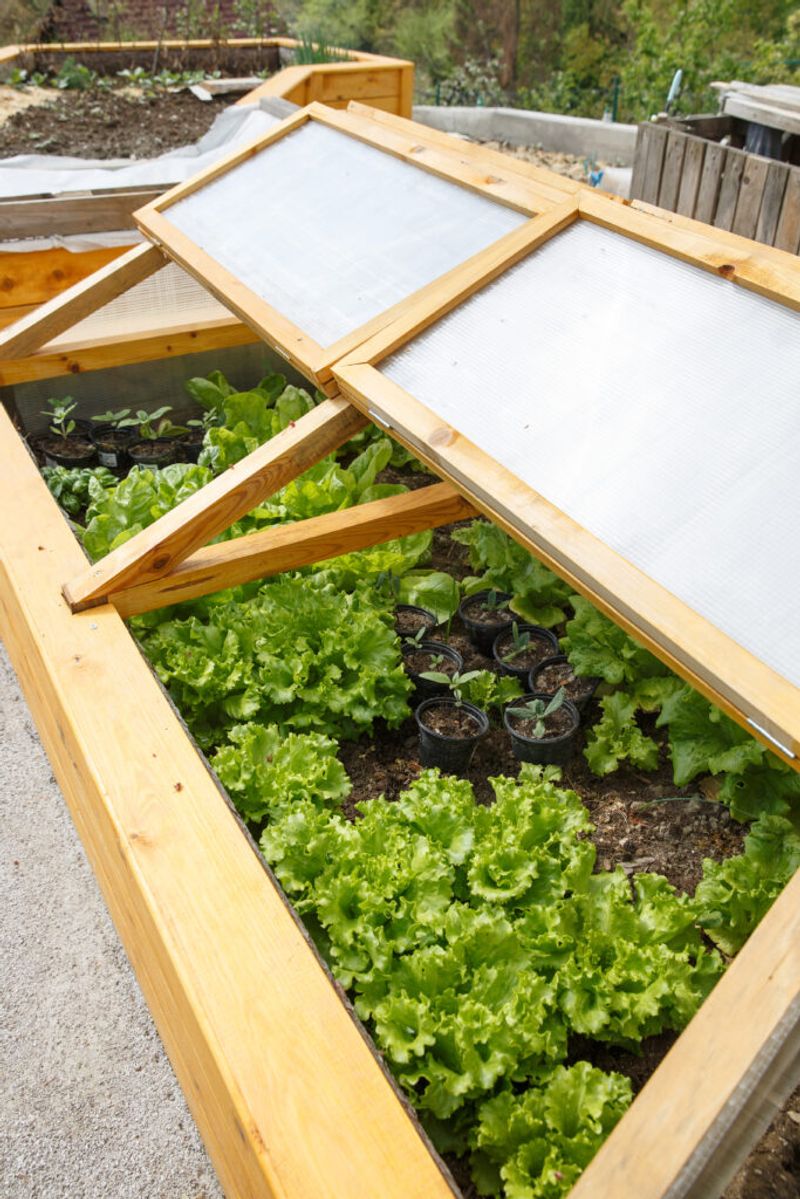
Think of a cold frame as a tiny sunroom for your salad. A simple box with a clear lid traps sunlight and keeps lettuce cozy.
Fall lettuce often tastes sweeter than summer lettuce. Cooler weather brings out its crisp, mild side.
For fall harvests, sow seeds about 60 days before your first frost. In much of New York, that lands around mid-August.
Aiming for winter salads instead? Sow in early September, then move seedlings into cold frames by late September or early October.
Some gardeners even plant in October or early November. Mild autumns give those late sowings a fair shot.
Rich, moist, well-drained soil keeps lettuce happy. Compost mixed into the frame bed gives roots a steady meal.
Watch the thermometer on sunny days. Prop the lid open so the inside stays near 65 degrees and nothing overheats.
Bitter nights call for extra cover. When temperatures may drop below 15 degrees, toss old blankets or hay over the lid.
Variety choice makes a big difference. Try Winter Density, Rouge d’Hiver, Marvel of Four Seasons, North Pole, Tango, or Green Forest.
Pick outer leaves and let the center keep growing. With luck, fresh salads may last into January or beyond.