Monstera Node: Is It Really That Important When Propagating?
Monsteras are popular houseplants because they produce large, beautiful, fenestrated leaves that can make any room look more lively. As well as their relatively easy plant care requirements, propagating them is also pretty straightforward.
The propagation process starts with finding a healthy Monstera node and then putting it in either soil or water. But how can you identify an ideal stem node for further propagation?
Well, we are here to help you!
Keep reading to find out everything you need to know about Monstera nodes and the best propagation methods. You can also propagate Monsteras without a node, and we’ll go through that too.
What Is A Monstera Node?
Monstera plants are tropical plants that belong to the Araceae family. The most popular variety is Monstera deliciosa, also known as the Swiss cheese plant. There are also variegated monsteras that are commonly grown as indoor plants, such as the Monstera standleyana.
If you are a beginner gardener who wants to start propagating plants, then you have probably already heard of node cuttings and stem cuttings. These parts of the plant are crucial if you want to grow a new plant.
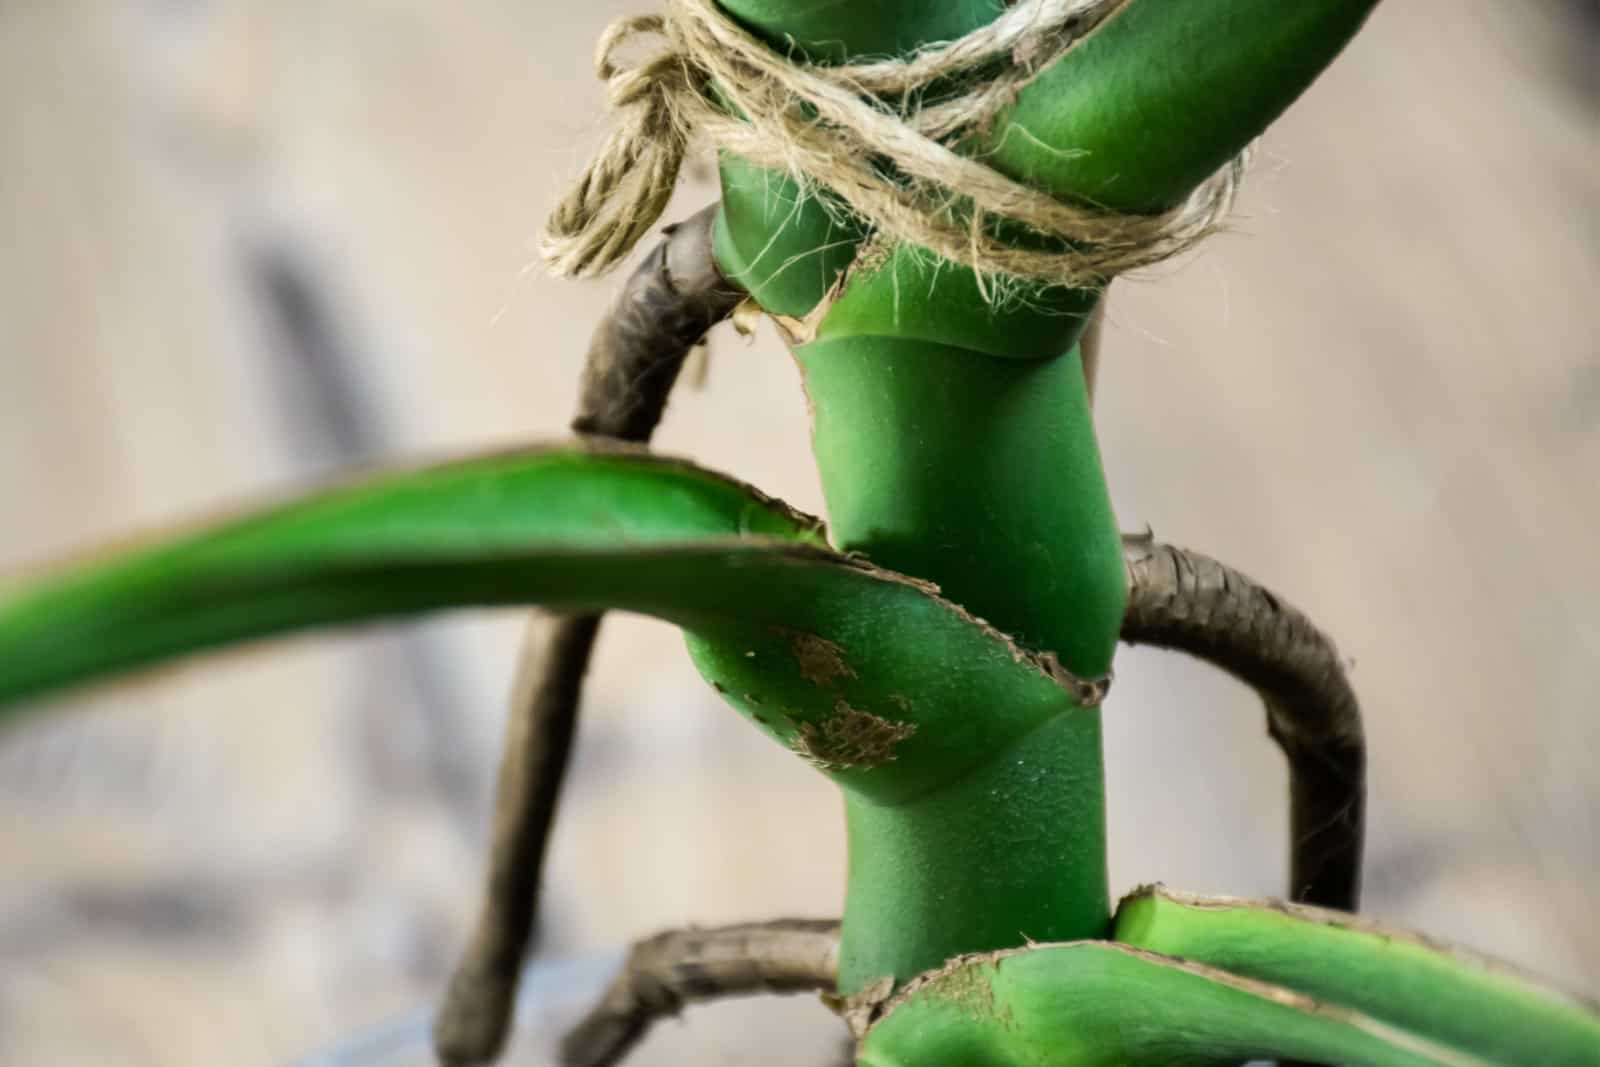
All plant stems are made up of internodes and nodes. A node is a section of the stem, and the segment that connects the node to the Monstera leaf is known as the internode.
The cell cluster required to generate new growth is present in the node. At the node, axillary buds, petioles, leaves, aerial roots, and flowers develop. New leaf growth is provided by nodes.
A Monstera node can be easily recognized because of its green or brown ring color. The aerial roots will expand more quickly if they grow from a stem.
Do All Monsteras Have Nodes?
All Monstera varieties produce a tiny bump on their stem that is known as a node. If you look carefully at the Monstera stem, you will probably notice several tiny nodes that are ready to produce new leaves.
What If My Monstera Doesn’t Have A Node?
If your Monstera plant does not produce any nodes, but is still looking quite lovely, then it probably means that your plant is still too young to produce any nodes.
You will have to wait until your plant is established. If your Monstera produces big healthy leaves, then you can look for nodes to propagate.
How To Choose A Node Cutting For Propagation
If this is your first time propagating Monsteras, you will have to find the best plant cutting to use. You can order it online if you want to grow a new Monstera plant. However, if you already own a Monstera that you want to propagate, you will simply have to examine it and look for nodes.
The node cutting from the mother plant should ideally have aerial roots developing from it that are at least a few inches long. Don’t use parts of the plant that have any black or brown spots, which indicate rot.
If you are growing a variegated plant, then it is completely normal that the stems also have some variegations on them.
If you are ordering the stem cutting online, check the reviews first and ask the seller to send you pictures of the cutting. I would advise you not to order online as you can easily get scammed. My friend ordered a cutting for a Monstera Thai Constellation but ended up with a completely different plant.
The Monstera Thai Constellation looks astonishingly similar to the Monstera Albo Borsigiana, so be careful not to get tricked if you want to buy a specific plant.
Can You Propagate Monsteras Without Nodes?
Unfortunately, you cannot propagate Monstera without a node. The cutting must contain a node that will ensure the growth of new leaves, stems, and eventually an entire plant!
This is because a single node contains all the genetic information that is necessary for growth and development.
You can’t simply put a leaf in the soil and hope for the best. While you might still see some new roots growing, an entire plant with stems and leaves will not grow from a single rooted leaf. The leaf will always remain just a leaf.
Can You Propagate Monsteras With A Leafless Node?
It is quite hard to find certain rare plants in local garden shops. However, you might often see them being sold online for propagation from a cutting without any leaves or roots, with just a single node in the middle. These are often referred to as wet sticks or stem cuttings.
However, a single node is necessary for a whole new plant to grow tall and strong!
The Monstera cutting needs to be about 3 to 4 inches long and contain at least one node that will ensure further growth and development. If you are a grower that wants to try propagating Monsteras from a single node, then check out this video:
The Best Monstera Propagation Methods
There are many different methods that you can use for plant propagation. The same methods can be used for a variety of plants, including Monsteras, Philodendrons, and Pothos plants.
Let’s take a closer look.
Propagation By Stem Cuttings (Soil & Water Propagation)
The quality of the stem you use will determine the success of further growth and development with this propagation type. Make sure the stem is free of any diseases or pests before moving onto the propagation process.
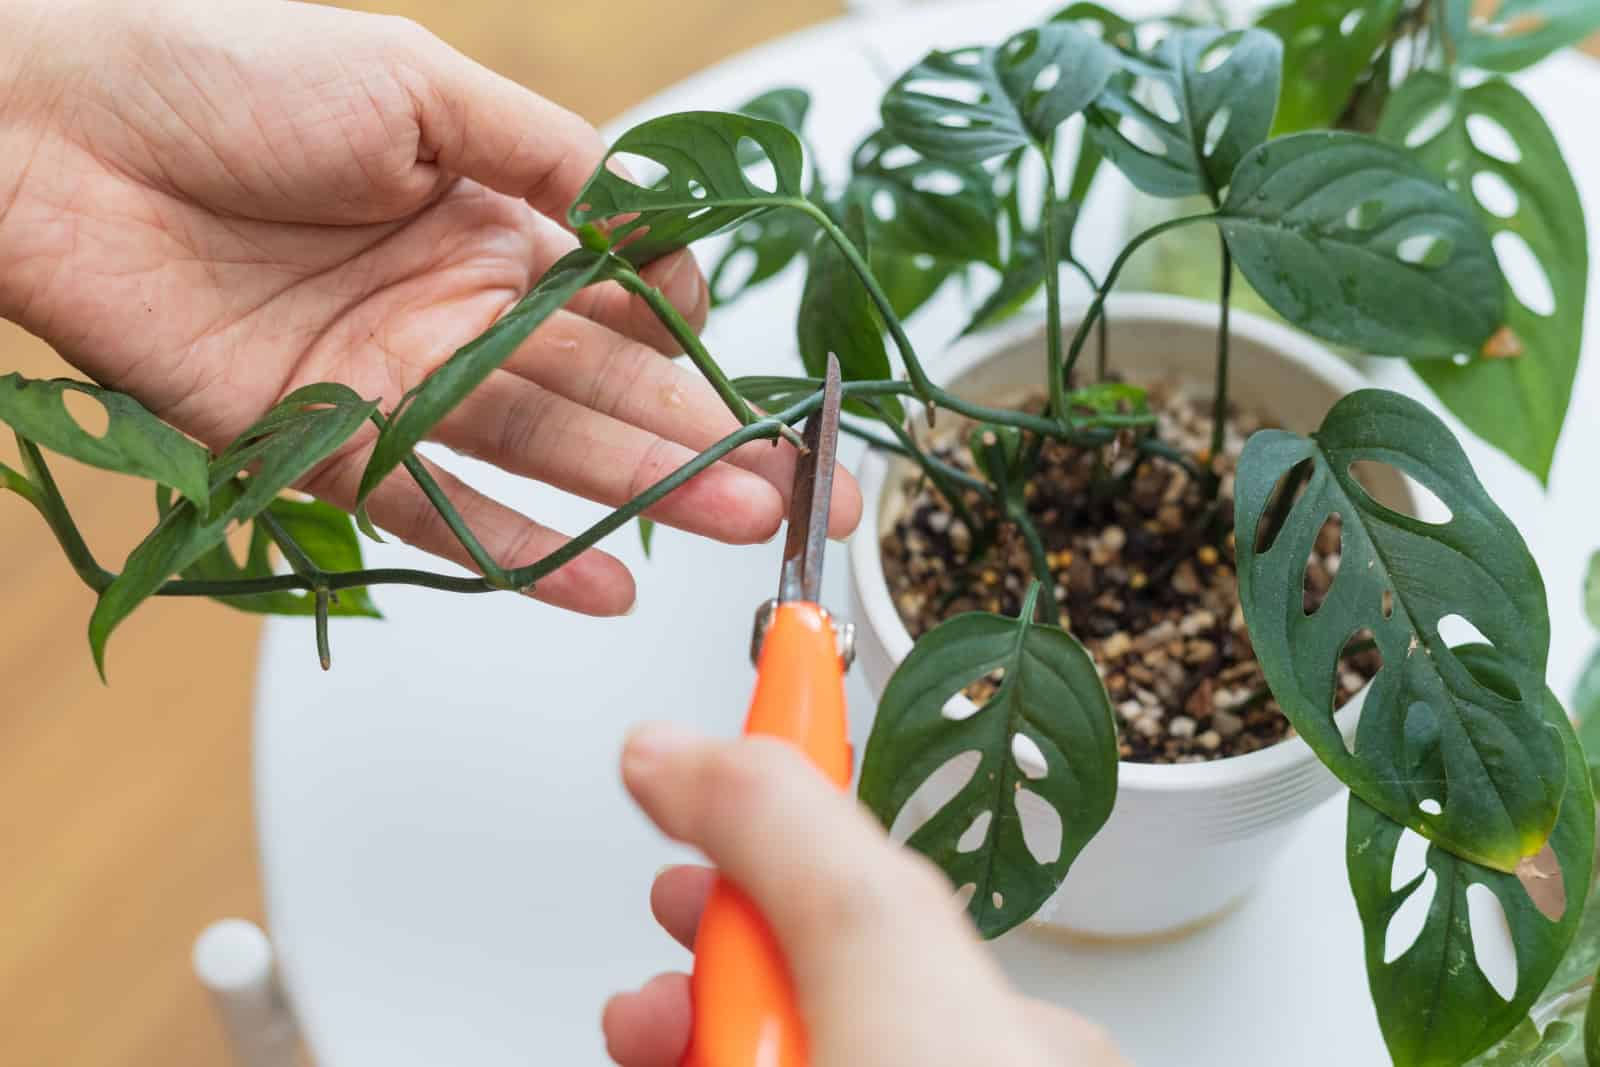
We have already discussed how to choose the ideal Monstera cutting — ensure that it is at least three to four inches long, and use sterile pruning shears when cutting to prevent the spread of diseases and infections.
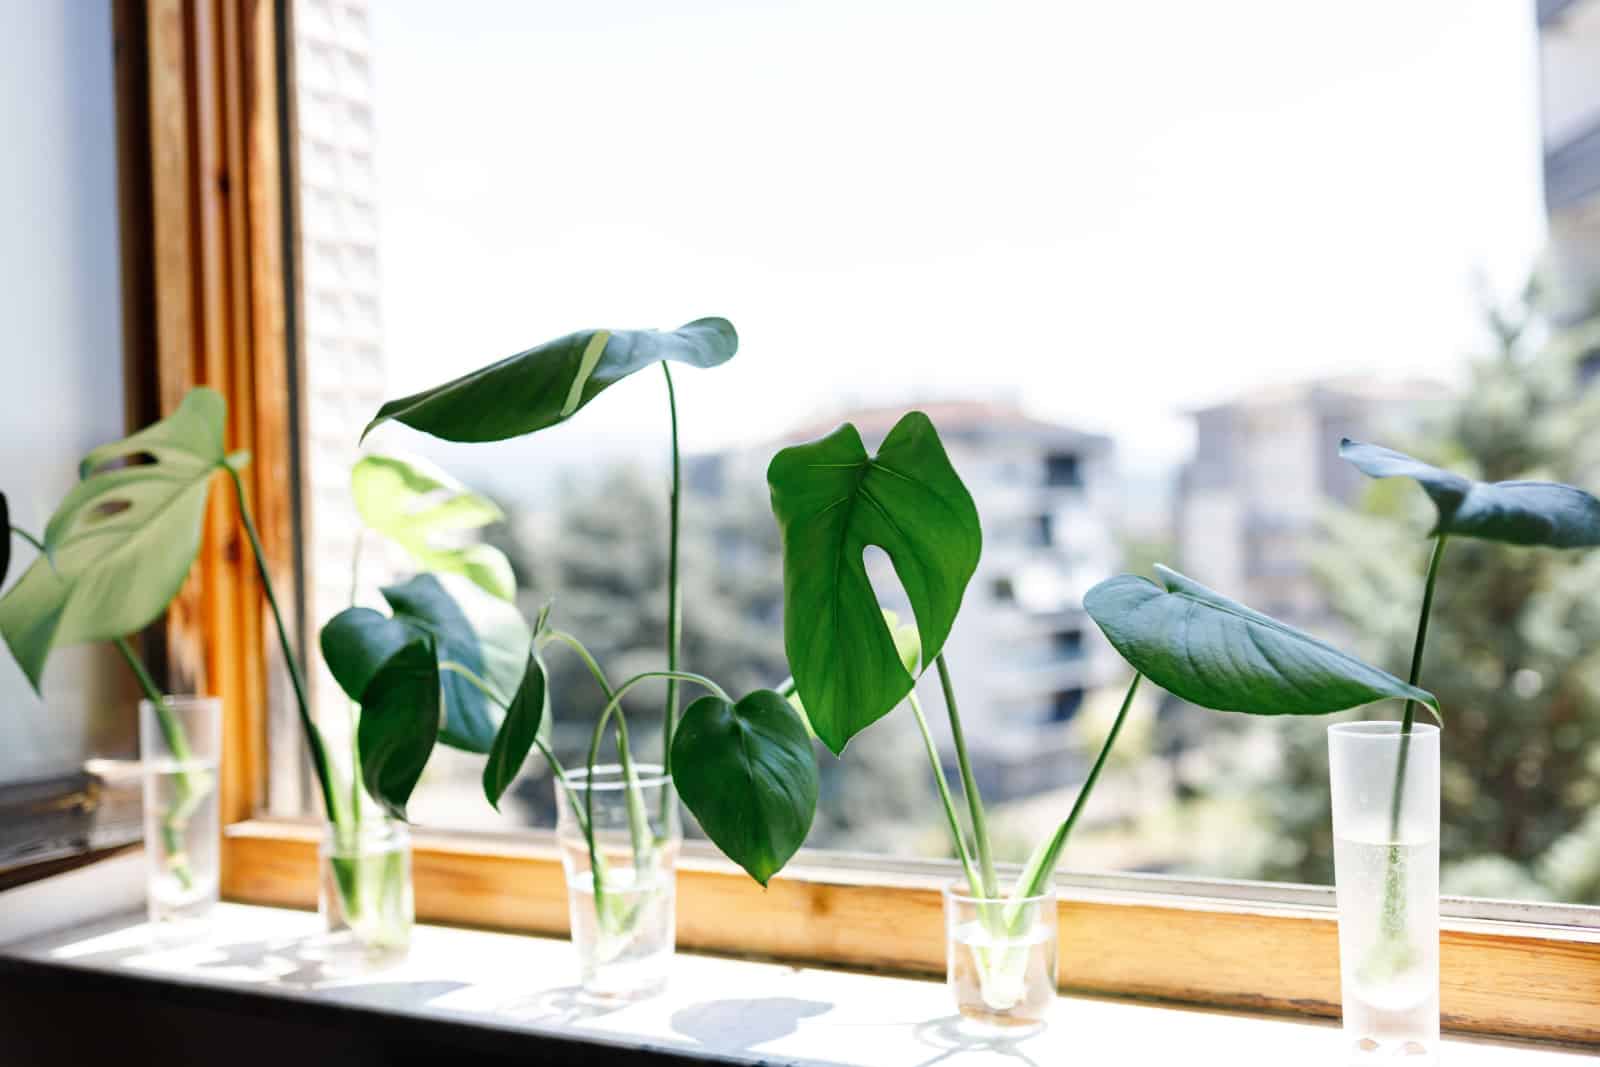
Propagation By Stem Cutting In Water
There are three advantages of water propagation:
1. This procedure is clean.
2. You can keep an eye on the roots’ growth and rot situations because they are visible.
3. It can be used to decorate tables.
In contrast, there are three drawbacks to growing a Monstera cutting in water:
1. The Monstera won’t receive a lot of nutrients.
2. This process requires more time.
3. After rooting, the plant is more vulnerable to transplant shock.
If you choose to use the Monstera water propagation method, follow these steps:
1. Cut a healthy stem that has at least two leaves with sterile scissors or pruners (if the stem has more than two leaves, cut the bottom ones). The plant’s leaves will aid in the process of photosynthesis.
2. To hasten the formation of the cell roots, submerge the new stems in a rooting hormone. The rooting hormone will stop root rot, particularly fungal-induced root rot.
3. Place the cutting in a jar of water, covering a node so the roots can emerge. Be careful not to submerge the leaves.
4. Find a warm location for the cutting. The optimum temperature is between 70 and 77 degrees Fahrenheit. Make sure the cutting is in strong indirect light.
5. Be sure to change the water every 3 to 4 days. Refill the jar if the water evaporates quickly.
You will have to wait about 4 weeks until the cutting has grown a healthy root system. The rooted cutting should be transplanted into the potting soil.
Propagation By Stem Cuttings In The Soil
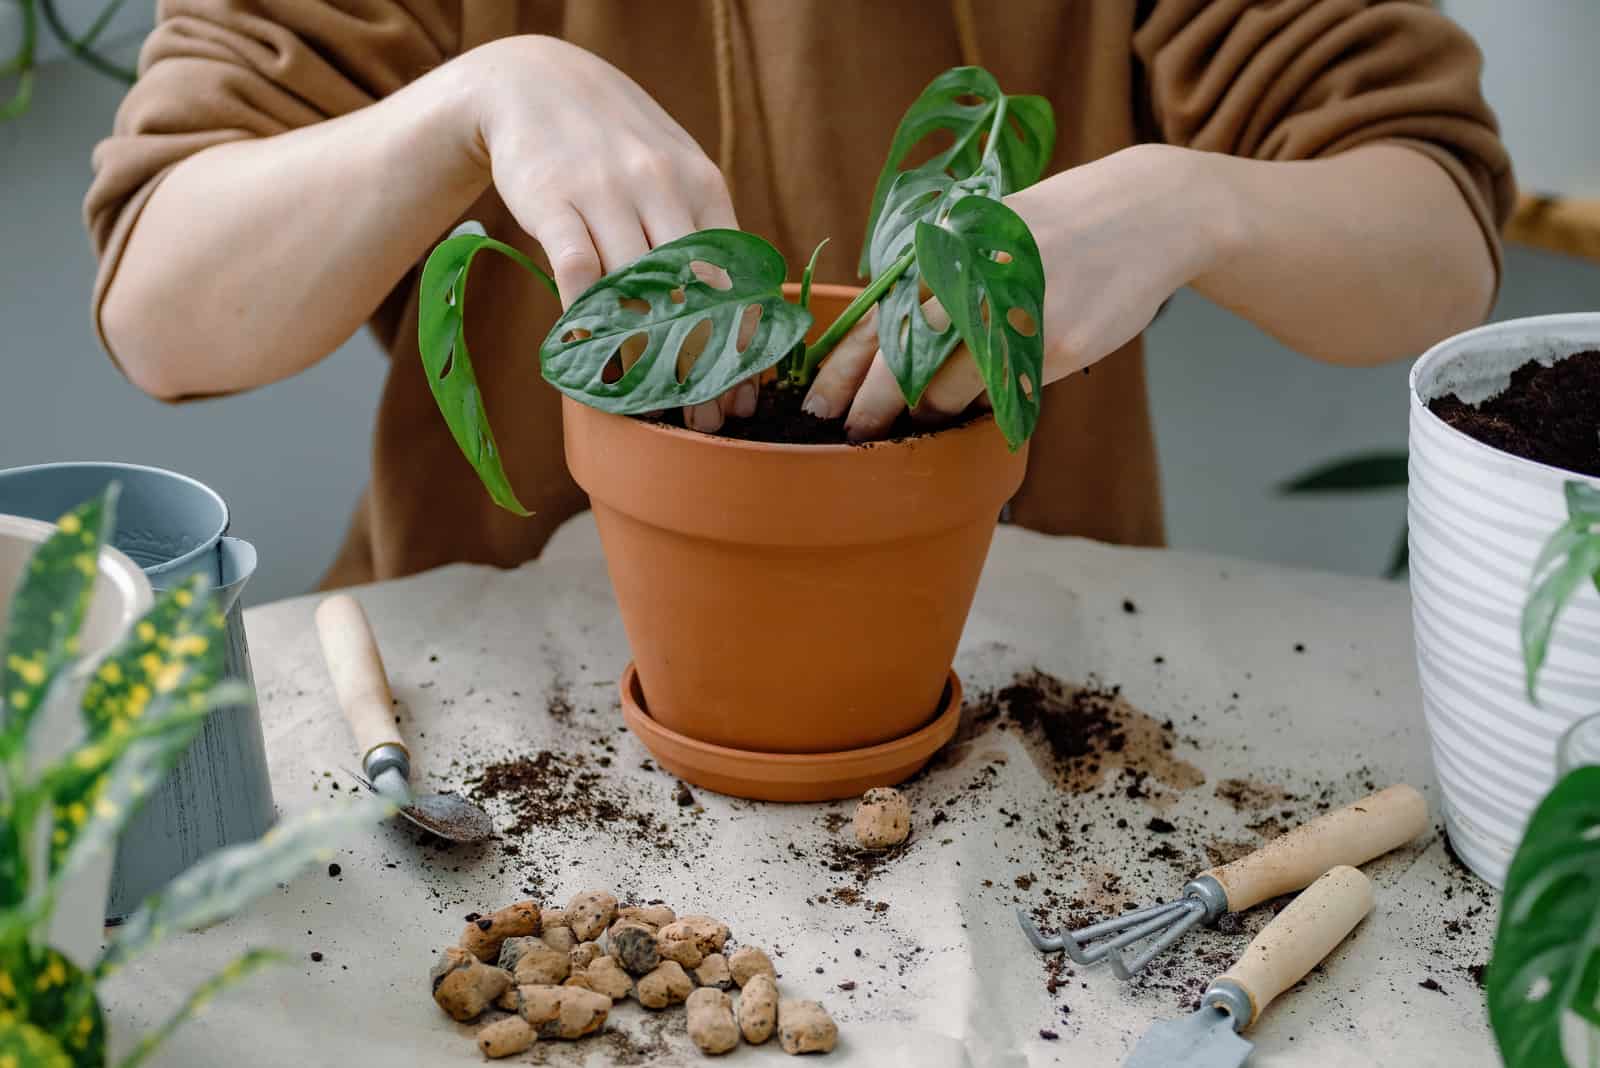
Even if the root isn’t visible and the process is messy, it will be quicker, provide the plant with more nutrition, and reduce transplant shock after rooting.
You will require potting mix, a nursery pot with drainage holes, and plastic wrap that you can seal.
The soil is the most important part of this method, which is why you will have to provide the best Monstera potting mix. A stem cutting node’s optimum potting mixture is:
• Peat-based potting soil
• Perlite-based potting soil
• Aroid mix
• Potting mix that only contains one ingredient, such as sphagnum moss
• Potting soil containing additives like vermiculite, leca, or pumice
Follow these instructions for soil propagation:
1. Place potting soil in the nursery pot. Put a pebble tray underneath the nursery pot. Wait until you notice extra water draining from the drainage holes before soaking the potting mix with water. Any water left in the tray should also be discarded. If the soil is only made up of sphagnum moss, soak it for about an hour then wring it out.
2. Cut a healthy stem that has at least two leaves with sterile scissors or pruners (if the stem has more than two leaves, cut the bottom ones).
3. Dip the cutting in a rooting hormone to speed up the formation of cell roots and prevent root rot, particularly fungal root rot. If you don’t want to use rooting hormone, you can skip this step.
4. Poke a hole in the potting soil with your finger. The lowest node should be covered by a 2-inch deep hole. Make sure the cutting is upright by gently pressing the soil.
5. Cover the cutting with a plastic bag, being careful not to let the bag touch the leaves. To ensure that the humidity doesn’t fluctuate, punch a tiny hole in the bag.
6. Pick a warm place for the cutting. The optimum temperature is between 70 and 77 degrees Fahrenheit. Make sure the cutting is in strong indirect light.
7. Ensure that the soil is uncovered sometimes. This way, you can make sure the plant has enough oxygen, and if the soil is dry, you can mist it.
It will take about 3 to 5 weeks for the cutting to develop sturdy roots. After that, your little Monstera plant will be ready for repotting.
If you aren’t sure, try gently pulling the plant, and if it comes out easily, you will need to wait a little longer until it is difficult to take out.
Air-layering Propagation Method
This approach is both interesting and by far the most effective. The mother plant and the new plant will be joined together immediately.
Prepare the following before using this propagation method:
• Rooting hormone
• Plastic bag
• Sharp knife
• Sphagnum moss
• String or twist knots (to secure the plastic bag)
These are the instructions for using the air-layering propagation method:
1. Soak the sphagnum moss for 30 minutes in water. After soaking, wring it out.
2. Make a cut beneath the node using a sharp, clean knife. Keep in mind that the node needs to be on a firm Monstera stem. The cut will promote root development and provide the node with oxygen.
3. Soak the top 2 inches of the cutting in rooting hormone. This will hasten the formation of the cell roots, and the rooting hormone will stop root rot, particularly the kind brought on by fungi.
4. Carefully cover the node with a handful of sphagnum moss. The plastic bag should be secured with string or twist ties. Create a few tiny holes in the bag, then cover the nodes.
5. If the sphagnum moss appears to be dry, you can mist it.
After a few weeks, new roots will become visible. When you see new roots, snip them off with sterilized scissors and plant your new Monstera Adansonii.
Propagation With A Leafless Stem Node
We have already mentioned that it is possible to propagate Monsteras with a leafless stem node.
Sphagnum moss, a shallow dish or tray, and a plastic bag are required.
Follow these five steps to propagate a stem node without leaves:
1. Soak the sphagnum moss for 30 minutes in water. After soaking, wring it out.
2. Ensure that the nodes are placed horizontally on the sphagnum moss. By doing so, you can guarantee that the node meets the sphagnum moss and that the aerial root portion is facing down.
3. Cover the node with a plastic bag, making sure it doesn’t touch the leaves. To ensure that the humidity doesn’t fluctuate, punch a tiny hole in the bag.
4. Find a warm location for the node cutting. The optimum temperature is between 70 and 77 degrees Fahrenheit. Put the node in bright indirect light.
5. Ensure that the sphagnum moss is uncovered every few days. By doing this, you can make sure the plant has enough oxygen, and if the sphagnum moss starts to dry out, you can spray it.
The new bud won’t start to appear for several weeks or even a few months. Transplant the plant as soon as the cutting shows signs of rooting.
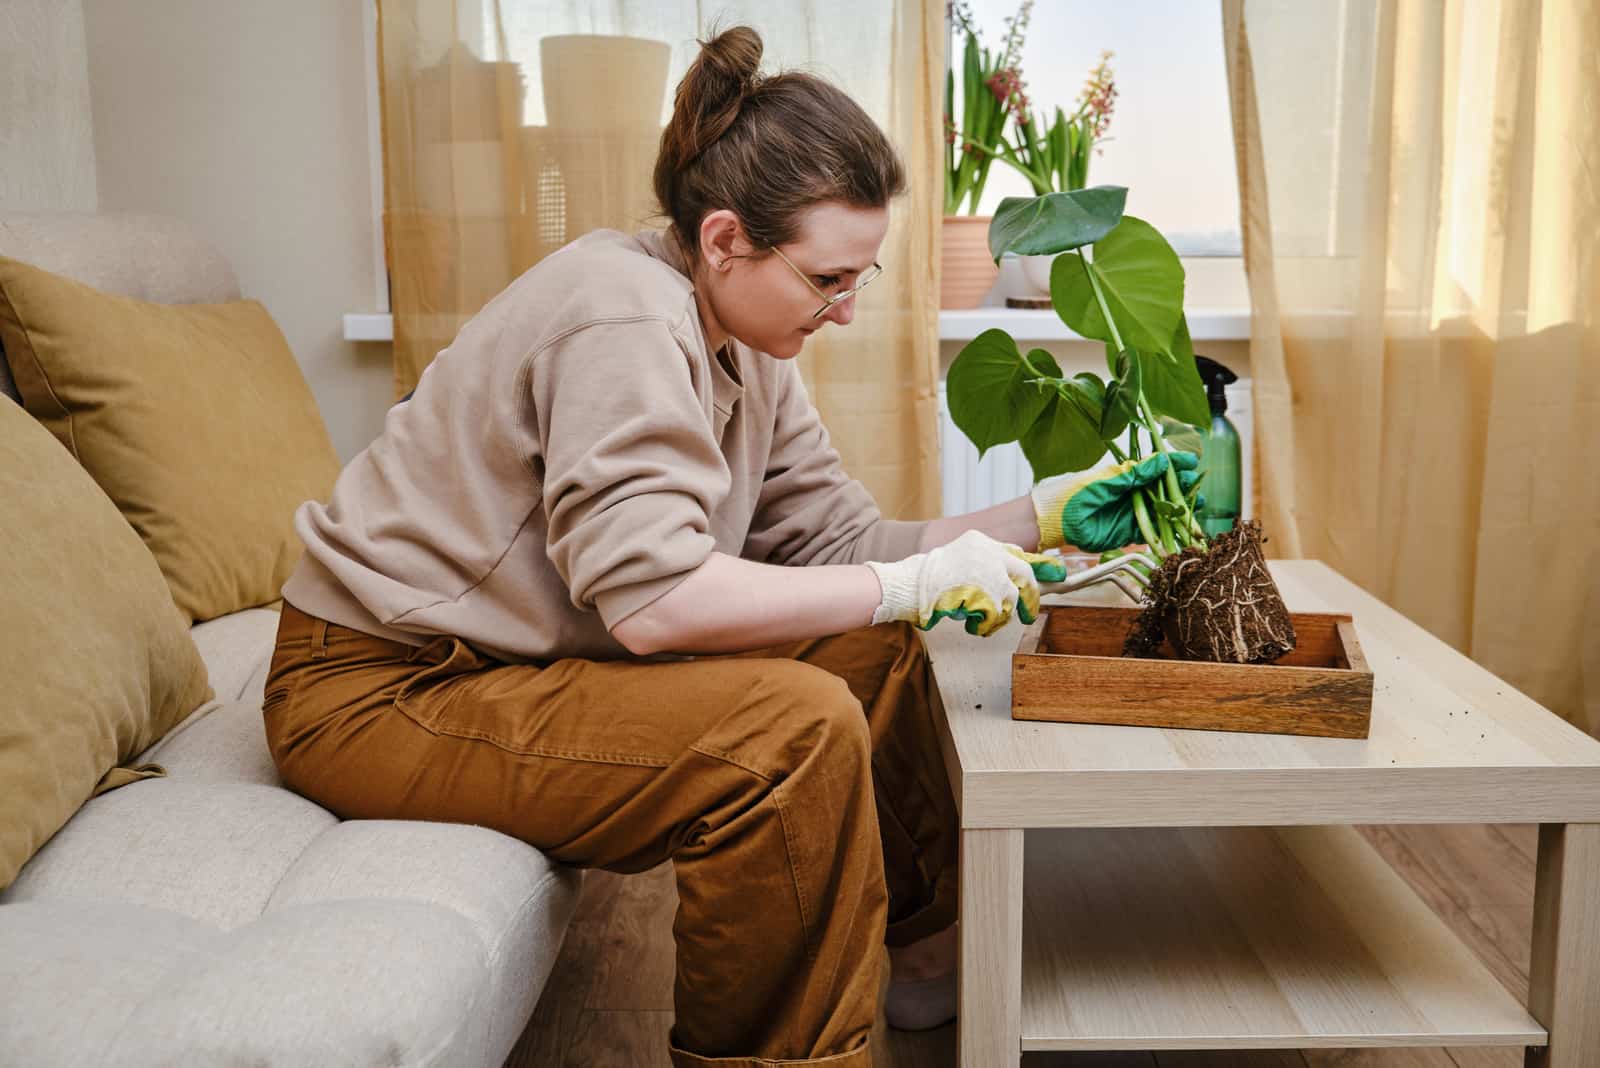
Propagation By Division
You can use this approach to get a new Monstera plant, even if it is typically used for Philodendrons or Snake plants.
This method is primarily used for Snake plants or Philodendrons, but you can also use it for propagating Monstera plants.
The process involves dividing the mother plant.
Monstera plants frequently don’t produce any offsets or suckers (vertical growth coming from the root system or lower Monstera main stem).
If your Monstera plant has a single sucker, you can use it to propagate the plant.
For this kind of propagation, you’ll need a sharp knife and a fresh pot filled with potting soil that drains well and contains a significant amount of organic matter.
You can follow these easy steps for propagating Monsteras by division:
1. Fill ⅓ of the pot with a potting mix.
2. Remove the mother plant from the pot and wiggle it loosely to drain the extra soil and water.
3. Take a sucker from the mother plant using a knife.
4. Put the sucker in a container and fill up the rest of the pot with potting soil.
5. Transplant the main plant.
Propagation By Seeds
Growing the plant from seeds is another method for getting baby Monsteras. The seeds of the Swiss Cheese Plant, or Monstera Deliciosa, are readily available and inexpensive (usually around $1 to $5).
When purchasing Monstera seeds, one crucial fact must be kept in mind: multicolored Monstera seeds do not exist.
Examples of genetically modified plants include Monstera Albo and Monstera Adansonii. Since these plants are expensive, many vendors will try to sell their seeds. When you purchase seeds of the Swiss Cheese Plant or the Monstera Deliciosa, keep them somewhere cold and moist.
Use only healthy seeds when propagating plants. Get a germination tray ready. A container is also an option, but it needs to be shallow. You will also need well-draining soil.
Again, you’ll need potting soil that drains well.
If you opt to use seeds for propagation, there are 5 steps you can follow:
1. Soak the seeds for one day to hasten germination.
2. Add wet potting mix to the germination tray or shallow container. If you choose to use a germination tray, poke a hole with your finger in the potting soil. The lowest node should be covered by a 2-inch deep hole. Simply scatter the seeds and cover them with soil in a small container.
3. Grab a plastic bag, then wrap it around the germination tray. To ensure that the humidity doesn’t fluctuate, punch a tiny hole in the bag.
4. Pick a warm place to store the seeds. The best temperatures for the little seeds to germinate and sprout range from 70 to 77 degrees Fahrenheit.
5. If the soil gets dry, you can mist it.
Monstera Care Tips
It is very important that you take good care of your plants, especially if they have been recently propagated. Younger plants are more fragile, which is why you have to pay close attention to their well-being.
Monstera plants are relatively low-maintenance plants, and they have similar requirements to any other tropical plant. All you have to do is provide them with warm temperatures, well-draining soil, high humidity, just enough water, and some plant food.
Follow these tips to keep your new Monstera plants happy and healthy.
Light: The plant prefers bright indirect light. Avoid areas that are in direct sunlight or have poor lighting. Use a grow light if you can’t find an ideal location for your new baby plant.
Humidity: New Monsteras thrive best in environments with humidity levels over 60%. To raise the humidity, use a pebble tray or a humidifier. Avoid areas with vents or air conditioners.
Temperature: The optimal temperature is between 65 and 85 degrees Fahrenheit. New houseplants shouldn’t be placed next to heating sources such as fireplaces or radiators.
Pruning: Young plants don’t require pruning unless there are any leaves that are damaged or dead. When pruning, always use sterile shears.
Fertilization: Wait three to six months before fertilizing the plant again because the potting mix contains nutrients already.
Soil moisture: In the first few days, the soil must be moist. Overwatering the potting soil mix should be avoided as it might lead to root rot and kill the plant. Monsteras grown in water will need more time to adapt.
Pests: Check for pests despite the fact that it may appear impossible for a young plant to get infested. These little critters are one of the most annoying Monstera problems. Mealybugs, aphids, spider mites, and fungus gnats are the most frequent pests that harm Monstera plants.
To Sum Up
The Monstera node is a very important part of the plant, especially when you want to propagate your Monstera. Propagating this plant without a node would be impossible because the node contains all of the plant’s DNA necessary for producing a whole new plant with healthy stems and leaves.
There are different methods that you can use for propagating Monsteras, though I personally believe that propagating by stem cutting in soil is the easiest one. If you aren’t very handy with propagation, you can always order seeds online and try growing Monsteras from seeds.
Provide them with plant care just as you would any other tropical plant, though I would suggest you be more careful about the little ones that have just been propagated.
That’s all, folks. I hope this article was helpful.
Until next time!