Root Those Christmas Cactus Pieces That Break Off And Grow A Whole New Plant In North Carolina For Free
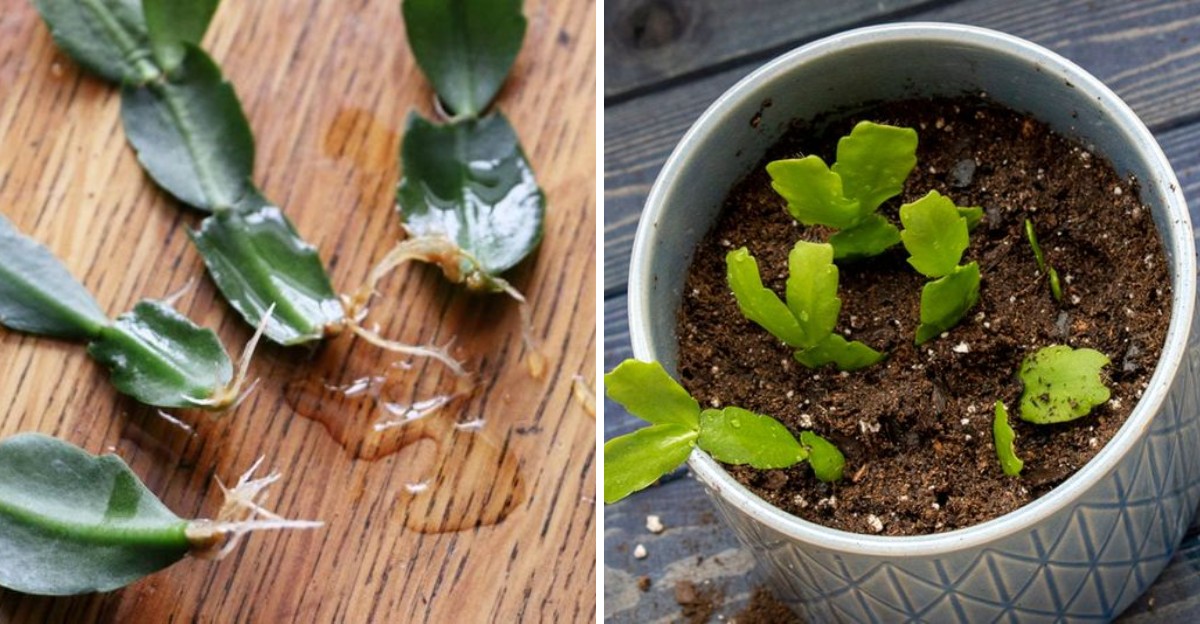
A segment snaps off your Christmas cactus, and you almost toss it. Don’t. That small green piece can become a brand-new plant. It is one of the easiest ways to grow more for free, and the results make wonderful gifts.
The process takes patience more than skill. The piece needs a short rest before it goes into soil.
Moisture, warmth, and light all play a part, and too much water ruins the whole thing. North Carolina homes are often warm enough for quick rooting, though dry winter air can slow it down.
Within a few weeks, tiny roots form and the plant starts to grow. Root any pieces that break off now, then take more cuttings in late spring, and you could have extra plants ready for next year’s holiday season.
1. Take Cuttings At The Right Time
Timing can make or break your first try at growing a new Christmas cactus. Pick the right season, and your cuttings will push out roots in just a few weeks. Pick the wrong one, and you might wait a long time with little to show for it.
The sweet spot usually runs from late spring into early summer. After the plant finishes blooming in winter, it takes a short rest to recover.
Once that break ends, you will spot fresh, light green segments forming at the tips of the stems, and that new growth is your signal to grab the scissors.
Most growers wait a few weeks to a couple of months after the last flower fades. By then, the plant has its energy back and is ready to grow again.
Cuttings taken during this active stage root faster because the plant is already busy making new cells.
Fall is a different story. From about September through November, your Christmas cactus is busy setting flower buds for the holidays.
Snipping stems during this time can cost you blooms on the parent plant, and nobody wants a bare cactus in December.
North Carolina gives you a real advantage here. Late spring brings warm, steady temperatures across the state, from the mountains to the coast.
Indoor rooms stay comfortable, and the longer days provide plenty of natural light without the harsh heat of midsummer.
Mark your calendar for May or early June as a good target. Watch your plant closely, and once those bright new tips appear, you will know the moment has arrived to start your project.
2. Twist Off Healthy Stem Pieces
Ever noticed how a Christmas cactus stem looks like a chain of flat green links? Each of those links is called a segment, and the narrow spot where two segments meet is a natural joint.
That joint is the secret to taking a clean, healthy cutting. Start by looking over your plant with a careful eye. You want stems that are plump, firm, and a rich green color.
Skip any pieces that look wrinkled, mushy, yellow, or spotted, since weak segments rarely root well and may carry rot into your new pot.
Your North Carolina Garden Changes Every Week. Your Plan Should Too.
Gardening in North Carolina changes quickly throughout the season. Every Friday you’ll receive a simple weekly plan showing exactly what to plant, prune, fertilize, harvest, and protect so you never miss the right timing.
Once you find a good stem, count back two to four segments from the tip. Hold the stem just below that joint with one hand.
With the other hand, gently twist the top piece until it snaps free. Prefer a tool? Clean, sharp scissors work just as well.
Wipe the blades with rubbing alcohol first so you do not spread germs, then snip right at the joint for a neat edge.
Breaking at the joint matters because it creates a small, tidy wound that seals up quickly. Tearing through the middle of a segment leaves a larger, ragged cut that heals slowly and invites trouble.
Take more cuttings than you think you need. Five to ten pieces is a smart number, because not every cutting will take root. Extra plants also make lovely gifts.
Gardeners across North Carolina know that a strong parent plant gives the best start. If your cactus has been well fed and watered, its cuttings will carry that good health right into their new life.
3. Let The Ends Dry Before Planting
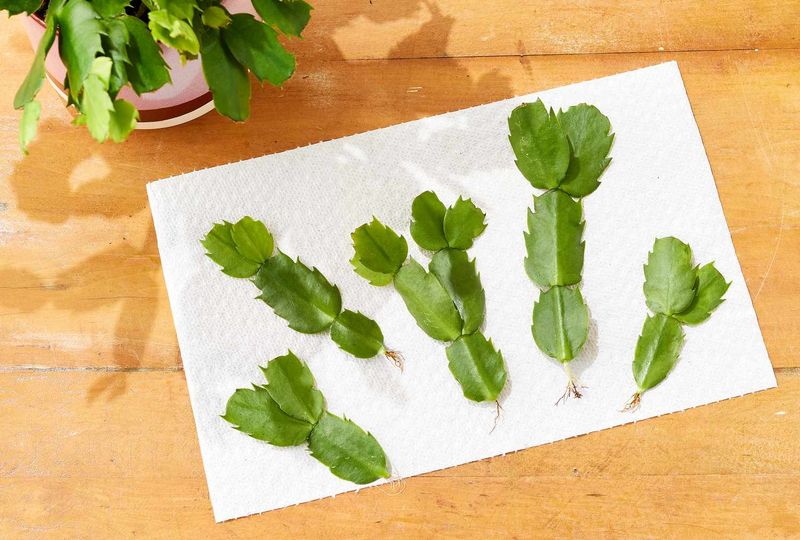
Patience pays off in a big way at this stage. You might feel eager to pop your fresh cuttings straight into soil, but a short waiting period can save them from trouble.
Here is why. When you twist or cut a stem, you leave an open wound at the bottom. If that wet, raw end goes right into moist soil, it can soak up too much water and start to rot before roots ever form.
Giving the cuttings a rest lets the end dry out and form a callus. A callus is a thin, tough layer that seals the wound, a bit like a scab on a scraped knee.
Once it forms, the cutting is protected and ready to grow roots safely. The method could not be easier. Lay your cuttings flat on a clean paper towel in a dry spot, away from direct sunlight.
A shelf, counter, or dresser top works well, as long as pets and curious kids cannot reach it. Leave them there for one to two days. Check the bottom ends each day.
When they look dry, slightly shrunken, and sealed over, they are good to go. Do not worry if the segments look a little limp during this time. They are tougher than they seem and will perk up once they start drinking water again.
North Carolina summers bring thick, humid air that keeps everything damp. That moisture slows healing and makes fresh cuttings more likely to rot.
Placing them in a room with air conditioning or a gentle fan can help them callus faster and give them a stronger start.
4. Root Them In A Light, Fast-Draining Mix
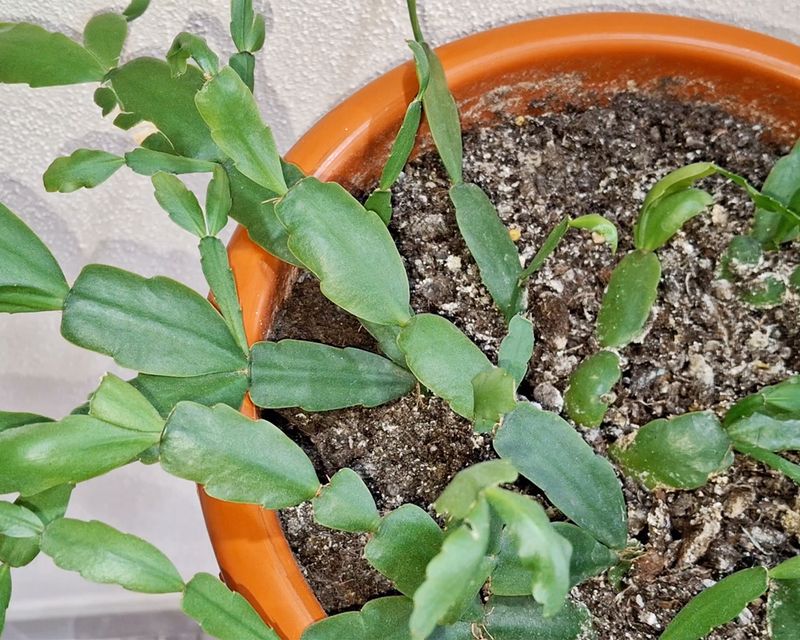
In the wild, Christmas cactus does not grow in desert sand at all. It comes from the rainforests of southeastern Brazil, where it often clings to tree branches and rocks.
Its roots are used to quick drinks of rain followed by plenty of fresh air. That background explains why soil choice matters so much. Roots need moisture to grow, but they also need oxygen.
A heavy, soggy mix squeezes out the air and leads to rot, which is the top reason cuttings fail.
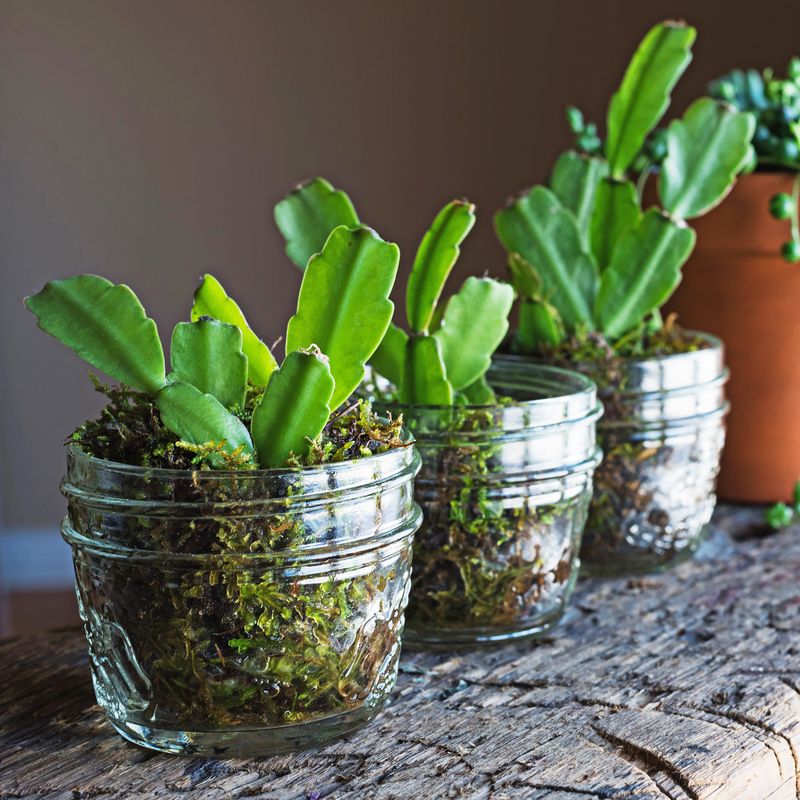
Start with a small pot, about three to four inches wide, that has drainage holes in the bottom. Fill it with a blend of regular potting soil and perlite, mixed about half and half.
A store-bought cactus mix with a handful of orchid bark also works nicely. Next, take your callused cutting and push the bottom segment into the mix. Aim for a depth of about half an inch to one inch, just enough to hold it upright.
You can tuck several cuttings into the same pot, leaving a little space between each one. Press the soil gently around the base so the cuttings stand steady. Then give the mix a light watering until it feels evenly damp, not dripping wet.
Clay pots are a great pick because they breathe and help extra water escape. Plastic pots hold moisture longer, so water a bit less often if you use them.
For North Carolina gardeners, skip the heavy red clay from the yard. It packs down tightly and stays wet, which is exactly what young cuttings do not want.
5. Try Rooting In Water As An Alternative
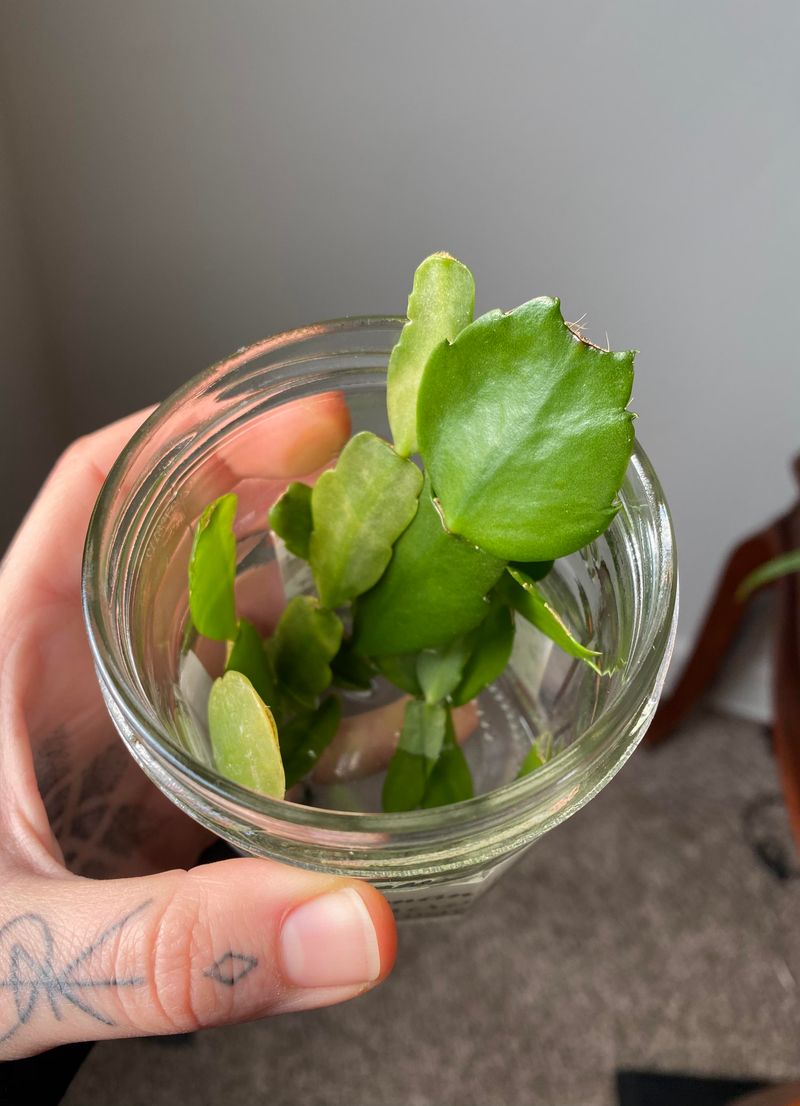
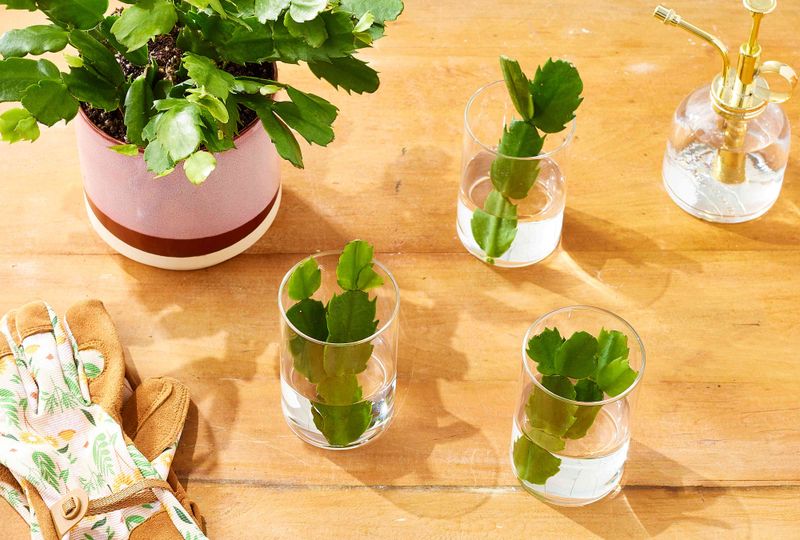
Kids love a science project they can actually see. Rooting Christmas cactus cuttings in water turns your kitchen windowsill into a tiny lab, where tiny white roots appear right before your eyes.
Many gardeners enjoy this method simply because it takes the guesswork out of the process. With soil, you have to wait and wonder.
With water, you can check progress every morning over breakfast. Begin with cuttings that have already callused for a day or two. Fill a small glass, jar, or bud vase with room-temperature water.
Set the cutting inside so only the bottom segment sits below the water line, since soaking more of the stem can cause rot.
A narrow glass helps hold the cutting upright. If it keeps tipping over, try stretching plastic wrap over the top and poking a small hole for the stem.
Place the glass in bright, indirect light, such as near an east-facing window. Swap in fresh water every two to three days to keep it clean and full of oxygen.
Within two to four weeks, you should see small roots sprouting from the base. Wait until they reach about one inch long.
Then move each cutting into a pot with a fast-draining mix and keep the soil lightly moist for the first week or two while it adjusts.
Water roots are a bit more delicate than soil roots, so handle them gently during the move. For North Carolina families, this method makes a perfect summer break activity.
Children can track root growth in a notebook and later proudly give their homegrown plants to teachers or grandparents.
6. Give Cuttings Bright Light And Gentle Warmth
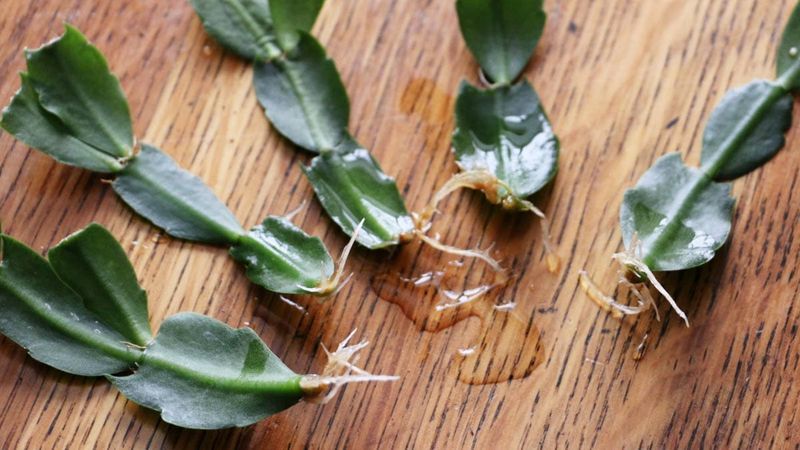
Think of your cuttings like a toddler taking a nap. They want a cozy, comfortable spot that is not too hot, not too cold, and not blasted by glaring light.
Get those conditions right, and roots will form much faster. Light comes first. Cuttings need bright, indirect light to fuel new growth.
A spot near an east-facing window or a few feet back from a south or west window works well. Direct afternoon rays can scorch the tender segments and turn them reddish or pale.
Warmth matters just as much. Keep the cuttings in a room that stays between about 65 and 75 degrees Fahrenheit.
Cooler air slows root growth way down, while too much heat dries the cuttings out. Watering takes a light touch. Keep the soil slightly moist, like a wrung-out sponge, but never soggy.
Poke a finger into the mix every few days, and add a splash of water only when the surface starts to feel dry.
After about three to four weeks, try a simple test. Give a cutting a very gentle tug. If you feel slight resistance, roots have formed and are gripping the soil, which is a great reason to celebrate.
No resistance yet? Give it more time, since some cuttings take up to eight weeks. North Carolina summer sun can be surprisingly strong, even through glass. Windows can heat up quickly in July and August.
Setting cuttings back from the pane or behind a sheer curtain keeps them safe while still giving them plenty of the light they crave.
7. Plant Several Together For A Fuller Plant
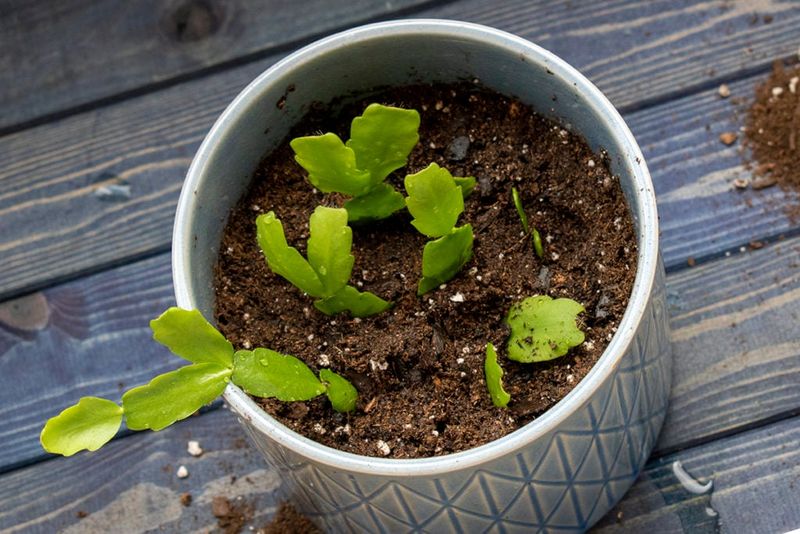
One lonely cutting can take years to look like much. Group several together, though, and you get a lush, full plant in a fraction of the time. That simple trick is how many gardeners create gift-worthy pots that look store-bought.
Once your cuttings have strong roots, gather three to five of them. Choose a small pot, about four to six inches wide, with drainage holes. Fill it with the same light, fast-draining mix you used for rooting.
Plant the cuttings close together near the center, spacing them evenly so the plant grows in a nice, rounded shape. Firm the soil gently around each one and give the pot a light drink.
From here, care gets simple. Water whenever the top inch of soil feels dry to the touch. Once you notice fresh green segments forming, start feeding with a balanced houseplant fertilizer mixed at half strength about once a month during spring and summer.
Flowers take a little time. Most young plants bloom within one to two years as they grow bigger and stronger. Cool nights and longer darkness in fall will help trigger those first colorful buds.
Christmas cactus plants can easily live for decades, and some have been handed down through four or five generations. That long life makes them a true family treasure.
Across North Carolina, many homes hold a cherished cactus that came from a grandparent or great aunt.
Rooting cuttings from that heirloom plant lets you share a living piece of family history with cousins, friends, and neighbors, keeping those memories blooming for years to come.