Simple Ways To Revive A Struggling Clematis In California
Clematis can be confusing when it starts to struggle. The vine may still be alive, but the leaves look tired, the stems seem weak, and the flowers are nowhere near what you hoped for.
In California gardens, small problems can build quickly once heat, dry soil, and strong afternoon sun enter the picture.
A clematis planted in the wrong spot may spend the season surviving instead of climbing and blooming.
The good news is that this vine often responds well once its needs are understood. It may need cooler roots, steadier moisture, better support, or a smarter pruning plan.
Before you give up on a sad looking plant, take a closer look at what it is trying to tell you. A few simple changes can help your clematis regain strength and put on a much better show.
1. Cool The Roots Before The Vine Gives Up

Root temperature matters more than most gardeners realize.
Clematis roots are extremely sensitive to heat, and in our state, summer soil temperatures can climb well above what this vine can handle.
When roots get too hot, the whole plant starts to suffer fast. One of the easiest fixes is to shade the root zone.
You can place flat stones, ceramic tiles, or even a small pot over the soil near the base of the plant.
These materials absorb heat and keep the ground beneath them much cooler. Some gardeners plant low-growing ground covers like creeping thyme or sweet alyssum around the base to shade the soil naturally.
Watering in the early morning also helps. Cool water reaching warm roots gives the plant a refreshing reset before the heat of the day builds up.
Avoid watering in the afternoon when the sun is strongest, because the water evaporates quickly and barely reaches the roots.
Another helpful trick is to use light-colored materials around the base. Dark soil and dark mulch absorb more heat, while light gravel or pale wood chips reflect sunlight away.
This small change can lower soil temperature by several degrees. Keeping the roots cool gives the rest of the vine the energy it needs to push out new growth and eventually bloom again.
2. Add Mulch Without Piling It Against The Stem

Mulching is one of the most helpful things you can do for a struggling clematis. It keeps moisture in the soil, regulates temperature, and slowly improves the soil as it breaks down.
Most gardeners know about mulch, but many make one common mistake that causes more harm than good.
Piling mulch directly against the stem of the plant traps moisture right where it should stay dry. That trapped moisture creates the perfect environment for fungal problems and stem rot.
The stem near the soil surface needs air circulation to stay healthy. Always leave at least two to three inches of clear space between the mulch and the base of the vine.
Spread your mulch in a wide ring, about two feet out from the center. A two to three inch layer is plenty.
Your California Garden Changes Every Week. Your Plan Should Too.
Gardening in California changes quickly throughout the season. Every Friday you’ll receive a simple weekly plan showing exactly what to plant, prune, fertilize, harvest, and protect so you never miss the right timing.
Going deeper than that can actually prevent water from reaching the roots properly. Good mulch choices for our state include shredded bark, straw, or aged wood chips.
Avoid fresh wood chips, as they can pull nitrogen from the soil as they break down.
Refreshing your mulch layer once or twice a year keeps it working well. Over time, it breaks down and adds organic matter to the soil.
That improves drainage and root health, which is exactly what a struggling clematis needs to recover and grow stronger.
3. Give The Top Growth Enough Sun To Bloom

Clematis has a famous saying attached to it: keep its feet in the shade and its head in the sun. That phrase exists for a very good reason.
The vine needs plenty of sunlight on its upper growth to produce flowers, but the roots need to stay cool. Striking that balance is key.
Most clematis varieties need at least six hours of direct sunlight each day to bloom well. If your vine is planted in a spot that gets too much shade, it will grow long and leggy but produce very few flowers.
Over time, it may look weak and sparse. Moving the vine to a sunnier location, or trimming back nearby shrubs and trees that block light, can make a noticeable difference.
South-facing and west-facing walls tend to get the most sun in most parts of our state. East-facing spots work well too, especially in hotter inland areas where morning sun is gentler and less intense.
North-facing walls are usually too shady for most clematis varieties to thrive.
Training the vine to spread out horizontally rather than growing straight up also helps. When the stems are spread wide, more leaves get direct sunlight.
More sunlight means more energy for the plant to produce the blooms you have been waiting for all season. Proper sun exposure is one of the simplest fixes with the biggest payoff.
4. Protect Clematis From Harsh Afternoon Heat

Afternoon sun in our state can be brutal, especially from June through September. Temperatures in many inland areas regularly hit triple digits.
Even heat-tolerant plants struggle during those peak afternoon hours, and clematis is not particularly heat-tolerant to begin with.
A simple shade cloth can do wonders. These lightweight fabrics come in different densities, typically blocking between 30 and 50 percent of sunlight.
Draping one over the vine during the hottest part of the day, usually between noon and four in the afternoon, gives it a much-needed break from the intensity.
Planting clematis near a wall or fence that faces east is another smart approach. The vine gets gentle morning sun, which it loves, but the structure blocks the harsh afternoon rays.
Pairing clematis with a taller shrub or ornamental grass on its west side also creates natural afternoon shade without the need for any fabric or structure.
Watch your vine closely during heat waves. Leaves that curl, turn crispy at the edges, or look faded are sending a clear signal that the heat is too much.
Acting quickly during those periods, even just moving a large pot to block the sun, can prevent the plant from going into serious stress.
Protecting clematis from afternoon heat is one of the most impactful things you can do during our state’s long, hot summers.
5. Water Deeply Instead Of Sprinkling The Surface

Frequent shallow watering is one of the most common mistakes clematis owners make. When you only wet the top inch or two of soil, the roots never have a reason to grow deeper.
Shallow roots are weak roots, and weak roots cannot support a healthy, blooming vine during hot, dry weather.
Deep watering encourages roots to grow further down into the soil, where temperatures are cooler and moisture lasts longer.
A good rule of thumb is to water slowly and deeply once or twice a week, depending on the heat and your soil type.
Sandy soils drain fast and need more frequent watering. Clay soils hold moisture longer but can become waterlogged if you overdo it.
One practical method is to use a slow drip or a soaker hose placed around the base of the plant. Let it run for 20 to 30 minutes so the water has time to soak down at least six to eight inches.
This approach mimics how rain naturally waters deeply during a good storm.
You can check whether you are watering deeply enough by pushing a wooden chopstick or your finger into the soil a few hours after watering.
If it comes out dry below the first couple of inches, you need to water longer next time.
Consistent deep watering makes a huge difference in how quickly a stressed clematis recovers and strengthens its root system.
6. Fix Drainage Before The Roots Rot

Standing water around the roots of a clematis is a serious problem. This vine absolutely cannot tolerate soggy soil for long.
When roots sit in waterlogged ground, they stop absorbing oxygen and nutrients. The plant quickly begins to look wilted and yellow, even though the soil is wet.
Poor drainage is especially common in our state’s heavy clay soils, which are found throughout many parts of Southern and Central regions. Clay holds water like a sponge and drains very slowly.
If you press a handful of your garden soil and it forms a tight ball that holds its shape for a long time, you likely have clay-heavy soil.
Improving drainage does not have to be complicated. Mixing generous amounts of perlite, coarse sand, or compost into the planting area loosens the soil and helps water move through more freely.
Raised beds are another excellent option. Planting clematis in a raised bed that is at least 12 inches high gives you full control over soil quality and drainage.
If the problem is severe, consider installing a simple French drain or digging a small channel to redirect water away from the planting area.
Catching drainage issues early prevents long-term root problems that are much harder to fix later.
Healthy, well-draining soil is the foundation of a thriving clematis, and no amount of sunlight or fertilizer will fix a plant sitting in waterlogged ground.
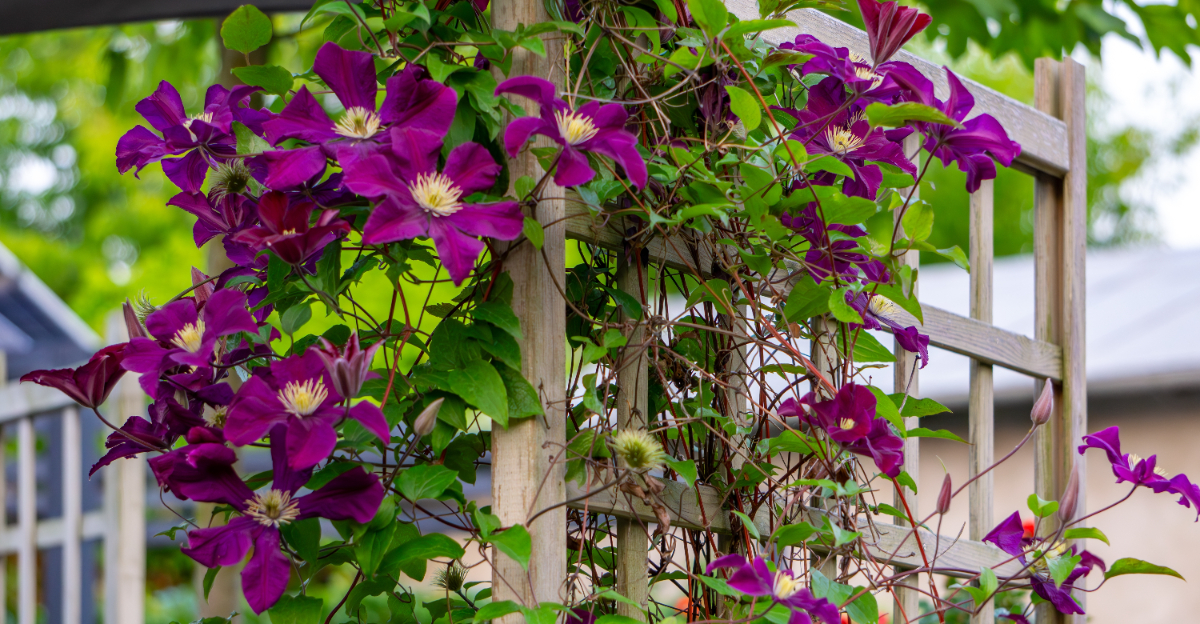
7. Check Whether The Vine Has A Strong Enough Support

Clematis climbs by wrapping its leaf stems around a support, not by gripping with clinging roots or sticky pads like some other vines.
That means the support structure you choose has to be the right size and shape for the plant to grab onto successfully.
Thick wooden posts or wide fence rails are actually too big for clematis stems to wrap around. The plant needs something thin, ideally no more than half an inch in diameter.
Wire mesh, thin bamboo stakes, jute twine, or narrow metal rods all work well. If your vine cannot find anything to grip, it will simply hang loose and eventually fall over under its own weight.
A vine that cannot support itself properly becomes stressed. Stems break in wind, leaves do not get even sun exposure, and the plant puts energy into survival rather than blooming.
Checking your support structure at the start of each growing season is a smart habit. Look for broken wires, loose ties, or sections where the vine has run out of places to attach.
In windy coastal areas and in inland valleys where afternoon gusts are common, the support needs to be anchored firmly to a wall or post. A wobbly trellis is almost as bad as no trellis at all.
Giving your clematis a solid, well-sized support is a small investment that pays off in stronger, more vigorous growth every single season.
8. Stop Pruning Until You Know Its Clematis Group

Pruning clematis at the wrong time is one of the fastest ways to accidentally remove all of your flower buds for the season.
Many gardeners prune out of habit in late winter or early spring without realizing that some varieties bloom on old wood from the previous year.
Cut that old growth away and you will not see a single flower until the following year at the earliest.
Clematis is divided into three main pruning groups. Group One blooms in early spring on old wood and should only be lightly tidied after flowering.
Group Two blooms on both old and new wood and needs only light pruning in late winter. Group Three blooms on new wood and can be cut back hard in late winter or early spring without any risk to the flowers.
If you do not know which group your clematis belongs to, stop pruning until you find out. Check the tag that came with the plant, or look up the variety name online.
Most reputable nurseries in our state can help identify the group as well. This one piece of information changes everything about how you care for the vine.
Skipping unnecessary pruning on a stressed plant also helps it recover faster. Every stem and leaf the plant keeps is one more source of energy.
Give it time to rebuild before you reach for the shears again, and you will be rewarded with a much healthier, fuller vine.
9. Feed Lightly During Active Growth, Not During Bloom

Fertilizing a struggling clematis sounds like a logical fix, but timing and amount matter more than most people think. Feeding too much, or at the wrong time, can actually make the problem worse.
A plant that is already stressed does not need a big dose of nutrients pushing it to grow faster than it can handle.
The best time to fertilize clematis is during active growth, which in most parts of our state means late winter through mid-spring and again in early summer.
A balanced, slow-release fertilizer with equal parts nitrogen, phosphorus, and potassium works well.
Some gardeners prefer a liquid fertilizer with a slightly lower nitrogen content to encourage more flowers rather than leafy growth.
Once the plant starts to bloom, hold off on feeding. Fertilizing during bloom can actually shorten the flowering period and push the plant to focus on leafy growth instead of opening its buds.
Wait until the current flush of flowers fades before applying any more fertilizer.
Less is more when it comes to a vine that is already under stress. Half the recommended dose is often enough to give a struggling clematis a gentle nutritional boost without overwhelming it.
Always water the plant thoroughly before applying any fertilizer to reduce the risk of root burn.
Consistent, light feeding during the right growth stages builds a stronger, more resilient vine over the course of the season.