9 Steps Michigan Gardeners Take After Mums Fade for Fuller Plants Next Fall

Those golden fall flowers on your porch only open because autumn nights grow long enough to flip a hidden switch. Growers call this a short-day response, and it explains why nurseries can time those blooms almost to the week.
Many shoppers toss these pots in the trash once the petals turn brown and crispy by November. Yet plenty of hardy types can return for years in Michigan gardens with a little seasonal help.
I love the moment fresh green shoots poke through the mulch each April, right where I left them. You may be surprised how few chores stand between a one-season plant and a bushy returning favorite.
Michigan winters test every root, so the timing of each small task matters more than most people expect. Which simple habits turn a tired porch decoration into a much fuller, brighter show next fall?
1. Leave Faded Mum Stems Standing Through Winter

Brown, crunchy mum stems look a little sad in November, yet they quietly do useful work all winter. Those old stalks catch blowing leaves and drifting snow, which form a cozy blanket over the crown.
Michigan State University Extension suggests leaving the tops in place until spring for better winter survival. Research on garden mums has shown higher survival rates when stems stay standing rather than being cut early.
I learned this the hard way after trimming a bed neatly to the ground one tidy October afternoon. Half those plants failed to return, while my lazy, untrimmed patch next door came back thick and leafy.
The crown of a mum sits close to the soil surface, so it feels every freeze and thaw. Standing stems help trap insulation right where the plant needs it most during the coldest stretch of winter.
You can still snip off faded flower heads if they bother you or look messy near the porch. Just leave the leafy stalks themselves alone, even when they flop over or turn a dull gray color.
Snow is one of the best insulators a northern garden can get, and mum stems help hold it. A few inches of settled snow can keep soil temperatures far steadier than bare, wind-blasted ground nearby.
Think of this step as permission to relax a bit while neighbors rush around with their pruning shears. Your mums will reward that patience with sturdier crowns and more shoots once warm weather returns.
2. Water Mums Deeply Before The Ground Freezes

Thirsty roots head into winter at a real disadvantage, even when the plant above ground looks finished. Fall in the Great Lakes region can bring surprisingly dry spells, especially during sunny, breezy October weeks.
Mums have fairly shallow, fibrous roots, so they dry out faster than deep-rooted perennials like peonies. A good soak before the soil freezes helps those roots hold moisture through the long, cold months.
I keep an eye on my rain gauge once the flowers fade, since autumn rainfall varies a lot. When a week passes with less than about an inch of rain, I grab the hose and water slowly.
Aim the water at the soil around the base instead of spraying the tired leaves and spent blooms. A slow trickle for several minutes soaks deeper than a quick splash that barely wets the surface.
Balance matters, because mums also dislike soggy feet and can rot in heavy, waterlogged ground over winter. Push a finger into the soil, and water only when the top inch or so feels dry.
Once the ground freezes solid, you can put the hose away, since roots cannot absorb frozen water anyway. Remember to drain and store hoses then, so a surprise cold snap does not crack them overnight.
Well-drained soil makes this whole job easier, which is why raised spots and slopes suit mums nicely. Healthy, moist roots in late fall usually mean stronger, faster growth when those first bright green spring shoots finally appear.
3. Pile Straw Mulch Over Mum Crowns After The Ground Freezes

Timing is the sneaky secret behind good mulching, and most folks put it down far too early. Mulch spread over warm soil can trap moisture and invite rot, or even give mice a snug home.
The better plan is to wait until the top inch or two of soil has frozen in late fall. In much of Michigan, that usually happens sometime in late November or December, depending on your region.
Then pile about four to six inches of loose straw or shredded leaves over and around each plant. Evergreen boughs work nicely too, and many gardeners recycle holiday tree branches for this exact purpose.
The goal is not to keep plants warm but to keep the soil evenly cold all season. Repeated freezing and thawing causes frost heaving, which can push shallow mum crowns right out of the ground.
I once found a mum sitting on top of the soil in March, its roots exposed to the wind. Ever since then, a fluffy straw blanket goes on every bed as soon as the ground stiffens.
Skip heavy, matted materials like whole oak leaves that pack down and hold too much water against crowns. Shredding leaves with a mower first keeps them airy, so oxygen and moisture move through more freely.
When spring warmth returns and new shoots appear, gently rake the mulch back from the plant crowns. Leaving a thin layer nearby still helps the soil hold moisture once summer heat starts to build.
4. Move Potted Mums Into An Unheated Garage
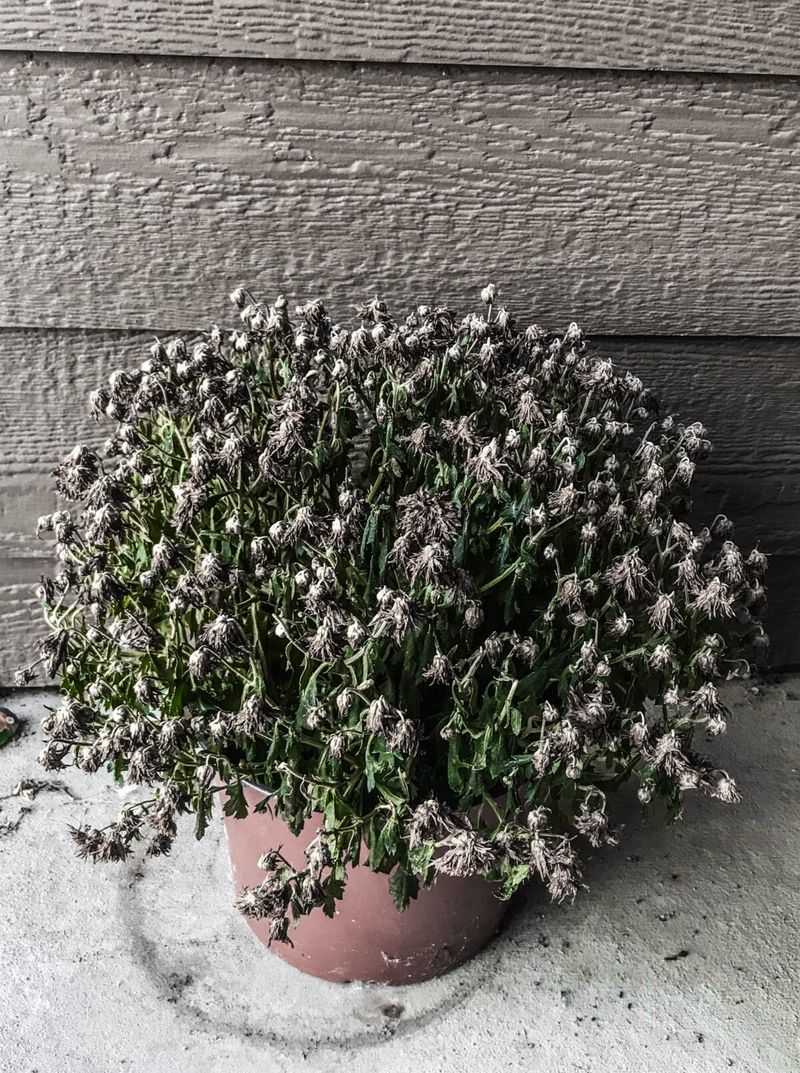
Roots in a plastic pot face much colder temperatures than roots tucked safely in garden soil. Above ground, the container offers little protection, so a single bitter night can freeze the whole root ball.
Many florist mums are bred mostly for one big show, so their winter hardiness varies quite a bit. Still, giving potted plants a sheltered winter spot dramatically improves their odds of greening up again.
An unheated garage or chilly basement works well when temperatures stay roughly between 32 and 50 degrees. That range keeps plants dormant without letting the roots freeze into one solid, damaged block of ice.
Before moving them, trim the stems back to a few inches and check closely for hitchhiking insects. Aphids and spider mites love to sneak indoors, and they multiply quickly once they settle into a garage.
Water sparingly through winter, about once a month, just enough to keep the soil from drying out. Soggy soil in a cold, dark space invites rot, so let the pot drain well each time.
Another option involves sinking the entire pot into a vegetable bed or empty garden space before the ground freezes. Soil around the container insulates the roots, and a layer of straw on top adds even more protection.
I tuck mine beside the garage wall, where they sit quietly until April without demanding much attention. Once frost danger passes in spring, move them outside gradually and plant them in the ground for good.
5. Cut Back Old Mum Stems When Spring Growth Appears

Few garden moments feel as hopeful as spotting tiny green rosettes at the base of last year’s brown stalks. Those fuzzy little leaves signal that your mum survived winter and is ready for a fresh start.
This is the right time to remove the old stems that protected the crown through the cold months. Cut them close to the new growth, roughly an inch or two above the soil, using clean pruners.
Wait until the worst cold has passed, since late frosts are common across the state well into May. Pull the winter mulch back slowly over a week or two, letting the tender shoots adjust to sunlight.
I like to do this chore on a mild morning with coffee in hand, admiring each new shoot. Some springs only a few plants show growth at first, so give stragglers a couple of extra weeks.
Mums tend to wake up later than many perennials, and impatient gardeners sometimes dig them out too early. Scratch gently near the crown, and look for pale green buds before deciding a plant has truly failed.
Old stems may carry fungal spores or insect eggs, so toss them in yard waste rather than compost piles. Clearing that debris gives fresh shoots better airflow, which helps reduce problems like leaf spot later in summer.
A clean, open crown lets sunlight reach every new stem, encouraging more shoots to sprout from the base. More shoots now mean more branches by midsummer, and more branches mean many more flower buds this fall.
6. Divide Crowded Mum Clumps In Early Spring

A mum that looks hollow in the middle is sending you a clear message about needing more elbow room. Over a few years, the center of a clump gets woody and weak while fresh growth spreads outward.
Many extension experts recommend dividing garden mums every two or three years to keep them vigorous and full. Early spring, once new shoots reach a few inches tall, offers the ideal window for this job.
Dig around the entire clump with a sharp spade, then lift it gently and shake off loose soil. You will usually see the tired center surrounded by healthy young shoots with plenty of fresh white roots.
Pull or cut apart the outer sections, keeping several shoots and a good chunk of roots on each piece. Toss the old woody middle, since it rarely produces the bushy growth you want for next autumn.
I still remember my first division, when one tired plant turned into eight lively starts along my walkway. Friends left my yard that spring carrying mums in buckets, and several still bloom in their gardens today.
Replant divisions about eighteen inches apart in a sunny spot with loose, well-drained soil and some compost. Generous spacing improves air movement between plants, which helps reduce powdery mildew and other leaf diseases.
Water new divisions deeply right away and keep the soil lightly moist for the next few weeks. They usually catch up fast, and by September each piece can form a mound covered in buds.
7. Give Mums A Sunny Spot With Well Drained Soil

Sunshine is basically fuel for mums, and a shady corner leaves them stretched and stingy with blooms. Aim for at least six hours of direct sun daily, and more is even better for flower production.
Morning sun deserves special credit because it dries dew from the leaves early in the cool day. Leaves that stay wet for hours give fungal diseases like powdery mildew a much easier foothold.
Drainage matters just as much, especially in heavy clay soils common across parts of southern Michigan. Mums sitting in cold, soggy ground over winter often suffer crown rot long before spring ever arrives.
To test your spot, dig a hole about a foot deep and fill it with water. If water still lingers after several hours, that area drains too slowly for happy, long-lived garden mums.
Mixing in a few inches of compost loosens clay and helps sandy soil hold onto moisture and nutrients. Raised beds or gentle slopes also work well, since extra water runs away from the crowns naturally.
I moved one sulky mum from a damp low spot to a sunny rise near my fence. Within a single season, it doubled in size and covered itself with buds by late August.
Fall is a fine time to note which beds stay soggy after rain or sit in afternoon shade. Those observations make spring transplanting much easier, since you will already know the best homes for each plant.
8. Feed Mums With Fertilizer In Spring And Early Summer

Mums are hungry plants, and their appetite peaks while they pack on leaves and branches in early summer. Feeding them at the right time builds a sturdy framework that can hold hundreds of autumn blossoms.
Skip fertilizer in fall, because late feeding can push soft new growth that winter cold easily damages. Instead, wait until spring shoots are actively growing and the soil has warmed up a bit in May.
A balanced, slow-release granular fertilizer works nicely for established mums, or you can scratch in compost around each plant. Follow label rates closely, since too much nitrogen creates lush leaves but fewer flowers and weaker stems.
Some gardeners prefer a diluted liquid fertilizer every few weeks during the busiest stretch of spring growth. I alternate between the two, mostly because I enjoy any excuse to wander the garden with a watering can.
Most guidance suggests stopping fertilizer around mid to late July, when plants begin forming their flower buds. Feeding past that point can delay blooming, which matters in northern areas where early frosts arrive quickly.
A soil test from your local extension office reveals which nutrients your beds actually lack or already have plenty of. Testing every few years saves money and prevents the buildup of extra phosphorus in garden soil.
Pale, yellowing lower leaves in June can hint at hungry plants, though overwatering causes similar symptoms. Check soil moisture first, then feed lightly if the soil feels fine and new growth seems unusually slow.
9. Pinch Mum Tips Until Early July

Those perfectly round mums at garden centers get their shape from growers pinching them, not from luck. You can copy that trick at home with your fingertips and a few spare minutes each month.
Once new shoots reach about six inches tall in spring, pinch off the top inch or so. Each pinched tip usually responds by sending out two or more side branches, which means more flowers later.
Repeat the pinching every few weeks whenever stems stretch another four to six inches beyond the last cut. By midsummer, a single scraggly start can turn into a dense, rounded mound full of future buds.
Many northern gardeners follow a simple rule of thumb and stop pinching around the Fourth of July holiday. Pinching later can remove developing flower buds and push blooming so late that frost arrives first.
I mark the date on my kitchen calendar, because summer gets busy and I forget otherwise. Skipping pinching altogether usually gives you taller, leggier plants that flop open in the middle by September.
Pinched tips are not wasted, either, since healthy and vigorous cuttings often root in moist potting mix within weeks. That gives you extra plants to share with friends or tuck into empty spots in your borders.
Early-blooming varieties may need fewer pinches, so check plant tags or nursery notes when you buy. Patience with this small summer chore pays off when your mums return as full, rounded domes next fall.